

In a crowded online world, 360° product shots aren't just a nice-to-have feature anymore—they're essential. Giving customers the power to spin, zoom, and inspect your products from every angle is the closest you can get to putting the item right in their hands. It closes that gap between just browsing online and having a real in-store experience.
Why 360° Product Shots Are No Longer Optional
Let's be real: flat, static images just don't cut it anymore. Today's online shoppers are more sophisticated. They expect to be able to virtually "hold" a product, get a feel for its dimensions, and see every little detail before they even think about clicking "add to cart."
This isn't just a gut feeling; the data backs it up. Shops that implement 360-degree images see a 22% increase in conversion rates and a whopping 35% jump in add-to-cart rates. Even better, people stick around longer, with time on product pages climbing from 32% to 50% when these immersive visuals are in play.
Build Trust and Slash Your Return Rate
The single biggest roadblock in e-commerce is customer doubt. A full 360-degree view tackles that problem head-on by offering total transparency. When a shopper can examine every stitch, port, or texture for themselves, there are no nasty surprises when the package arrives.
This simple act of showing everything has a powerful ripple effect:
- More Confident Buyers: You're answering their visual questions before they even have to ask.
- Fewer Returns: When people know exactly what they're getting, those costly returns start to disappear.
- A Stronger Brand: A professional, transparent presentation signals quality and makes you look trustworthy.
The real magic of interactive imagery is psychological. It puts the customer in control of their viewing experience, dissolving the kind of hesitation that leads directly to abandoned carts.
Making High-Impact Visuals Accessible to Everyone
Not too long ago, creating 360° product shots was a game reserved for big brands with massive budgets. The high cost of professional product photography and specialized gear put it out of reach for most of us.
Thankfully, that's all changed. Much like understanding the critical role of video in marketing has become standard, adopting interactive visuals is the new baseline for success.
The combination of a good smartphone camera and smart AI editing tools has completely leveled the playing field. In this guide, I'm going to walk you through how to create stunning, professional-quality results yourself—without the pro price tag.
Building Your DIY Smartphone Photo Studio
Forget the Hollywood budget and dedicated studio space. You can pull together a seriously effective setup for professional-grade 360 product shots with just a few affordable, everyday items. The real secret isn't about spending a ton of money—it's about knowing how to control your environment.
Your smartphone is already a powerhouse. Seriously, most recent models pack cameras that are more than capable of capturing the crisp, high-res images you need for a buttery-smooth 360 spin. The magic isn't in the phone itself, but in making sure your setup is consistent from one shot to the next.
The Foundation: Your Turntable and Background
First thing’s first: you need a turntable. This is what gives you that smooth, controlled rotation that's non-negotiable for evenly spaced shots. You've got a couple of solid options here:
- Go Full DIY: A simple "Lazy Susan" from a kitchen supply store works like a charm. To get those perfect, even rotations, grab a protractor and a marker. Draw out your degree increments—say, every 10 or 15 degrees—right on the edge. It's a cheap and surprisingly effective solution.
- Budget Motorized Option: If you want to make life easier, you can find a basic motorized turntable online for about $20-50. This automates the whole process, guaranteeing perfectly consistent spacing between each photo you take.
With your turntable sorted, you need a seamless background. A big sheet of white poster board or a roll of craft paper is all it takes. Just curve the paper from your table surface up against a wall or a box to create a gentle, sweeping curve. This trick gets rid of harsh lines and gives you that "infinity cove" look, making your product the absolute star of the show. A bit of tape will keep it from shifting around while you shoot.
Let's Talk Lighting
I can't stress this enough: lighting is the single most important part of product photography. It can make or break your final images. You don't need fancy, expensive strobes. The goal is simple: create soft, diffused light that kills harsh shadows and lets your product's details shine.
The pro standard is a classic three-point lighting system, and it's surprisingly easy to mimic on a budget. The setup uses a key light (your main light), a fill light (to soften shadows), and a back light (to separate the product from the background).
Here’s a great visual of how a standard three-point lighting arrangement works.
This diagram breaks down how the three lights work in harmony to wrap the subject in light, creating depth and knocking out distracting shadows.
For your DIY version, just start with what you already have:
- Key Light: Take your brightest lamp (a desk lamp is perfect) and position it at about a 45-degree angle to your product.
- Fill Light: Use a second, weaker lamp on the opposite side. Its job is to soften the shadows created by your main light. If you only have one lamp, no problem—a white foam board or even a piece of cardboard covered in tin foil can work as a reflector to bounce light back.
- Back Light: A small, third light placed behind and to the side of your product will create a subtle rim of light, helping it pop right off the background.
A quick pro tip: Never underestimate natural light. A large window on an overcast day provides some of the most beautiful, naturally diffused light you can get. If you go this route, just make sure to turn off all your indoor lights. Mixing different light temperatures can throw off your colors and make your photos look funky.
Your Smartphone Shooting Workflow
Okay, your DIY studio is set. Now for the fun part: capturing the images that will become your interactive 360° product shots. This is where precision and a consistent process become your best friends. Trust me, a methodical workflow here will save you a world of headaches in editing and is the secret to a final spin that doesn't have any weird jumps or flickers.
The whole game hinges on one simple rule: every single photo has to look like it was taken under the exact same conditions. Any tiny change in focus, brightness, or even color between frames will stick out like a sore thumb in the final animation.
Lock Down Your Camera Settings
Before you even think about snapping the first picture, you need to wrestle control of your smartphone's camera away from its automatic settings. By default, your phone's camera is constantly trying to "help" by auto-adjusting everything, which is a disaster for a 360° spin.
You've got to lock three critical settings. On most phones, you can do this by long-pressing on the screen right where your product is. You should see a yellow box or an icon (maybe a sun or a lock symbol) pop up, which confirms your settings are now fixed.
- Exposure (AE Lock): This locks the brightness. If you don't lock it, your phone might decide to brighten or darken shots as the product rotates, which creates a noticeable flickering effect in the spin.
- Focus (AF Lock): Locking the focus keeps your product perfectly sharp all the way around. If you leave it on auto, the camera might "hunt" for a new focal point and give you a couple of blurry frames mid-spin.
- White Balance (WB Lock): This keeps your colors true from shot to shot. Different angles can reflect light differently, tricking an auto white balance into making some frames look warmer (yellowish) and others cooler (bluish).
I can't stress this enough: locking these settings is non-negotiable. It is the single most important thing you can do to get a smooth, professional-looking result. Skip this, and you'll almost certainly have to do the whole shoot over again.
This diagram breaks down how all the pieces of a simple, effective DIY setup come together.
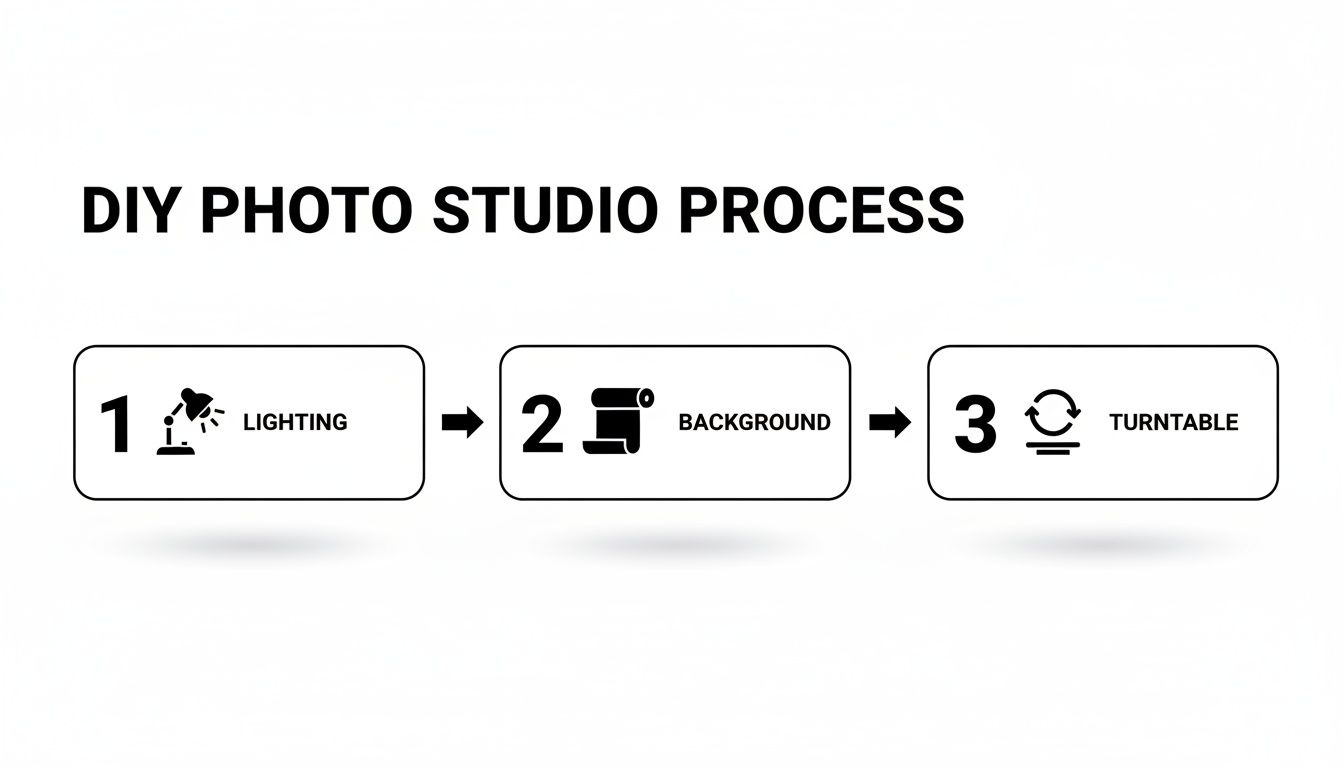
As you can see, controlling the light, background, and rotation is the foundation for a great 360° product shot.
Plan Your Rotation and Shot Count
Next up are the mechanics of the spin itself. How smooth your final 360° view looks comes down to how many photos you take. More photos mean a silkier rotation, but it also means bigger file sizes, so it's a bit of a balancing act.
Here’s a quick guide to help you decide how many shots to take for your 360-degree spin. More photos give you a smoother animation, but keep file size in mind.
| Number of Photos | Rotation Angle Per Shot | Resulting Smoothness | Best For |
|---|---|---|---|
| 24 Photos | 15 degrees | Good | The best starting point. Smooth enough for most uses without huge files. |
| 36 Photos | 10 degrees | Very Smooth | A popular choice for a more fluid, high-quality feel. Great for marketplaces. |
| 72 Photos | 5 degrees | Ultra-Smooth | The gold standard for premium products where a flawless animation is key. |
To make sure your rotation is perfect every time, grab a protractor and mark up your turntable base. Just a simple dot with a permanent marker at each interval is all you need. Then, make a corresponding mark on your stationary surface. For each photo, you just line up the marks. Simple.
Centering and Shooting Tricky Items
Make sure your product is sitting dead center on the turntable. If it’s even slightly off, it will look like it's wobbling or lurching as it spins. A quick way to check is to look through your phone’s camera and give the turntable a full 360-degree spin before you start shooting. If it stays put in the frame, you’re ready to roll.
Dealing with shiny or reflective items? They can be a real pain. Things like jewelry or chrome will act like a mirror, reflecting you, your phone, and the lights. The trick is to surround the product with white foam boards just outside the camera's view. This creates a clean, white reflection instead of a distracting one.
This technique is basically a DIY "light tent," and it works wonders to diffuse light and kill harsh glare. It's how you get those clean, professional results even with the most difficult products.
Using AI for Flawless Batch Editing
You’ve captured your sequence of images, which is a huge accomplishment. But now for the part that used to be the biggest headache: editing. If you want a smooth, professional-looking final spin, every single frame has to be perfectly consistent—from the background to the color balance.
This is exactly where modern AI tools completely change the game. Instead of chaining yourself to Photoshop for hours, painstakingly editing dozens of images one by one, you can now automate the entire post-production workflow. This isn’t just a small shortcut; it’s a fundamental shift in how 360 product shots get made.
The Power of Automated Consistency
The single biggest challenge in editing a 360 image set is getting perfect uniformity across the board. Even tiny variations in lighting, shadows, or color temperature between frames will create a distracting flicker in the final animation. AI-powered platforms are built to solve this exact problem.
When you upload your whole photo set, these tools analyze the images and apply a consistent set of enhancements to every single one. This process guarantees that:
- Backgrounds are identical: Every image gets a clean, uniform background, whether you want pure white or a custom color.
- Color correction is uniform: The AI balances colors and exposure across all frames at the same time.
- Shadows are consistent: AI can generate realistic, soft shadows that look the same from every angle.
Achieving this level of precision manually is incredibly difficult and mind-numbingly tedious. With AI, it becomes a simple, one-click operation, turning hours of meticulous work into a job that’s done in minutes.
From Manual Labor to Smart Automation
Just think about the traditional editing workflow for a moment. You’d open one image, carefully cut out the background, tweak the levels, correct the color, add a shadow, and save it. Then, you'd have to do that 23, 35, or even 71 more times, trying desperately to match each edit perfectly.
AI editing platforms let you sidestep that manual grind entirely. They use sophisticated algorithms to handle the most repetitive tasks for you, almost instantly.
The real value here isn't just speed—it’s the professional-grade consistency. AI ensures that frame #36 is edited with the exact same parameters as frame #1, something that is nearly impossible for a human to do perfectly over and over.
The eCommerce product photography sector, driven by demand for these accessible technologies, is projected to grow from US$163.91 million in 2025 to US$275.4 million by 2030. This growth highlights the massive shift toward tools that make advanced imagery like 3D and 360 views easier to create. You can dive deeper into these product photography trends on Prodoto.com.
For store owners, this is a massive win. You can now get the kind of flawless, consistent visuals that were once only possible for big brands with dedicated post-production teams. To see how this works firsthand, you can learn more about an AI product photo generator that automates these complex tasks. This makes professional-level 360 product shots accessible to everyone, no matter their editing skills or budget.
Getting Your 360° Viewer Live on Your Store
Alright, you've shot the perfect sequence of images and the AI edits look fantastic. Now for the most rewarding part: getting your interactive 360° product shots up on your storefront where customers can actually spin them around. This is the moment your hard work pays off, transforming a folder full of static JPEGs into a single, engaging experience.
To make that happen, you'll need something called a "viewer." It's essentially a small piece of software—usually built with JavaScript—that grabs your image sequence and stitches it together into a smooth, interactive rotation. Think of it as the engine that powers the whole 360° spin.
Choosing and Configuring Your Viewer
You've got a lot of great options here, from free open-source tools to powerful paid platforms. A few that I’ve seen work well for other sellers include:
- Sirv: This is a seriously powerful, feature-rich platform. It handles everything from hosting to embedding and gives you a ton of customization options.
- Magic 360: Known for its buttery-smooth performance and dead-simple integration with major e-commerce platforms like Shopify and BigCommerce.
- 360-Image-Spinner: A solid, no-frills open-source option. It's perfect if you're comfortable with a bit more manual setup to get things just right.
No matter which one you go with, the basic workflow is the same. You upload your batch of JPEGs, tweak a few settings, and the viewer spits out a small snippet of code—typically an <iframe> or <div> tag—that you can paste right into your website's HTML.
Performance is everything here. Always export your images as web-optimized JPEGs and look for responsive sizing options in your viewer settings. A fast-loading 360° spin is a conversion booster; a slow one will just frustrate your shoppers and send them packing.
Platform-Specific Embedding Tips
Dropping the viewer code into your site will vary a little depending on your e-commerce platform, but the idea is always the same. You just need to find where you can add that code snippet to your product page, either in the description or directly in the theme files.
If you’re on one of the big platforms, it’s usually pretty straightforward. On Shopify, for instance, you can just flip the product description editor to the "Show HTML" view and paste the code right in. For more great advice on prepping your site, check out these dos and don'ts of building your Shopify store. Many sellers also find that a dedicated Shopify photo editor can make managing all these high-quality visuals a whole lot easier. You'll find similar HTML editing access on product pages in WooCommerce and BigCommerce.
Getting this right is more important than ever. The demand for these immersive experiences is exploding—the global market for this kind of tech is projected to jump from USD 2.1 billion in 2025 to a whopping USD 8.7 billion by 2032. That's a massive shift in how people shop online. Making sure your viewers are integrated perfectly is how you stay ahead of the curve.
Got Questions About 360 Product Shots?
Even with a solid plan, you're bound to run into a few snags when you first start shooting 360 product photography. It happens. Let's walk through some of the most common issues I see people face, from quirky technical glitches to getting your final spin just right for customers.
A "wobbly" or off-center spin is probably the first headache you'll encounter. If your product looks like it’s doing a little dance as it rotates, the problem is almost always its placement on the turntable. It has to be dead center.
Before you start snapping away, just do a quick test spin and watch it through your phone's camera. See it drifting from one side of the frame to the other? Nudge it back toward the middle until it stays put.
How Many Photos Do I Really Need?
This is the classic question, and the answer is a balancing act between smoothness and file size. Sure, 72 images will give you a buttery-smooth animation, but the file size can get huge and slow your page down. For most online stores, there’s a happy medium.
- 24 Photos: This is a fantastic starting point. It gives you a clean, complete rotation without bogging down your site, making it a great all-around choice for product pages.
- 36 Photos: This is what I’d call the industry standard for a premium feel. The spin is noticeably more fluid and is perfect for marketplaces or high-end items where you want to show off the quality.
My advice? Start with 24 or 36 frames. You can always bump it up later if a specific product feels like it deserves that ultra-luxe, seamless spin.
The goal isn't just a cool effect; it's about making it easier for someone to decide to buy. A smooth, fast-loading 360 spin builds confidence and removes doubt. A slow or clunky one just creates frustration. Always prioritize the user experience.
Keeping File Sizes and Load Times in Check
A huge set of images can absolutely murder your website's performance if you're not careful. Nothing kills a sale faster than a product page that takes forever to load. The secret is to optimize your images before they ever touch your 360 viewer.
Always, always run your final edited images through an optimization tool like TinyPNG or ImageOptim. These services are amazing and can shrink file sizes by 50-70% without any real drop in visual quality.
Also, make sure whatever 360 viewer software you use has "lazy loading." This just means the images only load when a visitor actually starts interacting with the spin, which makes a massive difference for that initial page load speed.
Ready to skip the manual editing headaches and get straight to stunning, consistent results? ProdShot uses AI to automatically remove backgrounds, correct colors, and perfect your entire image set in minutes.
Create your first professional 360 product shots for free at ProdShot