

Knowing how to create a white background for your images isn't just a neat editing trick—it's a core skill for anyone serious about selling online. A clean, white backdrop gets rid of visual noise, puts your product in the spotlight, and creates a consistent look across every channel, from your website to your social media feed.
Why a White Background Is a Game-Changer
A crisp white background does more than just look clean; it's a powerful tool for your business. In the crowded world of e-commerce, it isolates your product, helping customers zero in on the details that matter without any distractions. That kind of clarity builds trust and has a real impact on whether someone decides to buy.
For brands, it’s all about building a cohesive, professional identity. When every single product photo sits on the same clean, neutral foundation, it strengthens your visual brand. Your entire catalog instantly looks more polished and put-together. It’s a simple shift that transforms a regular photo into a high-impact commercial asset.
The Impact on Conversions and Sales
Switching to a white background isn't just about looks—it’s a move backed by hard data. It instantly elevates the perceived value of a product and smooths out the path to purchase. On major e-commerce platforms like Amazon, a white background for your main product image is pretty much non-negotiable. It's one of the easiest ways to improve your Amazon product images and click-through rates and get a leg up on the competition.
I've seen it time and again: product images with clean white backgrounds can pull in up to a 30% higher conversion rate compared to shots with busy or colored backdrops. It's all about perception—a neutral setting just makes products feel more professional and trustworthy.
To really see the difference, let's break down how the background choice affects key performance metrics.
Impact of Background Choice on Key Metrics
A quick comparison showing why a white background is often the superior choice for commercial and professional photography.
| Metric | White Background | Complex/Colored Background |
|---|---|---|
| Customer Focus | Directs attention entirely to the product. | Distracts the eye, pulling focus from key details. |
| Professionalism | Conveys a clean, high-end, and trustworthy look. | Can appear amateurish or inconsistent with branding. |
| Conversion Rate | Higher, as it reduces visual friction. | Lower, due to potential distractions and clutter. |
| Consistency | Easy to maintain a uniform look across a catalog. | Difficult to achieve a consistent style. |
| Marketplace Compliance | Meets requirements for platforms like Amazon. | Often violates main image guidelines. |
As you can see, the white background consistently wins on the metrics that matter most for sales and brand perception.
Creating a Professional Standard
This approach is so effective that by 2020, over 70% of the world's top e-commerce platforms, including giants like Amazon and Alibaba, made white backgrounds the standard for primary product images. Adopting this practice signals to your customers that you're a serious, reliable brand.
If you’re selling online, our guide to professional Amazon product photography can help you nail these marketplace requirements. Once you understand why this matters, mastering the how becomes a whole lot easier, because the goal is crystal clear: make your product the hero of every shot.
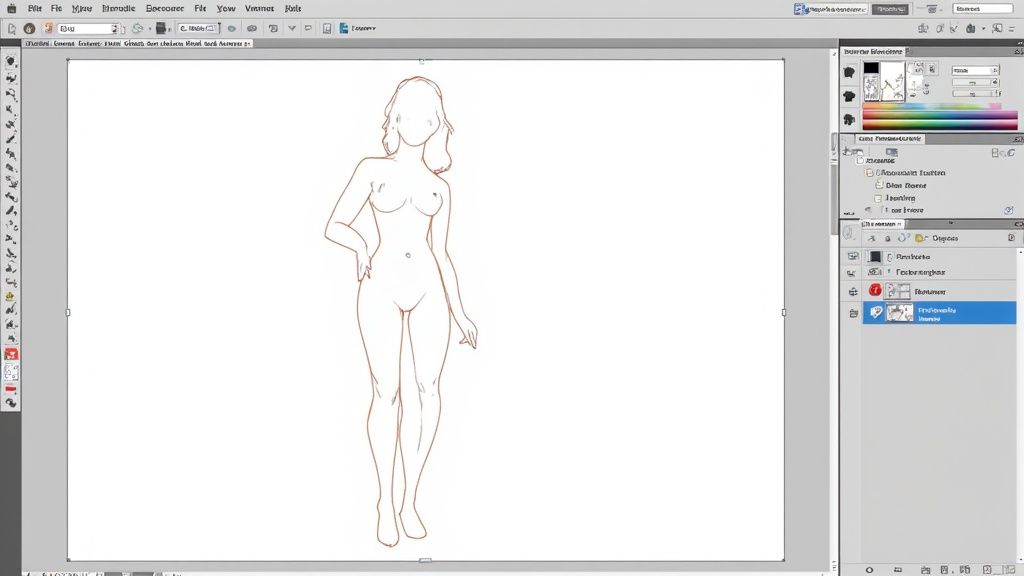
Getting Hands-On with Manual Background Removal
Sometimes, you just need absolute control. For those moments, manual background removal in software like Adobe Photoshop or GIMP is the tried-and-true method. This isn't about speed; it's about precision. When every single pixel counts, taking the time to do it by hand gives you the power to create a flawless result that automated tools might just miss.

This hands-on approach is your best bet for complex images with tricky details. Think of a high-end piece of jewelry with delicate metalwork or a promotional shot where the product's edge has to be perfectly crisp. It's in these situations that manual editing really shines, giving you a level of artistic control that an algorithm can't quite replicate.
Choosing the Right Tool for the Job
Not all manual tools are made equal. The real secret is knowing which one to grab for a specific task. Making the right choice can be the difference between a quick, clean edit and a frustrating, time-sucking ordeal.
-
The Pen Tool: This is your go-to for objects with hard, defined edges—like a smartphone, a book, or a bottle. The Pen Tool lets you create a clean vector path by plotting anchor points around your subject, giving you perfect lines that you can adjust endlessly.
-
Layer Masks and Soft Brushes: Got something with soft or complex edges, like a model's hair, a fuzzy sweater, or the fur on a stuffed animal? A Layer Mask is the answer. When you pair it with a soft-edged brush, you can "paint" away the background for a natural, realistic transition that avoids that harsh, "cut-out" look.
-
The Magnetic Lasso Tool: Think of this as a happy middle ground. It's great for objects with fairly distinct, but not perfectly straight, edges. The tool "snaps" to the edge of your subject as you trace around it, which can seriously speed things up on the right kind of image.
The effectiveness of these methods isn't just anecdotal. Millions of images are edited every month using background removal tools, with a success rate hitting over 90% for getting that pure white background. For experienced users, these manual techniques can cut editing time by up to 50% compared to clunkier methods. You can dive deeper into the data behind these editing trends from istockphoto.com.
A Pro Tip for Perfect Edges
Here’s a little trick that has saved me countless hours of frustration. It’s incredibly simple but works wonders for spotting errors you'd otherwise miss.
Before you start fine-tuning your selection or mask, just create a new layer underneath your image and fill it with a bright, obnoxious color. I'm talking neon green or hot pink. This contrasting color layer will instantly show you every single flaw in your cutout.
You'll be amazed at what this simple step reveals. Faint halos, messy edges, and tiny spots you missed will immediately stand out against the bright color, allowing you to clean them up with precision before finalizing your white background.
Refining Your Selection
Once you've made your initial selection, the work isn't quite over. A truly professional result is all in the refinement. Most advanced editing software has a "Refine Edge" or "Select and Mask" feature, and this is where the real magic happens for tricky subjects.
Here’s a quick rundown of what to focus on:
- Feathering: This softens the edge of your selection by a few pixels, helping the subject blend more naturally with the new white background. Just use it sparingly to avoid a blurry look.
- Contrast: This increases the sharpness of the selection edge. It's perfect for cleaning up any fuzziness left over from your initial pass.
- Shift Edge: This lets you expand or shrink your selection border. If you see a slight halo from the old background, shifting the edge inward by a pixel or two can get rid of it completely.
By mastering these manual tools and techniques, you gain ultimate control over your images. It definitely takes practice, but the ability to create a perfect white background on any object—no matter how complex—is a skill that will elevate your work from good to exceptional.
Using AI for Instant White Backgrounds
Manual editing has its place, but it demands time and skill—two things most of us are short on.
Imagine you've got a hundred new product photos to prep for a huge launch. Grinding through each one by hand isn't just a drag; it's a massive bottleneck that can stall your entire campaign. This is exactly where AI-powered tools come in and completely change the game.
Instead of meticulously tracing pixels for hours on end, you can now get that same professional result in seconds. Artificial intelligence has made getting a clean white background incredibly simple, smashing the technical barriers that used to require fancy software and years of experience. This shift means anyone can produce high-quality, market-ready images, no matter their editing background.
The Simple Workflow of AI Background Removal
The real magic of AI tools like ProdShot is just how easy they are to use. The whole process is intuitive, so you can forget about the steep learning curve that comes with traditional editing software. No need to wrap your head around layers, masks, or paths.
The workflow couldn't be more straightforward:
- Upload Your Image: Just drag and drop your product photo into the tool. It doesn't matter if it's a quick smartphone snap or a professional studio shot.
- Let the AI Work: In a few moments, the AI analyzes the image, locks onto your product with stunning accuracy, and cleanly lifts it from the background.
- Download Your Result: You get a perfectly cut-out image on a crisp, pure white background, ready to pop into your online store or marketing materials.
Here’s a peek at a typical AI tool interface. It’s built to be dead simple.
The clean design is all about one single action, making it obvious that a professional result is just a click away.
This isn't just about saving a few minutes here and there; it's about getting whole workdays back. What was once a tedious, multi-step headache is now a single, automated action. For a small business owner juggling a dozen different hats, that's a huge win. If you're curious about how this technology is shaking things up, it's worth exploring the broader implications of AI in digital content creation.
Killer Features That Boost Productivity
Beyond fixing one-off images, the real power of AI shines when you need to work at scale. Today's tools are built to handle the real-world demands of a growing e-commerce business.
For e-commerce managers, consistency is everything. AI tools ensure every single product photo in your catalog has the exact same shade of white and perfect centering. That polish builds the kind of customer trust that drives sales.
One of the biggest game-changers is batch processing. Instead of feeding images into the system one by one, you can upload your entire photoshoot at once. The AI will chew through all of them simultaneously, giving you a complete set of edited photos in the time it used to take to manually edit just one. This is a lifesaver for seasonal product drops or when you need to update a huge catalog. You can see how ProdShot's AI product photo generator can overhaul your entire product gallery with almost no effort.
Another massive advantage is the flawless consistency AI delivers. Every image is processed with the same algorithm, guaranteeing a uniform look across your entire product line. This gets rid of those tiny, distracting variations in cropping, alignment, and background color that creep in with manual editing. The result? A much more professional and cohesive brand presentation. The AI essentially becomes your tireless, perfectly consistent photo editor.
Manual vs. AI: Which Method Is Right For You?
So, should you roll up your sleeves and edit manually, or let an AI do the heavy lifting? The honest answer is: it depends. This isn't about which option is "better" overall, but which one is the right tool for the job you have right now. It's the classic trade-off between surgical precision and incredible speed.
Think of it this way. A professional photographer crafting a high-stakes composite for a magazine cover? They'll need the absolute control that manual editing in a tool like Photoshop provides. Every pixel matters.
But an e-commerce manager trying to get 50 new product shots live before the end of the day? An AI tool like ProdShot is the only sane choice.
This chart really drives the point home, showing the time and accuracy trade-offs with common manual tools.
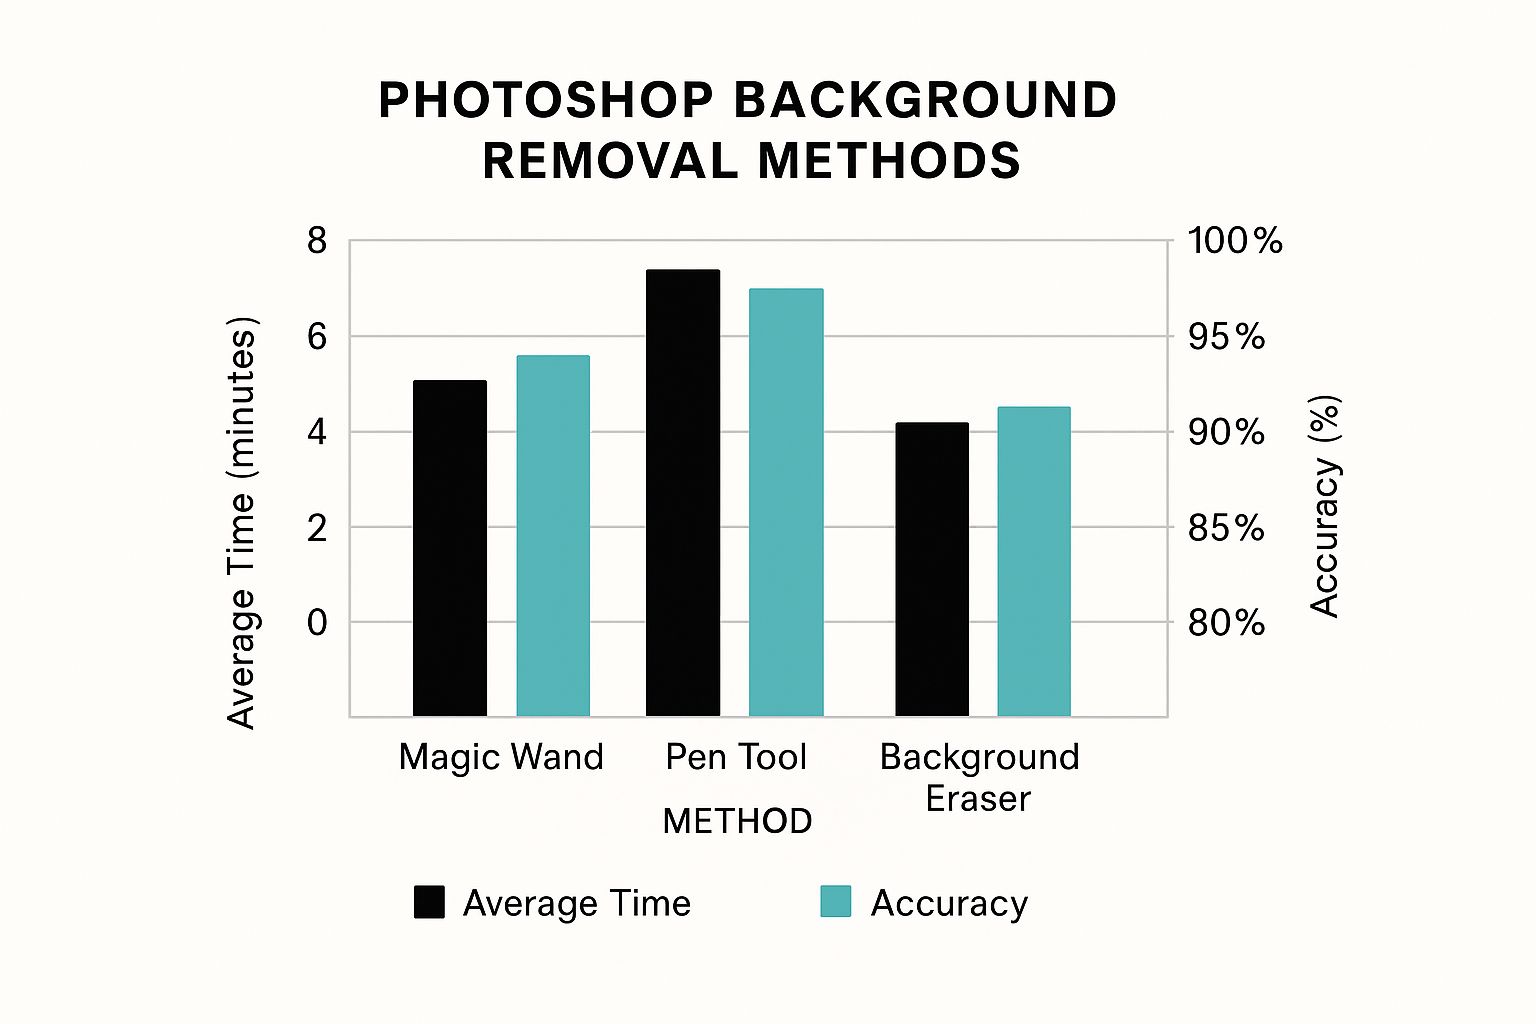
As you can see, the Pen Tool gives you the best results, but it's also a massive time sink. Faster options like the Magic Wand just don't offer the same precision. This is the core dilemma of doing it by hand—quality costs you time. That’s exactly the gap AI was built to fill.
Key Factors to Consider
When you're trying to figure out how to make a background white, a few key questions will point you in the right direction. Answering these honestly will save you a ton of frustration later on.
- Speed and Volume: How many photos are you dealing with? If it’s more than a couple, the time you'll save with an AI tool is astronomical. A batch of images that takes an expert hours to edit manually can be finished in minutes.
- Your Skill Level: Are you a Photoshop wizard? The learning curve for manual editing is steep. AI tools, on the other hand, are built for everyone. The workflow is usually just upload, click, and download.
- Brand Consistency: For a product catalog, consistency is everything. AI delivers the same pure white background and perfect centering every single time, removing the subtle human variations that creep in with manual work.
Ultimately, it all boils down to your main goal. Are you an artist perfecting a single masterpiece, or a business owner focused on getting products to market efficiently?
To make the choice even clearer, let's break down the specific strengths of each approach.
Feature Showdown: Manual Editing vs. ProdShot AI
Here’s a detailed comparison to help you decide which background removal method is right for your project.
| Factor | Manual Editing (e.g., Photoshop) | AI Tools (e.g., ProdShot) |
|---|---|---|
| Speed | Slow, especially for batches (hours) | Extremely fast, processes batches in minutes |
| Skill Required | High – requires technical expertise | Low – beginner-friendly, no skills needed |
| Consistency | Can vary slightly between images | Flawless, uniform results every time |
| Cost | Software subscriptions + time/labor costs | Low, pay-per-image or affordable subscriptions |
| Best For | Complex "hero" images, artistic composites | High-volume e-commerce, social media, marketing |
| Control | Absolute pixel-level precision | Automated, but with high accuracy |
This table lays it all out: if you have the time and the skills for intricate, one-off projects, manual editing is fantastic. But for the demands of modern e-commerce and marketing, AI offers a practical and powerful solution.
When to Choose Manual Editing
Manual editing is your go-to when you need complete artistic control. It’s perfect for those tricky subjects where an algorithm might miss the subtleties.
We’re talking about things like:
- Transparent or translucent objects like glassware
- Intricate jewelry with lots of fine details
- Soft, wispy edges like hair or fur
For creative composites and stunning hero images where every detail must be perfect, manual is still king.
When to Go with AI
AI is the undisputed champion of volume and efficiency. It’s a game-changer for e-commerce stores, social media managers, and marketing teams who need a constant stream of clean, professional images.
If your main goal is to get products online fast without compromising on a clean, professional look, AI is your best friend.
Pro Tips for a Flawless Finish
Getting the background removed is a huge step, but the final polish is what separates a good image from a great one. Mastering these subtle details will ensure your product photos look truly professional and avoid that amateur, "cut-out" appearance that can hurt customer trust.
It’s about more than just making the background white; it’s about making the entire image look believable and high-end. Small imperfections can make a product feel cheap, so taking a few extra minutes to refine the final image is a crucial investment.
Dealing with Tricky Subjects
Some products are just a nightmare to isolate cleanly. Transparent items like a glass vase or intricate objects like a delicate necklace chain can lose important details during background removal, whether you're working manually or with an AI tool.
To handle these challenges, your focus should be on preserving as much detail as possible during the initial selection. If you're editing by hand, don't be afraid to use a combination of tools. For something like a glass vase, a soft-edged mask can maintain that subtle transparency, while you'll need a precise pen tool path for the solid base.
Preserve or Recreate Natural Shadows
One of the biggest giveaways of an amateur edit is a product that looks like a flat sticker slapped onto a white background. This happens when you erase the natural shadow along with the original background. A realistic shadow is what grounds the object, giving it depth and dimension.
If your original photo has a good, soft shadow, try to preserve it during the editing process. You can often mask it out separately and layer it back in. If the original shadow is harsh or just plain unusable, it's actually better to create a new, artificial one.
A simple technique is to create a soft, gray, oval shape under your product on a new layer. From there, apply a blur effect and drop the layer's opacity until it looks subtle and natural. This small step makes a world of difference. For more complex fixes, exploring professional product photo retouching can provide deeper insights.
Fix Color Spill and Ensure True White
Ever notice that faint halo of the old background color clinging to the edges of your subject? That’s color spill. It’s especially common with vibrant backgrounds and can make your cutout look sloppy. Most advanced editing software has a "decontaminate colors" or "defringe" tool designed specifically to neutralize this halo.
Finally, double-check that your background is pure white. A slightly off-white or gray background can look dingy on a website, especially next to other perfectly white elements. Use an eyedropper tool to check the color value; it should read #FFFFFF or RGB (255, 255, 255) for a perfect, web-ready finish.
Frequently Asked Questions
Let's dive into some of the most common questions that pop up when you're trying to get that perfect white background. Here are a few quick answers to help you solve those nagging problems and get your workflow dialed in.
What’s the Best File Format for Images with a White Background?
This is a great question, and the honest answer is: it depends entirely on where the image is going. There’s no single “best” format, but there are definitely right and wrong choices for different situations.
For just about anything on the web, a high-quality JPEG is your best bet. It strikes that perfect balance between solid image quality and a small file size, which is critical for making sure your web pages load quickly. This is the go-to for e-commerce product photos, blog images, or any online content where you need that background to stay a solid, opaque white.
But what if you need a transparent background to place your product on different colored banners or designs? That’s where a PNG file is non-negotiable. And for professional printing, you’ll often hear designers ask for a TIFF. That’s because it’s a lossless format that keeps every bit of image data, guaranteeing the highest possible quality for print.
How Do I Handle a White Object on a Light Background?
Ah, the classic headache. This is one of those challenges that can stump even experienced editors and trip up a lot of AI tools. When your subject and the background are nearly the same color, getting a clean separation is tough.
If you’re doing it manually in a program like Photoshop, here’s a pro trick: temporarily add a contrast adjustment layer. Crank it up to make the mid-tones darker and the highlights brighter. Suddenly, that faint edge of your white object becomes much easier to see and trace. Once you’ve made your selection, you can just delete the adjustment layer.
When using an AI tool, the best fix often happens before you even upload the photo. If you have the chance, shoot your white object on a darker, contrasting background. This gives the AI a clear, defined edge to work with and almost always results in a much cleaner, more accurate cutout.
A clean, professional image can indirectly boost your website's SEO. Better visuals improve user experience, which can lower bounce rates and increase the time visitors spend on your page—both are positive signals for search engines like Google.
It also ensures your product photos meet the strict image requirements for platforms like Google Shopping, which can significantly increase their visibility in search results.
Ready to stop wasting time on tedious manual edits? ProdShot uses AI to give you stunning, professional product photos with a perfect white background in seconds. Try it for free and see the difference it makes!