
If you're looking for the quickest way to give your product photos a clean, professional look, adding a white background is it. This simple change instantly gets rid of distracting clutter, puts all the focus on your product, and helps build a sense of quality and trust with your customers. There's a good reason it's become the undisputed industry standard, especially in e-commerce.
Why a White Background Changes Everything
Ever noticed how product shots on giants like Amazon always look so sharp and consistent? The secret isn't some complex editing trick—it's the simple power of a plain white background. This isn't just an aesthetic choice; it’s a smart business move that directly shapes how people see your products and your brand.
A clean backdrop guides the eye exactly where you want it to go: to the details, the quality, and the unique features of your item. It creates a distraction-free zone that builds an immediate sense of professionalism. For anyone running an online store, this translates into real results. A catalog full of consistent, clean images makes your digital storefront look polished, organized, and trustworthy.
Driving Conversions and Trust
The impact on your sales can be huge. In the world of online retail, this clean look is the global norm, thanks to marketplaces like Amazon and eBay setting the standard. A 2022 survey revealed that 85% of the top 1,000 online stores use white-background product images as their go-to visual.
Even better, listings with this clean style can see conversion rates up to 10% higher than those with busy or colored backgrounds. This simple change sets the stage for you to achieve that same professional finish for your own images. After all, a solid visual presentation is a cornerstone of effective marketing.
A white background isn't just a design choice; it’s a conversion tool. It eliminates visual noise, making the product the hero of the shot and simplifying the customer's buying decision.
To help you see the benefits at a glance, here’s a quick breakdown:
Key Benefits of Using a White Background
| Benefit | Impact on Business | Best For |
|---|---|---|
| Increased Focus | Keeps customer attention solely on the product's features and quality, reducing distractions. | E-commerce listings, product catalogs, and detailed close-up shots. |
| Professionalism & Trust | Creates a clean, consistent, and high-end look that builds brand credibility. | Any brand wanting to establish a professional image, especially new businesses. |
| Higher Conversions | The industry standard look meets customer expectations and can lead to more sales. | Online marketplaces like Amazon, Shopify stores, and digital ads. |
| Versatility | Images can be easily repurposed for marketing materials, social media, and print without clashing. | Creating a cohesive brand identity across all marketing channels. |
This table really just scratches the surface, but it highlights how a simple background choice can have a ripple effect across your entire business.
Beyond E-Commerce
The advantages don't stop with your online store. A crisp, isolated image is an incredibly versatile marketing asset. Think about it—you can drop it into social media graphics, email newsletters, or even printed flyers without worrying about it clashing with other design elements.
This kind of flexibility is essential for building a cohesive brand identity everywhere you show up. A clean white background also boosts your brand’s presence in broader digital strategies, like when following content marketing best practices. And for those selling on specific marketplaces, getting the visuals right is key, as we cover in our guide to professional Amazon product photography.
Using AI Tools for Instant Background Removal
Manual editing definitely has its place, but when you need speed and efficiency, nothing beats AI. These modern tools have completely changed the game, making it possible to add a white background to images in seconds, not hours. For entrepreneurs and marketers juggling a dozen other tasks, this is a massive win.
You no longer have to wrestle with complex software. Just upload a photo, and the algorithm does the heavy lifting for you. It instantly detects the main subject—whether it's a person, a piece of furniture, or a t-shirt—and cleanly snips it from its original surroundings. The result? A crisp, professional image ready for any digital storefront.
How AI Simplifies Your Workflow
Picture this: you have dozens of new product photos from a recent shoot. In the past, editing each one to create a uniform look would have been a full day's work, if not more. With AI, that task becomes almost trivial.
Many platforms are built for batch processing, letting you upload an entire folder of images at once. The tool then applies the white background to all of them simultaneously, ensuring perfect consistency across your whole product line. This doesn't just save an incredible amount of time; it also reinforces a polished, trustworthy brand image. If you're curious, you can see how an AI product photo generator can slot right into your creative process.
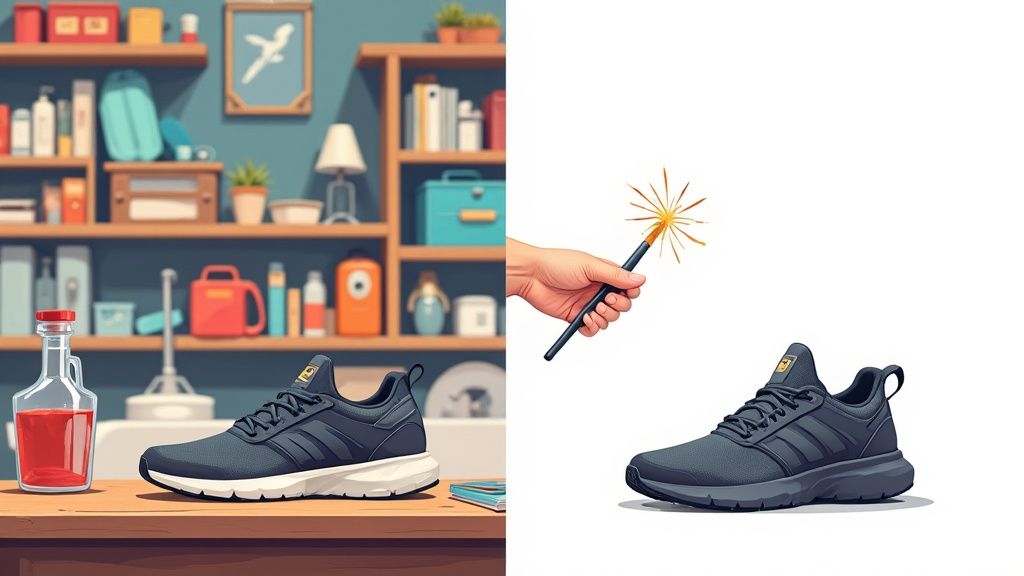
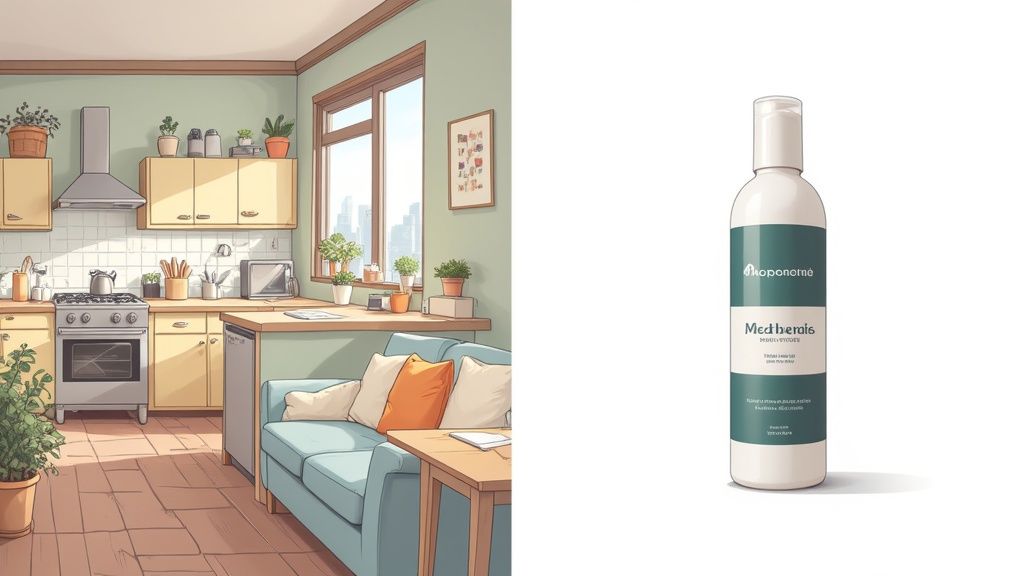
This screenshot shows just how simple the interface can be. You upload an image, and it's instantly processed.

The clean "before and after" slider really shows off the immediate and dramatic improvement, highlighting just how effective these tools have become.
The real power of AI isn't just removing a background; it's the ability to do it at scale. It automates a tedious, repetitive task, freeing up your time to focus on actually growing your business.
This shift toward automated visual asset creation is a major trend in ecommerce. To get a better sense of how artificial intelligence is reshaping online retail, you can explore generative AI's role in e-commerce content creation. By bringing these tools into your workflow, you can maintain a competitive edge and produce high-quality visuals without the headache.
While AI tools are incredibly fast, sometimes a project demands the kind of precision you can only get by hand. If you're already comfortable with powerful software like Adobe Photoshop or just prefer a more hands-on approach, you can definitely achieve a flawless finish with a little extra effort.
These manual methods give you complete control, which is absolutely critical for images with tricky details. Think fine hair, complex lace patterns, or semi-transparent objects like glassware.
For instance, Photoshop's 'Select Subject' tool is a great example of a hybrid approach. It uses its own AI to do the initial heavy lifting, giving you a solid starting point in seconds. From there, you can jump in with layer masks to refine the edges perfectly. It’s the best of both worlds: you get the speed of automation and the precision of a human touch.
Finding a User-Friendly Middle Ground
Let's be real—not everyone is a Photoshop wizard, and that's okay. There are fantastic tools that hit a sweet spot between professional-grade software and dead-simple apps.
A great example is Canva. Its background remover tool is surprisingly effective and ridiculously easy to use. You don’t have to get lost in complex menus or learn about channel masks to get a clean result. It's a go-to choice for creating quick social media graphics or marketing materials where you need to add a white background without the steep learning curve.
The best tool is the one that fits the job. For a single, high-stakes hero image for your homepage, Photoshop's level of control is invaluable. But if you're processing 50 new product shots, a dedicated AI tool is the obvious winner every time.
Choosing the right method really boils down to balancing three things:
- Complexity: How detailed is your subject? Simple, solid objects are a breeze for most tools. Intricate items will likely need some manual cleanup.
- Time: How fast do you need it? AI delivers nearly instant results, while manual editing is a more deliberate process.
- Budget: Are you already paying for something like the Adobe Creative Cloud suite? Or are you looking for a free or more budget-friendly option?
Here’s a quick breakdown to help you decide:
Comparison of Background Removal Tools
| Tool Type | Best For | Speed | Cost | Skill Level Required |
|---|---|---|---|---|
| Dedicated AI Tools | Batch processing, e-commerce, consistency | Fastest | Low (Subscription/Pay-per-image) | Beginner |
| Photoshop | Complex images, maximum control, creative edits | Slower | High (Subscription) | Intermediate to Advanced |
| Canva | Social media, quick marketing assets, ease of use | Fast | Medium (Included in Pro plan) | Beginner |
Ultimately, the right tool depends on your specific project and resources.
For those who need the pixel-perfect quality of a manual edit but just don't have the time to do it themselves, exploring professional product photo editing services is a smart move. It allows you to offload the detailed, time-consuming work to experts.
Knowing the strengths and weaknesses of each approach means you can confidently pick the perfect workflow for any situation you encounter.
Mastering Your Product Photos Before Editing

Here's a little secret from the trenches: the absolute best edits start with great original photos. Before you even think about how to add a white background, spending a few minutes on prep work will save you from a world of frustration later on. It’s the difference between a good result and a great one.
It all begins with something almost laughably simple, yet so many people skip it: make sure your product is spotless. Dust, fingerprints, and tiny smudges that you can barely see with your own eyes will suddenly scream for attention under studio lighting. Give your product a quick wipe-down with a soft, lint-free cloth right before you start shooting.
Setting the Stage for Success
Good lighting is completely non-negotiable. Don't worry, you don't need a thousand-dollar lighting rig. Natural light from a big window can be your best friend. The aim is to get soft, even light that doesn't create harsh shadows, because those shadows are a nightmare for background removal tools.
Next, get your product positioned just right. A tripod is a lifesaver here—it keeps your camera steady, your angle consistent, and prevents any blur. A blurry product with fuzzy edges will look amateurish no matter how clean the background is.
Pro Tip: Your camera's focus is everything. Make sure the entire product is tack-sharp. Soft, blurry edges from a shallow depth of field can really confuse AI tools and make manual editing a painful, tedious process.
This obsession with clean, crisp visuals isn't just a personal preference; it's a huge market trend. The global stock image market has shifted heavily toward minimalist, versatile photos that fit any brand. You can see this trend in action on Shutterstock.
Finally, pay attention to what's behind your product. Even though you're going to remove it, shooting against a simple, solid-colored backdrop that contrasts with your product will make the editing process a whole lot easier for whatever tool you end up using.
Practical Uses Beyond Product Photography

While a clean, white background is an absolute game-changer for e-commerce, that skill is far more versatile than you might think. It’s not just for product catalogs. This simple trick can turn all sorts of everyday visuals into polished, professional assets you can use just about anywhere.
Think about your professional headshot, for instance. A cluttered or distracting background on your LinkedIn profile just screams amateur. But swap that out for a crisp, white backdrop, and suddenly your portrait looks more focused, more authoritative. It’s a small change that makes a huge first impression on potential clients or employers.
Making Graphics and Data Clearer
Graphic designers are constantly isolating objects to use in bigger projects. Whether it’s an icon for a website, a featured item for a social media post, or a key element in a presentation, getting rid of the background is always the first step. Doing this builds up a library of clean, reusable assets you can grab whenever you need them.
Isolate once, use everywhere. Removing the background from an object turns it into a flexible building block for all your future marketing materials, ensuring brand consistency.
This same need for clarity applies to data visualization, too. There’s a reason white backgrounds have been the standard in scientific and financial reports for decades. In fact, studies show that over 70% of peer-reviewed articles use white or near-white backgrounds to make things easier to read and reduce the mental effort for the reader. You can see this principle in action across data visualization platforms like Adobe Stock. It just makes complex charts and graphs much simpler to understand at a glance.
Frequently Asked Questions
When you're first getting started with adding a white background to your photos, a few questions pop up time and time again. Let's tackle these head-on so you can get great results without all the painful trial and error.
Will I Lose Image Quality?
One of the biggest worries I hear is whether stripping out the original background will trash the photo's quality. The short answer is no—as long as you’re smart about it.
It really comes down to two things: starting with a high-resolution photo and using a quality tool. Professional software and modern AI editors are built to preserve every last pixel. Just make sure you save the final image in the right format. A high-quality JPEG is your best bet for the web, but if you need a transparent background for other projects, go with a PNG.
How Do I Avoid That "Cutout" Look?
Another common headache is making the edges around your product look clean and natural, not like a harsh, amateurish cutout. Nobody wants that.
The secret is in the edge refinement. In tools like Photoshop, this is where features like "Refine Edge" or "Select and Mask" come in handy.
The goal is a seamless transition. You want a slight feathering or smoothing of the edges, which helps the product blend into the new white background. It just makes the whole thing look more believable and professional.
Thankfully, many AI-powered tools now handle this for you. They automatically add a subtle softening to the edges that mimics how light naturally wraps around an object. It’s a small detail, but it makes a world of difference.
What's the Right File Format to Use?
Finally, you need to know which file format to save your image in. This is a crucial step for both your site's performance and how you can use the image later.
So, which one is best for images with a white background?
- JPEG (JPG): This is the workhorse for e-commerce and pretty much any other web use. It compresses the file size, which means your website pages will load much faster for your visitors. A slow site is a conversion killer.
- PNG: Only use this format when you need a transparent background, not a solid white one. It’s perfect if you plan on layering your product onto different colored backgrounds or into other designs later.
Ready to transform your product photos in seconds? With ProdShot, you can get professional, clean images with a perfect white background without any technical skills. Try ProdShot for free and see the difference.