
To get those jaw-dropping, professional-looking photos of your jewelry, you really only need to nail a few key things. At its core, it’s about having a dedicated camera with manual controls, a good macro lens for those tiny details, and a rock-solid tripod to keep everything sharp. This simple setup is your foundation for creating the kind of crisp, beautiful images that truly capture the soul of your work and, ultimately, drive sales.
Your Essential Jewelry Photography Toolkit
Before you even think about hitting that shutter button, getting your gear in order is the first real step toward success. This isn't about dropping a ton of cash on the most expensive equipment you can find. It’s about making smart, strategic choices that will have the biggest impact on your final images.
While a new smartphone can definitely get you started, a dedicated camera where you can control everything manually gives you a massive advantage, especially when shooting something as detailed and reflective as jewelry.
Your photos are what build trust with your customers. They need to accurately show off your incredible craftsmanship. Let's not forget, the global jewelry market was valued at around $348 billion, so top-notch photography is how you cut through the noise and stand out.
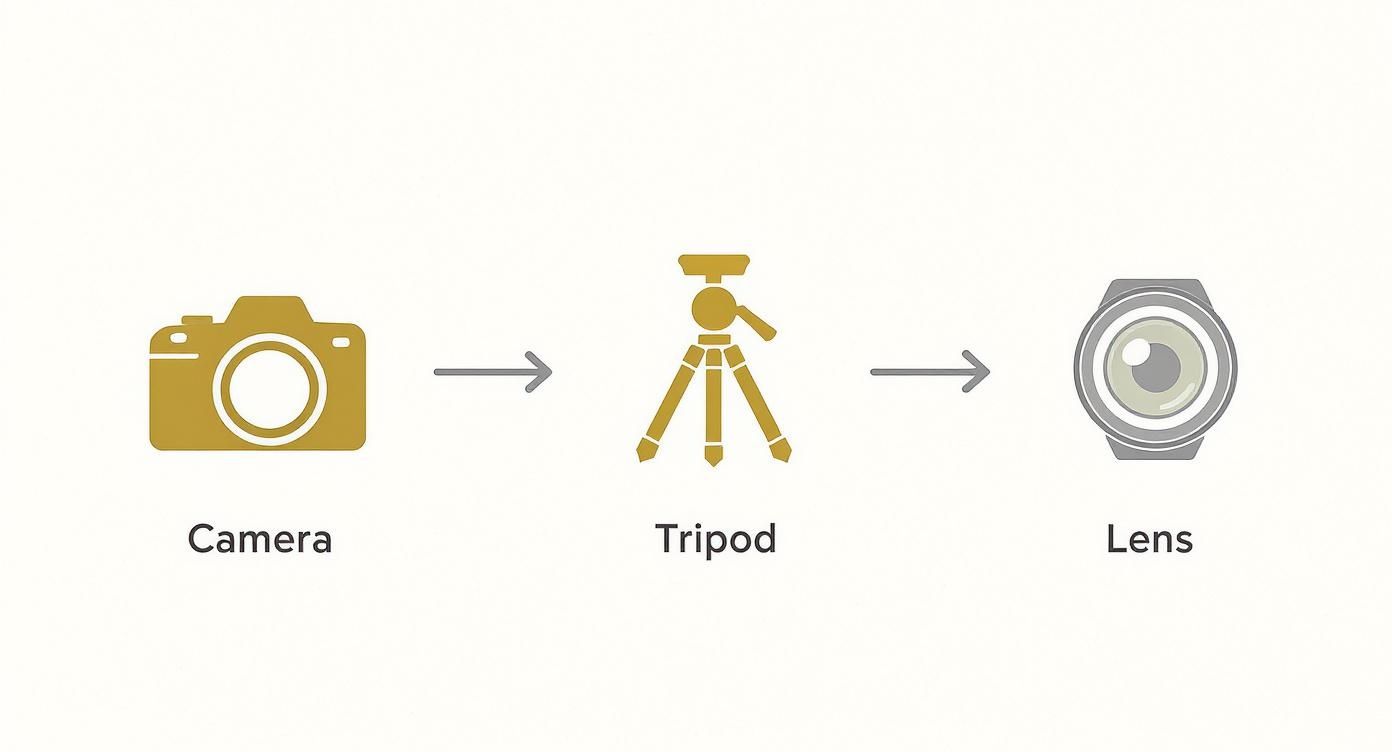
The Non-Negotiable Trio: Camera, Lens, and Tripod
Your foundational toolkit really boils down to three core pieces of gear that work together to create those sharp, pro-level shots.
-
A Camera with Manual Mode: A DSLR or a mirrorless camera is your best friend here. Being able to manually control the aperture, ISO, and shutter speed is everything. This control is what lets you manage the depth of focus and light—easily the two biggest headaches in jewelry photography.
-
A Macro Lens: This is the game-changer for getting those stunning detail shots. A true macro lens lets you get right up close to the jewelry, showing off the fine craftsmanship—think tiny engravings, intricate stone settings, and delicate metalwork that a standard lens would just turn into a blur.
-
A Sturdy Tripod: Even the slightest tremor from your hands can ruin a great shot, turning it into a soft, blurry mess. This is especially true with macro photography, where every tiny movement is magnified. A tripod locks your camera in place, guaranteeing you get maximum sharpness and consistency from one shot to the next.
If you're going to invest anywhere, start with these three items. Getting them right will give you the single biggest jump in photo quality. Everything else, from your lighting to your backdrops, builds on this solid foundation.
Once you’ve mastered this basic setup, you can really start to fly. For those looking to make the post-production process a bit easier, checking out an AI product photo generator can be a fantastic way to get polished, consistent backgrounds without spending hours in Photoshop.
And if you’re looking to dive even deeper, these essential jewelry photography tips are packed with more detailed approaches that can really elevate your work.
Essential Jewelry Photography Gear Checklist
To make things a bit clearer, here's a quick rundown of the essential gear. This table breaks down what you need, whether you're just starting out or ready to upgrade your setup.
| Equipment | Beginner Recommendation | Why It's Important |
|---|---|---|
| Camera | An entry-level DSLR or mirrorless camera with full manual mode. | Gives you complete control over exposure and focus, which is non-negotiable for reflective items. |
| Lens | A dedicated 100mm macro lens (or equivalent for your camera system). | Allows you to capture ultra-fine details like gemstone facets and metal textures from a comfortable distance. |
| Tripod | A sturdy, stable tripod with a versatile head (like a ball head). | Eliminates camera shake, ensuring every part of your jewelry is tack-sharp and perfectly in focus. |
| Lighting | A couple of off-camera speedlights or a simple continuous LED light panel. | Soft, diffused light is crucial for minimizing harsh reflections and bringing out the natural sparkle. |
| Diffuser | A light tent or large, softbox-style diffuser. | Softens your light source to create smooth gradients on metal and prevent blown-out highlights on gems. |
Think of this checklist as your starting point. You don't need everything at once, but building your kit around these core items will set you on the right path to creating stunning jewelry photos that truly sell.
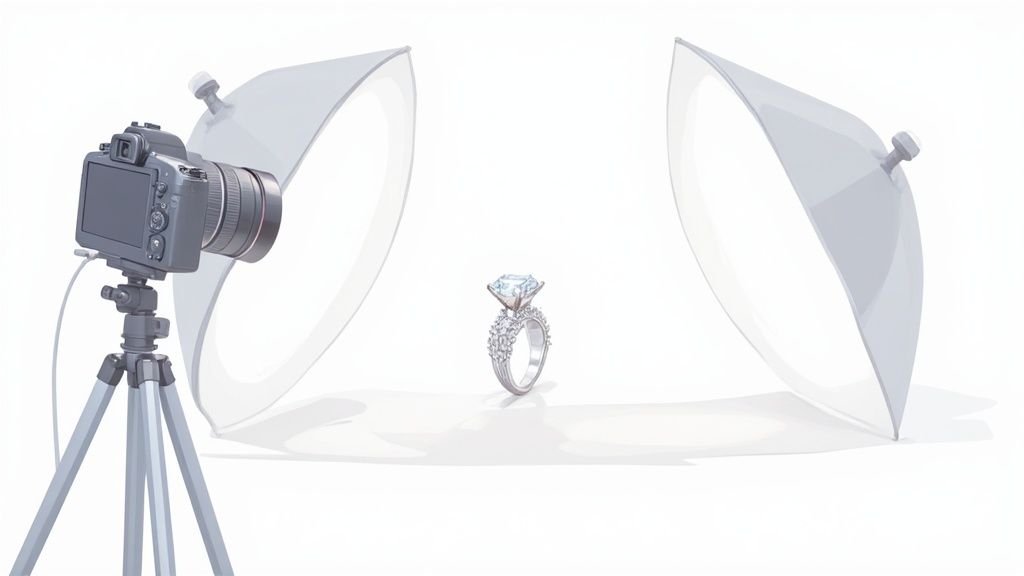
Mastering Light to Make Every Piece Sparkle
If there's one thing I've learned from years behind the lens, it's that light is the single most powerful tool in your photography arsenal. It's the magic ingredient that transforms a flat piece of metal into a radiant treasure and makes a gemstone dance with fire. Get the lighting right, and you've honestly won more than half the battle.
Your main goal here is to create a soft, even glow that just wraps around the jewelry. Harsh, direct light is the enemy. It creates sharp, distracting reflections and deep, unflattering shadows. This is exactly why shooting in direct sunlight is a recipe for disaster.
What you're after is diffused light. Think of the soft, gentle light you see on a bright but overcast day. That’s the effect we're trying to replicate, as it minimizes glare and illuminates every tiny detail beautifully.
The whole process starts with your foundational gear—the camera, tripod, and lens—which all work in concert with your lighting setup.
This visual really drives home how each tool is a crucial step in building a professional-quality image, with lighting acting as the element that brings it all to life.
Creating Soft, Diffused Light
So, how do you actually create this perfect light? You have two fantastic options: using natural light or building a controlled artificial light setup. Both can produce absolutely stunning results.
Natural light, especially from a large window that isn't getting hit with direct sun, is a brilliant starting point. I like to position my setup so the window light comes from the side, hitting the jewelry at about a 90-degree angle. This creates a beautiful, soft illumination with gentle shadows that add a sense of depth.
If you go the artificial route with an LED panel or a speedlight, you must soften it. Here are a few key tools to get that done:
- A Lightbox or Light Tent: This is basically a cube made of translucent white fabric. You place your light source outside the box, and the fabric diffuses the light, creating a soft, all-encompassing glow. It’s hands-down the easiest way to get consistent, reflection-free results.
- A Softbox: This is an attachment that fits over your light source. It has a diffusive front panel that softens and spreads the light, much like a lightbox but with the added bonus of more directional control.
- DIY Diffusers: Don't have a professional setup? No problem at all. A thin white sheet or even a piece of parchment paper held between your light and the jewelry can work wonders as a makeshift diffuser.
Sculpting Light with Reflectors
Once you have your main light source creating that soft glow, you’ll probably notice some areas are still a bit shadowy. This is where you get to start sculpting the light. The secret weapon here is a simple reflector, which is often just called a bounce card.
A small piece of white foam board or even just a folded piece of white paper is all you need to bounce light back into those shadows.
By angling a white card opposite your main light source, you can subtly fill in dark areas, revealing hidden details in the metalwork or under a stone’s setting. This simple trick adds a professional polish, making the entire piece look perfectly lit.
You can also use small black cards to do the exact opposite. Placed strategically, they absorb light and deepen shadows to create more contrast and drama. They're also great for blocking unwanted reflections from your camera or surroundings. Learning how to take a great photo of jewelry is truly about learning how to control where light goes—and just as importantly, where it doesn't.
Once your lighting is perfectly soft and diffused, it's time to get friendly with your camera. Seriously, moving past the "auto" setting is probably the single biggest leap you can take toward professional-looking jewelry photos. When you take manual control, you're telling the camera exactly how to see the piece, leaving nothing to chance.
The heart of manual photography is what we call the exposure triangle: aperture, ISO, and shutter speed. These three settings are in a constant dance, and getting them to work together is the key to those crisp, detailed images customers crave. And they really do crave them—the global photography services market was valued at a whopping $55.6 billion in 2023 and is still growing. You can dig into those numbers over at ImageRetouchingLab.com.
Nailing the Exposure Triangle for Jewelry
Photographing something as small and detailed as a piece of jewelry requires a very specific approach. Your main goal here is maximum sharpness and absolute clarity. Forget everything else for a moment; this is what matters most.
Here’s how to set your camera up for success:
- Aperture (f-stop): This setting controls your depth of field—basically, how much of your photo is in focus from front to back. For jewelry, you want the entire piece to be tack sharp. To do that, you need a narrow aperture, which means a higher f-stop number. Think f/8, f/11, or even f/16. This is how you get every tiny facet and engraving to pop.
- ISO: This is your camera's sensitivity to light. You want the cleanest image possible, with zero grain or "noise." That means keeping your ISO as low as it can go, usually 100 or 200. Since your camera is locked down on a tripod and the jewelry isn't going anywhere, there's absolutely no reason to raise it.
- Shutter Speed: This is simply how long your camera's shutter stays open. Because you've chosen a narrow aperture (less light) and a low ISO (less sensitivity), your shutter will need to stay open longer to compensate. This is exactly why a tripod is non-negotiable. The slightest wobble during a long exposure will turn your beautiful piece into a blurry mess.
My Go-To Starting Point: I always begin by setting my aperture to f/11 and my ISO to 100. From there, I just adjust the shutter speed until the camera's light meter tells me the exposure is correct. This simple workflow gives me a consistently sharp and clean base for every single shot.
Composing Your Shot for Maximum Impact
Composition is just the art of arranging things in your frame to look good. Just plopping the jewelry in the center of the frame is a safe start, but let's be honest—it's boring. Great jewelry photography tells a little story.
Don't just take one shot and call it a day. Your customers want to see the piece from different angles. They're trying to get a feel for its size, its texture, and how it’s constructed.

Here are the essential angles you need to capture:
- The Hero Shot: This is your main event. A straight-on, perfectly lit photo showing the entire piece. It’s your primary product image for your online store.
- The Detail Shot: Get in close with a macro lens. Focus on what makes the piece special—a unique clasp, the stone's setting, or some intricate engraving.
- The Angled Shot: Shooting from a 45-degree angle is a great way to show off the dimension and depth of the piece. It helps it feel more three-dimensional.
- The Scale Shot: You have to give people an idea of the jewelry's real-world size. A photo on a model or next to a simple, recognizable prop works wonders for this.
By providing a few different views, you're building a complete visual picture for your customer. You're answering their questions before they even think to ask, which builds the trust they need to click "add to cart."
Polishing Your Images with Smart Editing
Your work doesn’t stop after you press the shutter. In my experience, post-processing is where a good photo becomes a great one—the kind of professional product image that actually drives sales. This is the final polish that makes sure your jewelry looks its absolute best.
The goal here isn't to misrepresent the piece, but to present it as accurately and beautifully as possible. I like to think of it as cleaning the window so your customer can see the true beauty inside. This stage is all about making those subtle, crucial adjustments that end up making a massive difference.
The Essential Editing Workflow
A consistent editing process will save you a ton of time and ensures your entire product line has a cohesive, professional look. I always recommend starting with the most foundational adjustments first, since these will impact every other tweak you make down the line.
Your first move should always be about getting the color and clarity right. Here’s a simple, effective workflow that I've refined over years of shooting:
- Correct the White Balance: This is completely non-negotiable for jewelry. A bad white balance can make beautiful gold look sickly yellow-green or turn brilliant silver into a dull blue. Your software’s eyedropper tool is your best friend here—just click on a neutral gray or white part of your background, and it will instantly correct the color cast across the whole image.
- Adjust Exposure and Contrast: Even with perfect lighting, your camera's sensor might need a little help. Gently bump up the brightness to make the image pop, but watch out for "blowing out" the highlights on shiny metal or gemstones. A little extra contrast can also make the fine details stand out beautifully.
- Remove Imperfections: Now it's time to get nit-picky. Grab a spot healing brush or clone stamp tool to meticulously zap any tiny specks of dust, lint, or fingerprints you might have missed during cleaning. You absolutely have to zoom in to 200% or more for this step. Distractions that are invisible at a normal size can be glaringly obvious to a discerning customer looking closely.
Advanced Retouching for a Professional Finish
Once the basics are locked in, you can move on to the finer details that separate amateur shots from the pros. This is where you really enhance the natural beauty of the jewelry without overdoing it.
Sharpening is a critical final step. I typically use an "unsharp mask" filter to add that perfect crispness to the metal edges and gemstone facets. The trick is to apply it selectively—you don’t need to sharpen the soft, out-of-focus background. Subtlety is key. Too much sharpening creates a harsh, artificial look that can actually cheapen the appearance of your piece.
This is also where technology can be a huge time-saver. AI-powered tools are getting seriously good at automating tasks like enhancing gemstone clarity, adjusting lighting, and even removing complex reflections. Tools like Adobe Sensei and Fotor AI are now widely used for precise retouching, making it possible to highlight the intricate details of jewelry without heavy-handed editing. For a deeper look at what's coming, it's worth exploring the future of jewelry photography in 2025.
Remember, the best editing is invisible. The final image should look like it came straight out of the camera this way—perfectly clean, color-accurate, and razor-sharp.
If the thought of diving deep into Photoshop or Lightroom feels overwhelming, don't sweat it. It's often worth exploring professional services. Understanding the fundamentals of product photo retouching can help you figure out if you should DIY or outsource, ensuring your images always meet the high standards your customers expect.
Creative Shots and Common Mistakes to Avoid
Once you've nailed the technical side of things, it’s time to get creative and learn how to dodge the common mistakes that can tank your sales. Learning how to photograph jewelry is one part science, one part art. The "art" part is where you forge an emotional connection, helping customers see themselves wearing your beautiful pieces.
Let's start by moving beyond the standard white background. These other shots add vital context and create a much richer story for each item.
- Lifestyle Shots: Show your jewelry where it belongs—in the real world. A necklace paired with a simple black dress or a ring on a hand curled around a coffee mug tells a story. It helps customers instantly understand the piece's size and vibe.
- On-Model Photography: This is a game-changer for demonstrating scale. It answers that crucial question every online shopper has: "How big is it really?" A simple shot of earrings being worn provides way more information than a standalone photo ever could.
- Dramatic Macro Shots: Get in close. Really close. This is your chance to show off what makes your piece unique. Focus on the intricate details of a clasp, the unique texture of the metal, or the precise setting of a gemstone to highlight your incredible craftsmanship.
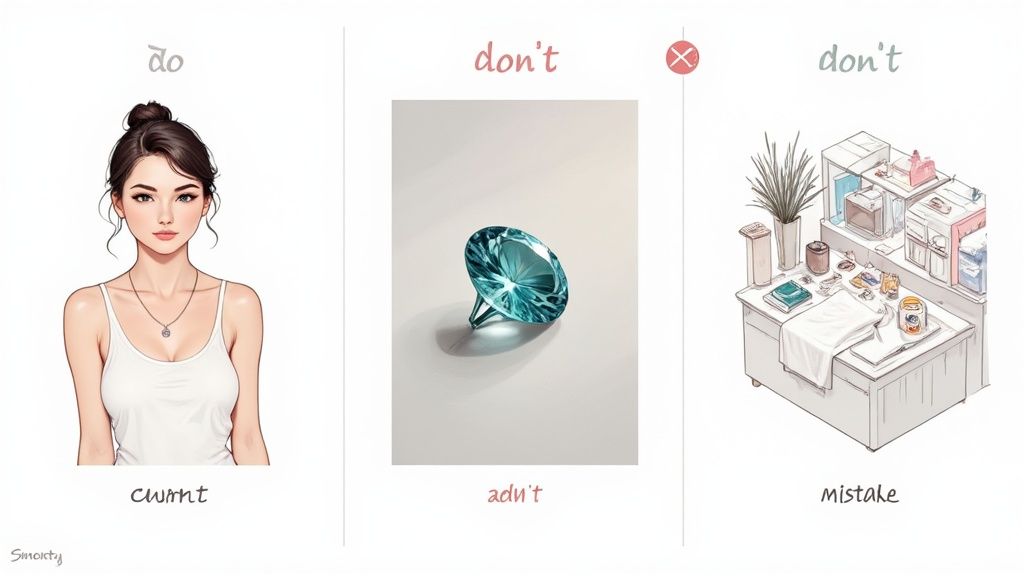
Sidestepping Frequent Photography Pitfalls
Even the most brilliant creative concepts can be torpedoed by a few common technical mistakes. Just being aware of these pitfalls is the fastest way to elevate the quality and consistency of your images across the board.
I see a lot of photographers run into trouble with their setups, and it's something I always caution against. These are the issues that can turn a great shot into a missed opportunity.
Common Jewelry Photography Mistakes and How to Fix Them
Here's a quick troubleshooting guide for the most common issues I see and how to get back on track.
| Common Mistake | Why It's a Problem | Quick Fix |
|---|---|---|
| Distracting Props | A busy background or a colorful prop pulls focus away from the jewelry. It should complement, not compete. | Stick to simple, neutral surfaces. Think marble, slate, clean linen, or a subtle wood grain. |
| Inconsistent Editing | Photos with different color temperatures or brightness levels look unprofessional and confuse shoppers browsing your store. | Create an editing preset or a simple style guide to ensure every image has a similar, cohesive look and feel. |
| Inaccurate Colors | Heavy-handed editing or the wrong white balance can make gold look brassy or silver look blue, leading to returns. | Always edit on a color-calibrated monitor. Do a final check of your edited image against the actual product. |
| Harsh Shadows | Hard, dark shadows can obscure important details and make the jewelry look cheap or poorly lit. | Use a diffuser or reflector to soften your light source. This will create gentle, flattering shadows instead. |
Avoiding these common errors is about more than just aesthetics; it's about building trust.
The most damaging mistake is presenting inaccurate colors. Nothing erodes customer trust faster than receiving an item that doesn't match the photo. It’s a direct path to disappointment and returns.
Finally, remember your images don't exist in a vacuum—they're a critical part of your sales strategy. Getting the perfect shot is just one piece of the puzzle. Understanding how those photos perform within a product listing is just as important. For a deeper dive, I recommend learning more about optimizing product images for Amazon listings.
By sidestepping these common errors, you'll create trustworthy, compelling photos that don't just look beautiful—they convert browsers into loyal buyers.
Frequently Asked Questions About Jewelry Photography
Getting started with jewelry photography can feel a little tricky, and a few common questions pop up time and time again. Let’s tackle some of the biggest hurdles so you can get clear, actionable solutions and start improving your shots right away.
Can I Really Get Professional Results With a Smartphone?
You absolutely can, but there's a catch: you have to give your phone the right support. While a fancy DSLR gives you more granular control, the cameras in modern smartphones are incredibly capable when you set them up for success. It all boils down to two things: stability and light.
First, get your phone on a tripod. Always. This one step eliminates the micro-shakes that create blur, which is a killer when you're shooting tiny details up close. A simple clip-on macro lens can also be a game-changer for capturing those intricate designs your customers want to zoom in on.
Most importantly, you have to control your light. A phone's sensor just can't handle harsh glares or dim rooms. Using a lightbox or a softbox to create soft, diffused light isn't just a suggestion—it's pretty much non-negotiable if you want that clean, professional look.
How Do I Stop Getting Reflections on Shiny Jewelry?
Ah, reflections. They're the bane of every beginner's existence. The secret weapon here is diffusion. You should never, ever point a direct, "hard" light at your jewelry. The goal is to soften it.
You need to place something between your light and the piece. This is exactly what the fabric walls of a lightbox are for. If you don't have one, a thin white bedsheet or even a sheet of parchment paper held between the light and the jewelry can work wonders. This scatters the light, creating a gentle glow that wraps around the piece instead of bouncing harshly off it.
Pro Tip: Grab some small black cards—foam board is perfect for this. Place them just outside the camera's view to block unwanted reflections. You can strategically position them to stop your camera, your room, or even yourself from showing up on those shiny metal surfaces.
What Is the Best Background for E-commerce Jewelry?
For most online stores and marketplaces like Shopify, Amazon, or Etsy, the answer is simple: pure white or light gray. It's the undisputed industry standard for a reason. This approach creates a clean, consistent look across your entire product gallery and makes the jewelry the absolute star of the show.
Now, for social media or your own brand website, you can definitely get more creative. Subtle textures like marble, slate, or a nice piece of linen can add a layer of sophistication. The golden rule is that the background must complement the jewelry, never compete with it. A great background helps tell the story of the piece.
If you're trying to decide which route to take, looking into the typical cost of professional product photography can give you a lot of insight into what the pros do and why.
Ready to skip the complex setups and get stunning, market-ready images in seconds? ProdShot uses AI to turn your simple phone photos into professional-quality product shots, complete with perfect lighting and clean backgrounds. Try it for free and see how easy it is to elevate your online store. Get started today at https://prodshot.net.