

So, what exactly is image editing for ecommerce? Put simply, it’s the art of refining your product photos to make them irresistible to online shoppers. This isn't about slapping on a quick filter; it's a deliberate process focused on creating clean, consistent, and true-to-life images that build trust and, most importantly, drive sales.
Why Better Images Mean Better Business
Picture this: you're shopping for a new handbag online and find the exact same one on two different websites. The first site has dim, blurry photos with a cluttered background. The second showcases the bag with bright, sharp images on a clean white backdrop, letting you see every stitch and texture.
Which store gets your money? It's a no-brainer.
This little scenario cuts to the heart of online retail. Your product photos are your digital storefront. Since a customer can’t pick up your product, feel its weight, or examine its quality up close, your images have to do all the heavy lifting. They're your number one tool for closing the gap between a customer seeing an item online and feeling confident enough to hit "Add to Cart."
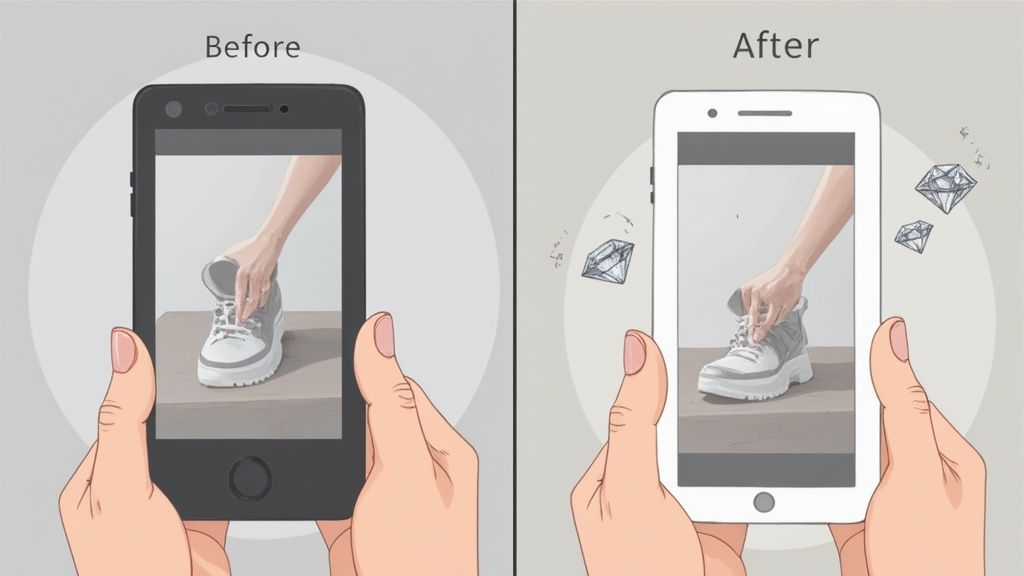
The Unpolished Diamond Analogy
Think of a raw photo straight from the camera as an unpolished diamond. It has potential, sure, but its real sparkle is hidden. Image editing for ecommerce is the expert faceting and polishing that brings out that diamond's brilliance and value.
This process removes tiny flaws, sharpens the details, and presents the product in its absolute best light. A polished image makes the quality feel undeniable, and it works hard for your business by:
- Building immediate trust. Professional, consistent photos tell customers you're a legitimate brand that cares about quality.
- Answering questions before they're asked. Clear shots from multiple angles show off the size, texture, and details, reducing customer uncertainty.
- Slashing your return rates. When what a customer sees online perfectly matches what arrives at their door, you all but eliminate post-purchase disappointment.
Before we dive into the specific techniques, let's connect these goals to real-world business metrics. This table breaks down how specific editing actions directly influence the numbers that matter most to your store.
How Editing Directly Impacts Ecommerce Metrics
| Editing Technique | Primary Goal | Impact on Business |
|---|---|---|
| Background Removal | Isolate the product, eliminate distractions | Increases conversion rates by focusing all attention on the product's features and quality. |
| Color Correction | Ensure color accuracy and vibrancy | Reduces product returns by setting accurate customer expectations, building long-term trust. |
| Shadow Creation | Add depth and realism | Boosts perceived value and professionalism, making the product look more tangible and high-end. |
| Retouching | Remove dust, scratches, and imperfections | Enhances brand perception, signaling high standards and meticulous attention to detail. |
As you can see, every edit has a purpose. These aren't just cosmetic tweaks; they are strategic moves designed to improve your customer's experience and, ultimately, your bottom line.
The Direct Impact On Your Bottom Line
The link between image quality and sales is rock-solid. In the hyper-competitive world of ecommerce, your photos are a massive conversion driver. Study after study confirms that professional images far outperform amateur ones. For instance, a report from Shopify revealed that 67% of consumers say product images are more important than product descriptions or even customer reviews when they decide to buy. You can find more great insights on winning with photo edits from Studiometrodesk.com.
An unedited photo shows a product. A professionally edited photo sells a product. It’s the silent salesperson working 24/7 to convince customers of your product's value and quality.
That first visual impression is everything. Investing in quality image editing isn’t an optional finishing touch—it's a core part of a winning sales strategy that ensures your products look just as amazing online as they do in real life.
Your Essential Product Photo Editing Toolkit
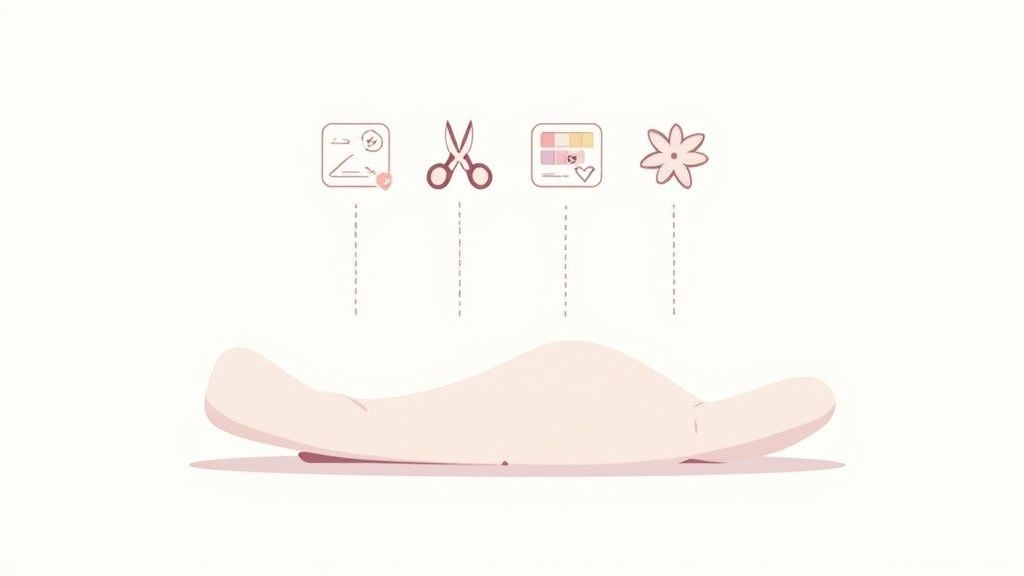
Turning a decent product shot into one that genuinely sells takes more than just a good camera. The magic really happens in the edit. A few core techniques are the secret sauce that professionals use to create clean, compelling images that stop scrollers in their tracks.
Think of these skills as the essential tools in your digital workshop. Each one has a specific job, and when used together, they create a final, polished product that looks incredible. Nailing these basics will build a powerful visual foundation for your entire store.
Start with a Clean Slate: Background Removal
If there's one edit that delivers the most bang for your buck, it's background removal. Switching out a cluttered or inconsistent background for a clean, uniform one—usually pure white or light gray—accomplishes two huge things at once.
First, it wipes out every possible distraction, forcing the shopper’s eye right where you want it: on your product. Second, it creates a cohesive, professional look across all your listings. This isn't just nice to have; it's a critical part of building a brand that feels trustworthy and high-quality. This consistency is mandatory on marketplaces like Amazon and a best practice everywhere else.
A clean background is like a silent stage for your product, ensuring it's the undisputed star of the show. It’s the first step in moving from an amateur snapshot to a professional, retail-ready image.
Get Colors True to Life with Color Correction
Have you ever bought a shirt online that looked like a vibrant cherry red, only to open the package and find a dull maroon? That's what poor color correction does, and it’s a fast track to customer frustration and costly returns.
Color correction is all about making sure the colors in your photo perfectly match the real-life product. Every camera and lighting setup can throw colors off slightly. This is where you fix it, ensuring the electric blue on the screen is the exact same electric blue your customer unboxes. It’s a matter of trust.
- White Balance: This fixes weird color casts so that white objects actually look white, not yellow or blue.
- Saturation & Vibrance: These tools give colors a healthy boost, making your product look rich and appealing without looking fake.
- Hue Adjustments: This allows you to fine-tune specific colors to get them spot-on.
Getting color right means fewer returns, happier customers, and better reviews. Simple as that.
Add Depth and Realism with Shadow Creation
Once you’ve removed the background, your product can sometimes look like it's just floating in a white void. It feels flat and unnatural. This is where shadow creation comes to the rescue.
Adding a subtle, realistic shadow grounds the product, giving it weight, dimension, and a sense of place. It instantly makes the item feel more tangible and real, even on a 2D screen.
- Natural Shadow: This is the most common type, mimicking how light would naturally fall to create a soft shadow on the surface beneath the item.
- Drop Shadow: This is a slightly more graphic style where the shadow sits behind the product, giving it a gentle lift off the page.
- Reflection Shadow: Perfect for glossy items like sunglasses or electronics, this creates a subtle mirror image on the surface, screaming "high-end finish."
The right shadow makes a product look significantly more professional and can bump up its perceived value.
Perfect the Details with Retouching
The final layer of polish is retouching. This is the art of buffing out all the tiny imperfections that a high-resolution camera mercilessly captures—every speck of dust, stray thread, or minor scuff.
Good retouching is invisible. You're not trying to make the product look fake; you're presenting an idealized version of the real thing. This means:
- Wiping away dust and fingerprints from shiny surfaces.
- Smoothing out distracting wrinkles or creases in clothing.
- Fixing tiny scratches on jewelry or gadgets.
- Toning down harsh glares or reflections from your lighting.
This meticulous attention to detail signals quality and care. It tells your customers you’re selling a premium product, and all these editing techniques work together to turn a simple photo into your most powerful sales tool.
Outstanding product photos aren't just a happy accident. They’re born from a deliberate, repeatable, and efficient process—a workflow.
Without a solid workflow, tackling even a small batch of photos can feel like herding cats. It’s chaotic and inconsistent. But with a good system in place? You can process thousands of images and be confident that every single one perfectly represents your brand.
Think of it as an assembly line for your pictures. Each image moves through a set of defined stages, from the initial cut to the final export, locking in quality and consistency every step of the way. This structured approach is the secret to managing a professional-looking product catalog without burning through time and money.
The Four Stages of a Killer Workflow
A powerful image editing for ecommerce workflow really boils down to four key phases. Each stage builds on the one before it, turning your raw camera files into assets that are ready to sell. Getting this sequence down is fundamental if you want to scale up your visual content.
-
Cull and Organize: This starts before you even fire up your editing software. First, you need to go through all the photos from a shoot and "cull" the herd. Pick out only the sharpest, best-lit shots. Immediately trash anything that's blurry or unusable—it just creates clutter. Then, organize the keepers into simple folders like "To Edit" and "Finished" so you always know where things stand.
-
Batch Edit for Consistency: This is where you save massive amounts of time. Instead of tweaking photos one by one, you apply universal adjustments—like color correction and exposure settings—to a whole group of similar images at once. It's the best way to make sure all the photos from the same session have that perfectly consistent look and feel.
-
Individual Retouching: After the broad strokes are done, it's time to zoom in and give each photo some personal attention. This is where you handle the little things, like zapping a speck of dust, smoothing out a wrinkle on a t-shirt, or making sure the product is perfectly centered. This detailed work is what adds that final layer of professional polish.
-
Final QC and Export: The last step is a final once-over. Check every image for consistency, accuracy, and any imperfections you might have missed. Once they get the green light, export the files using web-optimized settings. That means paying attention to file size, format (JPEG, PNG, WebP), and using smart naming conventions that help with SEO.
Your Brand Style Guide Is Your North Star
So, how do you keep thousands of images looking consistent when they're edited over several years, maybe even by different people? The answer is a brand style guide. This document is your rulebook for everything visual. It spells out every last detail of your product photography.
A brand style guide is the single source of truth for your visual identity. It ensures that whether an image is edited today or two years from now, it will look like it belongs to your brand.
Your guide should be super specific about things like:
- Backgrounds: The exact color codes for your backgrounds (e.g.,
#FFFFFFfor pure white). - Shadows: The specific type, angle, and softness of the shadows you use.
- Cropping and Margins: Clear rules for how much empty space to leave around the product.
- Color Tone: Should your images feel warm, cool, or perfectly neutral?
Choosing Your Operational Model
Alright, so who is actually going to do all this work? Most businesses land on one of three models for their image editing, and the right choice usually comes down to budget, volume, and the skills you have in-house.
1. In-House Team
Handling editing internally gives you the most control over quality and turnaround time. This is a fantastic option if you have a high, steady stream of images and the resources to hire and train a skilled editor or build a small team.
2. Freelancers
Hiring freelance editors from platforms like Upwork or Fiverr brings a ton of flexibility. It’s a cost-effective way to manage a workload that goes up and down, all without the commitment of a full-time employee. The real trick is finding reliable freelancers who can nail your brand style guide every single time.
3. Outsourcing to a Service
For sellers moving serious volume, dedicated product image editing services are often the most efficient route. These specialized agencies are built to handle scale and can turn around hundreds or thousands of images quickly and affordably. For instance, a major US fashion retailer managed to process over 324,000 images for a catalog launch by using an external partner with segmented, bot-assisted workflows. This model blends automation with a human eye for accuracy—a strategy you can dig into deeper in this ecommerce image editing guide.
At the end of the day, locking in the right workflow and operational model will make your image editing process predictable, scalable, and a seriously powerful tool for growing your business.
Advanced Edits That Make You Stand Out
Once you have your basic workflow humming along, it’s time to start creating visuals your competitors can't easily copy. Basic edits get you in the game, but advanced image editing for ecommerce is what helps you win. These next-level techniques create a much more immersive and persuasive shopping experience that can easily justify a higher price point.
Think of it this way: foundational edits like background removal are like setting a clean, well-lit stage. Advanced edits are like adding the stunning set design and expert choreography—they tell a richer story and completely captivate your audience. These are the details that turn a simple product listing into a compelling visual pitch.
The Ghost Mannequin Effect for a Perfect Fit
For any apparel brand, one of the biggest headaches is showing a garment's true shape and fit without the distraction of a live model or a clunky mannequin. This is where the ghost mannequin effect comes in. It’s a clever composite technique that makes clothing look like it's being worn by an invisible person.
The process involves taking two photos: one of the garment on a mannequin, and another of the inside of the garment (like the collar or waistband). An editor then skillfully combines these shots, digitally erasing the mannequin to create a hollow, 3D effect. The result? Customers see the garment’s true shape, how it drapes, and even interior details, giving them a much clearer idea of how it will actually fit on their own body.
It's a detailed process, but it proactively answers a customer's most critical questions about form and structure.
Mastering Challenging Reflective Surfaces
Products like jewelry, watches, sunglasses, and chrome fixtures are notoriously difficult to photograph. Their shiny surfaces act like tiny mirrors, picking up unwanted reflections of the camera, the photographer, and everything else in the room. Advanced editing isn't just nice to have here—it's essential for making these products look flawless.
This involves meticulous retouching to:
- Remove distracting glares and weird reflections.
- Enhance the sparkle and brilliance of gemstones.
- Create clean, defined lines on metallic surfaces.
- Ensure the product's finish looks luxurious, not smudged or dusty.
This level of detail is non-negotiable for luxury goods, as it directly communicates the quality and craftsmanship of the item itself.
Building Aspirational Lifestyle Composites
Sometimes, a product sitting on a plain white background just isn't enough to convey its true value. A lifestyle composite drops your product into an aspirational scene, helping customers actually envision it in their own lives. This could be placing a new sofa into a beautifully designed living room or showing a waterproof speaker sitting by a pristine swimming pool.
Creating these scenes often means combining multiple images—the product shot and a stock or custom background. The editor’s real job is to blend them seamlessly, perfectly matching the lighting, shadows, and perspective so the final image looks completely natural. While modern tools can definitely speed this up, a skilled human touch is what makes the result believable. If you're looking to explore automated solutions, learning more about an AI product photo generator can show you how to create stunning scenes in a fraction of the time.
This infographic breaks down a typical workflow for these more complex editing jobs.
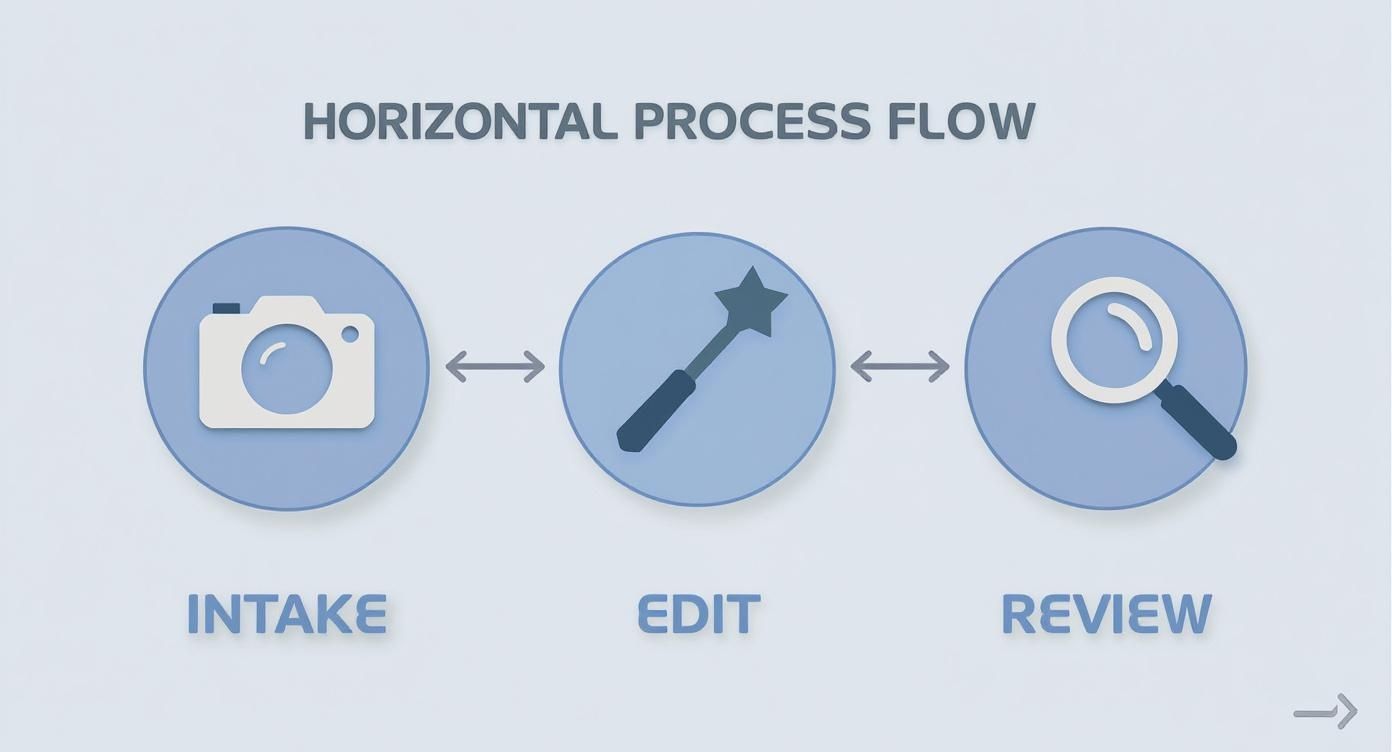
The flow from intake to final review makes sure that every advanced edit, no matter how complex, meets strict quality standards before it ever goes live on your site.
Preparing for the Future of Ecommerce Imagery
The next frontier of e-commerce visuals is all about interaction and immersion. The advanced editing skills of today are the foundation for creating the assets you'll need for these powerful new shopping experiences.
Today’s advanced edits are tomorrow’s standard expectations. Getting ahead of the curve with 360-degree views and AR-ready images positions your brand as a forward-thinking leader and gives customers unparalleled confidence to buy.
This means preparing images for things like:
- 360-Degree Views: This requires shooting and editing a whole series of images from every angle, which are then stitched together to create an interactive, rotating view of the product.
- Augmented Reality (AR): For AR, images and 3D models have to be precisely edited and scaled so customers can virtually place a piece of furniture in their room or see how a necklace looks on their skin.
For truly next-level visual experiences, a virtual clothing try-on app can completely change the game. These applications give customers the ultimate "try before you buy" confidence, dramatically reducing hesitation and boosting conversion rates for fashion retailers. They represent the next logical step in making online shopping feel just as tangible as walking into a physical store.
Choosing Your Ideal Image Editing Software
Picking the right software for your image editing for ecommerce is a lot like a chef choosing the right knife—it has to feel right for your skill level, your budget, and the specific job you need to get done. The market can feel a bit crowded, but it really boils down to two main camps: the heavy-duty, do-everything industry standards and the newer, friendlier tools built for speed.
The best tool is one that supports your workflow, not one that forces you into a new one. Be realistic about your team’s technical skills, the sheer volume of images you need to churn out each week, and what you can afford. The whole point is to find something that makes your life easier, helping you produce fantastic images consistently without a massive headache.
Traditional Powerhouses Versus Modern AI Tools
For years, programs like Adobe Photoshop and Lightroom have been the undisputed kings of the hill. These tools are incredibly powerful, giving you total control over every single pixel. They're the go-to for professionals who need to do complex work, like creating the ghost mannequin effect or retouching intricate jewelry.
But all that power comes with a price—both in terms of a steep learning curve and a monthly subscription. For a lot of online sellers, especially those just starting out, the endless menus and features can feel more like a roadblock than a helping hand. This is exactly where modern, AI-driven tools have come in and changed the game.
The best software isn't always the one with the most features; it's the one that helps you achieve professional results with the least amount of friction. Efficiency and quality are the ultimate goals.
AI-powered editors are designed with one thing in mind: making ecommerce image editing fast and painless. These tools automate the tedious, time-sucking tasks like removing backgrounds, adding realistic shadows, and even handling basic color correction in just a few seconds. For most sellers, this is a massive win, turning what used to be a multi-step chore into a single click. Our own guide on finding the perfect Shopify photo editor dives into several options that put this kind of efficiency first.
Key Factors in Your Decision
To cut through the noise and find the right fit, focus on these three things:
- Skill Level: Be honest about what you and your team can handle. If you don’t have a graphic designer on speed dial, a beast like Photoshop might just lead to frustration. User-friendly AI platforms are built so that anyone can get professional results right away.
- Image Volume: If you're only editing a few photos a month, doing it by hand might be fine. But if you’re staring down a pipeline of hundreds or thousands of images, automation isn't just a nice-to-have—it's essential for keeping your sanity and ensuring every photo looks consistent.
- Budget: Your budget is obviously a huge factor. Professional software usually locks you into a monthly subscription, while many AI tools offer more flexible pay-as-you-go plans or affordable tiers. You can even find free web-based apps that are great for handling the basics.
To help you get a clearer picture, here’s a look at how some of the top tools stack up against each other.
A Comparison of Top Image Editing Tools
A feature-by-feature comparison of leading software to help you choose the best fit for your needs, from professional suites to AI-powered web apps.
| Tool Name | Best For | Key Features | Pricing Model |
|---|---|---|---|
| Adobe Photoshop | Professional photographers and designers needing total control. | Advanced retouching, layers, complex selections, 3D editing. | Subscription |
| Adobe Lightroom | Photographers managing large batches of photos. | Batch editing, color grading, photo organization, RAW file processing. | Subscription |
| Canva | Beginners and small businesses creating marketing assets. | Templates, simple background removal, text overlays, social media design. | Freemium / Subscription |
| ProdShot | Ecommerce sellers needing fast, AI-powered product photos. | AI background generation, shadow creation, instant scene composition. | Credits (Pay-as-you-go) |
| Pixlr | Quick edits and users familiar with Photoshop's interface. | AI-powered tools, layers, filters, available on web and mobile. | Freemium / Subscription |
Each of these tools has its strengths. Photoshop is the undisputed champion of detailed, manual editing, while a tool like ProdShot is built from the ground up to automate the specific needs of an online store. Your choice depends entirely on where your priorities lie.
It's also worth noting that the industry isn't just standing still. While classic editing is still crucial, new tech like AI-powered retouching, 3D imaging, and augmented reality (AR) are reshaping how we display products online. These tools let brands build immersive experiences, like 360-degree views or virtual try-on features that give shoppers a ton of confidence. As discussed in the future of ecommerce editing tools on vservesolution.com, this shift makes it even more important to pick a tool that can grow with your brand.
Optimizing Images for SEO and Site Speed
https://www.youtube.com/embed/vaJx9Hu1sk0
A perfectly edited product photo is useless if customers—and search engines—can't find it or get tired of waiting for it to load. All your brilliant editing work goes down the drain if the final image is so big it slows your page to a crawl or so poorly named that Google has no clue what it is.
This is where optimization comes in. It’s the critical final step in image editing for ecommerce that makes sure your photos actually do their job.
Think of an unoptimized image as a brilliant salesperson who speaks a language no one understands. The pitch is amazing, but the message just doesn't land. Optimizing your images translates that pitch for both your human visitors and the search engine bots, ensuring your hard work pays off. It's all about balancing beautiful quality with blazing-fast technical performance.
File Formats: The Right Tool for the Job
Your first big decision is choosing the right file format. Each type has a specific job, and picking the right one can slash your file size without a noticeable drop in quality. Getting this right is a simple, high-impact win for your site's speed.
Here are the top three formats you'll be using in ecommerce:
- JPEG (or JPG): This is your workhorse for most product photos. JPEGs offer fantastic compression, creating small file sizes while keeping all those important photographic details sharp. It's the standard for your product-on-white-background shots.
- PNG: Reach for this format anytime you need a transparent background. PNGs are perfect for logos, icons, or product images that need to sit cleanly on top of colored backgrounds without that ugly white box around them.
- WebP: This is the modern format developed by Google. WebP often provides even better compression than JPEG and PNG, and it supports transparency, too. It’s a fantastic choice for boosting performance, and nearly all modern browsers support it now.
Smart Compression and Sizing
Once you’ve picked your format, it’s time to shrink that file. A massive, high-resolution photo straight from a camera can be several megabytes—way too big for a website. Slow load times are a certified conversion killer. In fact, studies show a tiny 1-second delay in page load can lead to a 7% reduction in conversions.
Image optimization isn’t about sacrificing quality; it’s about finding the sweet spot where your image looks fantastic but loads in a flash. It’s a technical necessity for a great user experience.
Always use an image resizer to get your dimensions right before you upload. For most product pages, an image width between 1000 and 1600 pixels is more than enough. If you need a hand, you can learn more about finding the right image resizer to make this part of your workflow a breeze. After resizing, apply compression to squeeze the file size down even further.
Alt Text and File Names: Your SEO Superpowers
Last but not least, you need to tell search engines what your image is all about. Google can't "see" your photo like a person can, so it relies on the text you provide.
- File Name: Don't just upload
IMG_8452.jpg. Change it to something descriptive likeblue-suede-running-shoe.jpg. Use keywords that people would actually search for. - Alt Text: This is a short, written description of the image that appears if the image can't load. It's crucial for accessibility (for visually impaired users) and gives Google vital context. An alt text like "A pair of navy blue suede running shoes with white soles" is perfect.
Getting your images right is a huge part of on-page SEO, but it's just one piece of the puzzle. Understanding broader creator SEO strategies can have a massive impact on your overall visibility and search rankings.
Frequently Asked Questions
When you’re deep in the world of ecommerce image editing, a few key questions always pop up. Let's tackle the big ones—time, money, and getting things right—so you can build your visual strategy with total confidence.
Think of this as a quick-reference guide to the stuff that really matters.
How Much Should I Budget for Ecommerce Image Editing?
There’s no single price tag here. Your budget really depends on how many images you have, how complex the edits are, and who's doing the work.
Outsourcing simple jobs like background removal can be incredibly affordable, often running between $0.25 to $1.50 per image. But if you're selling intricate jewelry that needs detailed retouching, you might be looking at $5 to $10+ per image.
Going the in-house route means factoring in software costs, like an Adobe Creative Cloud subscription for about $55 a month, plus the salary of the person doing the work. The best way to look at it is as an investment. If spending a few dollars on an image prevents one return or clinches one sale, it’s already paid for itself.
What Are the Biggest Mistakes to Avoid in Photo Editing?
It's funny—most of the worst photo editing mistakes start with good intentions. Keeping your brand looking professional and trustworthy often means knowing what not to do.
- Unrealistic Edits: It’s tempting to pump up the colors or smooth out every flaw, but altering a product’s true appearance is a recipe for customer disappointment and returns. Authenticity always wins.
- Inconsistency: If your product grid has different backgrounds, clashing lighting, and random shadow styles, it just looks messy. A consistent look across your catalog is a hallmark of a professional brand.
- Ignoring Web Optimization: This is a huge one. Uploading massive, uncompressed files will kill your page speed, frustrate shoppers, and hurt your SEO rankings. Always save for the web.
- Poor Source Photos: You've heard it before: garbage in, garbage out. Editing can enhance a good photo, but it can't magically fix a blurry, poorly lit, or low-resolution shot. A great edit starts with a great photo.
Should I Hire a Professional Photographer?
Honestly, when you're just starting out, a modern smartphone and some decent, consistent lighting can get you pretty far. The main goal is just to capture a sharp, clear image that your editor can work with.
A professional photographer provides a superior raw file, making the editing process faster and the final result more polished. Their expertise in lighting and composition is an investment in quality.
As your business scales, bringing in a pro becomes a serious advantage. Many smart brands use a hybrid approach: they hire a photographer for big-ticket items like hero images and new collection launches but handle standard catalog shots with a solid in-house setup. It’s a great way to balance world-class quality with your budget.
Ready to create stunning, sales-driving product photos in seconds? ProdShot uses AI to turn your simple snapshots into professional, on-brand images without any editing skills required. Get started for free and see how easy it is to elevate your online store. https://prodshot.net