
To get that perfect white background for your product photos, you really only need two things: a simple at-home studio setup and some smart editing—whether you do it by hand or use an AI tool. The end goal is always the same: isolate your product on a pure white canvas. This isn't just a preference; it's a non-negotiable for professional listings on platforms like Amazon and Shopify.
Getting this right is about more than just looking good. It's a fundamental step in building customer trust and making your products pop.
Why a White Background Is the Ecommerce Gold Standard
Before we jump into the "how-to," let’s talk about the "why." A crisp, white background isn't just a trend; it's a powerful and silent sales tool. It has become the default for professional online retail because it creates a consistent, clean shopping experience that puts your product center stage.
Think of it as the digital equivalent of a high-end, minimalist retail display. It’s a strategic choice with real, measurable benefits. When a customer lands on your page, you want their eyes locked onto your product—its color, texture, shape, and unique details. A busy or colored background just gets in the way, creating visual noise that can cheapen the perceived value of what you're selling.
How Background Choice Impacts Key Ecommerce Metrics
It’s easy to see why a white background consistently outperforms other options for product photos. Here's a quick comparison:
| Metric | White Background | Busy or Colored Background |
|---|---|---|
| Focus | Product is the undisputed hero. | Distracts from product details. |
| Perceived Value | Looks professional, clean, and high-quality. | Can appear amateur or cheap. |
| Conversion Rate | Higher, due to clarity and trust. | Lower, due to visual clutter and friction. |
| Brand Consistency | Creates a uniform, professional catalog. | Leads to a messy, inconsistent brand look. |
| Marketplace Compliance | Meets requirements for Amazon, Google, etc. | Often violates platform image guidelines. |
The data is clear: a simple white backdrop removes distractions and helps customers make faster, more confident buying decisions.
The Impact on Customer Perception
When every single one of your product listings features a uniform white backdrop, you’re signaling professionalism. It tells shoppers you’re a serious seller who cares about the details, which is a massive trust-builder.
This visual harmony makes your entire store feel more cohesive and easier to browse, encouraging people to stick around longer. For a complete look at nailing this style, check out this ultimate guide to white background for product photography.
The single biggest advantage of a white background is clarity. It removes all visual noise, allowing the product’s features to speak for themselves and making it the undisputed hero of the image.
Meeting Marketplace Requirements
Let’s get practical. Huge ecommerce platforms like Amazon, eBay, and Google Shopping aren't just suggesting a white background—they often require it. Adhering to these guidelines is mandatory if you want your products to be seen.
A recent report even showed that 85% of marketers agree that white backgrounds make product shots clearer and more professional. Failing to meet these standards can get your listings buried or even removed. It’s a foundational step you can’t afford to skip.
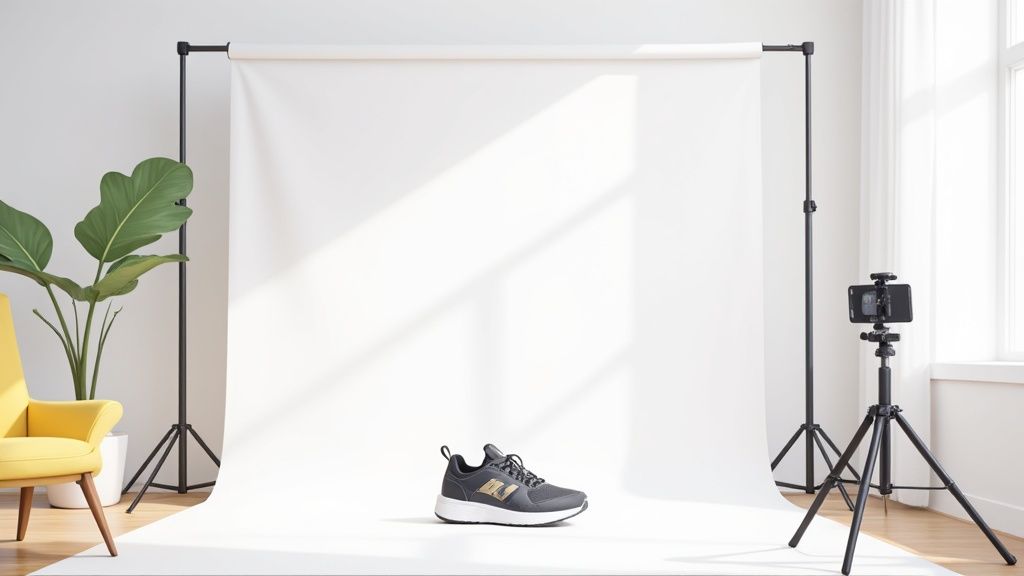
Your Budget-Friendly At-Home Photo Studio
You really don't need to rent an expensive space to get those crisp, white-background product photos. It's surprisingly achievable to get professional results right at home, often using stuff you already have lying around. Forget about complex lighting kits and pricey gear; a simple, smart setup is all that's standing between you and high-quality images.
The whole point is to create a clean, seamless environment that kills distracting shadows and makes your product the star of the show. Not only does this make your items look way better, but it also drastically cuts down on the time you'll spend wrestling with editing software later. A little time spent on the setup pays off big time.
Creating the Perfect DIY Backdrop
The foundation of your home studio is the backdrop. Your new best friend is a big, flexible piece of white poster board. You can grab one at any craft or office supply store for just a few bucks.
To create a seamless "sweep," just place the poster board on a table and gently curve it up against a wall, using some tape to hold it in place. That gentle curve gets rid of the hard line where the table meets the wall, giving you that smooth, infinite-looking white background. This simple trick is a cornerstone of professional product photography.
Harnessing Natural Light Like a Pro
Hands down, the best light source for a budget-friendly setup is the sun. Find a large window that lets in a ton of indirect sunlight—direct sun is way too harsh and creates ugly, distracting shadows. North or south-facing windows are usually your best bet, as they provide soft, consistent light all day.
Position your setup next to the window, not in front of it. Your product should be lit from the side. This technique, called side-lighting, adds just the right amount of gentle shadow to create depth and really show off your product's texture and shape.
Pro Tip: If the sunlight is still a bit too intense, you can easily soften it up. Just tape a thin white bedsheet or even a piece of parchment paper over the window. This acts like a giant softbox, scattering the light for a flattering, even glow on your product.
Figuring out how to get great white background shots often comes down to mastering these simple light tweaks. It’s more about controlling your environment than just snapping a picture. For a deeper dive into how equipment costs stack up against results, you can check out this breakdown of the cost of professional product photography and see just how much value a good DIY setup provides.
The infographic below really drives home how a clean visual presentation is the first step in grabbing customer attention, building trust, and ultimately driving sales.
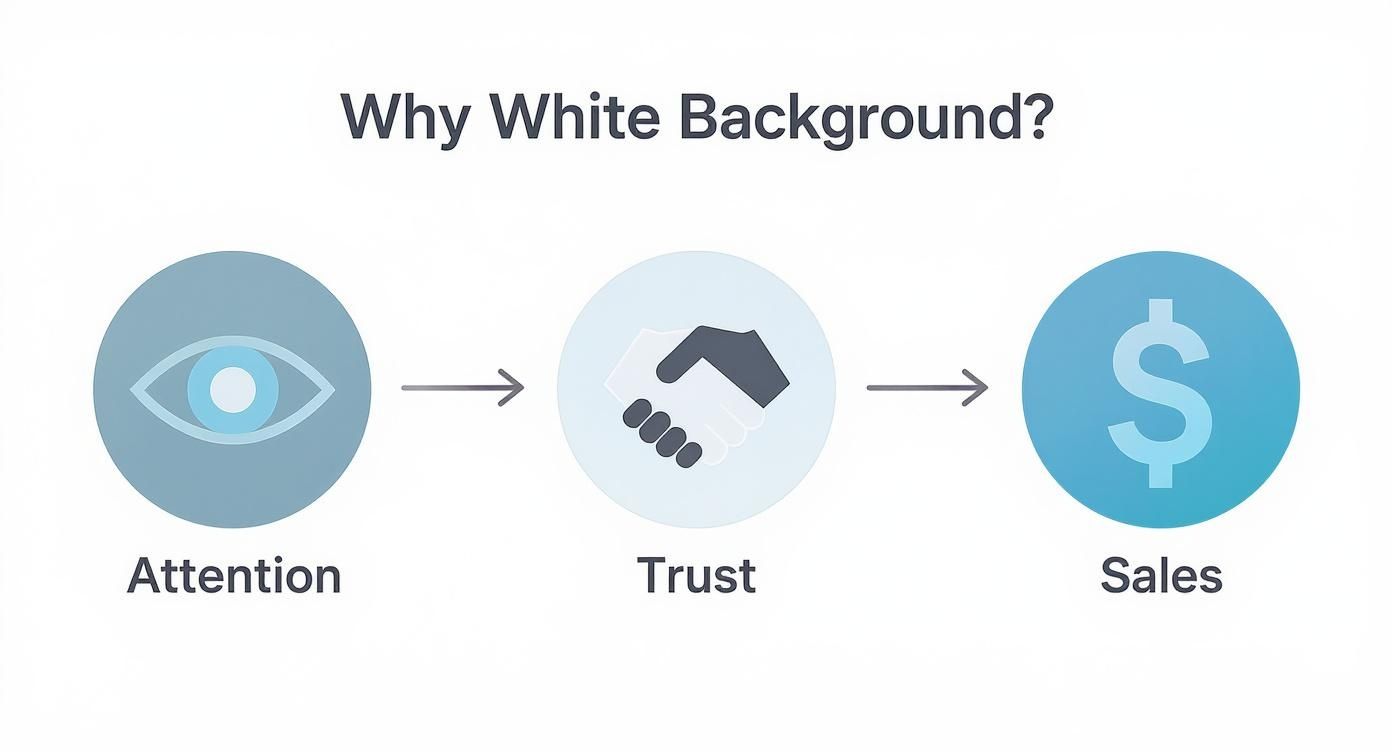
This visual flow shows that a professional, distraction-free image isn't just a pretty picture—it's the starting point of a successful customer journey that leads directly to a sale.
Ideal Placement for Product and Camera
The final piece of the puzzle is positioning. Put your product right in the center of your poster board sweep. Now, set up your camera (or smartphone) directly in front of it. I highly recommend using a tripod here; it's the secret to getting sharp, stable, and consistent shots every single time.
Here’s a quick checklist for your setup:
- Light Source: A large window to your left or right.
- Product: Centered on the white poster board sweep.
- Reflector: A piece of white foam board placed opposite the window. This will bounce light back onto your product and soften up any shadows.
- Camera: Directly in front of the product, mounted on a tripod.
This simple arrangement minimizes tricky shadows and makes the editing process a whole lot easier down the line.
Mastering Product Shots With Your Smartphone
Think you need a fancy DSLR to get killer product photos? Think again. The camera in your pocket is more than capable of producing bright, crisp images that look right at home on any e-commerce site. The secret isn't some expensive lens—it's knowing how to take control of the settings you already have.
Forget just pointing and shooting. The very first thing you need to do is manually set your phone's focus and exposure. It's simple: just tap and hold on your product right on the screen. After a second, you'll see a yellow box pop up, confirming that the focus and exposure are now locked. This is a game-changer because it keeps your product sharp and stops the lighting from flickering as you move.
Once that's locked in, a little sun icon with a slider will appear. This is where the magic happens.
Nail the Exposure In-Camera
That little sun slider is your exposure control—it dictates how bright or dark your photo is. Your goal here is to slide it up just enough to make your white background look, well, white. Getting this right in-camera is a critical step to make white background shots that require minimal editing later.
But be careful. It’s easy to go too far. If you crank the exposure too high, you’ll "blow out" the highlights on your product, completely erasing important details and textures. You're looking for that sweet spot where the background is almost pure white, but the product itself still looks detailed and vibrant.
Expert Tip: Some camera apps have features like "blinking highlights" or "zebras." If yours does, turn them on. They'll visually show you which parts of the image are overexposed, so you can protect your product’s details while brightening the scene.
Taking a few seconds to make this one adjustment can save you a ton of time in post-production. A well-exposed photo straight from your phone is already 90% of the way to a perfect final image.
Essential Smartphone Shooting Techniques
Getting the light right is half the battle; the other half is consistency. Consistency is what elevates a few decent shots into a professional-looking product catalog.
Here are a few practical tips to keep in mind to avoid common mistakes:
- Maintain Consistent Angles: Seriously, get a smartphone tripod. It keeps your camera locked in place, ensuring every single product image has a uniform angle and perspective. This is absolutely vital for creating a clean, trustworthy storefront.
- Avoid Glare and Reflections: Shooting something shiny, like jewelry or electronics? If you see a harsh reflection, don't try to fix it in editing. Just move. Shifting your position even slightly can often eliminate the glare completely.
- Check Your White Balance: Most phones are pretty smart about white balance, but they can get it wrong, casting an ugly blue or yellow tint over everything. If your white background looks a little off, dive into your camera settings and manually set the white balance to a preset like "Daylight" or "Cloudy" for more natural-looking colors.
Nailing these small details during the shoot saves you from massive editing headaches later. A clean, well-lit, and consistent photo from your phone is the absolute best foundation you can have, whether you're editing by hand or using an AI tool. It all starts with capturing the best possible image you can.
Getting Your Hands Dirty: Classic Photo Editing for a Perfect White Finish
Sometimes, even a great shot straight from the camera needs a little nudge to get that flawless, pure white background e-commerce sites love. For anyone who wants total, hands-on control, classic photo editing is the way to go for truly professional results. And you don't need to shell out for the full, expensive version of Photoshop. More accessible tools like Photoshop Express or even free, browser-based alternatives like Photopea have all the firepower you'll need.
At its core, this manual process is a one-two punch: first, you cut your product out from its surroundings, and second, you crank that background up to pure white. This approach gives you complete authority over the final image, making sure every last pixel is exactly how you want it. It's an incredibly valuable skill to pick up, especially when you need to make white background shots that are absolutely perfect.
Precisely Isolating Your Product
The first job is to draw a clean line around your product. Think of it as telling the software, "This is the important part; leave it alone while I mess with everything else." Most editing programs give you a few ways to do this, but for product photos, these are your best friends:
- Object Selection Tool: This is usually the best place to start. You just draw a rough box around your product, and the software’s AI does its best to find the edges for you. It's surprisingly good most of the time.
- Magic Wand Tool: This one’s a lifesaver if your product was shot against a fairly plain background. Just click on the background, and the tool instantly selects all the similar-colored pixels it can find.
- Quick Selection Tool: This tool acts like a smart paintbrush. You "paint" over your product, and it intelligently snaps to the edges as you go.
Let's say you're editing a photo of a fuzzy sweater. You might start with a quick pass using the Object Selection tool and then switch to the Quick Selection tool to clean up the tricky, fuzzy edges, adding or subtracting bits from your selection until it’s perfect. The goal is a crisp, clean outline that perfectly hugs the product's shape.
Once your product is perfectly selected, you have to "inverse" the selection. It's a simple but crucial command that flips the focus from the product to the background. Now, you can edit the background without any risk of altering your perfectly-selected product.
Pushing the Background to Pure White
With your product safe and the background isolated, you can finally make it perfectly white without messing up your product's colors. The best tools for this job are Levels and Curves. They might sound a bit technical, but they're actually pretty straightforward.
The Levels tool gives you a histogram—a little graph showing all the tones in your image. To get that pure white, you just grab the white point slider on the far right of the graph and drag it to the left. You'll see the background get brighter and brighter until it hits that flawless, pure white (#FFFFFF).
There's a good reason this clean look is so popular. An Adobe Stock report from 2022 found that over 70% of professional designers and marketers prefer white backgrounds because they look clean and make text highly readable in corporate materials. You can check out more visual trends on Adobe Stock to see what's current.
For something with delicate details, like shiny jewelry, the Curves tool gives you a bit more finesse. It lets you brighten the background with a more gradual, controlled adjustment, which is great for preserving subtle highlights and stopping the product from looking blown out.
While these manual methods offer incredible control, they can be time-consuming. If you find yourself bogged down in the process, looking into professional product photo editing services can be a fantastic way to get consistent, high-quality results without the steep learning curve.
One-Click AI Tools to Make a White Background Instantly
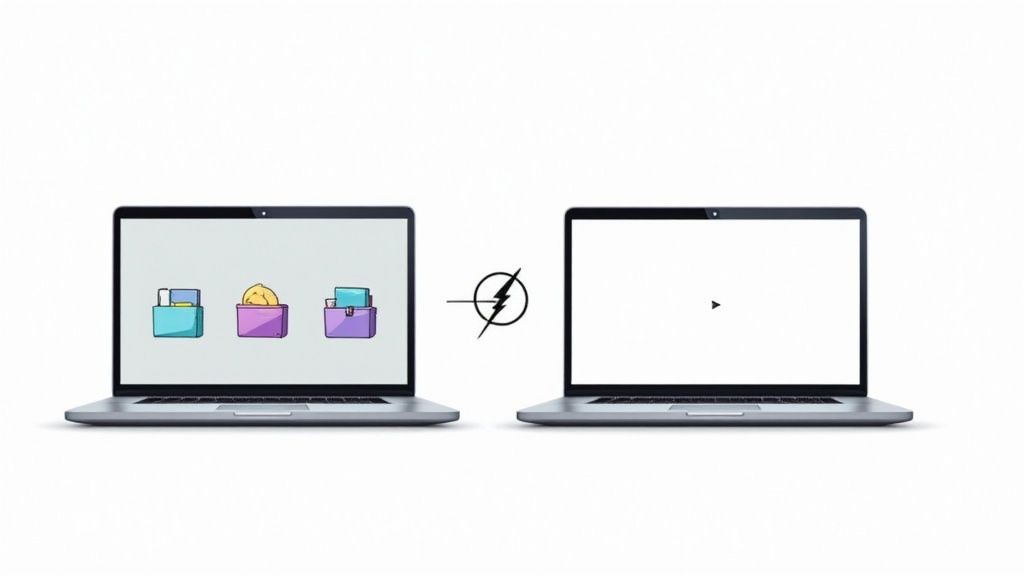
If the idea of manually editing photos makes you groan, I’ve got good news. The latest AI-driven tools have completely flipped the script, turning what was once a tedious, hour-long chore into a literal click of a button. These platforms do all the heavy lifting for you, delivering professional-looking results in seconds.
This is, hands down, the fastest way to make white background images for your entire product catalog. The whole process couldn't be simpler: you upload your photo, the AI does its magic to analyze and cut out the background, and you download a perfect, ready-to-use image. For any busy e-commerce seller, it’s a massive time-saver.
The Power of AI Precision
What really sets these tools apart is their incredible accuracy. A well-trained AI can intelligently identify your product down to the most minute details. Just think about the kind of items that would be an absolute nightmare to edit by hand:
- The delicate, wispy strands of a model’s hair.
- The soft, fuzzy edges of a cashmere sweater.
- The intricate gaps in a piece of fine jewelry.
AI handles these complex edges with pinpoint precision, creating a clean cutout that looks completely natural and professional. It’s that level of detail that separates a decent product shot from a truly great one.
Speed and Consistency at Scale
For anyone managing an online store, consistency is everything. AI tools give you a dead-simple way to ensure every single product photo in your catalog has the exact same pure white background (#FFFFFF). This is what creates that polished, cohesive, and trustworthy shopping experience you’re aiming for.
Picture this: you have 100 new product photos to get online. Doing them all manually could easily eat up a few days. With an AI tool, you can batch-process the entire set in minutes, and every single image will be perfectly consistent.
The real value of AI isn't just speed—it’s the ability to achieve perfect consistency at scale. This allows even small businesses to present a highly professional and uniform brand image without a dedicated design team.
This automated approach is a complete game-changer for productivity. Our own AI product photo generator, for example, is built to do exactly this, letting you focus on growing your business instead of getting bogged down in editing.
And it doesn't just stop at background removal. When you're ready, you can explore platforms that offer more comprehensive solutions for AI product photoshoots to streamline your entire visual workflow. These tools are the modern, efficient answer for sellers who demand professional results without the traditional time and expense.
Your Top Questions About White Backgrounds, Answered
Even with a solid plan, a few little hurdles always seem to pop up when you're trying to get that perfect, clean product shot. Nailing a flawless white background can be surprisingly tricky, and a few common challenges can stump even seasoned online sellers.
Let’s go through some of the questions I hear all the time and get you some clear, practical answers. Think of this as your quick-reference troubleshooting guide. Getting these details right is what separates an amateur shot from a professional one that builds trust and drives sales.
How Can I Photograph Shiny Stuff Without That Awful Glare?
Ah, the classic problem. Photographing anything with a reflective surface—jewelry, glass, polished metal—is a true test of your lighting skills. The secret is to manage the light, not blast it head-on. Never, ever point your main light source directly at the product. That’s a surefire way to get a harsh, blown-out reflection that completely hides the details you want to show off.
Instead, start by moving your light off to the side, maybe at a 45-degree angle. Then, you need to soften it. A simple diffuser does the trick—and you don't need fancy gear. A white bedsheet clipped to a stand or even a piece of parchment paper taped over your lamp can work wonders.
Here are a few more tricks from my playbook:
- Bring in a Reflector: Grab a cheap white foam board and place it on the opposite side of your light. It will gently bounce soft light back onto your product, filling in dark shadows and killing extra glare.
- Change Your Perspective: Don't be afraid to move around. Sometimes just shifting your camera a few inches up, down, or to the side is all it takes to make a reflection disappear.
- Get a Polarizing Filter: If you're using a DSLR or mirrorless camera, a circular polarizing filter (CPL) is a game-changer. It screws onto your lens and lets you dial down glare from surfaces like glass or metal with a simple twist.
What’s the Best File Format for My Website?
This one is a crucial tug-of-war between image quality and your website's loading speed. Nobody waits for slow-loading pictures, so getting this technical detail right really matters for your sales.
For almost any e-commerce site, whether it's Shopify or WooCommerce, a high-quality JPEG is your best bet. JPEGs are the workhorse of the web because they offer an excellent balance, keeping plenty of image detail while compressing the file size down. That means your pages load fast for your customers.
The big exception? If you need a transparent background to layer the image over different colors or use it in marketing graphics, you have to use a PNG file. PNGs are fantastic because they support transparency, but the price you pay is a much larger file size, which can slow things down.
Should I Settle for Light Grey or Go for Pure White?
Always, always, always aim for pure white. And I mean pure white.
There’s a very specific technical standard here. Pure white has a hex code of #FFFFFF and an RGB value of (255, 255, 255). This isn’t just a matter of taste; it’s the non-negotiable requirement for major marketplaces like Amazon and Google Shopping.
A background that’s just "off-white" or light grey can make your product look dingy and cheap. It sends a subconscious signal that the photo is unedited or unprofessional. A pure white background, on the other hand, makes your product’s colors pop and gives your entire store a clean, cohesive, and high-end feel.
Using the editing steps we’ve talked about—or letting an AI tool do the heavy lifting—to hit that exact #FFFFFF value is critical. It’s what makes a good product photo a great one that meets industry standards and truly sells.
Tired of battling with editing software to get that perfect background? With ProdShot, you can just upload your photo and our AI will instantly create a flawless, pure white background for you in seconds. Give ProdShot a try for free and see how easy it can be.