
In the crowded world of online shopping, your product clothing photography is your most powerful salesperson. Think about it: it’s the very first thing a customer sees, your digital first impression. High-quality images do more than just display a shirt or a pair of pants; they build instant trust, erase doubt, and are often the single biggest factor in that "add to cart" click.
Why Great Product Photos Are Non-Negotiable
Your product photos are doing some serious heavy lifting. Without a physical fitting room, they’re the only way a customer can get a feel for the texture, the fit, and the true quality of your clothing. Bad photos—blurry, dark, or all over the place stylistically—create a wall of uncertainty. That friction is all it takes to send a potential buyer clicking over to a competitor.
On the flip side, amazing photos create a smooth, confident shopping experience. They silently answer all the little questions customers have: How does that fabric really hang? Is that blue as vibrant in real life? What does the stitching look like up close? This kind of visual reassurance is incredibly powerful.
The True Impact on Sales and Returns
The link between professional-looking photos and e-commerce success isn't just a gut feeling; the numbers don't lie. In the fashion world, high-quality images can boost conversion rates by as much as 30%. That’s a massive lift for any online store. What's more, a whopping 75% of online shoppers say they rely heavily on product photos to make a purchase decision. If you want to discover more insights on how visuals drive e-commerce growth, you'll quickly see why this can't be an afterthought.
This means putting a little effort into your product photography isn't just about making things look pretty—it's a direct investment in your bottom line.
A great product photo does more than sell a garment; it sells confidence. When a customer can clearly see the details and imagine themselves wearing the item, you're not just preventing a sale from being lost—you're preventing a future return.
The Shift Away from Expensive Studios
For years, getting that "pro" look meant shelling out big bucks for photographers or renting a studio. Thankfully, that’s no longer the case. The good news is you’ve already got the most important tool right in your pocket.
Your smartphone, paired with a little know-how about lighting and some clever AI tools, is more than capable of producing incredible visuals that will make your brand pop. This guide is here to show you exactly how to turn a simple setup into a powerhouse for creating images that look professional and actually drive sales. We'll walk you through every step, from setting up your space to the final edits, proving you don't need a huge budget to make a huge impact.
Building Your At-Home Photography Setup
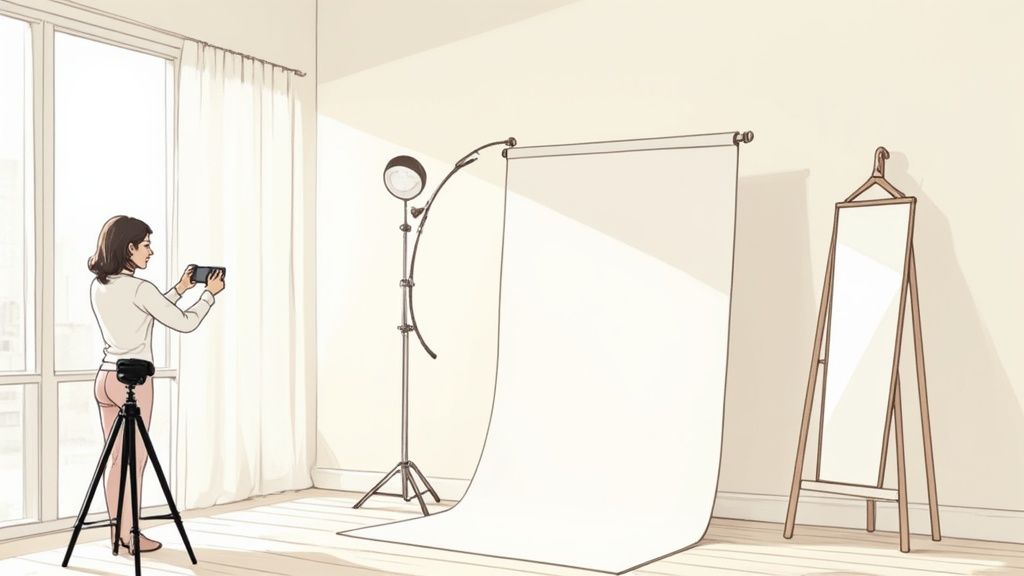
You absolutely do not need a dedicated room or a mountain of expensive gear to get stunning product clothing photography. Creating a functional at-home studio is way more accessible than most people think. It really just comes down to finding the right spot and grabbing a few essential, budget-friendly items.
Your first mission is to find the best light source in your home. For most of us, this is simply the largest window you've got. Natural, diffused light is incredibly flattering for fabrics, bringing out their true color and texture without the harshness you often get from artificial lights.
Set up your shooting area right next to that window. And here’s a pro tip: try to pick a room where you can turn off all the other lights. Mixing that beautiful natural light with the warm, yellow glow from your ceiling fixtures is a super common mistake. It contaminates your photos with weird color temperatures and creates an editing nightmare later on.
Choosing Your Background
Once you’ve found your light, it's time to create a clean, non-distracting background. The whole point is to make your clothing the undisputed hero of the shot. A cluttered or busy background just pulls the customer's attention away from what you’re actually trying to sell.
Here are a few simple and effective background options that won't break the bank:
- White or Light Grey Seamless Paper: This is the industry standard for a reason. You can buy a roll pretty affordably, and when it gets dirty, you just snip off the used section and pull down a fresh piece. It creates that seamless "infinity" look where there's no horizon line behind your product.
- Poster Board: This is my go-to for smaller items like accessories or folded shirts. A big piece of white foam or poster board from a craft store is a fantastic, cheap alternative. You can lean it against a wall and curve it down onto a table to create a mini-sweep.
- A Freshly Painted Wall: If you happen to have a neutral-colored wall (think light grey, off-white, or beige), you can use it as a permanent backdrop. Just make sure it’s free of scuffs and has a matte finish—anything glossy will cause unwanted glare.
The real secret to a professional background isn't complexity; it's consistency. Using the same clean backdrop for all your product shots creates a cohesive, polished look for your entire online store, which builds brand trust at a glance.
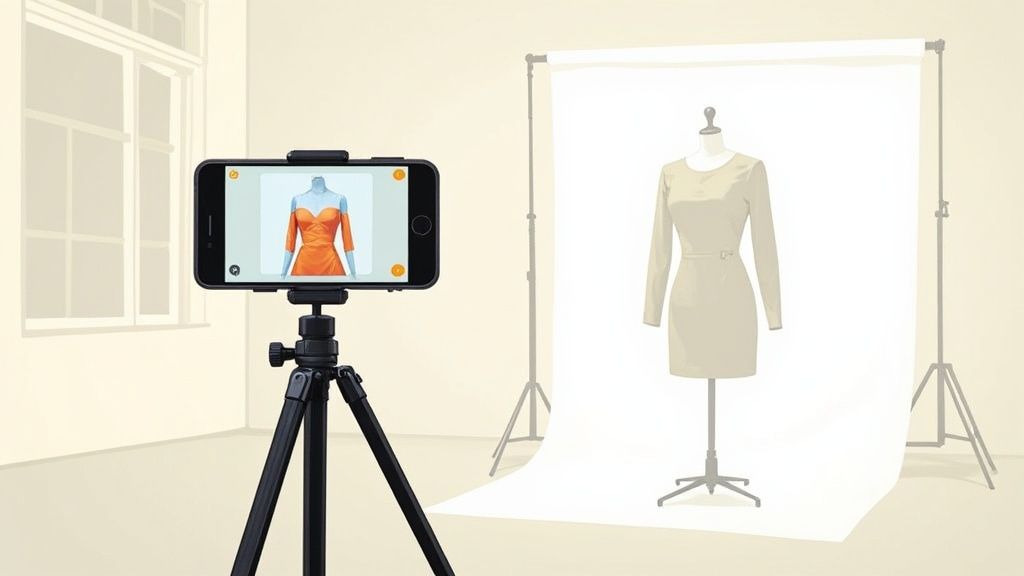
Stabilizing Your Shot with a Tripod
Even the steadiest hands introduce a tiny bit of motion blur, which can make your final images look soft and unprofessional. This is where a smartphone tripod becomes your best friend. It’s a simple tool that ensures every single shot is perfectly sharp.
But a tripod does more than just hold your phone steady. It locks in your camera angle. This allows you to style the garment, make a small adjustment, and then snap another picture from the exact same position. That consistency is crucial when you need to shoot multiple angles for a cohesive product gallery. You don't need a fancy model; a basic, sturdy smartphone tripod you can find online for under $30 will do the job perfectly.
Manipulating Light with Simple Tools
While a big window provides gorgeous light, sometimes it can be a little too direct, creating harsh, dark shadows on one side of your product. Your job is to soften and control this light. Don't worry, you don’t need a professional lighting kit.
Two DIY tools can dramatically improve your lighting:
- A Reflector: You use this to bounce light back into the shadows, which softens them and reveals more detail in the fabric. You can easily make one with a white foam board or even cardboard wrapped in aluminum foil (pro tip: crinkle the foil first for more diffused light).
- A Diffuser: If the sunlight streaming through your window is just too harsh, you need to soften it. Taping a thin, white bedsheet or a piece of parchment paper over the window acts as a perfect diffuser, scattering the light for a much softer, more flattering effect.
By placing a reflector opposite your window, you can fill in those dark shadows on your clothing. This one simple trick makes your product look more evenly lit and three-dimensional, instantly elevating the quality of your product clothing photography.
Nailing Your Lighting and Camera Settings
Lighting is everything in product photography. Seriously. It’s the one thing that separates a flat, boring snapshot from a dynamic image that makes people want to buy. The best part? The most effective light is often free, you just have to know how to use it. Think of light as your new secret weapon.
Let The Sun Do The Work
Grab a spot near a large window—this is your new best friend. The natural light that comes through is soft, diffused, and shows colors exactly as they are, which is a huge deal for clothing.
Set up your product so the light is coming from the side, at roughly a 90-degree angle. This little trick creates soft shadows that give the fabric shape and texture. It makes the clothes look more real, more tangible, and far more appealing.
The time of day is also a game-changer. Those "golden hours" right after sunrise or before sunset are amazing for lifestyle shots with a warm, dreamy vibe. But for clean, crisp product photos, you’ll want to shoot during midday when the light is bright but not directly hitting your product. Direct, harsh sunlight is your enemy—it creates ugly, distracting shadows. Avoid it at all costs.
When Natural Light Fails: Simple Artificial Setups
Let's be real, the sun isn't always cooperative. That’s where a few simple, cheap artificial lights can step in and save your shoot. You don’t need a fancy, expensive studio rig to get great results.
Even a single light source, like a basic LED panel or a ring light, can make a massive difference. Here’s a quick guide on where to place it:
- Side Lighting (45-degree angle): This is your bread and butter. Placing the light at a 45-degree angle gives you that perfect mix of light and shadow. It’s the best way to show off texture and form without getting too dramatic.
- Front Lighting: Pointing the light straight at the garment gets rid of most shadows. It’s good for a super clean, almost clinical look, but be careful. This can sometimes flatten the image and wash out important fabric details.
- Backlighting: This one is a bit more advanced. Putting a light behind your product can create a beautiful glow, especially for lighter fabrics like silk or chiffon. It’s perfect for creating those moody, editorial-style shots.
Key Takeaway: Stick with one light source to start. The goal isn't to kill all the shadows—it's to control them. Shadows are what give your product depth and a sense of reality. Your job is to make them soft and flattering, not harsh and distracting.
Mastering Your Smartphone Camera Settings
Your phone's auto mode is smart, but it's built for selfies and vacation pics, not for selling products. To get that professional polish, you need to dive into your phone's "Pro" or manual mode. This is where you unlock the settings that will make your photos shine.
The two most important settings to get a handle on are ISO and White Balance.
- ISO: This basically controls how sensitive your camera's sensor is to light. A low ISO (think 100 or 200) gives you a super clean, sharp image without any of that grainy "noise." Since you'll have your phone on a tripod, you can keep the ISO low and just use a slower shutter speed to let in the right amount of light. No blur, just crisp detail.
- White Balance (WB): This is what makes sure your colors are accurate. If that white t-shirt you’re shooting looks a little blue or yellow in the photo, your white balance is off. Most phones have presets like "Daylight," but for perfect color, learning to set it manually is a game-changer.
The impact of great visuals is undeniable. Web pages with quality images get up to 94% more views than pages with just text. And for 60% of online shoppers, the photo is the single most important factor in their buying decision. Getting a handle on these simple settings is your direct line to creating photos that actually sell. You can learn more about how photography impacts online sales to see the full picture.
To help you get started, I've put together a quick cheat sheet for different fabrics. These are just starting points, so feel free to experiment!
Smartphone Camera Settings for Different Fabrics
This table offers some reliable starting points for your camera settings based on the material you're shooting. Every fabric interacts with light differently, so a little tweaking will be necessary to perfectly capture its unique texture and sheen.
| Fabric Type | Lighting Goal | Suggested ISO | White Balance Tip | Focus Strategy |
|---|---|---|---|---|
| Denim | Emphasize rugged texture | 100-200 | Use a "Daylight" preset for true blue tones. | Tap to focus on a seam or pocket. |
| Silk/Satin | Capture sheen without harsh glare | 100 | Manual WB adjustment may be needed for accuracy. | Focus on a subtle fold or drape. |
| Cotton | Achieve clean, natural color | 100-200 | "Cloudy" or "Daylight" presets usually work well. | Focus on the center of the item. |
| Knitwear | Highlight the weave and softness | 200-400 | A slightly warmer WB can enhance coziness. | Tap to focus on the knit pattern. |
| Leather | Show gloss and grain without reflections | 100 | Use a custom WB with a grey card if possible. | Focus on the most detailed area. |
Think of this as your guide, not a rigid set of rules. For example, if you're shooting a rugged denim jacket, you’d use side lighting to bring out that coarse texture. You'd lock in your ISO at 100 and set your white balance to make sure the blue looks rich and authentic. But for a delicate silk blouse, you’d want a much softer, more diffused light to highlight its natural luster without creating distracting hotspots. Playing with these settings is how you gain total creative control and make your product photos look truly professional.
Styling Garments to Showcase Their Best Features
You can have the most perfect lighting and camera settings in the world, but a wrinkled, poorly presented garment will always fall flat. I've learned that great product clothing photography actually starts long before you ever think about hitting the shutter button—it begins with meticulous, hands-on styling. This prep work is what makes your clothing look genuinely irresistible online.
First things first, and this is non-negotiable: you have to get rid of every single wrinkle. Creases and folds cast tiny, distracting shadows that instantly make a brand-new item look worn out and cheap. Honestly, one of the best investments I ever made for my home studio was a simple handheld steamer.
Unlike an iron, which can crush textures and sometimes leave shiny marks, a steamer is incredibly gentle on fabrics. It just relaxes the fibers, letting the garment hang exactly as it was designed to. I always make a point to steam my items just a few minutes before I shoot them.
Perfecting the Fit Off-Model
Even if you aren't using a live model, creating a tailored, flattering shape is absolutely essential. Clothes that look saggy or ill-fitting are an instant turn-off and make it impossible for a customer to imagine how it might look on them. This is where a few simple styling tools become your best friends.
- Styling Clips and Pins: I use small binder clips, clothespins, or even proper tailor's pins on the back of the garment to cinch the waist or pull the fabric taut. From the front, it creates a clean, perfect silhouette.
- Tissue Paper: For things like handbags, shoes, or the shoulders of a structured blazer, stuffing them with a bit of acid-free tissue paper helps them hold their shape and stops them from looking sad and deflated.
The whole point is to show the garment in its most ideal form, helping customers see its true potential.
The Art of the Flat Lay
The flat lay is easily one of the most popular and effective ways to shoot clothing. It's that classic top-down shot where the garment is displayed on a flat surface, giving a really clear, full view of its shape and design.
To get it right, start by laying your item on whatever background you've chosen. Gently smooth out the fabric, paying close attention to the sleeves, collar, and hem. The secret is to arrange it so it feels natural but still looks intentional.
For example, a t-shirt can be folded neatly, or you can give it a subtle "S" curve to add a bit of movement and visual interest. With jeans, try folding one leg slightly over the other to create some depth. You can add a few complementary props, but don't go overboard—the clothing has to be the hero of the shot.
This simple infographic is a great visual reminder of the core smartphone settings to double-check before every single shoot.
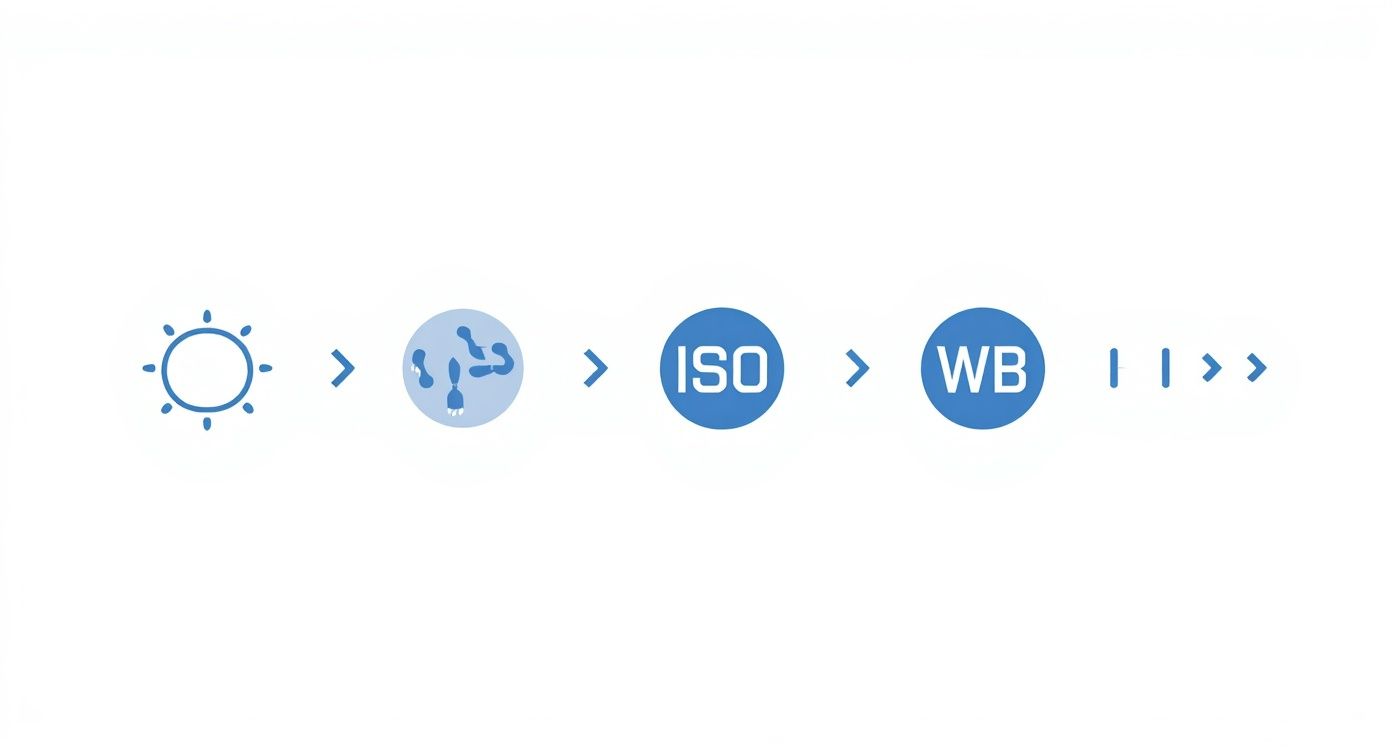
This workflow really drives home the point that getting your light, ISO, and white balance right is the foundation for capturing professional-looking images straight from your phone.
Elevating the Simple Hanger Shot
Hanger shots are another fantastic option, especially for items like blouses, dresses, and jackets where you really want to show off the drape. But—and this is a big but—the kind of hanger you use matters immensely. A cheap plastic hanger can instantly kill the perceived quality of your product.
Do yourself a favor and invest in a nice set of matching hangers that fit your brand’s vibe.
- Wooden Hangers: Give off a classic, high-quality, and sometimes rustic feel.
- Velvet Hangers: Look sleek and modern, and they’re great because they’re non-slip.
- Metal Hangers: Can create a cool, minimalist, or industrial look.
Once you've got your hanger, hang the garment against your clean background and use your styling clips on the back to make sure it hangs perfectly straight. This one small upgrade adds a huge layer of professionalism and brand consistency.
Pro Tip: When you're doing hanger shots, tape a piece of fishing line to the bottom of the hanger and then tape it to the floor or wall behind it. This stops the hanger from swaying, which saves a ton of frustration and ensures your shots are consistently sharp.
The Professional Ghost Mannequin Effect
The ghost mannequin, or invisible mannequin, technique is the undisputed gold standard for e-commerce. It creates this cool 3D effect where the clothing looks like it's being worn by an invisible person, which does an amazing job of showing its structure and fit without a distracting human model. It sounds complicated, but you can pull it off with just a couple of extra shots and some basic editing.
You’ll need to take two specific photos:
- The Main Shot: Get a picture of the garment on a mannequin or even a live model.
- The Detail Shot: Now, turn the garment inside out and take a picture of the inside back of the collar or any other part that was hidden by the mannequin in the first shot.
Later, in your editing software, you'll layer these two images. You digitally remove the mannequin from the main photo, and then you slot that detail shot into the gap where the collar was. This process is a game-changer for creating high-end fashion product photos that build serious customer confidence. It lets shoppers see the inside of the garment and how it's made, adding a powerful touch of quality and transparency.
Using AI Tools for Flawless Photo Editing
So you've snapped your shots. Now the real magic happens. This is the post-production phase, where you take your well-lit, nicely styled photos and turn them into something truly professional. Not long ago, this meant wrestling with complicated software for hours on end, but thankfully, AI-powered editing tools have completely changed the game.
These smart apps automate the tedious stuff that used to require a skilled retoucher. This means you can get that polished, consistent look for your store in a fraction of the time. In the fast-paced world of e-commerce, that kind of efficiency is gold—it means getting new products listed faster and driving more sales.
Instant Background Removal and Replacement
One of the quickest and most impactful edits you can make is ditching the original background. A clean, consistent backdrop across all your listings just screams professionalism. AI tools are shockingly good at this, detecting the edges of your clothing and cutting it out perfectly with a single click.
No more painstakingly tracing outlines with a pen tool—a task that used to be a major headache for sellers. Once the background is gone, your options open up:
- Go with pure white: This is the standard for marketplaces like Amazon for a reason. It’s clean, simple, and puts all the focus on your product.
- Use a consistent brand color: A soft grey or a specific pastel that matches your brand can make your whole store feel more cohesive and memorable.
- Drop in a lifestyle background: Some of the newer AI tools can generate realistic settings, placing your flat lay t-shirt in a stylish bedroom or your jacket on a modern wooden surface.
The goal is to make your product the hero. AI background removal is the fastest way to eliminate visual clutter and ensure your clothing commands the customer's full attention, leading to better engagement and higher conversions.
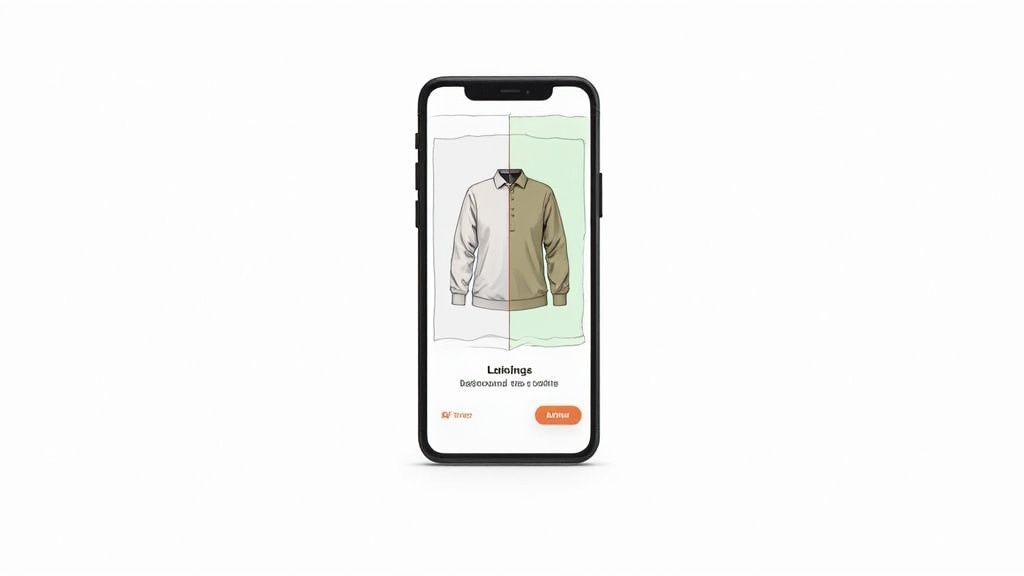
Effortless Color Correction and Blemish Removal
Getting the color right is non-negotiable. If the product that arrives doesn't match the photo, you're practically asking for a return. In fact, mismatched colors are one of the biggest reasons for returns in online fashion. AI tools take the guesswork out of this with one-click solutions for white balance and color enhancement.
The software analyzes your image and automatically corrects for weird lighting, making your whites actually white and your colors pop accurately.
On top of that, these platforms are brilliant at spotting and zapping minor imperfections. Think about those tiny specks of lint, a single stray thread, or a bit of dust you missed during styling. AI can identify and erase these blemishes instantly, a job that used to require meticulous spot-healing work.
Adding Depth with AI-Generated Shadows
Nothing screams "fake cutout" more than a product photo without a natural shadow. Shadows are what make an object look like it's actually part of the scene—they give it weight, depth, and a sense of realism. Creating believable shadows by hand is a true art form, but AI makes it easy for anyone.
With a simple toggle, many editing apps can generate a soft, realistic drop shadow under your clothing item. It’s a small touch, but it adds a three-dimensional quality that makes the product look so much more tangible and professional.
This kind of digital wizardry is a huge part of the e-commerce photography market, which makes up almost 45% of the entire commercial photography industry. The market is projected to hit US$5.1 billion in 2025 and climb to US$6.4 billion by 2035, driven by the demand for realistic digital product presentations.
The Future: On-Model Generation
This is where things get really exciting. AI can now take your flat lay or hanger shots and generate on-model images from them. For small brands, this is a total game-changer, sidestepping the massive costs of hiring models and organizing photoshoots.
You can upload a photo of a dress on a hanger, and an AI product photo generator can create a whole series of images showing that same dress on a diverse range of AI-generated models. This helps customers visualize how the garment fits and drapes in a way a simple flat lay never could.
And it doesn't stop there. You can also dive into guides on how to generate images with AI for unique backgrounds or creative shots, pushing your visual branding even further. This technology is closing the gap between small sellers and big brands, giving everyone a shot at creating stunning, competitive product listings.
Fine-Tuning Your Images for E-Commerce Success
Taking stunning photos is a huge win, but it’s only half the job. The final, make-or-break step for truly professional product clothing photography is getting your images ready for the web. This optimization stage is what really separates the pros from the amateurs, and it directly impacts everything from how fast your page loads to how much a customer trusts your brand.
First up, let's talk about consistency. Every single product image on your site needs to feel like it belongs to the same family. A great way to do this is by setting a standard aspect ratio—think square (1:1) or a slightly taller rectangle (4:5)—and sticking with it for everything. When a potential buyer is scrolling through a category page and sees a clean, uniform grid of photos, it builds a sense of professionalism and trust without you having to say a word.
Get Smart About Image Compression
With your images all cropped to the same dimensions, your next mission is tackling file size. Huge image files are the number one culprit behind slow-loading e-commerce sites, and a sluggish website is a surefire way to lose sales. Your goal here is to compress the file size way down without losing that crisp, clear quality you worked so hard to get.
You'll want to use a dedicated tool for this before you upload anything. The magic number to aim for is under 200 KB per image, while making sure it still looks fantastic. This one small tweak can dramatically speed up your site, which search engines love. And once your photos are technically perfect, the next step is to master image SEO so that people can actually find them.
Remember, a fast, visually consistent website feels more reliable to shoppers. They're more likely to stay, browse, and ultimately make a purchase if the experience is smooth and professional from the very first click.
Your Final Pre-Upload Checklist
Before you even think about hitting that "upload" button, get in the habit of running through this quick checklist. It's a simple process that helps you catch common mistakes and makes sure every photo is pulling its weight.
- Spot-On Color: Does the color in the photo perfectly match the real-life garment? This is a big one. If you can, check it on a couple of different screens. Getting this right is your best defense against returns.
- Smart File Naming: Give your files descriptive names. Instead of
IMG_8472.jpg, go for something likeblue-linen-button-down-shirt-front.jpg. This is a low-effort SEO win that helps search engines understand what your image is about. - All the Right Angles: Have you covered all your bases? A complete set usually includes the front, back, and side views, plus at least two close-up shots to show off the fabric texture or unique details like buttons or stitching.
Running this final quality check, along with the technical optimization, ensures your photos don't just look amazing—they perform brilliantly online, too. For those on Shopify who want to create an even more polished storefront, learning how to remove the background from product photos for Shopify is a fantastic next step to level up your workflow.
Even after you’ve dialed in your setup, a few questions always pop up when you're in the thick of a product shoot. Let's tackle some of the most common ones I hear—getting these right can make a huge difference in your workflow and the final shots.
A big one is always, "How many photos do I actually need for one piece of clothing?" A solid target is 5-8 photos per item. This gives you enough room to show off the essential angles—front, back, and a good side view—plus those all-important close-ups. Don't forget to zoom in on the details that signal quality, like the fabric's texture, clean stitching, or custom buttons.
Let’s Talk Backgrounds and Gear
Figuring out the right background is another frequent hurdle. While crisp white is the classic e-commerce look, it can sometimes trick your smartphone's camera into underexposing the shot. I’ve found that a light grey or even an off-white often works much better, especially for lighter-colored clothing. It adds just enough contrast to make the product pop without washing it out. Whatever you choose, the key is to remain consistent across your entire store for that clean, professional vibe.
Then there's the big question: "Can my smartphone really replace a professional DSLR?" Absolutely. The cameras on modern phones are powerhouses.
The secret to professional product images isn't really about the camera you're holding. It comes down to mastering three things: your lighting, your styling, and your editing. When you nail those, your phone can produce photos that are every bit as sharp and color-accurate as those from expensive gear.
Think about it—great lighting brings out texture, smart styling gives the garment an appealing shape, and a little editing magic provides that final professional polish. Focusing on your technique is what truly elevates your photos, not just the tech in your hand.
Ready to see what your smartphone is capable of? With ProdShot, you can turn your casual photos into polished, sales-driving images in seconds. It handles everything from background removal to color enhancement automatically—no design skills needed. Try ProdShot for free and see the difference.