
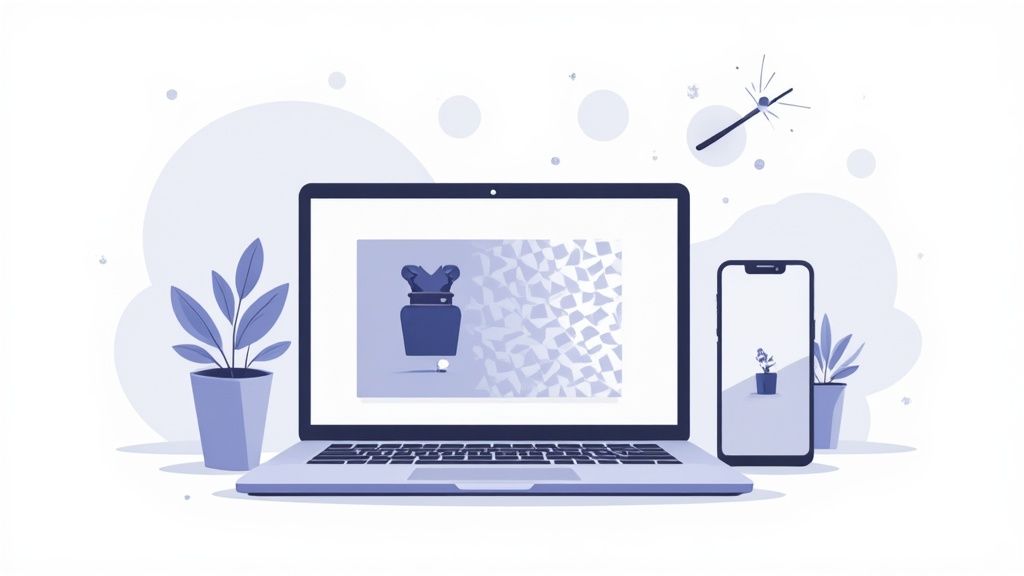
If you're in e-commerce, marketing, or design, knowing how to create a transparent background is a game-changer. It’s the secret to making your product images look clean, professional, and versatile.
A product on a transparent background can be dropped onto any website design, social media post, or marketing banner without those clunky, distracting white boxes. It’s a small detail that makes a huge difference in how polished your brand looks.
There are a few different ways to get this done, from one-click AI tools to the more hands-on approach with pro software. The right method for you really depends on your budget, how much time you have, and the level of quality you're after.
For those of us juggling massive product catalogs, outsourcing can be a lifesaver. Specialized product photo editing services can handle the heavy lifting, giving you a scalable way to get professional results without doing it all yourself.
Comparison Of Transparency Methods
To help you figure out the best approach for your workflow, I've put together a quick comparison of the most common methods. Think about your own technical skills, your deadlines, and how perfect the final image needs to be.
| Method | Speed | Control | Best Use Case | Cost |
|---|---|---|---|---|
| AI Tools | Instant | Low to Medium | High-volume e-commerce, social media | Free to Subscription |
| Photoshop | Slow | High | Complex images with fine details | Subscription |
| Mobile Apps | Fast | Medium | Quick edits for social media | Free to Premium |
| Online Editors | Medium | Medium | Simple images, occasional use | Mostly Free |
So, what's the takeaway? The best technique is always the one that fits your needs. If you're processing hundreds of product shots for a new collection, an AI tool is your best friend. But for that one hero image on your homepage that needs to be flawless, nothing beats the pixel-perfect control you get with Adobe Photoshop. And for on-the-fly edits, mobile apps are perfect for getting content out fast.
Knowing how to make a background transparent is more than just a neat photo editing trick. It's a core skill that has a massive impact on how professional and versatile your brand looks online.
Picture this: you have a perfect product photo, but it's stuck inside a clunky white box. That image is rigid. You can't do much with it. Now, imagine that same product totally free from its background, ready to drop onto any website banner, social media post, or email without a second thought. That's the power of transparency.
For anyone selling online, this isn't just nice to have—it's essential. Marketplaces like Amazon and Shopify have strict rules, often requiring a pure white or transparent background. It’s all about creating a clean, consistent look for shoppers. An image with a transparent background not only meets the rules but instantly looks more polished, helping your product pop in a seriously crowded feed.
Elevate Your Brand and Design
Beyond just following the rules, transparent backgrounds are your secret weapon for brand consistency. Think about your logo. It needs to look good everywhere—layered over a dark hero image on your homepage, slapped onto a colorful Instagram story, or even printed on a business card. A logo saved with a solid background just creates an ugly, unprofessional-looking box that ruins the design.
When your assets are transparent, they become like LEGO bricks for your brand.
- Layer Like a Pro: Drop your product over lifestyle photos, textured backdrops, or even video clips without any awkward outlines.
- Build Killer Collages: Easily combine multiple products into one eye-catching graphic for a big sale or a new collection launch.
- Keep the Focus: A clean, isolated product image cuts out all the noise, pointing your customer's eyes directly to what you're selling.
The ability to lift an object from its background is what turns a simple photo into a dynamic, reusable asset. It gives you the freedom to build a cohesive story across every single place a customer sees your brand, from the first ad to the final checkout page.
How We Got Here
The whole process of making a background transparent has come a long way. This became a real possibility for everyone with the arrival of the Portable Network Graphics (PNG) format back in 1996, which introduced the "alpha channel" for controlling opacity pixel by pixel.
Today, over 30% of all images you'll find on popular graphic resource sites are PNGs with transparent backgrounds. And with modern AI, algorithms can now remove backgrounds with over 90% accuracy, even on tricky subjects like hair or glass. It's pretty incredible how far we've come—you can even explore a detailed timeline of these digital imaging advancements to see the full story.
Ultimately, getting good at this saves you a ton of time and seriously levels up your creative game. Every image you create becomes a more valuable and adaptable tool, ready for whatever marketing campaign or design challenge you throw at it. It’s a fundamental skill for anyone serious about building a sharp, effective online presence.
AI Background Removal Tools
When you need a transparent background and you need it fast, nothing comes close to AI-powered tools. These services are built for one purpose: to instantly slice a subject away from its surroundings, often with just a single click.
This is the go-to method for busy e-commerce store owners, social media managers, and anyone who needs clean, consistent images without getting bogged down in manual editing.
Think of these tools as specialized assistants. They’ve been trained on millions of images, learning to tell the difference between a product and a backdrop with shocking accuracy. The technology has come a long way since online removers first popped up around 2015. Today's AI models can isolate a subject with 85-95% confidence. It's no surprise that surveys show about 60% of freelance designers use these automated tools weekly to speed things up.
The whole process is dead simple. You upload your image, the AI does its thing, and seconds later, you have a downloadable file with a perfectly transparent background.
Putting AI Into Practice
Let's walk through a real-world scenario. You just wrapped a photoshoot for ten new products for your Shopify store. The photos look good, but they're shot against the slightly off-white wall of your office. You need to get them all on a pure white background for your product pages, and you'll also need transparent versions for a new promotional banner.
Here’s how you’d handle it with an AI tool:
- Pick Your Best Shot: Start with an image where the product stands out. The more contrast between your product and the background, the better the AI can work its magic. A product shot against a solid-colored wall is pretty much perfect.
- Upload and Let it Rip: Head over to a service like remove.bg or use a mobile app like PhotoRoom. Just drag your first product image into the uploader. The AI gets to work instantly, and you’ll see a preview in less than five seconds.
- Quick Review and Tweak: For most clean shots, the result will be spot-on. But for more complex items—say, a fuzzy sweater or a detailed necklace—you might need to make a few small tweaks. Most tools provide simple "Erase" and "Restore" brushes to clean up any little bits the AI missed.
- Download Your File: Once you're happy with the cutout, just download the image. It will be saved as a PNG file, which is the format that preserves transparency.
For those looking to weave this kind of automation into their larger workflow, it's worth exploring the best AI tools for content creators to see what else you can offload.
Dealing With Imperfections
As amazing as these AI tools are, they aren't miracle workers. They can get tripped up by certain types of images, which can lead to some wonky cutouts. Knowing their weaknesses is the key to getting better results.
Here are a few common challenges:
- Fine Details: Wispy hair, delicate jewelry chains, or the fur on a teddy bear can be tough for an algorithm to trace perfectly.
- See-Through Stuff: Glassware, clear plastics, or sheer fabrics often confuse the AI because it struggles to find a hard, defined edge.
- Low Contrast: If your subject is a similar color to the background (like a beige handbag against a tan wall), the AI might have a hard time telling where one ends and the other begins.
Pro Tip: The single best way to improve an AI's accuracy is to give it a better photo to start with. Shoot your products against a solid, contrasting background whenever you can. Good, even lighting also helps create the kind of sharp edges that an AI can easily lock onto.
Comparing Background Removal Methods
With so many ways to remove a background, it helps to see how they stack up. Here's a quick comparison to help you choose the right method for the job.
| Method | Best For | Speed | Level of Control | Cost |
|---|---|---|---|---|
| Manual (Photoshop/GIMP) | Complex images, professionals needing pixel-perfect results | Slow | High | Varies (Subscription/Free) |
| AI Tools (Online/Mobile) | E-commerce, social media, quick turnarounds | Very Fast | Low-Medium | Freemium/Subscription |
| Automated Software (ProdShot) | Integrated e-commerce workflows, generating new scenes | Instant | Automated | Subscription/Credits |
| Smartphone Apps | On-the-go edits, social media content | Fast | Low | Freemium/One-time |
Ultimately, the best method depends entirely on your needs. For raw speed and efficiency, AI is king. For artistic control and complex subjects, manual tools still have their place.
The Real Power: Batch Processing
For e-commerce sellers, the real game-changer with AI tools is batch processing. Instead of editing images one by one, you can upload your entire product catalog and let the AI handle the whole lot at once.
Many services offer desktop apps or API integrations that let you process hundreds of images simultaneously. This feature alone can turn what used to be a tedious, multi-day editing marathon into a quick, automated job that's done in minutes.
This kind of automation frees you up to focus on what actually matters—growing your business. For an even more seamless workflow, you can use an AI product photo generator that not only removes the background but also places your product in custom scenes with professional lighting, taking your raw photos to a whole new level. By bringing these smart tools into your process, you can maintain a high-quality, professional-looking storefront with a fraction of the effort.
Manual Removal In Adobe Photoshop
For those times when you need absolute, pixel-perfect control over your product images, Adobe Photoshop is still the undisputed champ. When you're dealing with tricky subjects like glassware, fur, or delicate lace, a simple one-click tool just won't cut it.
This is where a professional workflow comes in. Let's dive into how the pros get those flawless transparent backgrounds, ensuring even the most complex edges look crisp and clean.
Understanding Selection Techniques
A great place to start is with Photoshop’s AI-powered Select Subject feature. It does a surprisingly good job, often getting you about 90% of the way there in a single click. Think of it as your first rough draft.
From there, you’ll want to grab the Quick Selection Tool to fine-tune things. Hold down the Shift key to add to the selection or the Alt key to subtract from it. This is how you wrangle those little areas the AI missed or grabbed by mistake, preventing those annoying white halos later on.
- Object Selection Tool: Works like a charm when your product has strong, clear contrast against its background.
- Quick Selection Tool: Your go-to for more detailed, hands-on adjustments.
- Subtracting (Alt/Option key): Essential for cleaning up selections where the AI got a little too enthusiastic.
Once you’re happy with the outline, just hit Enter to lock it in.
Refining Edges With Select And Mask
This is where the real magic happens. The Select and Mask workspace is your secret weapon for taming stray hairs, fuzzy fabrics, and other fine details with incredible precision.
Start by adjusting the Feather slider just a tiny bit—somewhere between 0.5 to 2 px is usually enough to soften the transition without making it look blurry. Bumping the Contrast up to 50–100% will then help sharpen up any soft areas. These small tweaks are what make a cutout look like it truly belongs in its new environment.
| Setting | Range | Use Case |
|---|---|---|
| Feather | 0.5–2 px | Soft edges like hair or fuzzy sweaters |
| Contrast | 50–100% | Defining sharp, clean outlines |
| Shift Edge | -2 to +2% | Pulling the mask slightly inward or outward |
A pro tip: hide your original background and pop a bright, solid-colored layer underneath your product. This instantly reveals any leftover halos or dark fringing you might have missed.
Drawing Precise Paths
When you’re working with products that have hard, clean curves—think electronics, furniture, or bottles—nothing beats the Pen Tool for precision. You get total control by clicking to drop anchor points around your subject and dragging to shape the curves.
It takes a little practice, but it's a non-negotiable skill for high-end work. Once your path is complete, just right-click and choose "Make Selection." This method is the preferred workflow for an estimated 93% of professional retouchers because it’s so exact.
- Use the Convert Point tool to adjust individual handles and angles.
- Hold the Alt/Option key to break a curve and create sharp corners.
- Always save your path in the Paths panel so you can come back and edit it later.
Using Layer Masks
The most important rule of professional photo editing? Work non-destructively. Layer masks are the key. Instead of permanently deleting pixels, a mask lets you hide or reveal parts of your image.
Simply paint with black on the mask to hide areas and with white to bring them back. You can even use shades of gray for semi-transparent effects, which is perfect for things like glass or shadows. This gives you 100% flexibility to make changes without ever having to start over.
- Group your layers and masks into folders to keep your file organized.
- Give your masks descriptive names (e.g., "Edge Refine," "Shadow Mask").
- Link masks to smart objects to preserve your entire editing history.
Process Flow Infographic
To put it all into perspective, here’s a visual breakdown of how a modern, AI-assisted background removal process works from start to finish.
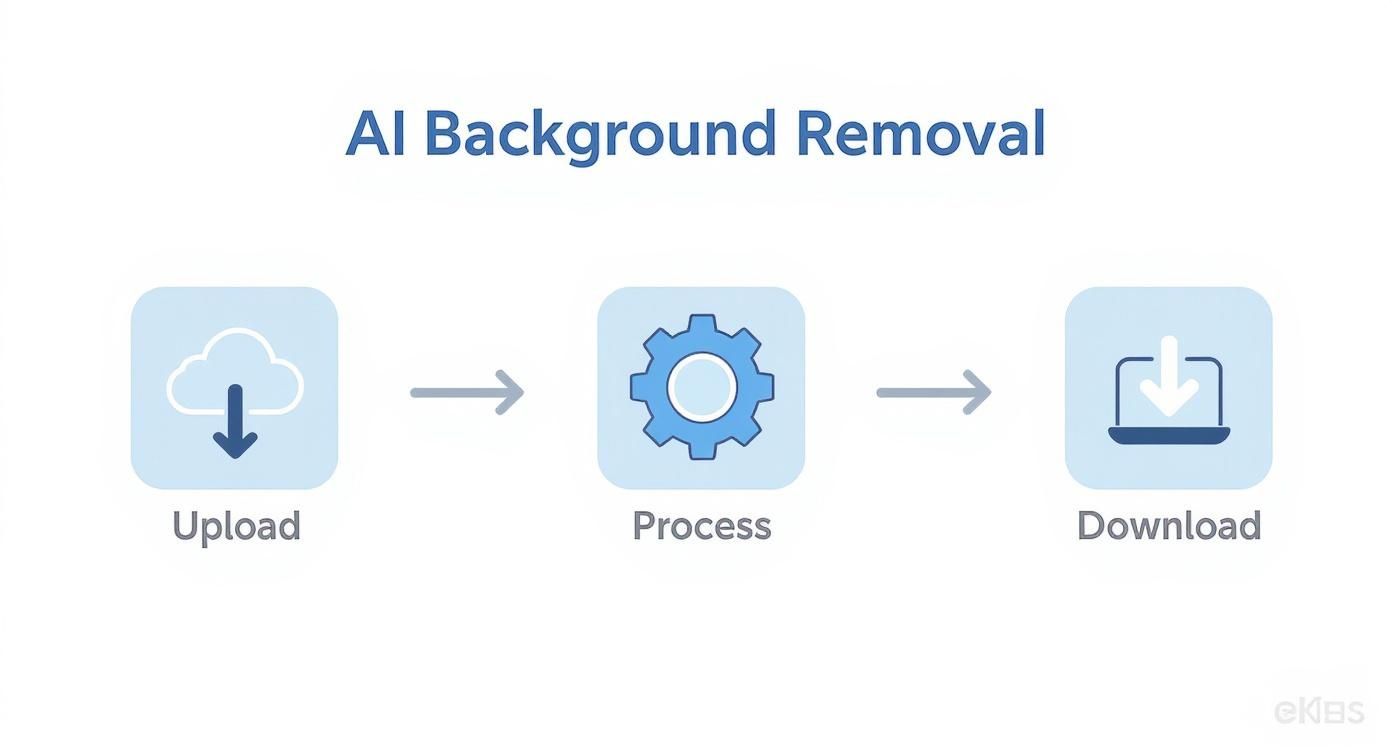
As you can see, automating the tedious parts of the pipeline can slash manual editing time by as much as 60%, freeing you up for more creative work.
“AI can handle up to 500 images in minutes, freeing designers for creative tasks.”
Testing And Quality Checks
Before you call it a day, always check your work against different backgrounds. A white background might hide flaws that a dark or brightly colored one will immediately expose. A quick check against a mid-gray or a vibrant color is a non-negotiable final step.
This is especially critical for tricky materials. For something like glass or lace, you'll need to pay extra attention to the details. I often use the Refine Edge Brush at a small size (10–15%) to carefully paint along the edges, which helps capture tiny details without over-softening them.
- For fur: Zoom in to at least 200% and use a brush with low flow to paint individual strands back in.
- For glassware: Keep the feathering under 1 px to preserve those crisp, specular highlights.
- For lace: Try creating a custom channel mask to isolate the intricate holes for a much cleaner selection.
Testing across colors reduces overlooked errors by over 80%.
Final Tips For Complex Objects
Let's be honest: glassware, fur, and lace will test your patience. But this is exactly where a manual workflow proves its worth, delivering flawless cutouts that automated tools simply can’t replicate.
I know a local product studio that saw a 35% improvement in image clarity after they committed to a precise masking workflow for their crystal vases. They now get zero halos, and their images convert better because they look so clean and professional. You can do the same.
- Before tackling a whole object, test your technique on a small, tricky section.
- Save your Photoshop workspace layout so all your favorite tools are ready to go.
- Create Photoshop actions to automate repetitive steps like creating a new mask layer.
With these techniques in your back pocket, you’re well on your way to mastering transparent backgrounds that make your products pop. It takes practice, but the precision you gain is well worth the effort.
Workflow Summary
So, to wrap it all up:
- Start with Select Subject for a quick initial cutout, then jump into Select and Mask to refine the soft and tricky edges.
- For products with hard lines or smooth curves, switch to the Pen Tool and create a precise path, then convert it to a layer mask for non-destructive editing.
- Always, always test your final mask against different colored backgrounds to catch any leftover fringing or halos before you export.
This Photoshop workflow gives you complete command over every pixel. By mastering these core tools, you ensure your products look fantastic and professional, no matter where you place them.
Happy editing
Transparent Backgrounds On Mobile Apps
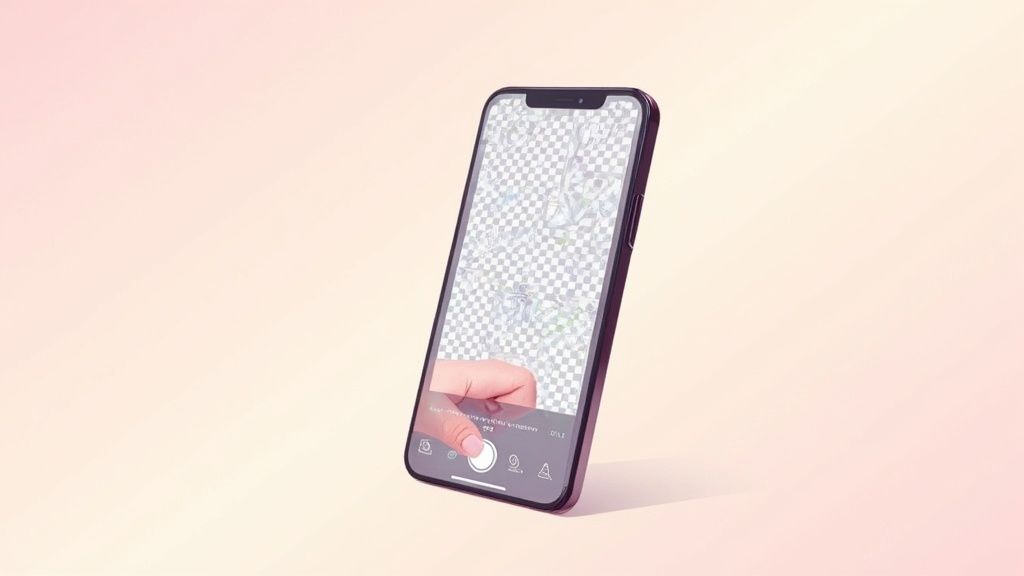
Creating professional-looking product images no longer means you're tied to a desktop. If you’re posting to Instagram between meetings or updating an Etsy listing from your favorite café, a solid mobile app can deliver clean, transparent PNGs faster than you can say “upload.” These tools pack powerful editing features into a pocket-sized workflow, so you spend less time switching devices and more time selling.
Choosing Your Go To Mobile App
The market is full of background-removal apps, from free ad-supported options to subscription-based editors. Two standouts are PhotoRoom and YouCam Perfect. They both lean on AI to save you time—but don’t stop there. Look for:
- Automatic Cutout: AI-driven detection that removes backgrounds in a tap. Ideal for straightforward product shots.
- Manual Refinement: “Erase” and “Restore” brushes let you polish edges around handles, straps, or intricate details.
- Smart Selection: Tools like a magic lasso or smart marquee to trace irregular shapes.
- Export Flexibility: Ability to save as a high-resolution PNG so your transparent background stays intact.
For instance, PhotoRoom can isolate a subject automatically and even suggest fresh, styled backdrops. It’s perfect when you need a quick lifestyle image or a marketplace-ready shot straight from your camera roll.
A Practical Mobile Editing Workflow
Imagine you snapped a picture of a new leather wallet against a busy countertop. Here’s how to turn that into a crisp, transparent PNG:
Start with your shot. Position the wallet against a plain surface or a sheet of contrasting paper. That simple setup gives the app’s AI a clear edge to work with, boosting accuracy right out of the gate.
Open your app and tap “Remove Background” or “Start from Photo.” In seconds, you’ll see a preview—often around 95% accurate on simple shapes.
Zoom in for a closer look:
- Use the erase brush to clear any stray pixels.
- Switch to the restore tool if the AI ate part of your product.
- Adjust brush size for fine details around corners and crevices.
Pro Tip: Shoot in Portrait Mode whenever possible. The extra depth information helps your background removal tool separate subject from scenery, leading to sharper cutouts.
When your edges look flawless, hit the share or export icon. Always choose PNG so that transparent areas stay clear. If you save as a JPG, you’ll end up with a white background—and none of that careful work will carry over.
Export Settings And Common Pitfalls
You’ve put in the work, carefully tracing every edge and erasing every last bit of the old background. Your product looks clean, sharp, and ready to go. But all that effort can be wasted with a single wrong click if you mess up the export settings.
Getting the final save right is just as important as the edit itself. The file format you choose is the gatekeeper of your transparency—some formats just can’t handle it. They don't support an alpha channel, which is the technical term for the extra layer of data that tells a program which parts of your image should be see-through. This is a classic trip-up. You save your masterpiece, only to open it and find a solid white or black background has mysteriously appeared.
The Best File Format for Transparency
When you need that crystal-clear background, PNG-24 is your go-to format. It's the undisputed champ for web graphics that need transparency because it supports a full 256 levels of opacity.
This means it's not just an on/off switch for transparency. PNG-24 can handle soft edges, subtle shadows, and even tricky materials like glass or smoke. The result is a smooth, natural-looking image that blends seamlessly into any background you place it on.
You might also see an option for PNG-8. While it does support transparency, it's a far more limited choice.
- PNG-24: Perfect for high-quality photos. It supports millions of colors and 256 levels of transparency for smooth, professional edges.
- PNG-8: Only for simple graphics like icons or logos. It's limited to a palette of 256 colors and has basic, on/off transparency that often creates jagged, pixelated edges.
For any product photo, always stick with PNG-24. Anything less will compromise the quality you've worked so hard to achieve.
The number one reason a "transparent" image shows a white background? It was saved as a JPEG. The JPEG format flat-out does not support alpha channels. It will always flatten your image and fill any transparent areas with solid white.
Navigating Common Problems and Fixes
Even when you follow the rules, things can go wrong. Understanding why these issues pop up is the key to fixing them without tearing your hair out.
My Transparent PNG Still Has a Background
You save your image as a PNG, but when you open it, there's a solid white or black background. Don't panic! More often than not, the transparency is still there. The problem is usually the program you're using to view the file.
Many basic image viewers (like the default ones on some operating systems) can't render transparency, so they just show a solid color behind it. To check if your file is actually transparent, drag it into a modern web browser like Chrome or drop it into a program that understands layers, like Photoshop, Canva, or even PowerPoint. If you see that classic gray-and-white checkerboard pattern behind your product, you're golden.
The Edges Look Jagged or Pixelated
If the outline of your product looks rough and blocky, the culprit is usually a lack of anti-aliasing. This is a simple but crucial technique where semi-transparent pixels are added along curves and diagonal lines to smooth out the transition.
Here’s how to fix it:
- In Photoshop: When you’re using tools like the Lasso or Magic Wand, look for an "Anti-alias" checkbox in the options bar at the top. Make sure it's ticked before you make your selection.
- For AI Tools: The best background removers handle this for you automatically. If your results are still jagged, the source image might be too small or low-resolution to begin with.
- With PNG-8: This is a built-in problem with the format. Its basic transparency is what causes those harsh edges. The fix is simple: always export as PNG-24 instead.
Understanding how different file types handle image data can be a real eye-opener. A good WebP vs JPEG comparison can shed light on compression and quality principles that apply across the board.
Handling Semi-Transparent Objects
What about the really tricky stuff, like a glass of water, a sheer scarf, or a puff of smoke? These objects aren't fully opaque, so you need to preserve that partial transparency. This is where a non-destructive workflow using layer masks is a lifesaver.
Instead of permanently erasing the background, use a layer mask and paint on it with different shades of gray. Painting with 50% gray on the mask will make that area of the layer 50% see-through. This gives you precise control over the opacity, making sure the object looks realistic against any new background. And when you export, PNG-24 will preserve all that subtle detail perfectly.
Finally, don't forget about file size. A giant, high-resolution PNG can slow your website down. Once your edit is done, you might want to resize images without losing quality to make sure they're optimized for fast loading times. Mastering these final steps will ensure your hard work pays off with a flawless, professional image every single time.
Frequently Asked Questions
Jumping into image editing can feel like learning a new language. You're bound to have questions, especially when you're trying to nail that perfect transparent background for the first time. Let's tackle some of the most common snags you might hit along the way.
Why Does My Transparent PNG Show a White Background?
This is a classic—and totally frustrating—moment. You spend time carefully removing a background, save the file as a PNG, and when you open it… there's a solid white or black background mocking you.
Don't panic! The good news is your transparency is probably still there. The real culprit is usually the program you're using to view the file.
A lot of basic image viewers, like the default photo apps on some operating systems, just don't know how to handle alpha channels (the tech that makes transparency possible). Since they can't render the transparent parts, they just fill them in with a solid color as a fallback.
Here’s how to check if your image is actually transparent:
- Drag it into a modern web browser. Chrome, Firefox, or Safari will almost always display the transparent areas correctly.
- Drop it into a program that gets layers. Any decent design tool like Photoshop, Canva, or even PowerPoint will show that tell-tale gray-and-white checkerboard pattern, confirming your transparency is intact.
What Is the Best File Format for a Transparent Background?
When it comes to transparent backgrounds, PNG is the undisputed king. It's the industry standard for a reason. But here's a detail that trips a lot of people up: not all PNGs are the same. You really need to know which one to pick.
- PNG-24: This is your go-to for pretty much any photograph or complex image. It supports a full alpha channel with 256 levels of opacity. That's what gives you those beautifully smooth edges, soft drop shadows, and any semi-transparent effects.
- PNG-8: This one is much more limited. It does support transparency, but it's binary—a pixel is either 100% visible or 100% transparent. There's no in-between. This works for simple, hard-edged logos or icons, but try it on a photo and you'll get jagged, pixelated outlines.
And what about JPEGs? Just forget about them for transparency. A JPEG file can't handle it, period. If you save your work as a JPEG, it will permanently flatten the image and fill any transparent bits with solid white.
How Can I Make the Background of a Logo Transparent?
Getting a transparent background for a logo all depends on what you're starting with. If you have a clean, simple logo with solid colors, you can often get away with a quick fix using a tool like Photoshop’s Magic Wand. Just set a low tolerance, uncheck the "Contiguous" box, and you can select and delete the entire background color at once.
But if you're stuck with a low-quality JPEG or a logo with gradients and fine details, that method will just make a mess. For those trickier cases, you'll need to manually trace the logo with the Pen Tool to create a super clean and precise path.
Honestly, the best-case scenario is to recreate the logo as a vector graphic in a program like Adobe Illustrator. That gives you infinite scalability and perfect quality before you export it as a PNG.
Can I Batch Remove Backgrounds from Multiple Images?
Yes, and you absolutely should. Nobody has time to manually edit hundreds of product photos one by one. It's a soul-crushing task, and this is exactly where automated tools become a lifesaver.
Plenty of AI-powered services and desktop apps are built specifically for this. You can just upload an entire folder of images, and the AI will churn through them, automatically knocking out the background on every single one. Then you just download the finished transparent PNGs in a single batch.
Services like PhotoRoom and Remove.bg are popular for this, offering batch processing in their paid plans or through their apps. This kind of workflow turns a multi-day project into a job you can finish in a few minutes. For anyone managing an e-commerce catalog, it's a total game-changer.
Ready to transform your product photos in seconds? ProdShot uses advanced AI to automatically create stunning, high-converting images with perfectly transparent backgrounds. Try it for free and see the difference today.