
Props are so much more than just set dressing. They’re the secret sauce, the storytelling tools that inject context, emotion, and visual pop into your product photos. By choosing props with care, you can turn a basic product shot into a compelling story that guides the eye and broadcasts your brand's personality without a single word.
Why Props Are Your Secret Storytelling Tool

Think of your product as the main character. It might be great on its own, but the story really takes off when you build a world around it. That's exactly what photo shoot props do—they create the scene, give the product context, and make it far more relatable to your audience.
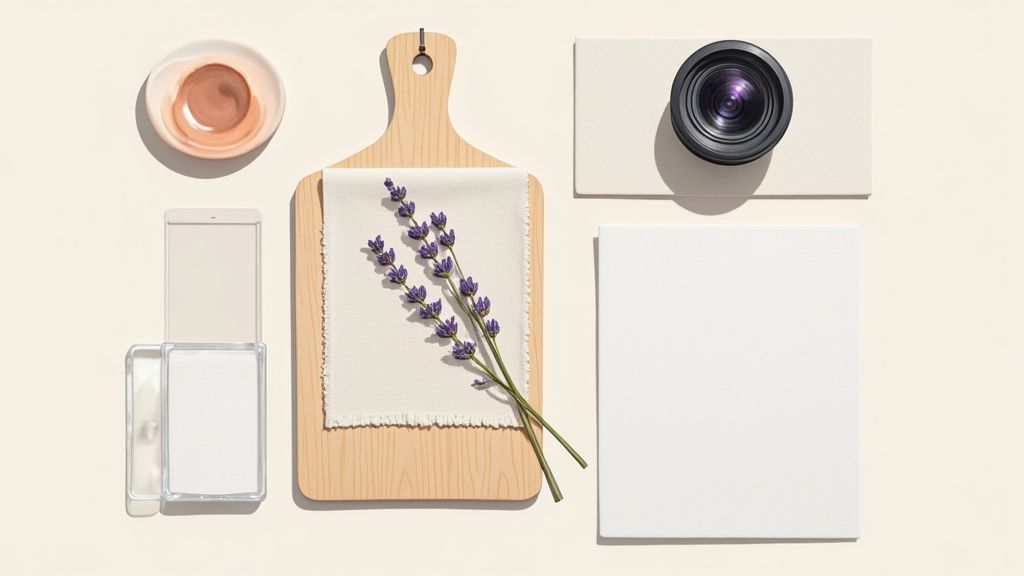
A simple sprig of lavender next to a bottle of lotion isn't just decoration; it instantly suggests a calming, natural fragrance. A crumpled linen napkin beside a ceramic bowl whispers of a rustic, home-cooked meal. These small details are incredibly powerful communicators.
Building an Emotional Connection
The right props tap directly into emotions and memories. They help your audience picture themselves actually using your product. A cozy blanket and a steaming mug of tea next to a new novel create a feeling of pure comfort, framing the book as the perfect escape for a lazy afternoon.
This emotional link is what makes you stand out. In a sea of stark, white-background photos, an image with thoughtfully chosen props tells a story that sticks with people and makes your product memorable.
Guiding the Viewer's Eye
Beyond the story, props are workhorses for good composition. You can use them to create balance, add a sense of depth, or draw the viewer's focus right where you want it: on your product.
- Creating Depth: Pop a prop slightly out of focus in the foreground or background. This adds layers to the image, making it feel more three-dimensional and alive.
- Establishing Scale: A familiar object, like a pair of glasses next to a new gadget, immediately gives a sense of the product’s true size. No guesswork needed.
- Adding Texture: Contrasting textures are a feast for the eyes. Think of a smooth ceramic vase against a rough, weathered wooden table. It just creates a visual interest that makes the whole shot more engaging.
A great prop doesn't steal the show; it makes the star of the show shine brighter. The goal is to create a cohesive scene where every element works together to support the product and tell its story effectively.
We're living in an age of visual overload. While only a few million photos were taken globally throughout the entire 1800s, today we snap over 1.8 trillion photos every single year. This explosion of content means that using props is no longer just an artistic choice—it's a strategic move to cut through the noise. If you're curious about this visual revolution, you can discover more insights about photo volume statistics.
Choosing Props That Complement Your Product
Picking the right photo shoot props isn't about just grabbing things that look pretty. It's about strategic storytelling. Forget the generic advice—every product has its own story, and your props need to be the supporting cast that makes your product—the main character—shine without ever stealing the show.
The whole point is to build a world around your item. This means every single prop in the frame needs a job. Whether it's highlighting a key feature, showing how the product is used, or just creating a certain mood, if a prop doesn't serve the story, it's just clutter.
To get you started, here’s a quick-reference table with some ideas that match common product types to the brand message they help create.
Prop Ideas by Product Category
| Product Category | Recommended Props | Message Conveyed |
|---|---|---|
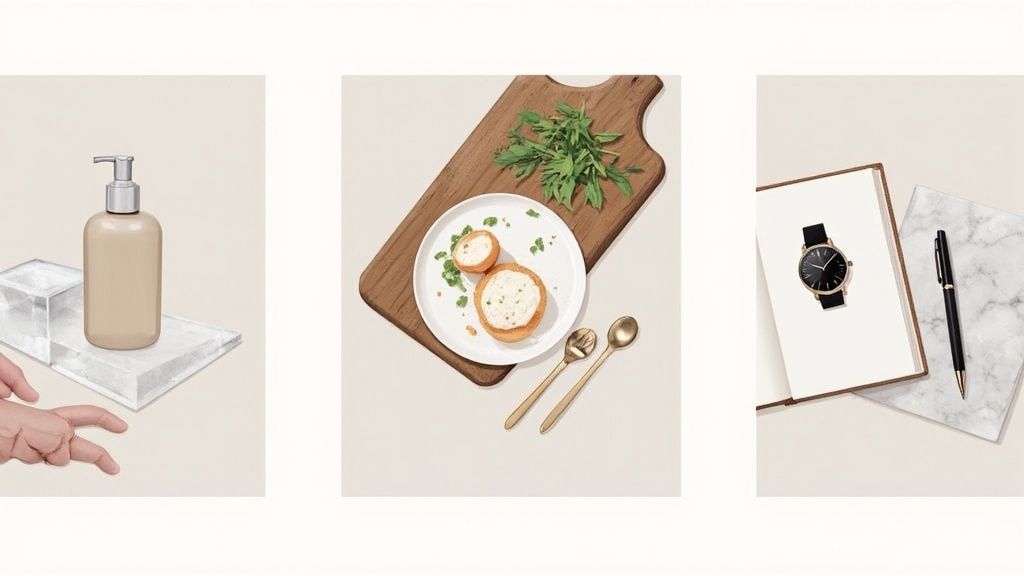
| Beauty & Skincare | Acrylic blocks, silk fabric, fresh botanicals | Clean, luxurious, natural, effective |
| Food & Beverage | Linen napkins, raw ingredients, cutting boards | Fresh, rustic, high-quality, delicious |
| Fashion Accessories | Marble trays, leather notebooks, sunglasses | Sophisticated, trendy, aspirational |
| Home Goods | Cozy blankets, ceramic mugs, books, plants | Comfortable, stylish, relaxing, personal |
| Tech Gadgets | Sleek metal stands, minimalist notebooks, coffee | Modern, productive, efficient, essential |
This table is just a starting point, of course. The real magic happens when you tailor these ideas to your specific brand and product.
Styling for Beauty and Skincare
Beauty and skincare products are all about communicating texture, luxury, and results. Your props have to echo those qualities, so think about materials that look and feel clean and indulgent.
Clear acrylic blocks are a fantastic tool. They add height and a modern, almost clinical vibe that hints at scientific precision. To soften the look and add a touch of luxury, try draping a small piece of silk or satin fabric nearby. This contrast between hard and soft textures is an instant recipe for visual interest.
And don't overlook the power of ingredients. A few fresh cucumber slices next to a hydrating mask or a single vanilla bean beside a warm-scented body butter immediately tells the customer what’s inside and what it smells like.
Setting the Scene for Food and Beverages
When you're shooting food or drinks, your one and only job is to make the viewer hungry or thirsty. It all comes down to suggesting freshness, quality, and a genuinely enjoyable experience.
- Rustic and Hearty: For a warm, homemade feel, lean on props like weathered wooden cutting boards, crumpled linen napkins, and cast-iron skillets. A light dusting of flour or a sprig of fresh rosemary adds that touch of authenticity.
- Modern and Chic: If you're going for a more refined look, stick with minimalist ceramic plates, sleek silverware, and clean marble surfaces. A single, perfect ingredient—like one ripe berry or a fresh mint leaf—can provide a stunning pop of color.
- Elegant and Sophisticated: Styling spirits or fine beverages? Think elegant glassware and high-end bar tools. For shoots that need a bit of vintage class, finding the right background piece is key. Exploring guides on choosing an antique drinks cabinet can help you source that perfect, scene-setting element.
The goal is to use props that tell the story of the meal. Is it a cozy winter stew or a light summer cocktail? Your props should answer that question at a glance.
Accessorizing Fashion and Lifestyle Products
For fashion items like watches, jewelry, or handbags, props are there to build a narrative. You’re placing the item within a specific lifestyle. You aren't just selling a product; you're selling an identity.
Marble trays are a go-to for showcasing jewelry, giving you a clean, high-end backdrop that doesn’t compete with the piece itself. To build out a more dynamic lifestyle shot, try pairing a handbag with things its owner might actually carry—a leather-bound notebook, a stylish pen, or a chic pair of sunglasses.
This simple technique builds a powerful story around your product. If you want to go deeper on this, our guide on perfecting fashion product photos has more specialized tips for creating images that truly resonate.
Your product is the hero of the story, and the props are the setting and supporting characters. If a prop doesn't contribute to the plot—by highlighting a feature, suggesting a use, or building the right atmosphere—it doesn't belong in the shot.
Ultimately, a smart prop strategy comes down to one word: intention. Every item in the frame should be a deliberate choice that reinforces your brand message and makes your product look absolutely irresistible. When you match your props to your product category, you stop just showing an item and start telling its story—and that’s what connects with an audience.
Building Your Prop Library on Any Budget
Creating stunning product photos doesn't mean you need a Hollywood-sized budget for props. I've learned over the years that a truly versatile and effective prop library is built with creativity and resourcefulness, not just cash.
The secret is to see potential everywhere. Once you know where to look and what to look for, you can assemble a powerful collection of photo shoot props that elevates your images without breaking the bank. It’s all about shifting your mindset from buying finished props to sourcing raw materials you can adapt.
Sourcing Props Creatively and Affordably
Forget those expensive photography supply stores, at least for now. Your best starting points are often the places you already visit. It’s amazing how a little imagination can turn everyday items into high-end styling elements.
Here are a few of my favorite unexpected places to hunt for props:
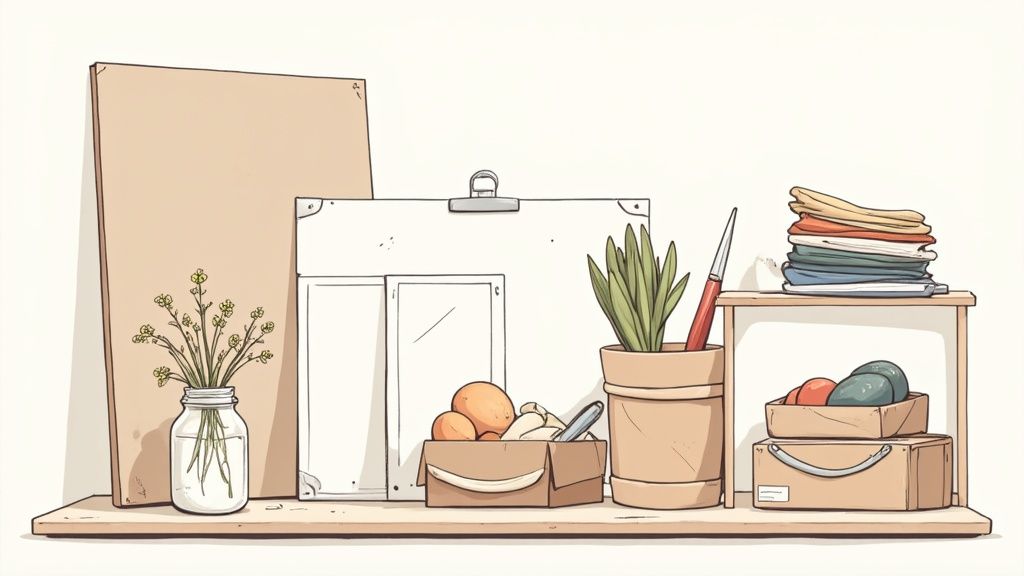
- Hardware & Home Improvement Stores: Head straight for the flooring section. You can often find sample tiles of marble, slate, or cool concrete for just a few dollars, giving you an instant luxury surface. I've used a single, inexpensive tile as the perfect, elegant backdrop for jewelry and small cosmetics more times than I can count.
- Craft & Fabric Shops: This is your go-to for adding softness and texture. I always keep a collection of linen, silk, and cheesecloth on hand. You'll also find large sheets of foam core, which are invaluable for creating custom, non-reflective backgrounds.
- Thrift Stores & Antique Shops: These are absolute gold mines for unique items with real character. Look for interesting glassware, old books with worn covers, rustic wooden trays, and vintage silverware that can add a story to your photos for next to nothing.
The most valuable prop isn't the most expensive one; it's the one that tells the right story. A simple, well-chosen prop sourced for a dollar can be more effective than a hundred-dollar item that doesn't fit your brand's narrative.
DIY Solutions for Professional Results
Some of the most effective props I've ever used were the ones I made myself. Going the DIY route gives you complete control over color, texture, and size, ensuring every single element is perfectly on-brand.
One of the best DIY hacks is creating your own custom surfaces. Just buy a few large pieces of foam core or thin plywood. Using matte-finish sample paints from a hardware store, you can create a nearly endless library of colored backgrounds. For a more textured look, I like to mix a little sand or even baking soda into the paint to create a cool stucco or plaster effect.
This approach isn't just wildly cost-effective; it ensures your backdrops are unique to your brand. Plus, they're lightweight and easy to store, making them far more practical than heavy, expensive surfaces.
To Buy or to Rent Your Photo Shoot Props
Building your own library is a no-brainer for props you'll use over and over again—things like neutral surfaces, basic risers, and classic fabrics. But for highly specific or one-off shoots, renting can be a much smarter move.
I typically consider renting for:
- Large or Bulky Items: Think furniture, big plants, or specific decor pieces that are a pain to store.
- Expensive Niche Props: If you need a vintage camera or a specific piece of high-end kitchen equipment for a single shoot, renting is far more economical.
- Trend-Based Items: For props that might feel dated in a few months, renting lets you stay current without the long-term investment.
Ultimately, a balanced prop budget comes down to smart sourcing. When you understand the cost of professional product photography, you start to see where investing in reusable props can save you a ton of money in the long run. By building a core collection of versatile items and supplementing with DIY creations and occasional rentals, you can achieve that professional look on any budget. It’s all about working smarter, not spending more.
Mastering Composition and Styling Techniques
Having the perfect collection of photo shoot props is a fantastic start, but it's only half the story. The real artistry comes from how you arrange everything in the frame. This is where we shift from just picking out props to strategically styling them to create images that don't just show a product but truly sell it.
The way you position your props can completely change the energy and focus of a shot. Your goal is to guide the viewer’s eye, create a sense of harmony, and build a scene that feels both intentional and effortlessly natural. It's a delicate balance, but once you get the hang of it, you'll elevate your product photography from simple snapshots to compelling visual narratives.
Applying Timeless Compositional Rules
You don't need a formal art degree to understand what makes a good photo. A few timeless guidelines can give you a powerful framework for arranging your props and product, making sure your shots look balanced and professional.
One of the most effective is the Rule of Thirds. Just imagine your frame is divided by a 3×3 grid. Instead of sticking your product dead center, try placing it along one of the grid lines or at an intersection. This simple shift creates a more dynamic and visually engaging image. You can then place props at other intersection points to create balance without cluttering up the shot.
Another powerful trick is using props to create leading lines. These are visual pathways—like the edge of a book, the stem of a flower, or the swirl of fabric—that draw the viewer’s eye directly toward your product. It’s a subtle but incredibly effective way to make sure your hero item remains the undisputed star of the show.
Creating Depth and Visual Interest
A flat, one-dimensional photo is a boring photo. Props are your secret weapon for creating a sense of depth and making the scene feel immersive. It’s all about adding layers that trick the eye into seeing a three-dimensional space.
Here’s how that might look in practice:
- For a skincare product: Place a few fresh botanicals or a small, elegant dish slightly in the foreground and a little out of focus. This immediately creates a layer that gives the shot depth. Then, put your product in sharp focus in the middle ground, with a soft-textured fabric behind it. Suddenly, you have a rich, layered scene that feels real.
Texture is another huge part of this. Mixing contrasting materials adds a tactile quality that viewers can almost feel. Think about pairing a sleek, glossy tech gadget with a rough, raw concrete surface, or a soft, knitted sweater with a smooth, cool marble tray. This interplay of textures makes the whole composition more memorable.
The most successful compositions feel natural, not staged. Aim for a "perfectly imperfect" look by slightly angling objects, creating gentle folds in fabric, or scattering small elements like coffee beans or petals as if they landed there by chance.
Balancing Color and Scale
Color and scale are the final touches that pull your composition together. Your prop colors should always complement your product, not compete with it. A great strategy is to use a neutral palette for most of your props (think greys, whites, and beiges) and introduce a single pop of a complementary color to add a bit of energy.
Scale is just as important for creating a believable scene. Props should generally be smaller than your product to avoid overpowering it. For instance, using small, stacked neutral-colored blocks can add height and a modern feel to a watch photo without drawing attention away from the watch itself. Using props helps provide a visual reference, giving the customer an intuitive sense of the product’s actual size. To really nail the look with floral props, learning how to arrange a flower bouquet effectively is a game-changer for your composition.
Finally, think about how light interacts with your props. A matte prop will absorb light and create soft shadows, giving you a moody, gentle feel. On the other hand, a reflective or metallic prop will bounce light around, adding bright highlights and a sense of energy. By thinking through these details, you can use your photo shoot props to not only build a scene but to sculpt the light and mood of the entire image.
Weaving Props Into Your Photoshoot Workflow
Having amazing props is one thing; using them effectively is another game entirely. A messy, disorganized set can tank even the most brilliant creative ideas, turning a fun shoot day into a stressful scramble. To sidestep that chaos, you need to bake your photo shoot props into a solid workflow from the very beginning. This isn't about being rigid—it's about creating a system that frees you up to actually be creative.
A smooth workflow doesn't start when you pick up the camera. It starts way back in pre-production. This is the crucial planning stage where you take your vision and turn it into a real, actionable plan, making sure every single prop has a purpose.
The Magic of Pre-Production Planning
First things first: the mood board. This is your visual North Star, getting everyone on the same page about the look and feel we're aiming for. It should be packed with inspiration for lighting, colors, composition, and, of course, the kinds of props that will help tell your product's story.
Once the mood board is set, it's time to build a detailed shot list. Think of this as your playbook for the shoot. A good shot list doesn't just say what photos you need; it details exactly which props go with each setup. For instance:
- Shot 1: Product A, front view. It's sitting on a white acrylic block, and we'll have a couple of soft-focus green leaves in the foreground.
- Shot 2: Product A, top-down flat lay. Place it next to an open notebook and a sleek silver pen, all on a grey linen background.
- Shot 3: Product A, lifestyle shot. We need a model's hand holding it, with a cozy, cream-colored sweater sleeve just visible in the frame.
That kind of detail kills any guesswork on shoot day. It saves a ton of time and keeps your creative energy focused where it matters.
On-Set Habits for a Smooth-Running Shoot
With a solid shot list in hand, the day of the photoshoot feels much less frantic. I always get to the studio early to prep the props. That means wiping down every surface, steaming any fabrics to get rid of wrinkles, and laying everything out according to the shot list. A little trick I've picked up is to group the props for each shot on separate trays. When it's time for the next setup, I can just grab the tray and go.
The demand for high-quality, prop-styled photos is absolutely booming. The global photography props market was valued at around $1.8 billion in 2023 and is projected to skyrocket to $3.2 billion by 2032. This isn't just a random number; it shows how critical visually compelling content has become for e-commerce and social media. You can explore the full photography props market research to see just how fast this space is growing.
To keep up without losing your mind, I highly recommend creating a "go-kit" of styling tools that you bring to every single shoot.
My Prop Styling Go-Kit Essentials:
- Museum Putty: An absolute lifesaver for stopping small, round items from rolling away.
- Microfiber Cloths: You'll need these to wipe fingerprints off shiny surfaces without leaving lint behind.
- Canned Air: The fastest way to blow away tiny specks of dust from products and props right before a shot.
- Clamps and Clips: Essential for holding backdrops and fabrics perfectly taut.
- Double-Sided Tape: I've lost count of how many times this has saved me for quick, on-the-fly adjustments.
Having these tools within arm's reach means you can fix common little problems instantly without derailing your creative momentum.
This visual shows how we use props to guide the viewer’s eye, moving from establishing balance, to creating depth, and finally to locking in their focus on the product.
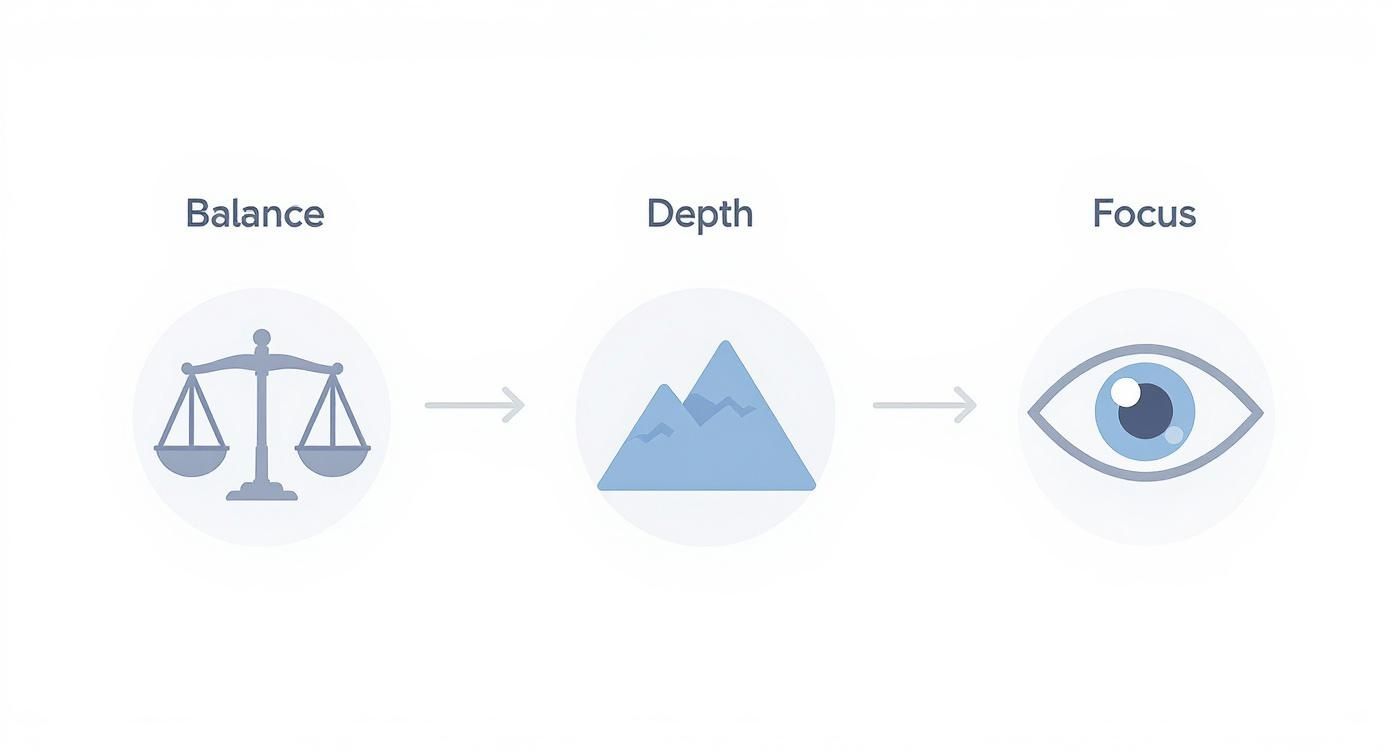
This progression—balance, depth, focus—is exactly what a well-structured workflow helps you achieve deliberately in your compositions.
But the work isn't done when the camera is put away. Your workflow has to include post-production, where you give everything a final polish. No matter how careful you are on set, tiny imperfections will show up. For teams that need a perfect finish on every image without spending hours in Photoshop, looking into high-quality product photo editing services can be a total game-changer, ensuring every shot is marketplace-ready.
By treating prop styling as a core part of your entire workflow—from the first mood board to the final edit—you turn a potentially chaotic job into a streamlined, creative, and even enjoyable process. It's a professional approach that not only makes your final images better but ensures you can deliver stunning, consistent results every single time.
Your Top Prop Questions, Answered
Working with props can feel like a bit of an art and a science. It's easy to get tangled up in questions, from how to avoid common mistakes to building a solid collection that works for any shoot. Let's dig into some of the most frequent questions I hear to get you styling with total confidence.
How Do I Keep Props From Overpowering My Product?
This is the big one—the most critical balancing act in product photography. Always, always remember that your props are the supporting actors. Their only job is to make your product, the star of the show, look its absolute best. If a prop is stealing the spotlight, it's not working.
The easiest way to keep your visual hierarchy in check is to stick with props in a complementary or neutral color palette. This stops a loud, distracting color from pulling the eye away from your main item. Scale is just as important; a prop should almost never be larger or feel visually heavier than the product itself.
My go-to professional trick? Use a shallow depth of field. By setting your camera to a low f-stop (think f/2.8 or lower), you can keep your product perfectly in focus while the props in the foreground or background melt into a beautiful, soft blur. It’s a simple move that instantly tells the viewer exactly where to look.
What Are the Most Versatile Props to Start a Collection With?
When you’re just starting to build out your prop library, versatility is everything. You need pieces that can shapeshift to fit different products, brand vibes, and photo styles. Focusing on a core set of flexible props gives you the most bang for your buck and prevents your studio from turning into a storage unit.
Here are the foundational pieces that belong in every starter kit:
- Neutral-Colored Fabrics: Scraps of linen, cotton, or even cheesecloth in shades of white, grey, and beige are absolute lifesavers for creating soft, inviting textures.
- Matte Ceramic Dishes: A few simple plates or shallow bowls in white or a light, earthy tone can act as elegant pedestals or subtle background elements for almost anything.
- Geometric Blocks and Risers: Simple wooden blocks or clear acrylic risers are the secret to adding height and dimension. They instantly make a flat lay feel more dynamic.
- Painted Foam Boards: Grab a stack of foam boards from a craft store and paint them in various neutral, matte colors. You’ll have an endless supply of custom backgrounds and surfaces that are lightweight and a breeze to store.
These staples can be mixed, matched, and reimagined for nearly any product you can think of, from rustic home goods to sleek tech gadgets.
How Do I Choose Props That Actually Match My Brand?
Your props are a direct extension of your brand’s personality. If they don't align, the whole image feels off. So, before you even think about buying a single prop, you need to have a rock-solid understanding of what your brand is all about.
Start by defining your brand with three to five keywords. Are you minimalist, rustic, luxurious, playful, or tech-forward? These words become the filter for every prop decision you make.
For a brand that’s ‘rustic,’ you’d be on the hunt for things like reclaimed wood, dried botanicals, and rough-textured ceramics. A ‘luxurious’ brand, on the other hand, calls for materials like marble, silk fabric, and polished metallic accents. See how every choice reinforces the story?
I highly recommend creating a brand mood board that goes beyond just colors and logos. Pin textures, materials, and objects that capture the feeling of your brand. When you're out sourcing props, keep that mood board handy. If a potential prop doesn't look like it belongs on that board, it doesn't belong in your photo.
Can I Use Food as a Prop for Non-Food Items?
Absolutely! But—and this is a big but—it has to make sense. Food can be an incredibly effective prop for suggesting an ingredient, a scent, a mood, or a lifestyle. The trick is making sure the connection between the food and the product feels logical and intuitive to the person seeing the photo.
For instance, placing a few roasted coffee beans next to a coffee-scented candle is a perfect match; it visually spells out the primary scent. In the same way, styling a daily planner with a fresh croissant and a steaming mug of coffee instantly creates a story about a productive morning routine. The prop tells a story about how and when the product is used.
The number one rule here is to make sure the food always looks fresh and appetizing. Wilted herbs or a sad-looking piece of fruit will instantly cheapen the entire image. Your goal is to arrange it artfully to enhance the scene, not create a weird distraction.
Ready to create stunning product images without the hassle of sourcing props and setting up shoots? With ProdShot, you can turn simple phone pictures into studio-quality photos in seconds. Let our AI handle the backgrounds, lighting, and styling so you can focus on growing your business. Try ProdShot for free and see the magic for yourself.