
When you want to create that classic white background for your product photos, you’ve got two main paths: shoot against a real white backdrop from the start, or use editing software to digitally knock out the background later. The end goal is the same: a perfectly clean, distraction-free image that makes your product the absolute star of the show.
Why a White Background Is Such a Game-Changer
A clean white background does way more than just look professional. For e-commerce, it's a foundational piece of the puzzle that builds instant trust and clarity with your customers.
By stripping away all the visual clutter, you let your product’s details, colors, and textures really pop. For someone shopping online who can’t pick up and feel the item, this kind of focus is absolutely critical for them to feel confident enough to click "buy."
This approach also brings a polished, consistent look across your entire product catalog. When a customer is browsing your site, that uniform background creates a strong brand identity and makes the whole experience feel organized and trustworthy. It's a technique that used to be reserved for high-end studios with pricey setups, but thankfully, accessible tools have made it the standard for sellers of all sizes.
Meeting Marketplace Standards
The demand for this style of photography has absolutely exploded with the growth of e-commerce. Big players like Amazon, eBay, and Shopify often require images to have a pure white background (RGB 255, 255, 255) to keep a uniform, professional look across their platforms.
It’s not just a suggestion; it's a core part of the online retail ecosystem. In fact, it's estimated that a staggering 75% of all product images you see online have been processed to get that perfect white backdrop, which really tells you how dominant this standard has become.
Boosting Conversions and Brand Value
At the end of the day, you're here to sell. A crisp, white background directly helps you do that by making your products look more appealing and valuable. It instantly gets rid of any amateurish vibe that a busy or inconsistent background can create, elevating how customers perceive the quality of your brand.
By putting the product first, you remove friction from the buying process. The customer sees exactly what they’re getting, which builds confidence and reduces the likelihood of returns.
This isn't just about making things look pretty—it's about sales psychology. When you consider the cost of professional product photography, learning to nail this yourself delivers an incredible return on your time and effort.
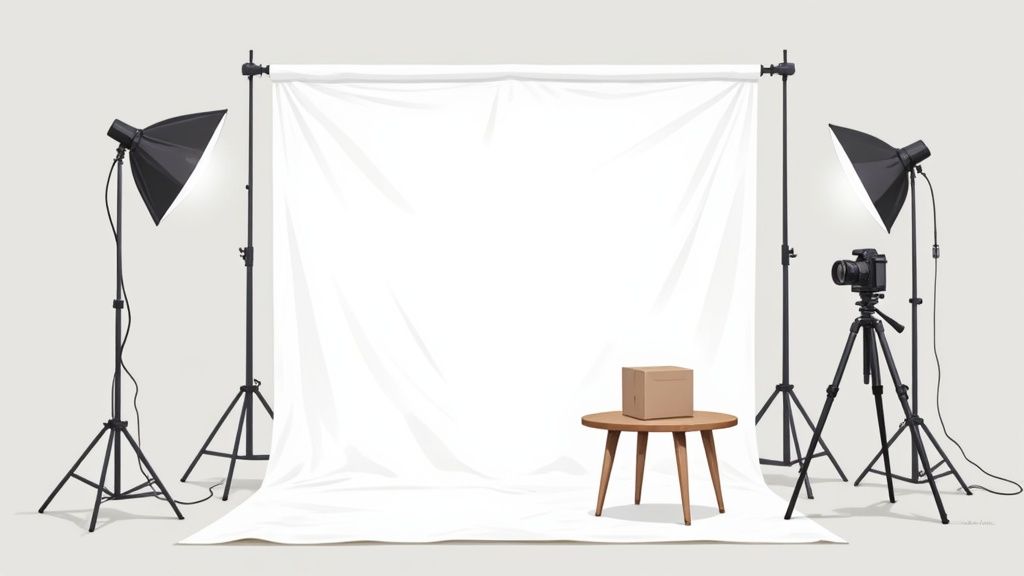
Building Your DIY White Background Studio
You don't need a fancy, high-end photography studio to get those crisp, professional product images you see on major e-commerce sites. Honestly, with a little ingenuity and some affordable gear, you can rig up a killer DIY setup right in your office or living room. The best part? You'll have total control over every single shot.
The heart of any great white background photo is, well, the white background. You’ve got a few solid options here, and the right choice really just depends on what you're shooting and your budget.
Choosing Your White Backdrop
If you’re working with smaller items—think jewelry, makeup, or small gadgets—a simple piece of white poster board or foam board from any craft store is your best friend. It’s cheap, easy to find, and you can bend it to create a seamless "sweep" from the table up the wall. This trick instantly eliminates that distracting hard line where the horizontal and vertical surfaces meet.
For bigger products like clothing on a mannequin or home decor, you'll want to step it up to a roll of seamless white paper. This is what the pros use, and for good reason. It gives you a perfectly smooth, non-reflective surface that makes everything look clean. To hold it up, investing in a sturdy frame like an 8ft x 8ft backdrop stand hardware is a game-changer for building a stable and versatile shooting space.
Pro Tip: Your seamless paper is going to get scuffed and dirty. It's inevitable. When it does, just grab some scissors, snip off the dirty end, and roll down a fresh section. It keeps your background perfect for every shoot without having to buy a whole new roll.
Mastering Your DIY Lighting Setup
Here’s the real secret to getting that pure white background without blowing out your product: you have to light the background and the product separately. This is the technique that separates amateur-looking shots from professional ones, and it will slash your editing time later.
You'll need at least two lights, but don't think you need to shell out for expensive studio strobes. A couple of affordable LED panels or even basic clamp lights from the hardware store (just make sure you use daylight-balanced bulbs) will work great.
- Background Lights: Position one light on each side of your backdrop, aimed right at it. Your goal is to intentionally overexpose the background just enough to make it pure white in-camera, but without that light spilling onto your actual product.
- Key Light: This is the main light for your product. Place it at roughly a 45-degree angle to your subject. This creates soft, flattering shadows that define the product's shape and show off its details. A simple softbox or even a white bedsheet draped in front of the light will diffuse it beautifully and kill any harsh glare.
By lighting the background separately and making it about one to two stops brighter than your product, you create a natural separation. The backdrop goes pure white, while your product stays perfectly lit and full of detail.
Think of it this way: a clean, professional presentation builds immediate trust. That trust allows a customer to focus on the product, which ultimately leads them to convert.

This simple flow shows why a professional white background is the critical first step. It's the foundation of a customer journey that goes straight from trust to purchase.
Essential Camera Settings for a Clean Shot
Getting your camera settings dialed in before you start shooting will save you a world of pain in post-production. Since you're controlling all the light, you can set your camera for optimal quality.
Here’s a great starting point. Tweak from here as needed.
- ISO: Lock your ISO at its lowest native setting, which is usually ISO 100 or 200. This gives you the cleanest, most detailed image possible by minimizing digital noise.
- Aperture: An aperture between f/8 and f/11 is the sweet spot for most product photography. It gives you a deep enough depth of field to keep the entire product tack sharp, from front to back.
- White Balance: Never trust auto white balance in a controlled studio setting. Use a custom white balance by shooting a grey card or even a piece of your white background. This guarantees your whites are actually white, not tinted slightly blue or yellow.
Once your DIY studio is set up, your lights are in place, and your camera is dialed in, you're ready to start taking shots that look polished and professional right out of the camera.
Editing Manually with Photoshop and Lightroom
For those times when you need absolute, pixel-perfect control, nothing beats getting your hands dirty with Adobe Lightroom and Photoshop. While AI tools are a massive timesaver, this classic two-part workflow is the gold standard for a reason. It gives you the power to make sure every single detail is perfect.
Think of it this way: Lightroom is your development lab for broad strokes, and Photoshop is the surgical suite for the fine details.
Starting Your Edits in Lightroom
First things first, get your RAW photos into Lightroom. I can't stress this enough—always shoot in RAW if you can. JPEGs are fine, but RAW files hold so much more information, giving you way more room to play with highlights and shadows without wrecking your image quality.
Once your photo is loaded up, jump into the Develop module. The main goal here is to brighten up that background without completely blowing out the highlights on your actual product. The Whites and Highlights sliders are your best friends for this. Nudge them to the right and watch the background get brighter, but keep a close eye on your product. If it starts losing detail and turning into a flat white blob, you've gone too far.
For trickier spots, the Adjustment Brush is a lifesaver. You can grab it, bump up the exposure or whites on the brush itself, and just paint over the parts of the background that need a little extra help. This lets you target just the background without touching the product itself.
Transitioning to Photoshop for Precision Work
After you’ve pushed Lightroom as far as you can, it’s time to bring in the specialist: Photoshop. This is where we’ll create that razor-sharp cutout. Just right-click on your image in Lightroom and select "Edit In > Edit in Adobe Photoshop."
This will open your image right up in the Photoshop workspace, which is packed with all the selection and masking tools you'll need.
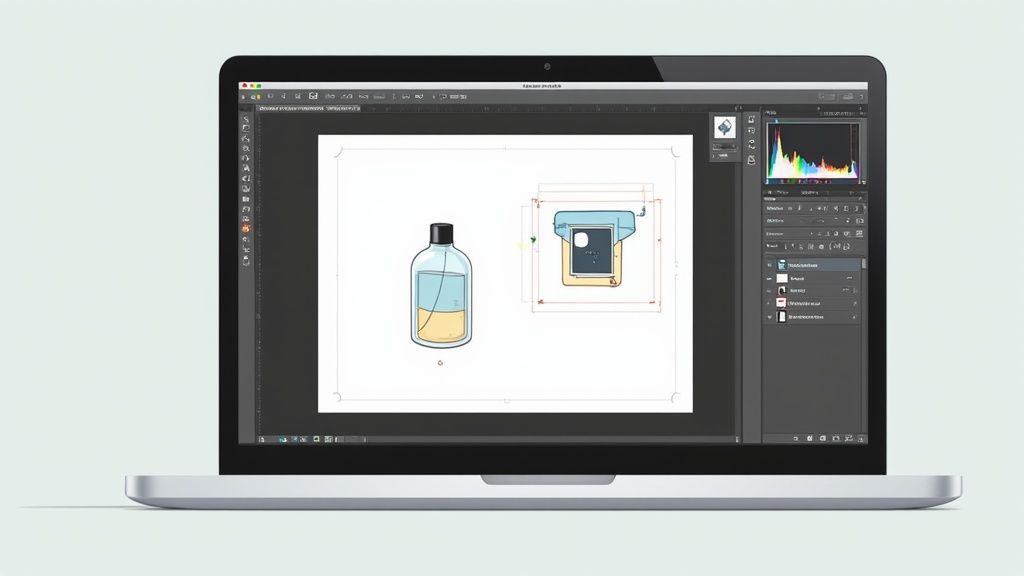
The Pen Tool is the undisputed champion for creating clean, precise cutouts. Yes, it takes a little practice to get the hang of it, but the level of control you get is second to none. You'll click to create anchor points and drag to create smooth curves, tracing a perfect path around your product.
Once the path is complete, you can easily turn it into a selection and then—this is the important part—apply a Layer Mask. A layer mask is a non-destructive way to hide parts of your image. Instead of permanently deleting the background, you're just masking it. This means you can always go back and tweak the edges later if you spot a mistake. No commitment issues here.
Dealing with fuzzy, soft, or super detailed edges like hair, fur, or fabric? The Select and Mask workspace is your secret weapon. It has incredibly smart tools like the Refine Edge Brush that can intelligently figure out those tricky transitional areas. For any business needing consistently flawless cutouts, mastering these tools is a must. Alternatively, exploring professional product photo retouching services can be a huge time-saver.
Achieving a Pure White Finish
Alright, your product is perfectly isolated on its own layer. The final move is to create that pure, crisp white background.
Pro Tip: The e-commerce standard for a pure white background is RGB (255, 255, 255). Anything less, like a light grey (RGB 245, 245, 245), can look dingy and unprofessional when it's sitting next to other listings on a marketplace.
Just create a new layer, drag it underneath your product layer, and fill it with pure white.
To be absolutely sure, you can do a final quality check. Add a Levels or Curves adjustment layer on top of everything. Use the eyedropper tool in that panel and click anywhere on your background. The info panel will show you the RGB values. If it reads 255, 255, 255, you’ve nailed it. Your image is now ready to meet even the strictest marketplace requirements.
Ditching Photoshop: AI Tools for Instant Background Removal
Look, manual editing in Photoshop is an art form. It gives you incredible precision, but let's be honest—it's slow. When you've got dozens of products to get online yesterday, speed is everything. This is where AI-powered background removal tools completely change the game.
These tools are built on a simple premise: upload your photo, and let a smart algorithm do the heavy lifting. Within seconds, it identifies your product, digitally snips it out, and gives you back a clean image with a transparent or pure white background. For e-commerce sellers, this is a massive workflow upgrade.
The biggest win here is time. What might take a skilled designer 10-15 minutes wrestling with the Pen Tool, an AI can knock out in under 10 seconds. When you're dealing with a huge catalog, that time savings is astronomical.
How Do These AI Tools Actually Work?
The beauty of most AI background removers is their simplicity. You don’t need any technical skills, just a web browser. The process is usually a straightforward upload-and-go model.
- You upload your image. Just drag and drop your product photo right onto the tool's website.
- The AI gets to work. In a flash, the algorithm analyzes the pixels, figures out what’s product and what’s background, and makes the cut.
- You refine and download. Most tools give you a simple editor to clean up any tiny imperfections. Happy with the result? Just download the final image, usually as a PNG file you can slap onto any background you want.
If you’ve ever experimented with physical setups for background removal, like making green screen videos, you'll appreciate how AI complements those foundational techniques by automating the final, tedious step.
Now, are they perfect? Not always. These tools are fantastic for products with hard, clean edges—think electronics, books, or boxes. They can sometimes get a little confused by fuzzy details like stray hairs on a model, the soft edges of a knitted sweater, or intricate jewelry. But even then, a quick manual touch-up is worlds faster than starting from scratch.
The real power of AI is that it makes professional results accessible to everyone. You no longer need to be a Photoshop wizard to create clean, marketplace-ready product images. This tech is a huge equalizer for small businesses and solo entrepreneurs.
Comparing Manual vs AI Editing Methods
Let's break down the real-world differences between grinding it out in Photoshop and letting an AI do the work for you. Here’s a quick look at how they stack up.
| Feature | Manual Editing (Photoshop) | AI Tools |
|---|---|---|
| Speed | Slow; 5-20+ minutes per image depending on complexity. | Incredibly fast; typically under 10 seconds per image. |
| Cost | Requires a costly software subscription and potentially hours of skilled labor. | Often free for low-res images or available through affordable subscription plans for high volume. |
| Skill Level | High; requires a deep understanding of tools like the Pen Tool, masks, and channels. | Beginner-friendly; no technical skills needed, just upload and download. |
| Precision | Can achieve pixel-perfect results, especially on complex images with fine details. | Generally excellent but can struggle with fuzzy edges, hair, or transparent objects. |
| Consistency | Can vary slightly from image to image depending on the editor's focus and technique. | Highly consistent results across large batches of similar images. |
| Use Case | Best for hero images, complex subjects, or when absolute perfection is non-negotiable. | Ideal for bulk processing, e-commerce listings, and situations where speed is the top priority. |
While manual editing still holds its place for high-stakes "hero" shots, AI tools are undeniably the workhorse for modern e-commerce.
The Bigger Picture: The Rise of Virtual Production
This technology is just the tip of the iceberg. We're seeing a massive shift in how product visuals are created, moving away from physical studios and toward digital ones.
The global virtual production market, which is all about creating digital backgrounds and environments, was valued at a staggering $2.11 billion in 2023 and is projected to explode in the coming years. These advanced tools let you generate a perfect white background—or any background—without a physical setup, offering insane flexibility.
This trend makes it clear: the future is about working smarter, not harder. For businesses that need to produce tons of high-quality visuals without the hassle, using an AI product photo generator is the logical next step. It’s no longer just about removing a background; it’s about generating the entire polished, ready-to-sell image automatically.
Working Through Common White Background Problems
Even with the best-laid plans, you're bound to run into a few frustrating hiccups when shooting on white. Don't sweat it. Most of these problems are incredibly common, and the fixes are usually pretty straightforward. Knowing what to look for is half the battle.
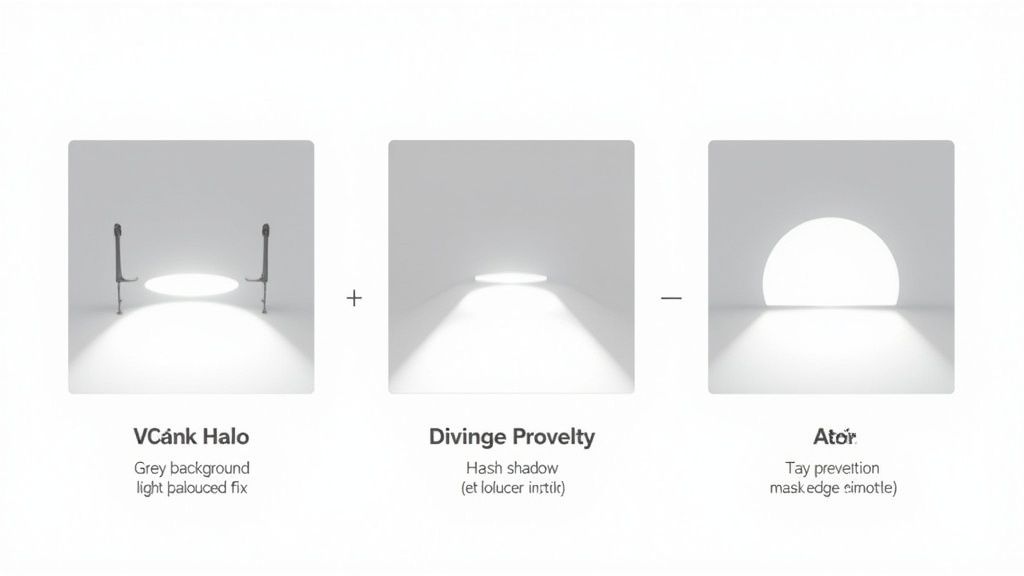
One of the biggest complaints I hear is about backgrounds that look dull and grey instead of that crisp, pure white. This almost always comes down to one thing: your background simply isn't bright enough. Your camera’s sensor tries to average out the light in the whole scene, so if the background isn’t significantly brighter than your product, it’s going to register as grey.
The trick is to light your background and your product separately. Point dedicated lights right at your backdrop to overexpose it just a bit. This forces it to pure white in the camera, while your main light can be set to expose the product perfectly.
Fixing Shadows and Glare
Harsh, ugly shadows are another headache that can ruin an otherwise great shot. This is usually caused by using a small, direct light source positioned too close to your product. The fix? Make your light source bigger and softer.
- Use a diffuser: A softbox is the gold standard here, but even a thin white sheet hung between your light and the product can work wonders to soften the light.
- Move your light: Just pulling the light further away from your subject will soften the shadow edges.
- Add fill light: Grab a white reflector card (or even just a piece of foam board) and place it opposite your main light. This will bounce light back into the shadows and make them far less intense.
Nailing this technique is crucial for that clean, professional look that keeps the focus squarely on your product.
Avoiding Blown-Out Highlights and Halos
In the push to get a perfectly white background, it’s all too easy to accidentally overexpose your product. This creates "blown-out highlights"—those glaring white spots where all detail and texture are completely lost. A good rule of thumb is to always expose for the product first. Make sure you can see all its details clearly. You can always brighten the background in post-production.
Another frustrating issue, one that usually pops up during editing, is the dreaded "halo effect." This is that faint, bright outline that can appear around your product after you’ve cut it out from the background.
Halos are often a side effect of the background light being too intense and spilling onto the edges of your product. If you control your lighting and create a clean separation during the shoot, you’re much less likely to deal with this in post-production.
If you do spot a halo, you’ll probably need to jump back into a tool like Adobe Photoshop and refine the mask or selection around your product. Gently feathering the edge can help create a much more natural transition.
Got Questions? We’ve Got Answers.
Here are some of the most common questions that pop up when you're trying to nail that perfect white background for your products.
Can I Really Get a Pro-Looking White Background with Just My Phone?
You absolutely can. Smartphone cameras these days are seriously impressive. If you can get a decent, well-lit shot against something simple like a white wall or even a piece of poster board, a good background removal app can do the rest.
The secret sauce is always good, even lighting. Get that right, and your phone can deliver results that rival a much more expensive setup.
Help! My White Background Looks Grey in My Pictures.
This is, without a doubt, the most frequent problem people run into. It's almost always a lighting issue. Your camera is trying to be smart by finding a "middle-grey" exposure for the whole scene. If your background isn't significantly brighter than your subject, the camera plays it safe and underexposes it, turning your would-be white into a dull grey.
Here's the fix: You need to light your background and your product separately. Point a couple of dedicated lights only at the backdrop. The goal is to intentionally overexpose it by one or two stops compared to your product. This blows the background out to a pure, clean white while keeping your product perfectly lit.
Do I Need to Shell Out for Expensive Lights?
Not at all. While professional strobes are fantastic, you can get incredible results on a shoestring budget. A couple of simple LED panels or even clamp lights from the hardware store with daylight-balanced bulbs will do the job perfectly.
It’s not about how much the lights cost; it’s about where you put them. Proper positioning trumps expensive gear every time.
What’s the Best File Format for These Images?
For just about anything on the web, especially e-commerce sites like Shopify or Amazon, JPEG is your go-to. It gives you that sweet spot of great image quality and a small file size, which means your pages will load nice and fast.
However, if you think you might want a transparent background later—so you can place your product on a colored background or in a marketing graphic—you have to save the file as a PNG. It's the only common format that supports transparency.
Ready to skip the manual editing and get stunning, marketplace-ready images in seconds? ProdShot uses AI to instantly generate perfect white backgrounds for your product photos. Try it for free and see the magic for yourself!