

So, what exactly is professional product photography? It’s the craft of capturing stunning, high-quality images of your products with one goal in mind: attracting customers and making sales. It’s a blend of smart lighting, intentional composition, and sharp editing that makes your item look its absolute best. For anyone selling online, it's not just a skill—it's essential.
Why Smartphone Product Photography Matters
In e-commerce, your photos are your storefront. They're the first handshake, the first impression. High-quality images aren't just a nice-to-have; they build instant trust and communicate the real value of what you're selling.
Think about it. When a customer can't physically touch or hold a product, your photos have to do all the heavy lifting. They need to answer unspoken questions about quality, size, texture, and color. A blurry, poorly lit image screams a lack of care, and customers will instinctively map that feeling onto your product and your brand.
The great news? You don't need a studio stuffed with expensive gear anymore. The camera already in your pocket is more than powerful enough to create gorgeous, marketplace-ready photos. The secret isn't the equipment, but the strategy behind it—planning your visual style, mastering your lighting, and composing shots with purpose. This is how you move from simple snapshots to strategic visual marketing.
Define a Cohesive Visual Style
Before you even think about taking a picture, pause and define your brand's visual identity. What’s the vibe? Are you going for a minimalist and clean look, something vibrant and energetic, or maybe a more rustic, handmade feel?
Your choice needs to click with your target audience and, of course, your product. A consistent style makes your brand instantly recognizable and helps build a storefront that feels cohesive and trustworthy.
Here are a few popular styles to consider:
- Minimalist: Think clean lines, lots of negative space, and a neutral color palette. This is perfect for luxury goods, tech gadgets, or modern home decor because it puts all the focus squarely on the product.
- Vibrant and Bold: This style uses bright, saturated colors and dynamic, eye-catching compositions. It’s a fantastic fit for brands targeting a younger audience, like quirky accessories or fun kids' products.
- Rustic and Natural: This look leans on organic textures like wood and linen, often paired with soft, warm lighting. It’s ideal for handmade goods, artisanal foods, or eco-friendly products.
The global product photography market was valued at a whopping $129 million in 2021 and is on track to more than double to $275 million by 2028. This explosive growth, fueled by e-commerce, shows just how critical high-quality visuals are for online success.
Select Backgrounds and Props That Enhance
Once you've nailed down your style, choosing the right backgrounds and props gets a whole lot easier. The golden rule is simple: everything in the frame should enhance the product, not compete with it.
A clean, white background is a timeless, go-to choice for main product listings on platforms like Amazon. But for your supplementary lifestyle shots, thoughtful additions can make all the difference.
For that minimalist look, a simple white or light gray poster board does the trick perfectly. If you're aiming for a rustic vibe, a weathered wooden plank or a piece of linen fabric can add just the right amount of texture without creating clutter.
When it comes to props, make sure they're relevant and add context. A few coffee beans scattered near a bag of gourmet coffee? Makes sense. A random houseplant? Not so much. The goal is to create a little scene that helps customers imagine the product in their own lives. If you're curious how much this all costs, you can explore our guide on the cost of professional product photography to compare the DIY route with hiring a pro.
Your DIY Lighting and Smartphone Camera Setup
You absolutely don't need a high-end studio to get professional-looking product photos. Honestly, some of the best shots come from simple, clever setups using gear you probably already have lying around. The real secret isn't the camera you use—it’s how you control the light.
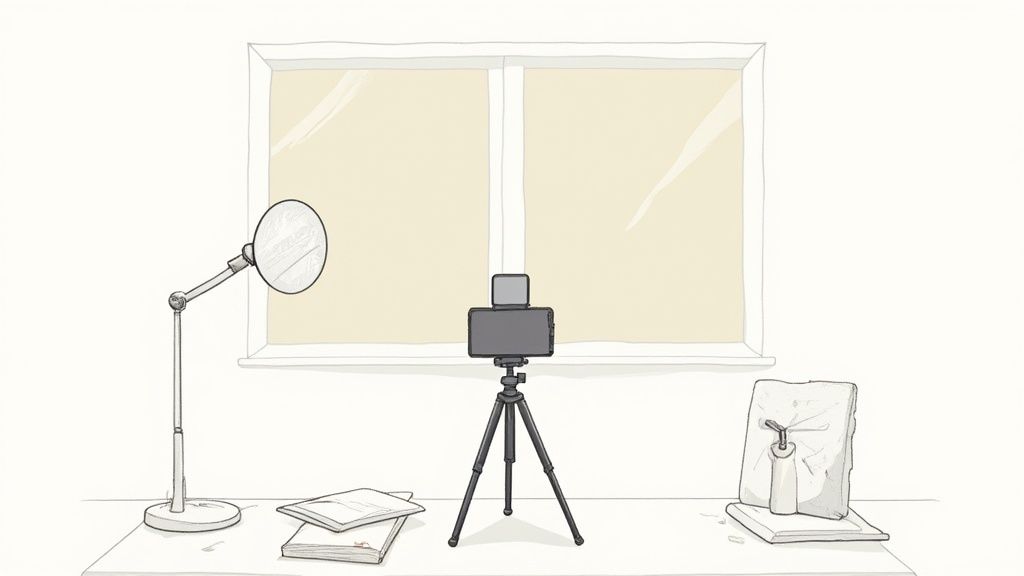
The gold standard for beautiful, soft lighting? A big window on a cloudy day. That's it. This natural light source is like a giant, free softbox, wrapping your product in even light that melts away harsh shadows.
Just set up a small table next to your window, making sure it’s not in a direct beam of sunlight. Direct sun creates those high-contrast, amateur-looking shadows that kill a shot. Then, place your product on a clean background. A simple piece of white poster board, curved up against a wall to create a seamless "sweep," is perfect for this.
Harnessing Natural and Artificial Light
Your main job is to fill in the shadows created by your primary light source. For this, you need a reflector. Don't overthink it—a piece of white foam board or even another poster board works perfectly.
Position the reflector on the side of your product opposite the window. Its only job is to bounce that beautiful window light back into the shadows, brightening them up and bringing out the details. Play around with it. Move the reflector closer for brighter fill, or further away for a more subtle effect.
No decent windows? No problem. You can build a surprisingly good lighting rig with a couple of desk lamps.
- Lamps: Grab two matching lamps and pop in some daylight-balanced LED bulbs (look for something around 5000K). This ensures you get clean, white light that won't mess with your product's true colors.
- Diffusion: Never, ever point a bare bulb at your product. Tape a piece of parchment paper over the lamp heads. This simple trick diffuses the light, softening it to mimic what you’d get from a professional softbox.
- Placement: Set one lamp at a 45-degree angle on one side of your product and the second on the opposite side. This is a classic two-light setup that gives you nice, even illumination.
Key Takeaway: Whether you’re using sunlight or desk lamps, the secret to pro-level results is always diffusion. Soft, diffused light minimizes harsh shadows and just makes any product look more high-end and appealing.
Unlocking Your Smartphone Camera Settings
Your phone's default camera settings are made for quick snapshots, not controlled product shoots. To get the control and consistency you need, you have to dig into the "pro" or manual modes. But first, always give your camera lens a quick wipe with a soft cloth. You'd be amazed how much a fingerprint can ruin a shot.
The first thing you should do is turn on the gridlines. This simple overlay is a game-changer for composition, helping you line everything up perfectly using principles like the rule of thirds.
Next, you need to master the AE/AF lock (Auto Exposure/Auto Focus). On your screen, just tap and hold on your product until you see a little lock icon appear. This is a crucial step. It stops your phone from randomly changing the focus or brightness from one shot to the next, so all the photos in your batch look consistent.
Finally, tweak these last few settings for the best possible quality:
- Turn off the flash. Your phone's built-in flash is harsh and ugly. Just don't use it.
- Disable HDR (High Dynamic Range) for most product shots. While HDR can be great for landscape photos, it often makes products look a bit unnatural and overly processed.
- Shoot in the highest resolution possible. This gives you maximum flexibility for cropping and editing later without losing all that important detail.
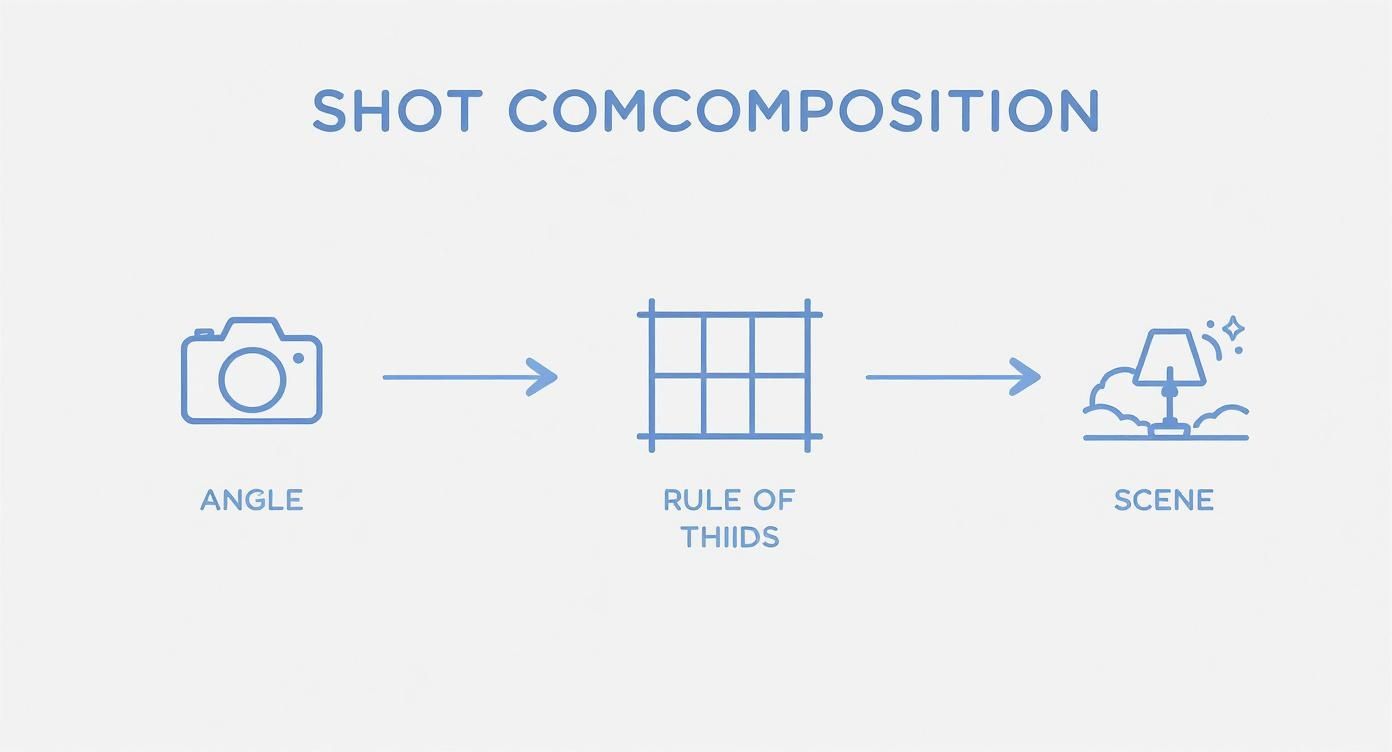
Composing Shots That Turn Browsers into Buyers
Fantastic lighting gets you halfway there, but how you arrange your product in the frame? That’s what seals the deal. Good composition does more than just show an item—it tells a story and steers your customer's eye right to the features that matter most. This is where we graduate from simple snapshots to thoughtful, persuasive professional product photography.
One of the oldest tricks in the book is still one of the most powerful: the rule of thirds. Just imagine your screen has a tic-tac-toe grid laid over it. Instead of plopping your product smack in the center, try positioning it along one of the lines or where two lines cross. It's a simple shift, but it instantly makes your photo feel more dynamic, balanced, and professional.
Then there's negative space, which is just a fancy term for the empty area around your product. Don't be afraid of it. A cluttered photo is a confusing photo. Giving your product some breathing room makes it feel more premium and keeps the focus exactly where you want it.
Get Creative With Your Angles
The angle you shoot from can completely change the vibe of a product. You can't just take one shot and call it a day. Giving customers a few different perspectives helps them feel confident they know what they’re buying.
- The Eye-Level Shot: This is your classic, straight-on view. It’s the perfect hero shot because it’s honest and clear, showing the product just as you’d see it on a shelf.
- The Flat Lay (Top-Down): Shooting from directly overhead is a game-changer for things like skincare sets, curated gift boxes, or flat items like art prints and t-shirts. It’s clean, modern, and great for showing off multiple items at once.
- The 45-Degree Angle: This one is my personal favorite for adding a bit of depth. It shows the front and side of an item simultaneously, which is crucial for things like sneakers, handbags, or electronics where multiple surfaces are key selling points.
- The Detail Shot (Macro): Get in close. Really close. Show off the texture of a hand-knit sweater, the fine details on a piece of jewelry, or the quality stitching on a leather bag. These are the shots that scream craftsmanship and justify a higher price point.
A powerful image does more than just display a product; it creates desire. By carefully composing each shot, you're not just taking a picture—you're crafting a persuasive argument for why your product is the one they should choose.
It's no surprise that the demand for killer visuals is a massive driver in the photography market, which was valued at around $105.2 billion in 2025. This boom is tied directly to the explosion of e-commerce, proving just how vital great images are online. You can dig into more insights about the professional photography industry's growth on dojobusiness.com.
Once you've nailed your photos, make sure your words are just as powerful. Pair your stunning new images with copy that sells. If you need a little help in that department, here’s a great guide on how to craft compelling product descriptions that turn casual lookers into loyal customers.
Taking the picture is really just the first step. The magic that turns a simple phone photo into a professional product shot happens in the editing room. This is where you polish the raw image, making sure every detail screams quality and nudges customers to hit that "buy" button.
Your editing process doesn't need to be some complicated, multi-day affair. The real goal is to make clean, consistent tweaks that make the product look its best without looking fake. Think of it as tidying up, not a complete remodel. The most important edits are all about making the product look true-to-life and irresistible.
Foundational Photo Adjustments
Let's start with the basics. Getting these initial steps right makes everything that follows so much easier.
First up, crop and straighten your image. Pop open the gridlines in your editing app and make sure your product is perfectly level. Even a slightly crooked photo can look sloppy and unprofessional. Cropping is also your chance to perfect the composition, trimming away any dead space and pulling the viewer’s eye right where you want it: on your product.
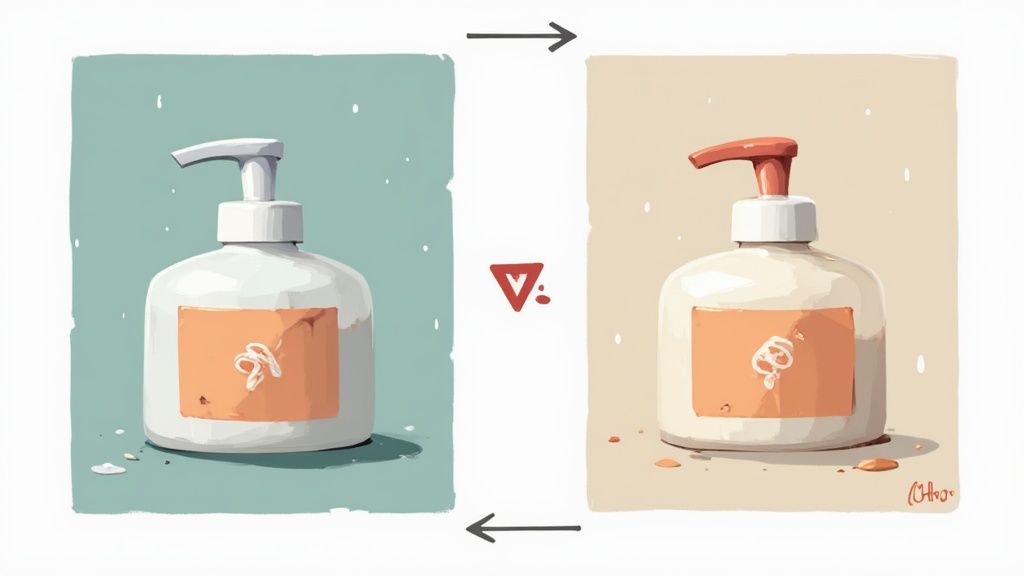
Next, it's time for color correction. Your phone’s camera isn't perfect and can sometimes get the lighting wrong, making your whites look a little yellow or blue. This is an easy fix. Just use the white balance tool in your editor. Find something in the photo that's supposed to be pure white—like the background—and play with the temperature and tint sliders until it looks clean and neutral. This one move is crucial for showing your product’s true colors and can seriously cut down on returns from disappointed customers.
Finally, let's dial in the brightness and contrast. A gentle bump in brightness can make the whole photo feel lighter and cleaner. Just be careful not to "blow out" the highlights, which is when you lose all the detail in the brightest spots. A little extra contrast can also make the product pop by making the darks a bit darker and the lights a bit lighter, giving the image more depth.
Getting the shot right in the camera saves you a massive headache later. This is what you're aiming for.
When you nail the camera angle, rule of thirds, and lighting during the shoot itself, you drastically cut down on the heavy lifting you have to do in post-production.
Refining and Polishing for Marketplaces
Okay, with the basics handled, it's time for the cleanup work that really separates the amateur shots from the pro-level, e-commerce-ready images.
Background removal is non-negotiable for marketplaces like Amazon and Shopify. Trying to do this manually with a lasso tool can be a nightmare, but thankfully, many apps now have one-click background removal that does a pretty good job. The aim is a perfectly crisp edge around your product, placing it on a pure white or transparent background with zero distractions left over from the original scene.
Now, zoom in and play detective. Use a spot healing or clone tool to zap away any tiny dust specks, fingerprints, or minor scuffs on the product. It sounds nitpicky, but these little details make a huge difference in how customers perceive the quality of your brand.
Pro Tip: Your very last step should always be sharpening. Apply just a touch of sharpening to make the edges and textures on your product look crisp and defined. The key is to be subtle—cranking it up too high will just make your photo look gritty and weird. You're going for clarity, not an abrasive texture.
This whole editing dance can eat up a ton of time, especially if you have a lot of products. If you're spending more time in an editor than you are shooting, it might be worth looking for a faster way. For anyone who wants to streamline this part of the workflow, specialized product photo editing services can take over the technical heavy lifting, delivering consistent, marketplace-ready images without you having to do all the manual work.
Before you upload, you'll also want to make sure your images are sized correctly for the platform you're selling on. Each one has slightly different rules for what looks best.
E-commerce Platform Image Requirements
Here's a quick reference guide to the recommended image specs for the big online marketplaces. Getting this right ensures your photos look sharp and load quickly for your customers.
| Platform | Recommended Resolution (pixels) | File Type | Maximum File Size |
|---|---|---|---|
| Shopify | 2048 x 2048 | JPG, PNG, GIF | 20 MB |
| Amazon | 1000 x 1000 (minimum), 2560 on longest side (recommended) | JPG, TIFF, PNG | 10 MB |
| Etsy | 2000 on the shortest side | JPG, PNG, GIF | 10 MB |
| eBay | 1600 on the longest side | JPG, PNG, TIFF, GIF | 12 MB |
Sticking to these guidelines helps avoid any weird stretching or pixelation and keeps your pages loading fast—something both customers and search engines appreciate.
Using AI Tools to Streamline Your Workflow
Let's be honest, manual editing is a time-sink. It's where countless hours disappear, especially if you're juggling a big product catalog. This is where you can start working smarter, not harder.
Modern AI tools are a genuine game-changer for e-commerce sellers. They completely automate the tedious tasks that used to demand specialized design skills and a ton of patience. Think instant and accurate background removal, realistic shadow generation, and even placing your product into an endless variety of lifestyle scenes—all from a single, clean shot.
This approach totally changes the game for content creation. You can now snap a simple product photo on your phone, upload it, and let the AI do all the heavy lifting. It's my secret for churning out a high volume of marketing assets quickly, from marketplace-ready images to social media content.
Integrating AI for a Faster Turnaround
The real beauty of an AI-powered workflow is its sheer efficiency. Forget spending hours in Photoshop painstakingly tracing product edges or hunting for the perfect stock photo. Now, you can get polished, professional results in seconds.
This frees you up to focus on the other critical parts of your business, like marketing, shipping, or customer service.
The field of photography is highly competitive. In the United States, commercial photographers earn an average of around $37,000 annually, often on a freelance basis. AI-based editing tools are reshaping workflows, allowing solo entrepreneurs to produce high-quality visuals and compete more effectively. Discover more insights about photography industry trends on imageretouchinglab.com.
This shift empowers small businesses and solo entrepreneurs to achieve a level of visual quality and consistency that was once only possible with a big budget and a design team. Plus, the platforms built for this are designed to be incredibly easy to use.
A typical workflow is ridiculously simple:
- Shoot: Take a clear, well-lit photo of your product against a plain background.
- Upload: Just drag and drop your image into the AI tool.
- Generate: Let the AI work its magic, removing the background and creating new scenes based on your text prompts or pre-set styles.
- Download: Save your brand new, professional-quality images. They're ready for any platform.
Choosing the Right AI Tool
Not all AI tools are created equal. Some are hyper-focused on one task, like background removal, while others are full-fledged scene creators that can do it all. For most e-commerce sellers, a versatile, all-in-one solution is invaluable.
If you’re looking to create a wide variety of compelling visuals, you should definitely explore an AI product photo generator designed specifically for this. These tools can turn one simple photo into dozens of unique, on-brand assets—key for keeping your marketing fresh without constant, expensive reshoots.
And the world of AI doesn't stop with still images. If you're looking to expand your content, the Shortgenius platform is worth checking out for AI-powered video and ad generation. Ultimately, bringing these tools into your workflow helps you produce professional-level marketing materials at a fraction of the traditional cost and time.
Common Product Photography Mistakes to Avoid
It’s easy to get caught up in the excitement of shooting your products, but a few simple slip-ups can instantly tank an otherwise great photo. Sidestepping these common pitfalls is one of the fastest ways to elevate your images from looking homemade to high-end and build that crucial trust with your customers.
One of the most frequent errors I see is inconsistent lighting. When one photo in your gallery is bright and cool-toned and the next is warm and shadowy, it creates a jarring experience for the shopper. This almost always happens when shooting over several hours as natural light shifts, or by mixing different light sources, like a window and an overhead lamp.
Another classic mistake? A busy or distracting background. Your product needs to be the hero of the shot, period. Wrinkled fabric, cluttered tables, or patterned backdrops that compete for attention will only pull the customer's eye away from what you’re actually trying to sell.
Blurry Photos and Harsh Shadows
Blurry photos are an immediate red flag for buyers. They scream a lack of care and professionalism. The main culprit is almost always a shaky hand. Even the slightest movement while you tap the shutter button can ruin a perfect shot, which is why a simple tripod is non-negotiable for crisp images.
Harsh, ugly shadows are another tell-tale sign of an amateur setup. This is usually caused by a direct, undiffused light source—think a bare lightbulb or direct, midday sunlight. These hard-edged shadows can completely obscure important product details and create a cheap, unappealing vibe.
Key Insight: Professional photos control light; amateur photos are controlled by it. The secret to getting those soft, flattering shadows that make products look high-end is diffusing your light source. It can be as simple as taping parchment paper over a lamp or hanging a sheer curtain in front of a window.
Over-Editing and Poor Composition
In the quest for a "perfect" photo, it's surprisingly easy to go too far with editing. Cranking up the saturation until your colors look radioactive or over-sharpening an image until it looks gritty are common missteps. Your goal with editing should be to make the product look polished and true-to-life, not artificial.
Finally, a cluttered composition will just confuse the viewer. Cramming too many props into a scene or failing to leave any negative space (or "breathing room") around your product makes the whole frame feel chaotic. A great composition guides the eye exactly where you want it to go, while a poor one leaves the customer unsure of where to even look. Just avoiding these simple mistakes will put you miles ahead of the competition.
Ready to skip the mistakes and create stunning, marketplace-ready images in seconds? With ProdShot, you can transform your simple smartphone photos into high-converting visuals without any of the hassle. Try ProdShot for free today!