
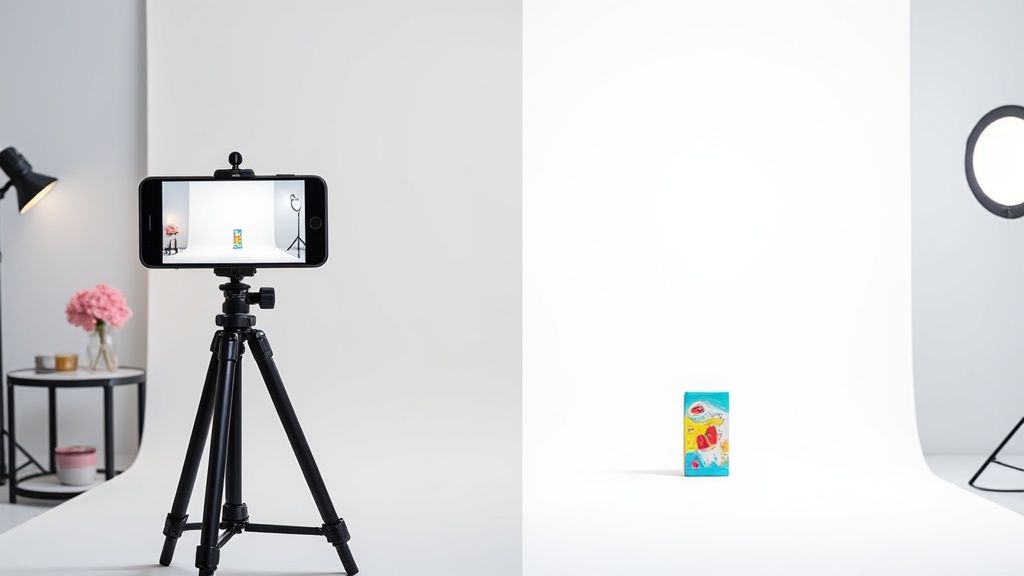
Great product photos start with… well, a great photo. But here's the secret most people miss: you don't need a fancy studio or a DSLR to get one. The phone in your pocket is all you need to capture crisp, clean, and perfectly lit shots that are ready for an AI editor to polish up.
The whole game is won in the setup. A few minutes of prep before you snap the picture will save you hours of headaches in editing.
Capture Pro-Level Product Shots With Your Smartphone
Forget all the noise about expensive gear. Seriously. The camera you already own is more than capable of producing stunning product photos that look professional and, more importantly, actually sell your products.
The real magic isn't in the lens; it's in how you set the stage. By focusing on three simple things—lighting, styling, and a few key camera settings—you create a rock-solid foundation that makes any AI background removal tool work like a charm.
This prep work is more crucial than ever. The demand for clean, consistent product images has exploded, turning editing tools into a massive industry. In fact, the market for background remover software is expected to jump from USD 500 million in 2025 to roughly USD 1.8 billion by 2033. This growth is all thanks to AI tools that are making professional results accessible to everyone. You can dive into the full industry analysis if you're curious about the numbers.
Master Your Lighting and Styling
If you only get one thing right, make it the lighting. This is the single most critical element for a great shot. Your goal is soft, even light that wraps around your product without creating ugly, distracting shadows.
- Find a big window. Natural light is your best friend. Set your product on a table near a window on an overcast day, and you'll get beautifully diffused light for free.
- Dodge direct sunlight. Harsh sun is your enemy. It creates dark shadows and bright "hotspots" that are a nightmare for any editing software to fix.
- Grab a bounce card. This sounds technical, but it’s not. A simple piece of white foam board (or even just a sheet of printer paper) works perfectly. Place it on the opposite side of your product from the window to "bounce" light back into the shadows. This one little trick instantly makes your lighting look more balanced and professional.
And before you even think about shooting, give your product a good wipe-down. Use a microfiber cloth to get rid of dust, fingerprints, and smudges. Trust me, it’s way easier to clean the actual product than to try and edit out tiny imperfections later.
Essential Smartphone Camera Settings
Your phone’s camera app is designed for selfies and vacation pics, not precise product shots. A couple of quick tweaks will give you the control you need.
Before we get into the specifics, here's a quick cheat sheet for the most important settings to check before you start shooting.
Smartphone Camera Settings for Product Photography
| Setting | What It Does | Pro Tip |
|---|---|---|
| Gridlines | Overlays a 3×3 grid on your screen. | Turn this on! It's the easiest way to ensure your product is perfectly centered and your lines are straight. |
| AE/AF Lock | Locks the Auto-Exposure and Auto-Focus. | Tap and hold on your product until you see a lock icon. This stops the camera from annoyingly refocusing or changing brightness mid-shot. |
| Digital Zoom | Artificially magnifies the image, reducing quality. | Never, ever use it. If you need a closer shot, physically move your phone closer to the product. Your final image will be much sharper. |
| Flash | Uses the phone's built-in LED light. | Keep it off. The on-camera flash creates harsh, flat, and unflattering light that will ruin your shot. |
| RAW Mode | Captures uncompressed image data (if available). | If your phone has this, use it. It gives you far more flexibility for editing color and exposure later without losing quality. |
Getting these settings dialed in takes less than a minute but makes a world of difference. You're telling your camera to stop guessing and start taking your instructions, which is exactly what you want for consistent, high-quality results.
Pro Tip: My go-to move is to always tap and hold on the product to lock focus and exposure. It’s a simple habit that prevents the camera from getting confused and ensures my product stays perfectly sharp and correctly lit, no matter how I adjust the composition.
Got your smartphone photos ready to go? Awesome. The next step is turning them into the clean, professional shots you see on major retail sites. This is where a good AI white background maker comes in—it completely automates what used to be a mind-numbingly tedious manual job in Photoshop.
Picking the right tool is key. It’s not just about saving time; it's about getting a polished, consistent look across all your product listings. Look for platforms that offer advanced clipping solutions so you get the most precise background removal possible. The best ones are amazing at detecting tricky edges, which is a lifesaver for products with fine details. Don’t just settle for a basic tool; you want one that gives you real control.
Key Features to Look For
Let's be real, not all AI editors are the same. You need to focus on features that directly impact your workflow and the final quality of your images. A confusing interface is a deal-breaker—you shouldn't need a graphic design degree to make your products look good.
Here’s what really matters:
- Precise Edge Detection: The AI has to be smart enough to separate your product from its original background. This means cleanly handling tough spots like fuzzy sweaters, transparent glass, or delicate jewelry chains without leaving weird, jagged edges.
- Batch Processing: This is a non-negotiable for anyone selling more than one or two items. Being able to upload an entire photoshoot and have the AI work its magic on all the images at once will change your life. Seriously.
- Refinement Tools: AI is incredible, but it’s not infallible. The best tools include manual brushes—usually called "erase" and "restore"—so you can easily touch up any little spots the algorithm missed.
A Quick Look Under the Hood: The tech behind these tools has gotten so much better. We're seeing huge leaps in AI, especially with diffusion models and segmentation neural nets. This is what allows them to handle complex stuff like hair and see-through materials with stunning accuracy. In fact, industry projections show a 75% rise in diffusion model use among creators by 2025, which means the quality of background removal is only going to get better.
Your Typical Editing Workflow
Once you've found a white background maker you like, the actual process is refreshingly simple. It’s usually a quick three-part workflow built for speed, taking you from upload to final export in minutes.
The infographic below nails the prep work that happens before your photos even touch the AI editor.
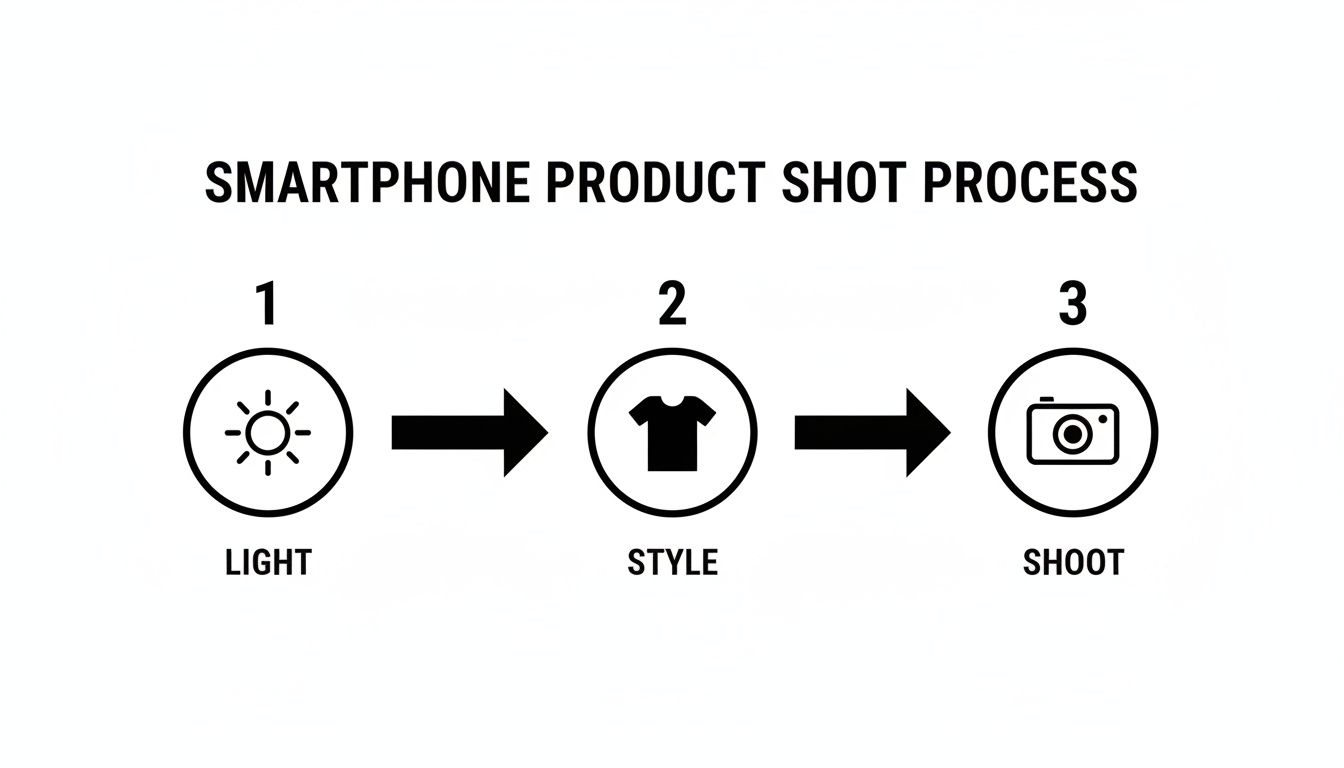
It’s a great reminder that a fantastic final image always starts with solid lighting, styling, and shooting.
You'll kick things off by uploading your images, either one at a time or as a whole batch. The AI immediately gets to work, identifying and zapping the background. Within seconds, your product is sitting on a crisp, pure white canvas. With most modern tools, this first pass gets you 95% of the way there.
The last part of the process is refinement. Zoom in and give the edges a quick once-over. See any minor mistakes, like a bit of shadow that wasn't fully erased or a tiny piece of your product that got snipped by accident? Just grab the refinement brushes and make a few quick tweaks. Once you’re happy with how it looks, you can export your images, perfectly formatted for any marketplace. This is what makes a great AI product photo generator such an invaluable tool for modern sellers.
Meet Marketplace Image Requirements Every Time
So, you’ve nailed the perfect product shot with a crisp, clean white background. That's a huge win, but it's only half the battle. Before you can start selling, your images have to get past the gatekeepers—the strict technical requirements of ecommerce giants like Amazon, Shopify, and Etsy.
If your images don’t tick all their boxes, you're looking at frustrating listing rejections and delays. It's a momentum killer.
Each platform plays by its own rulebook, and these aren't just friendly suggestions. They're hard-and-fast requirements enforced by automated systems. This is where a good white background maker becomes your secret weapon, giving you the control to fine-tune every export and ensure compliance right from the start.

Decoding the Technical Specs
Getting these details right is what separates the pros from the amateurs. Amazon, for example, is famous for its 1000-pixel minimum on the longest side. Why? It's all about enabling their zoom feature, a tool that shoppers rely on to inspect products up close. If your image is too small, you lose out on a massive conversion driver.
Making your products stand out is crucial, and that's where Amazon listing optimization services can offer a deeper dive into making your entire storefront shine.
Here are the core specs you need to get right every single time:
- Image Dimensions: This is simply the height and width of your photo in pixels. Marketplaces have minimums (and sometimes maximums) to keep everything looking sharp and uniform. A safe bet that works almost everywhere is 2000 x 2000 pixels.
- File Format: You'll mainly be dealing with JPEG and PNG. For product photos on a solid white background, JPEG is almost always the better choice. It keeps the file size down, which means your pages load faster for impatient shoppers.
- Color Profile: This one is subtle but critical. The web standard is sRGB. If you don't export with this profile, your product colors can look washed out or just plain wrong on different screens. Always double-check this setting.
A Quick Guide to Marketplace Specs
To make things easier, here’s a quick-glance table comparing the standard image specifications for some of the top ecommerce platforms. Getting these right ensures your product photos are always compliant and ready to go live.
| Platform | Minimum/Maximum Size (pixels) | Background Requirement | Recommended Format |
|---|---|---|---|
| Amazon | Min: 1000px on the longest side. Max: 10,000px. | Pure white (RGB 255, 255, 255) for main image. | JPEG |
| Shopify | Up to 4472 x 4472px; recommends 2048 x 2048px. | Not strictly required, but white is standard practice. | JPEG |
| eBay | Min: 500px on the longest side. | Clean, uncluttered; white is highly recommended. | JPEG |
| Etsy | Recommended: 2000px on the shortest side. | Not strictly required, but recommended for clarity. | JPEG |
This table covers the basics, but always check the latest guidelines directly from the marketplace, as they can update their rules.
Setting Up Your Export Presets
The smartest way to stay compliant is to build presets inside your white background tool. Set one up for Amazon, another for Shopify, and so on. Dial in the exact dimensions, file type, and quality settings each one needs.
Once that's done, your workflow becomes incredibly simple. It completely removes the guesswork and saves a massive amount of time, especially when you're processing dozens of photos.
This need for speed and precision is why so many sellers are turning to specialized visual content tools. In fact, over 56% of marketers are now boosting their investment in visual content, leaning on platforms that simplify image production from start to finish.
By mastering these technical rules, you ensure your images don't just look professional—they sail through every marketplace's approval process without a hitch. This focus on the details is a cornerstone of professional Amazon product photography and a key to scaling your business.
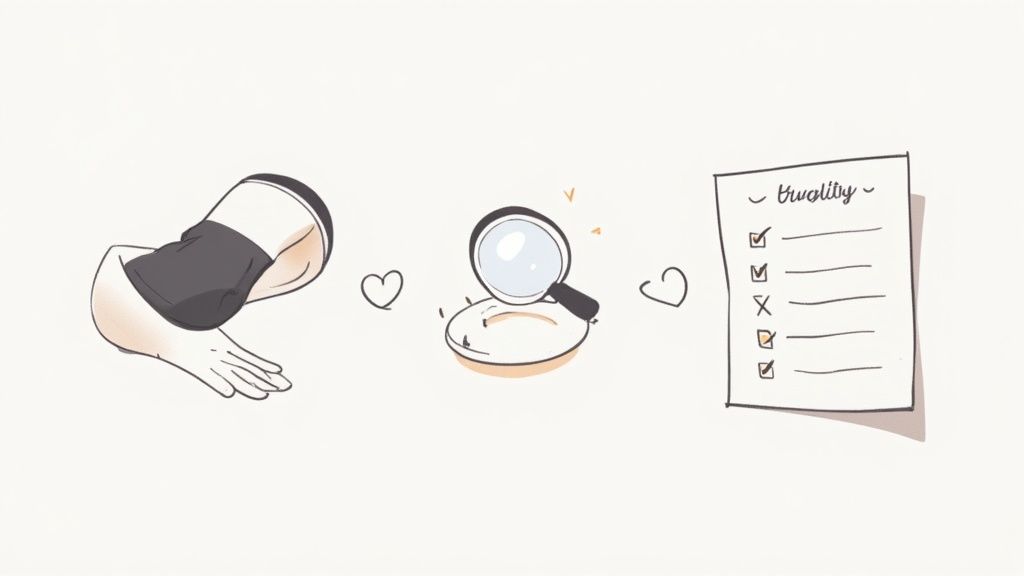
Your Final Quality Check Before Publishing
Alright, you've used the AI tool, and your product is sitting on a crisp, clean white background. It's tempting to just download and upload, right? Hold on a second. This final, quick look-over is what separates the pros from the rest.
Taking just a minute to do a quality assurance (QA) check is your last line of defense. It ensures your entire product gallery looks polished and cohesive, preventing those tiny, overlooked mistakes that can make a potential customer click away. The AI gets you 99% of the way there, but your human eye is what adds that final touch of perfection.
The Essential QA Checklist
Before you hit export, run through this simple checklist. It might seem like a small thing, but these details add up to create a powerful impression of quality and trustworthiness for your brand.
-
Edge Integrity: Get in close. Zoom in on the edges of your product and look for any weirdness. Are there any fuzzy glows or slightly jagged lines the AI might have left behind? This is most common around tricky curves or textures, so give those spots an extra look.
-
Shadow Consistency: If you've added shadows, do they look real? Even more importantly, are they consistent from one photo to the next? The angle, softness, and darkness of your shadows should be the same across all images. Uniformity is what makes the whole set look believable.
-
Cropping and Centering: Take a step back. Is the product centered properly, or is it drifting off to one side? Consistent framing across your product grid is huge for making your storefront look clean and professional. Use your editor’s guides to make sure everything is perfectly aligned.
-
Lighting and Color Uniformity: Now, pull up your final images side-by-side. Does one look a little brighter or warmer than the others? This is an easy mistake to make but also an easy one to fix. A quick comparison helps you spot any outliers so your gallery feels like a single, professional shoot.
One of the most common mistakes I see is uneven lighting. A product shot under slightly different conditions can stand out in a grid for all the wrong reasons. A final check ensures every item looks like it belongs in the same professional photoshoot.
Making this QA checklist a non-negotiable part of your workflow guarantees every image you post is top-notch. It’s a simple, repeatable process that builds incredible trust with buyers by showing them you care about the little things.
Scale Your Image Production With Smart Workflows
Moving from a handful of product shots to an entire catalog is a huge leap. What worked for ten images will quickly become a bottleneck when you’re dealing with a hundred. The secret isn't working harder; it's working smarter by building a repeatable, efficient workflow.
Consistency is the bedrock of a professional-looking storefront. When every image has the same lighting, angle, and background, it builds subconscious trust with your customers. A streamlined process ensures you get this look every single time, without having to reinvent the wheel for each photoshoot.
Create and Save One-Click Presets
Your white background maker is more than just an editing tool; it’s a command center for consistency. The most powerful, time-saving feature you can master is creating and saving export presets. Think of a preset as a saved recipe for your perfect image.
Instead of manually tweaking dimensions, file types, and quality settings for every single batch, you can create specific presets for each marketplace you sell on.
- Amazon Preset: Configure it for a 2000×2000 pixel canvas, a high-quality JPEG, and the required sRGB color profile.
- Shopify Preset: Set it to a versatile 2048×2048 pixels to look sharp on all screen sizes.
- Marketing Preset: Create a version that exports as a PNG with a transparent background, perfect for dropping into social media graphics or email campaigns.
Once these are in place, exporting a finished batch of photos for a specific channel becomes a simple one-click process. This step alone eliminates human error and guarantees every image meets the exact technical requirements without a second thought.
A well-organized workflow is your best defense against inconsistency. By establishing clear standards for everything from file names to shooting angles, you create a system that anyone can follow, ensuring your brand's visual identity remains strong as you scale.
Develop a Smart File Naming System
Let's be honest, a folder full of files named IMG_8394.JPG is a recipe for disaster. A logical naming convention is essential for keeping your digital assets organized and easily searchable down the road. The best systems are both descriptive and scalable.
Consider a structure like this one:
[ProductName][SKU][Angle]_[Version].jpg
So, for example, a file might be named:BlueSuedeShoes_SHOE123_Front_01.jpg
This tells you everything you need to know at a glance. You can instantly find all front-facing shots, all images for a specific SKU, or different edited versions of the same photo. This level of organization is an absolute lifesaver, especially when you need to quickly find and update an image months later.
Maximize Your Image Assets
Every clean, white-background image you create is a valuable asset that can be repurposed for countless marketing activities. The initial effort you put in pays dividends long after the product is listed.
Once you have that perfect shot, you can quickly:
- Add a new, colorful background for a social media campaign.
- Incorporate promotional text for a holiday sale banner.
- Use it in email newsletters to announce new arrivals.
This approach maximizes the return on your initial photography and editing time. For a deeper dive into handling massive volumes, our guide on photographing 1,000 items in a batch provides even more advanced strategies for scaling up. By treating each image as a versatile building block, you create a library of content that can fuel your entire marketing strategy.
Common Questions About White Background Makers
Even with the best AI tools, you're going to have questions as you dial in your process. This section is your go-to guide for the most common hang-ups and questions that pop up when you start using a white background maker for your product shots.
Getting these little details right is what separates an okay image from one that's clean, effective, and ready to sell.
Why Do Marketplaces Require Pure White Backgrounds?
Ever wonder why platforms like Amazon are so incredibly strict about pure white backgrounds? They're not just being picky. The technical requirement is RGB (255, 255, 255)—a true, digital white with zero tint.
This isn't just about looks; it’s a critical piece of their customer experience strategy.
A perfectly uniform background creates a clean, consistent shopping environment. It lets customers focus entirely on the product, making it way easier to compare items without being swayed by busy or branded backdrops. This visual consistency builds a sense of professionalism and trust across the whole platform. Using a dedicated white background maker is the only reliable way to nail this technical spec and keep your listings from getting flagged.
Can AI Really Handle Complex Stuff Like Jewelry or Fur?
Absolutely. This is where modern AI tools really flex their muscles. Older background removers would choke on anything more complicated than a shoebox, but today's algorithms are a different beast entirely.
They've been trained on millions of images, learning to identify and isolate even the most challenging details, like:
- The tiny chains and clasps on delicate jewelry.
- The soft, fuzzy edges of a wool sweater or a faux fur collar.
- Transparent items like glassware or a bottle of perfume.
- Tricky negative space, like the gaps between bicycle spokes or through a purse handle.
The AI gets it right over 95% of the time on the first pass. But for those rare tricky shots, the best tools also give you refinement brushes. This means you can jump in and make tiny manual tweaks, giving you total control for a flawless result every time.
JPEG vs. PNG: Which One Should I Use?
This one trips people up all the time, but the answer is pretty simple once you know the goal. The whole game comes down to one thing: transparency.
- JPEG (or JPG): This format does not do transparency. Period. Any transparent pixels get filled in with a solid color, usually white. Because JPEGs use compression, they create smaller file sizes, which is great for fast-loading websites. For marketplaces that demand a solid white background, JPEG is your go-to.
- PNG: This is the format you need for transparency. If you want to save your product cutout to use in other designs—like dropping it onto a colored background for an Instagram post or a website banner—you have to export it as a PNG.
My Workflow Tip: I always export two versions of every final image. I save a high-quality JPEG for marketplace listings and a PNG with a transparent background that goes straight into my marketing asset folder. This saves me a ton of headaches later.
How Do I Add Realistic Shadows Back In?
When you remove the original background, you also strip out the natural shadows. This can leave your product looking flat and weirdly disconnected, like it’s floating in a white void.
Adding a realistic shadow back is the final touch that grounds your product, making it look professional and three-dimensional.
Luckily, you don't need to be a Photoshop wizard. Most good white background tools have shadow generators built right in. Look for options like "Drop Shadow" or "Ground Shadow." You can usually tweak things like the shadow’s angle, how soft or sharp it is, and its distance from the product. It’s a small step that makes a huge difference in how professional your photo feels.
Ready to create stunning, marketplace-ready product photos in seconds? ProdShot uses advanced AI to instantly remove backgrounds, add realistic shadows, and generate visuals that sell. Stop wrestling with complicated software and start creating professional images today. Try ProdShot for free at https://prodshot.net.