
Great clothing photos really boil down to three things: your gear, the lighting, and the scene you create. Nail these fundamentals, and you can take professional, sales-driving images even if all you have is your phone.
Setting The Stage For Compelling Clothing Photography
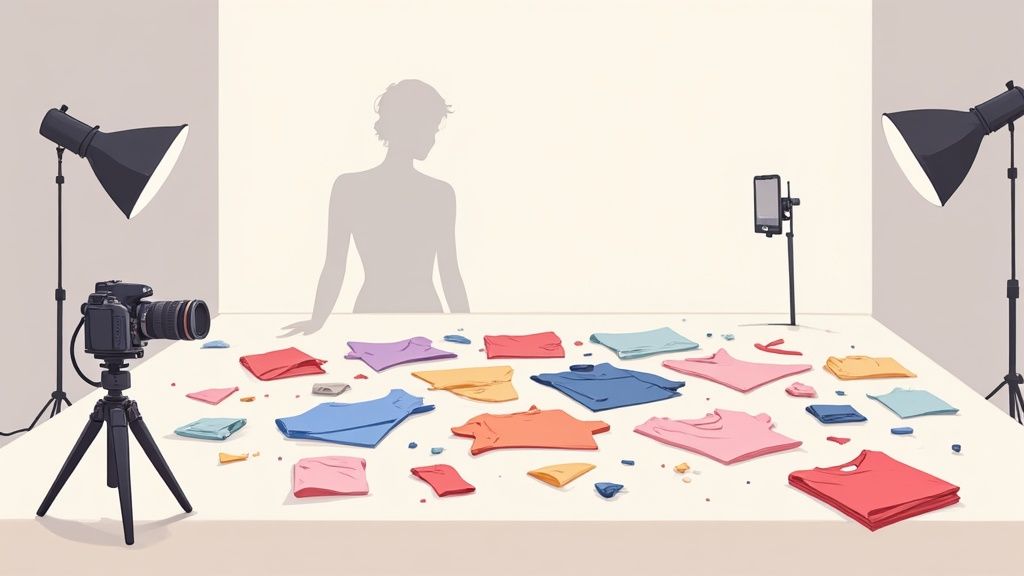
Before you even think about hitting that shutter button, the prep work you do is what truly makes or breaks your final images. I’ve learned over the years that great photography isn't about some magic that happens during the shoot—it’s the direct result of thoughtful planning.
This means making smart, practical choices about your equipment, light source, and environment to build a consistent, on-brand look.
The best part? You don’t need a Hollywood-sized budget to pull it off. High-quality clothing photos are completely achievable whether you’re using the smartphone in your pocket or investing in a more versatile DSLR. The trick is knowing how to get the most out of the tools you already have.
Getting this right is a huge deal for how customers see your brand. The demand for stunning visuals is exploding, with the photography services market growing from $55.6 billion in 2023 to a projected $81.83 billion by 2032, a surge driven almost entirely by e-commerce and fashion. It just goes to show how critical professional imagery has become.
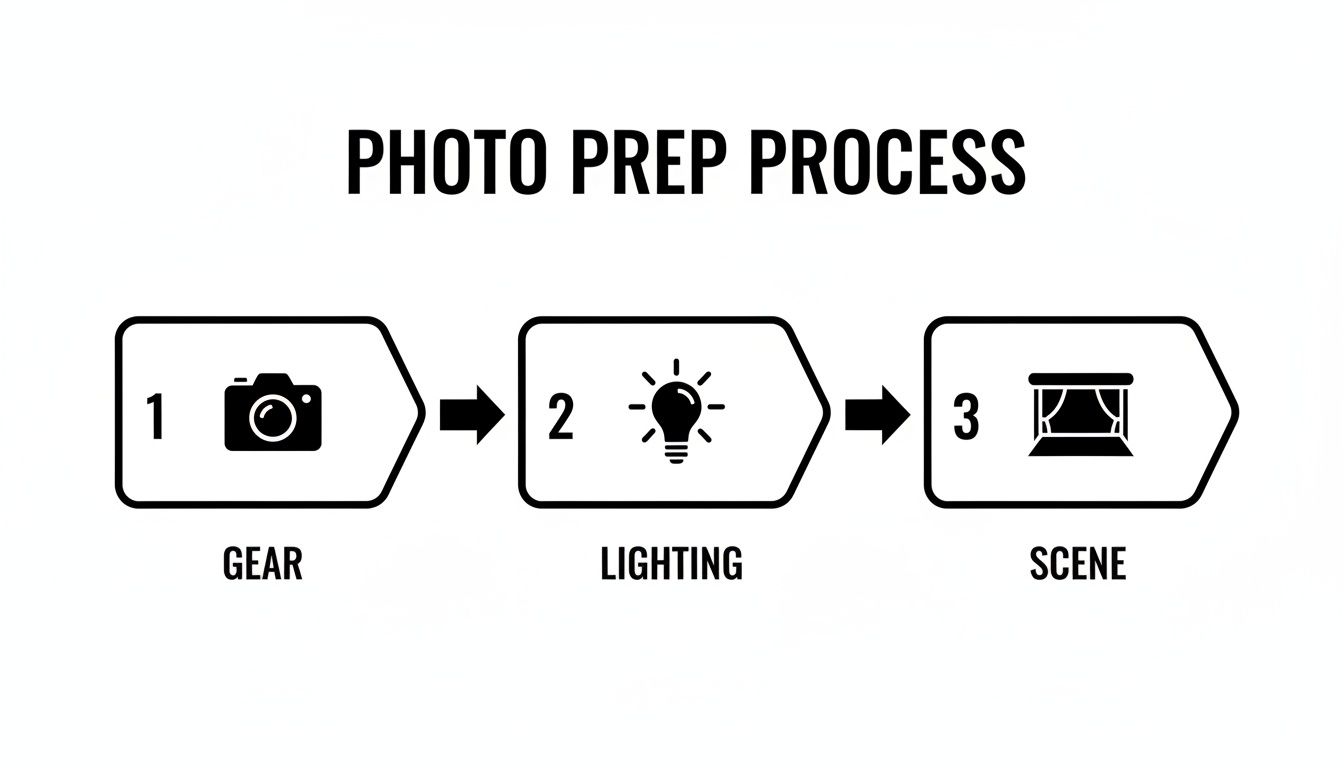
This little workflow sums it up perfectly. It’s all about getting your gear, lighting, and scene working together.
Choosing Your Gear: From Smartphone to DSLR
Your camera is obviously your main tool, but the "best" one is totally relative to your budget and what you’re trying to do. A modern smartphone is honestly more than capable of producing incredible product photos. Their built-in software is surprisingly powerful, and the high-resolution sensors deliver crisp, vibrant images that look great on any online marketplace.
If you're ready to step up and want more manual control, a mirrorless or DSLR camera is the way to go. These give you the flexibility of interchangeable lenses, so you can capture everything from wide lifestyle shots to tight, detailed close-ups of fabric and stitching.
A 50mm lens is a fantastic and surprisingly affordable starting point for clothing. It's often called a "nifty fifty" because it sees the world much like the human eye, producing natural-looking photos without weird distortion.
My Two Cents: Don't let a lack of fancy gear hold you back. The best camera is the one you have with you. Mastering its settings—especially exposure and focus—will do far more for your photos than buying the latest and greatest model.
No matter what camera you use, a sturdy tripod is non-negotiable. Seriously. It completely eliminates camera shake, guaranteeing your images are sharp and clear. This stability is also the secret to creating a consistent look across all your product listings, which is key for building customer trust and a professional brand image. The small investment in a good tripod pays for itself almost immediately. For more insights on where to allocate your budget, you can explore the costs of professional product photography.
Mastering Your Lighting and Background
Lighting is everything in photography. It sets the mood, defines texture, and makes your colors look true to life. You can’t beat the natural light from a large window—it's a fantastic and totally free resource. Just position your setup so the light comes in from the side. This creates soft, gentle shadows that give the garment shape and show off its details. Try to avoid harsh, direct sunlight, which creates ugly glares and can completely wash out the colors.
For more control and consistency, a simple artificial lighting kit is a game-changer. You don't need to go crazy. One or two softbox lights are enough to provide clean, even illumination that makes your products look amazing. This kind of setup gives you total control, so you can shoot whenever you want—day or night—and get the exact same look for every new item you list.
Finally, your background and props are what complete the scene. For marketplace listings on sites like Amazon or eBay, a pure white or light gray background is the gold standard. It cuts out all the distractions and keeps the focus 100% on the clothing. You can easily achieve this with a roll of seamless paper or even just a clean, well-lit wall.
When it comes to your lifestyle shots, pick backgrounds and props that tell your brand’s story. A rustic wooden table might be perfect for a heritage brand, while a minimalist concrete backdrop could be the ideal vibe for modern streetwear. The whole point is to build a world that your target customer can see themselves in.
Nail Your Shot List: The Essential Photoshoot Styles
One photo just won't cut it. To really grab a customer's attention and give them the confidence to click "Add to Cart," you need a mix of images that tell the full story of your product. Think of it as building a visual case—each photo is a piece of evidence that answers a potential question.
We're going to walk through the four core styles every clothing brand needs in their arsenal: the clean flat lay, the relatable on-model shot, the slick ghost mannequin, and the all-important detail shot. Getting these right will give your product pages the visual punch they need to convert browsers into buyers. If you want to dig even deeper, this comprehensive guide to product photography offers some great additional perspectives.
So, how do you decide which styles to focus on? Each one has its own strengths. I've put together a quick comparison to help you figure out what works best for your brand and your goals.
Choosing The Right Photoshoot Style For Your Goal
| Style | Primary Purpose | Pros | Cons | Best For |
|---|---|---|---|---|
| Flat Lay | Showcasing the item clearly and creatively. | Easy to style, versatile for social media, highlights patterns and details. | Can look flat, doesn't show fit or drape well. | Social media posts, email marketing, category pages. |
| On-Model | Showing fit, movement, and creating an emotional connection. | Helps customers visualize themselves in the clothes, dynamic and relatable. | Can be expensive (models, location), requires more direction. | Hero images, lifestyle content, showing how an item moves. |
| Ghost Mannequin | Displaying the garment's 3D shape and structure without distraction. | Clean and professional, shows form and fit accurately, uniform look. | Requires specific photography and post-production skills. | Primary product images on e-commerce sites (e.g., Shopify, Amazon). |
| Detail Shot | Highlighting quality, craftsmanship, and unique features. | Builds trust and justifies price, shows off what makes the item special. | Can feel disconnected without context from other shots. | Secondary product images, reinforcing quality and reducing returns. |
By mixing and matching these styles, you give shoppers a complete picture. Now, let's break down how to execute each one.
The Flawless Flat Lay
This is the art of arranging your clothing on a flat surface and shooting from directly overhead. It's a go-to for social media and marketing because it produces a clean, organized, and often creative look.
Your first step is always to get the wrinkles out. Seriously, a handheld steamer is non-negotiable here; tiny creases look like giant flaws on camera. Next, find your background. A simple white poster board is great, but don't be afraid to use a rustic wooden table or a cool textured rug if it fits your brand's personality.
Composition makes or breaks a flat lay. Create a more natural, "lived-in" feel by giving a sleeve or hem a gentle S-curve. To add a bit of context, bring in one or two simple props—sunglasses, a book, a coffee mug—that complement the item without stealing the spotlight.
Engaging On-Model Photography
Flat lays are fantastic, but nothing demonstrates fit, drape, and movement like seeing clothes on an actual person. Model shots are critical because they help shoppers see themselves wearing your product. They answer the question, "How will that dress flow when I walk?"
You don't need to be a seasoned art director to get great shots. The goal is natural, authentic poses, not stiff, robotic stances. Encourage movement! Have your model walk, laugh, or interact with something in the environment.
Here are a few dead-simple posing cues that always work:
- The Casual Lean: Leaning against a wall instantly creates a relaxed, effortless vibe.
- Hands in Pockets: It's a classic for a reason. This looks casual and shows off the fit around the hips.
- Walking Towards Camera: This creates motion and shows exactly how the fabric moves with the body.
These photos are your chance to sell the experience of wearing your clothes. For more ideas on creating lifestyle content, check out our guide on making fashion product photos that truly connect with customers.
The Professional Ghost Mannequin Effect
The ghost mannequin (or "invisible mannequin") technique is a fantastic way to show a garment's true shape in 3D without the distraction of a model. It’s the perfect compromise between a flat lay and a person, giving you a clean, professional look that’s ideal for your main product images.
The magic happens in post-production. You take multiple shots of the item on a mannequin and then digitally stitch them together to remove the mannequin itself. You'll need shots of the front and back, plus separate photos of any interior details that are covered up, like the inside of the collar or cuffs.
Pro Tip: For the interior shots, turn the garment inside-out and put it back on the mannequin. This makes it way easier to composite the pieces later for a seamless, hollowed-out effect.
While it takes a bit of editing know-how, the result is a crisp, uniform image that beautifully highlights your product's construction.
Trust-Building Detail Shots
Never, ever underestimate the power of a great detail shot. These close-ups are where you get to show off the quality and build serious customer confidence. By showing people exactly what they're paying for, you can drastically cut down on returns.
Think about what makes your product special and get your camera in close.
Key Details to Capture:
- Fabric Texture: Show the weave of the denim or the softness of the cashmere.
- Stitching Quality: Zoom in on those clean, straight seams.
- Unique Hardware: Focus on custom buttons, branded zippers, or special tags.
- Special Features: Got an embroidered logo, a hidden pocket, or delicate lace trim? Show it off!
These shots prove you're proud of your craftsmanship and have nothing to hide. They elevate a simple piece of clothing into a well-made garment that customers will feel great about owning.
Creating a Lifestyle Narrative For Your Brand
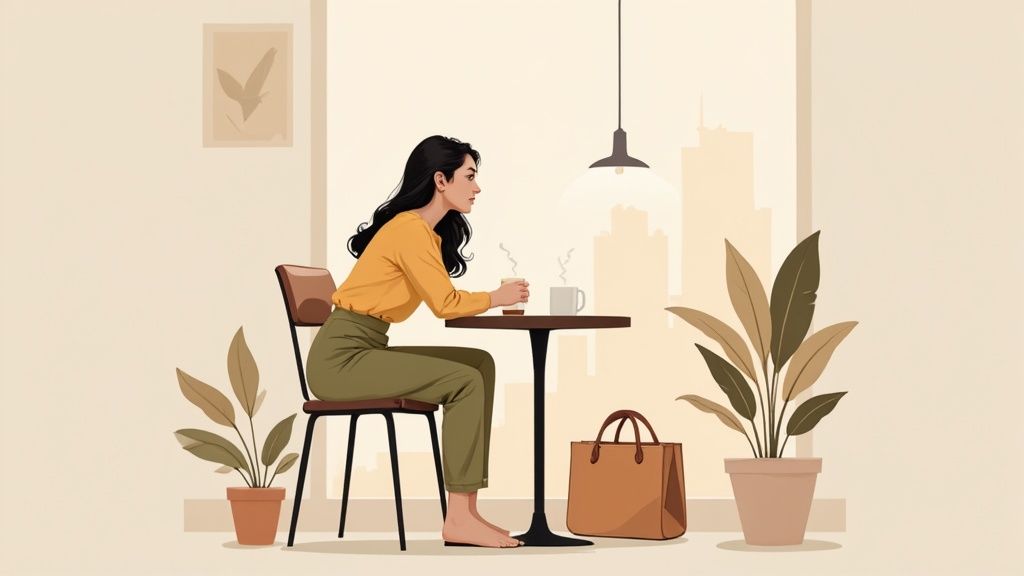
Clean studio shots are absolutely essential for your product pages, but lifestyle photography is where you actually build a brand. This is where you stop just selling a garment and start selling an experience, a feeling, an entire vibe. These are the images that let customers connect emotionally with your products and picture them as part of their own lives.
For any clothing brand, a compelling visual story is at the heart of an effective e-commerce marketing strategy. It’s what turns a basic t-shirt into the perfect shirt for a first date, or a cozy sweater into the ideal companion for a weekend getaway. You can't overstate the power of these images.
This shift to storytelling is more critical than ever when you look at the market. Online fashion sales are on track to hit an incredible $1.2 trillion by 2025, and that growth is fueled by stunning photography that stops the scroll. We've all seen how trends like #OOTD can explode overnight, proving that one powerful image can make all the difference.
Choosing Locations That Tell Your Story
Think of your setting as a stage—it needs to perfectly match your brand's personality. Don't just pick a location because it looks pretty; choose one that feels authentic to the story you're trying to tell. A grungy, graffiti-covered wall might be perfect for an edgy streetwear brand, while a sun-drenched, minimalist coffee shop would be a much better fit for a brand focused on sophisticated casual wear.
Get inside your target customer's head. Where do they hang out? What do they do for fun?
- For the urban explorer: Think city streets, subway stations, or rooftop gardens.
- For the nature lover: Consider scenic parks, quiet hiking trails, or a beach at sunrise.
- For the homebody: A cozy, well-lit living room or kitchen can create a deeply relatable scene.
The key is creating an environment that feels both aspirational and achievable. Your customer should be able to look at the photo and think, "I want to be there, and I can be."
My Personal Tip: Always, always scout your locations beforehand. Go at the same time of day you plan to shoot to see what the light is really doing. This one simple step can save you hours of frustration and helps you plan your shot list with confidence.
Directing Models For Authentic Moments
The biggest mistake you can make in lifestyle photography is letting your model look stiff and posed. You're aiming for authentic, candid moments that feel like you just happened to catch someone living their life. The secret? Give directions based on actions, not static poses.
Instead of saying "stand there and smile," try giving prompts that encourage natural movement and genuine emotion.
Action-Based Posing Cues:
- "Walk towards me, then look back over your shoulder like you heard someone call your name."
- "Adjust the cuff on your jacket and then glance up at the building across the street."
- "Take a sip of your coffee and laugh like you just heard a really funny joke."
These small actions instantly break the tension and lead to much more believable expressions and body language. You're not just taking a picture of a person in your clothes; you're capturing a moment in their story.
The Art Of Storytelling Through Props
Props are the final layer of your visual narrative. They add context and depth to the scene. And just like your location, your props should be chosen with intention and feel like they naturally belong in the environment.
A well-placed prop can completely change the mood of a photo. A laptop and a notebook on a cafe table suggest productivity and a modern work-life balance. A vintage bicycle leaning against a brick wall can evoke a sense of nostalgia and carefree adventure. The goal is to build a world around your product that resonates with your ideal customer, making all your clothing photo ideas come to life.
Creative Clothing Photo Ideas That Stop the Scroll
Your standard product shots on a white background are the workhorses of any e-commerce store. They're essential. But in a feed full of similar-looking items, they don't always stop the scroll.
If you really want to capture a buyer's imagination, you need images that feel dynamic, artistic, and memorable. This is your chance to step away from the clean studio setup and inject some real personality into your brand's visual identity. It's a strategic move that forges a stronger emotional connection and shows off your products in an entirely new light.
Let's break down a few creative techniques that work for any brand, whether you're selling high-fashion pieces or durable activewear. These ideas are designed to be both inspiring and totally achievable.
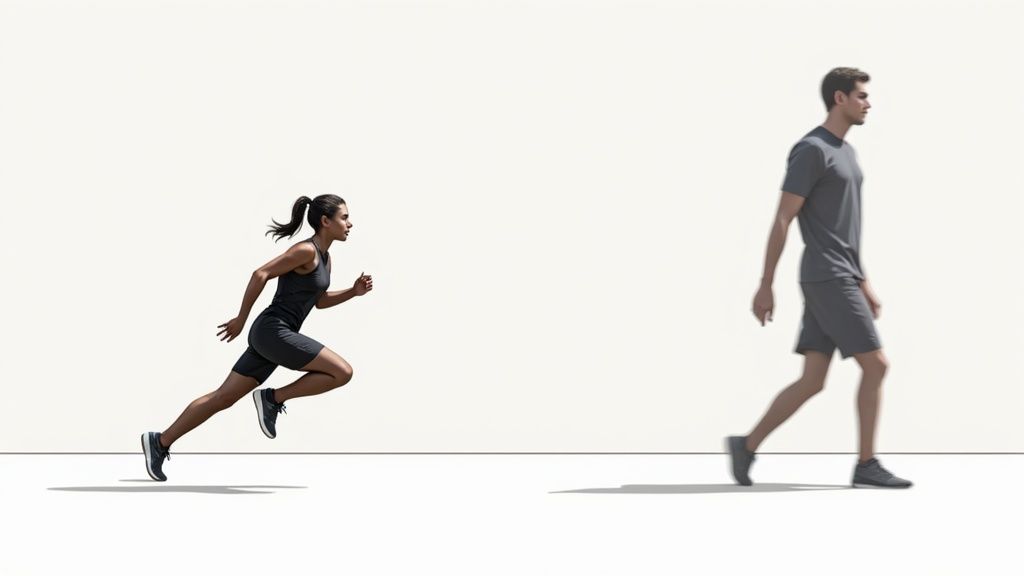
Inject Energy With Intentional Motion Blur
When you’re selling activewear or anything designed for movement, a stiff, static pose just feels wrong. It doesn't tell the right story. Intentional motion blur is a fantastic technique for conveying energy, freedom, and how your clothing actually performs in real life.
To get this effect, you'll need to slow down your camera's shutter speed. I've found that a setting somewhere between 1/15th and 1/60th of a second is a great starting point. As your model moves—walking, spinning, or running—the camera captures that motion as a graceful blur, keeping parts of the image just sharp enough.
A few ways to try this:
- Panning: This is a classic. Follow your moving subject with the camera and press the shutter button mid-motion. This keeps your model relatively sharp while the background blurs into streaks of color, creating a killer sense of speed.
- Stationary Subject, Moving Limbs: Have your model stand still but move their arms or legs. This creates a beautiful, almost ethereal effect that works wonders for showing the flowy fabric of a dress or skirt.
Suddenly, the viewer doesn't just see the leggings; they feel the energy of the run. That's powerful stuff.
Create Mood With Hard Shadows and Color
Soft, even lighting is the gold standard for e-commerce, but it's not the only way. Playing with hard light and dramatic shadows can give your photos a high-fashion, editorial vibe that's perfect for lookbooks, social media, or hero images on your website.
The trick is to use a single, direct light source. Think of the sun on a clear day or a single bare-bulb studio light. This harsh light casts deep, defined shadows that add an incredible amount of depth, texture, and drama to an otherwise simple shot.
Creative Tip: Position your model near a window with blinds or even a plant with interesting leaves. The light filtering through will cast intriguing patterns across the scene, turning a simple portrait into something much more artistic.
You can take this even further by using colored gels. These are just inexpensive transparent sheets you place over your light source to tint it. A splash of a warm orange or a cool blue can completely transform the mood and create a cohesive, branded look for an entire campaign.
Tell a Story With Themed Lookbooks
A themed lookbook is one of the most effective ways to launch a new collection. Instead of just showing individual items, you’re building a cohesive visual narrative. You're telling a story. This helps customers see the inspiration behind the collection and, crucially, how different pieces work together.
The theme can be anything that clicks with your brand's DNA:
- A "Weekend Escape" theme could feature cozy knits and comfy denim shot in a rustic cabin.
- A "City Noir" theme might use sharp tailoring and dark colors against a moody, urban backdrop at night.
- A "Summer Nostalgia" theme could lean on vintage-inspired props at a sun-drenched beach.
The real power here is that you're selling an entire aesthetic, not just a single product. You're building a world around your brand that customers want to be part of. This is how you turn a one-time purchase into lasting brand loyalty.
Polishing Your Photos: A Streamlined Post-Production Workflow
Getting the shot is really just the starting line. The real magic—the part that turns a decent photo into an image that actually sells—happens in post-production. An efficient editing workflow is your secret weapon for creating that polished, professional, and consistent look that defines a trustworthy online store.
This whole process doesn't need to be a major time-suck, either. Once you nail down a clear set of steps and find the right tools, you can get from raw image to marketplace-ready in a surprisingly short amount of time. The idea is to make smart, repeatable adjustments that make your images pop without getting bogged down for hours on every single photo.
First Things First: Cull Your Shots
Your first job is always to cull your photos. All this means is going through everything you shot and picking out the absolute winners. I know it's tempting to keep a few "just in case" options, but that habit will only slow you down. You have to be ruthless.
Look for images that are tack-sharp, well-composed, and show the clothing in its best light. Toss anything that's even slightly out of focus, has an awkward pose, or features a distracting background element you can’t easily fix. Trust me, this one step alone will save you a massive amount of editing time down the road.
Nailing the Color and Essential Retouching
With your final selections in hand, it's time for color correction. For clothing, this is arguably the most critical part of the editing process. You absolutely need the color of the product in the photo to be an exact match to the item in real life. Mismatched colors are one of the biggest reasons for customer returns and bad reviews.
Most editing software gives you control over white balance, exposure, contrast, and saturation. Your goal here is realism. Avoid slapping on trendy filters or going for overly dramatic edits on your main product shots; you can save that for social media. The aim is a clean, accurate, and appealing photo of what the customer is actually buying.
For the little fixes, focus only on small imperfections that take attention away from the product.
- Dust and Lint: Zoom way in and use a spot healing tool to zap any distracting specks from the fabric.
- Minor Wrinkles: A clone stamp or healing brush can help soften any stubborn creases you missed with the steamer.
- Background Scuffs: Clean up any smudges or marks on your backdrop so it's perfectly uniform.
If you find yourself spending way too much time on these little fixes, tools like ProdShot can automate a huge chunk of this. To see what's really possible, you can explore the world of AI-powered product photo retouching that handles these tedious tasks in seconds.
Creating a Clean, Consistent Background
For most big online marketplaces like Amazon or Shopify, a pure white background isn't just a friendly suggestion—it’s a hard requirement. It creates a clean, distraction-free shopping experience and puts 100% of the focus on your clothing.
Manually cutting out backgrounds can be incredibly tedious work that requires a very steady hand. This is where AI-driven tools have become a total game-changer for online sellers. They can detect the edges of your product and remove the background flawlessly in just a few seconds.
Here's a quick look at how an AI tool can instantly give you that clean, pro-level background.
You literally just upload a photo and the AI handles the complex task of background removal, saving you a ton of manual effort.
Key Takeaway: A consistent background is the foundation of a professional-looking product gallery. Automating this step gives you back valuable time and ensures every single one of your product photos has the same polished, high-quality look.
Batch Processing to Get Your Images Web-Ready
The final step is prepping your images for your website. Every platform has its own rules for image size, file type, and aspect ratio. Adjusting these one-by-one is a recipe for a headache.
This is where batch processing saves the day. Most editing programs let you create an "action" or a preset that applies the exact same settings to an entire folder of images all at once. For example, you can set it to resize all your photos to 2048 x 2048 pixels, apply a consistent sharpening effect, and export them as web-optimized JPEGs. Creating a simple export template like this ensures every image on your site is uniform, which leads to a faster-loading, more professional-looking store.
Got Questions About Clothing Photography? I've Got Answers.
Even with the best plan, you're going to run into questions on shoot day. It just happens. This section tackles some of the most common hurdles I see sellers face, with straight-up, practical answers to keep your momentum going.
Let's dive into some of the big ones, from getting killer shots with just your phone to building that consistent brand look everyone's after.
How Can I Take Good Clothing Photos With My Phone?
You absolutely can. Modern phone cameras are incredible, but the real secret is light. Always, always, always start with light.
Find a large window and set up near it. That soft, natural, indirect light is a miracle worker for showing off fabric textures without harsh shadows. Next, turn on your phone's gridlines—they're a lifesaver for lining up your shots. And don't forget to tap the screen right on the garment to lock in your focus.
The biggest mistake I see people make? Pinching to zoom. It completely nukes your image quality. Just move your feet and get physically closer to the item. A cheap phone tripod is also a brilliant investment; it eliminates that dreaded hand-shake blur and keeps every shot sharp.
For the final polish, a free app like Lightroom Mobile or Snapseed is all you need. A quick tweak to the brightness and a little color pop can take your photos from "phone pic" to "pro shot" in seconds.
What Are The Most Important Shots For An Online Store?
You want to give your customer the full picture, literally. Aim for a solid 5-7 key images for every single product. This mix covers all the bases and helps shoppers feel like they've seen the item in person.
Here’s a shot list that works every time:
- The Essentials: Clean front and back views. A model or a ghost mannequin works best here.
- The Dimensional Shot: A 45-degree angle view is perfect for showing off the item’s silhouette and how it hangs.
- The Quality Check: Get in close for at least two detail shots. Think fabric weave, a unique button, or the quality of the stitching. This is where you build trust.
- The In-Real-Life Shot: Wrap it up with one or two lifestyle photos. Show someone wearing it out and about. This helps customers imagine it in their own lives.
This combo of clean, informative shots and aspirational lifestyle photos answers almost every question a buyer could have, from "What's the texture like?" to "How could I style that?"
How Do I Make My Clothing Photos Look Consistent?
Consistency is everything. It’s what makes your shop look legit and builds that all-important brand recognition. The simplest way to nail this is to create your own "style guide."
Figure out your go-to lighting setup, your preferred background, and your camera settings. Write them down. Use them for every single shoot. It might feel rigid at first, but this discipline is what creates a cohesive look.
In the editing phase, create a preset or follow the exact same steps for every batch of photos. This guarantees your colors, brightness, and contrast are uniform across your entire store. For your lifestyle shots, stick to a similar mood or color palette—that’s how you build a vibe that customers will remember.
What Is The Best Background For Clothing Photography?
This really depends on where the image is going.
For your main product listings, especially on marketplaces like Amazon, pure white or light gray is the undefeated champion. It’s clean, removes distractions, and puts 100% of the focus on your product. It's the industry standard for a reason—it works.
But for your own website, Instagram, or a lookbook, the "best" background is the one that tells your brand's story. Are you minimalist and modern? A warm, uncluttered interior might be perfect. Edgy and urban? Try a textured brick wall. Earthy and natural? A beautiful outdoor landscape could be your signature.
Just remember the golden rule: the background should always complement the clothing, never compete with it.
Ready to turn those snapshots into polished, marketplace-ready images? With ProdShot, you can automatically remove backgrounds, fix lighting, and generate conversion-focused visuals in just a few clicks. Try ProdShot for free and see the difference it makes for your online store.