
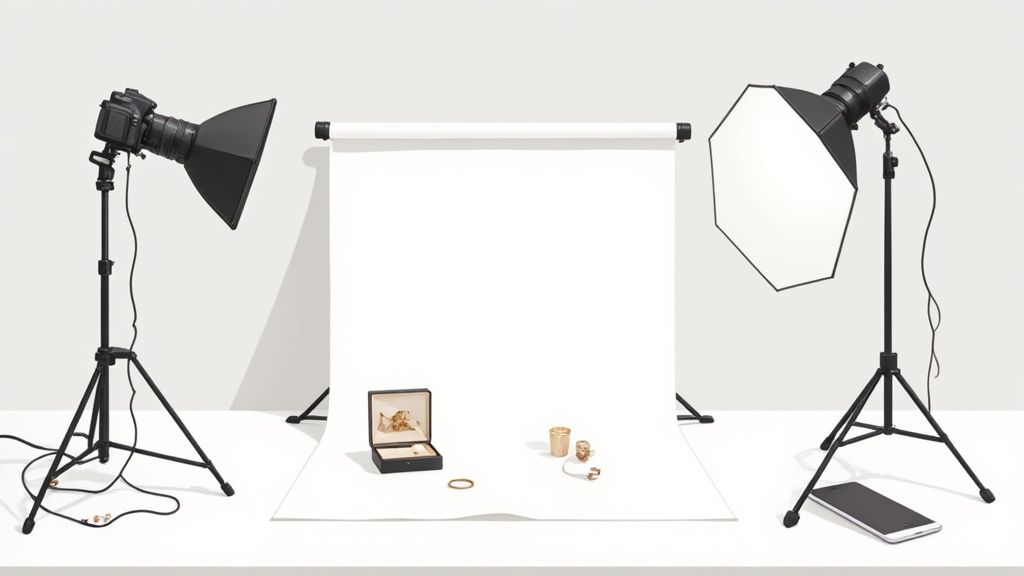
Backdrop product photography can be a game changer for your online store.
By swapping out messy, wrinkled backgrounds for clean, seamless setups, you’ll immediately notice listings that feel more professional—and perform better. A small jewelry shop I worked with saw a 35% jump in clicks just by moving from fabric to paper.
How Backdrops Transform E-Commerce Images
Picking the right backdrop isn’t just about looks—it’s about building trust with shoppers and making your post-shoot edits a breeze. When colors and textures stay consistent, AI tools like ProdShot sail through background removal without hiccups. Here’s what you’ll tackle in this guide:
- Material choices that keep glare at bay and render true-to-life colors
- Lighting setups designed to banish harsh shadows
- Composition and styling tricks that draw eyes to your product
- On-the-fly fixes for wrinkles and unwanted reflections
- Prep tips for AI-driven editing to speed up your workflow
Market research drives this home. The global commercial photography market is expected to hit USD 5.1 billion by 2025, with 45% of that—roughly USD 163.9 million—coming from product shoots. By 2030, it’s forecast to climb to USD 275.4 million at an 11.6% CAGR. For more details, check out the full ElectroIQ report on e-commerce product photography.
A consistent backdrop not only boosts clicks by over 30% but also slashes editing time.
Key Stages In Backdrop Setup
-
Material Selection
In my experience, seamless paper is unbeatable for a wrinkle-free sweep. Fabric can work if you need to reuse it, but expect a few tucks and irons. -
Lighting And Camera Setup
Softboxes on either side of your subject keep shadows soft. Dial your ISO low and stop down your aperture for razor-sharp detail. -
Composition Focus
Embrace negative space around your product. Simple props—think clear acrylic risers—add a floating effect without stealing the spotlight. -
Quick Troubleshooting
Wrinkles or stray reflections? A roll of background tape can pin down paper instantly, and a polarizing filter tames stubborn glare. -
AI Editing Prep
Before you shoot, place a small color target or gray card in frame. Embedding metadata and color profiles now means fewer rounds of tweaking later in ProdShot.
Real-World Example
A boutique jewelry studio I collaborate with spent one afternoon switching out their draped cloth backdrop for white seamless paper. The next week, their product listings saw a 35% uplift in click-through rate. Consistency paid off—in both presentation and sales.
With these guidelines, you’ll have a clear, visual-first roadmap for backdrop product photography. Expect more engagement, higher conversions, and editing workflows that finally make sense.
Choosing The Right Backdrop Materials
Picking the right surface under your product makes a bigger difference than you might think. A simple roll of paper or a draped fabric backdrop can highlight features you never knew existed.
Seamless paper delivers a clean sweep with no folds or gaps—perfect for that polished, minimalist look. Vinyl stands up to rough handling and moisture, though it can catch unwanted glare. Fabric brings subtle texture to the scene, but you’ll want to iron out creases first. And when you want to signal eco-friendly values, recycled-fiber paper rolls send a clear message.
I always clip the edges of my paper before shooting to avoid curl marks in the frame. With vinyl, tension rods are my go-to for a perfectly flat surface. On pop-up assignments, a lightweight cotton muslin backdrop fits in my bag and can be hand-washed on site.
Recently, I shot a series of reflective gold rings. Dialing down the overhead lights and switching to matte paper eliminated hotspots and made the metal glow. For a textured knitwear line, I draped charcoal-grey fabric and used side fill cards—every stitch popped without harsh shadows.
- Cost: Paper rolls start at $20 for 53 inches, while vinyl runs around $30–$50 per roll
- Durability: Vinyl can last for years outdoors; paper needs careful handling to avoid tears
- Cleaning: Vinyl wipes down easily, fabric goes in the wash, and paper usually gets swapped out when it’s stained
- Visual Impact: Jewelry shines on paper, bulky items look clean on vinyl, and apparel gains depth with fabric
Comparison Of Backdrop Materials
Let’s put these options side by side so you can weigh cost, upkeep, and ideal scenarios at a glance.
| Material | Cost per Roll | Durability | Cleaning | Best Use |
|---|---|---|---|---|
| Seamless Paper | $20 | Moderate (single use) | Replace when stained | Reflective jewelry |
| Vinyl | $30–$50 | High (tear resistant) | Wipe clean | Large props and hardware |
| Fabric | $25–$40 | Medium (washable) | Machine wash | Textured apparel |
That quick look should help you zero in on the perfect backdrop for each shoot.
With e-commerce demand on the rise, seamless paper sales hit about USD 0.2 billion in 2024 in North America—and analysts predict growth to USD 0.3 billion by 2033 at a 5.8 % CAGR. Read the full research on seamless backdrop paper trends here.
Infographic Summary
Below is an infographic illustrating how material choice, lighting, and composition converge to shape professional product images.
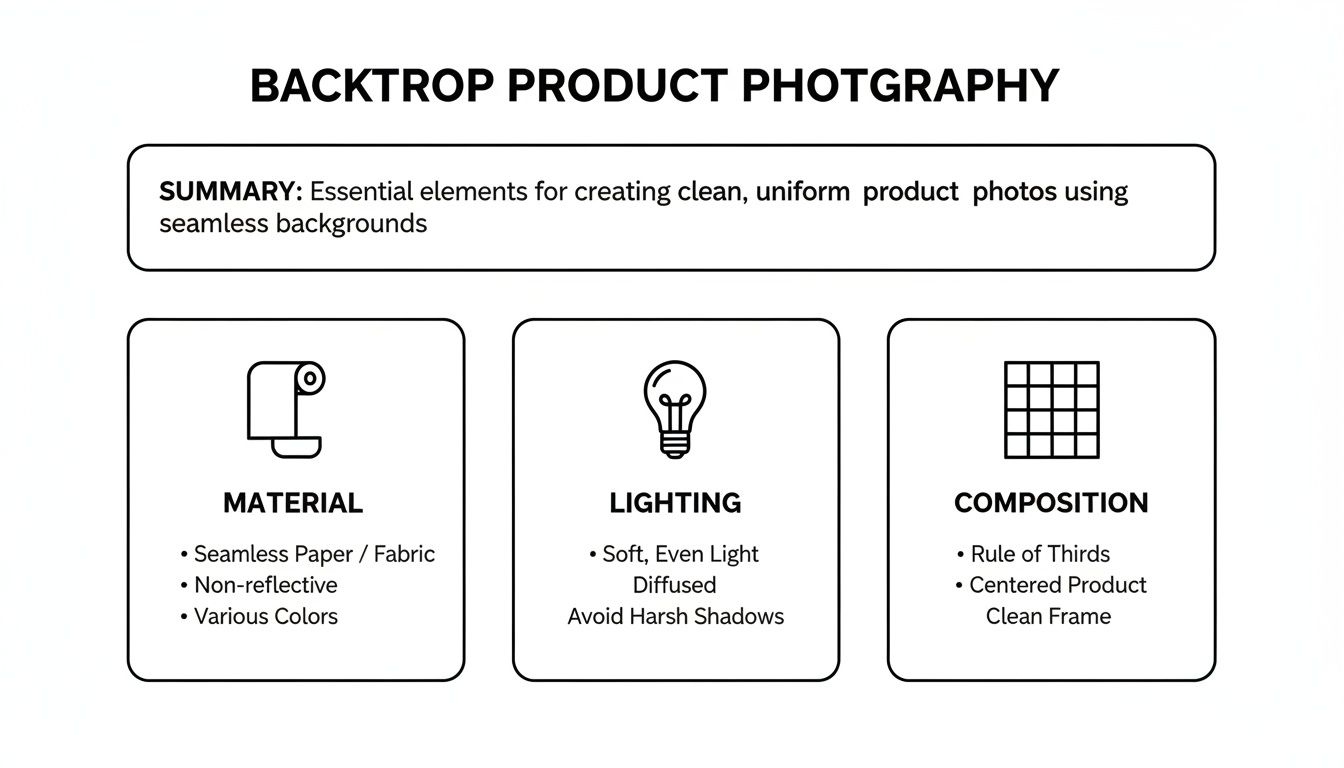
It underlines that proper prep, coherent lighting, and smart framing each play an equal role in elevating your shots.
A backdrop's lifecycle cost often outweighs its upfront price, especially when reusable fabrics slash replacement expenses.
Many budget studios mix paper and fabric backdrops to keep costs under $100 without limiting creativity. Pairing white paper with colored muslin panels lets you switch moods in seconds. Assign paper for clean catalog images and fabric for lifestyle scenes—it speeds up setup and keeps your brand look consistent.
Whether you’re capturing reflective jewelry or textured apparel, matching your product lineup with the right backdrop material saves time, cuts waste, and strengthens brand appeal. Always test any background before a full shoot to avoid expensive do-overs.
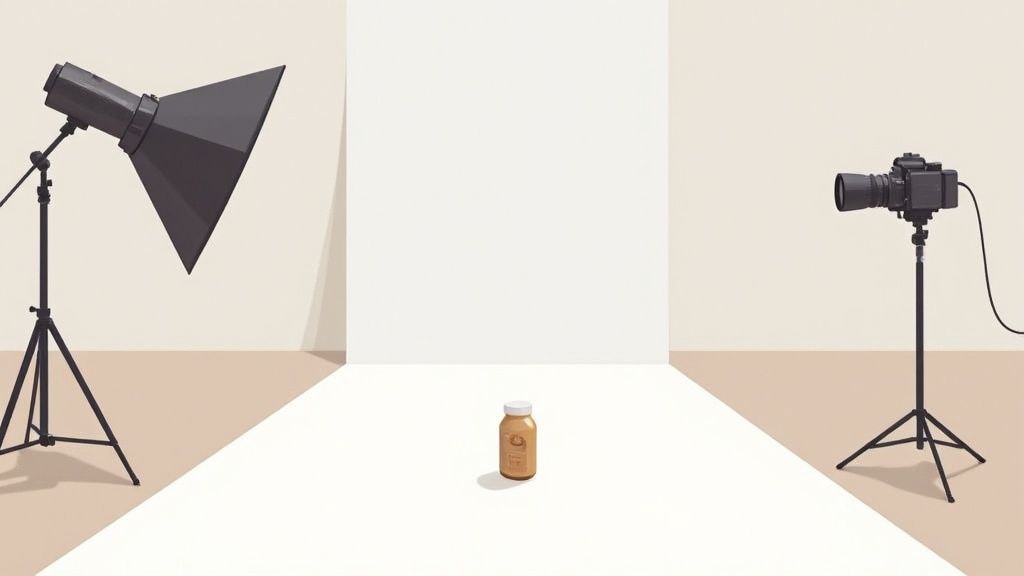
Setting Lighting And Camera For Consistent Results
When you aim for a uniform look across your product gallery, the secret lies in dialing in your lights and camera just right. Softboxes soften harsh beams, reflectors fill in shadows, and continuous LEDs help you nail daylight color. Keep your setup locked down and your images will stay rock solid from one shoot to the next.
Lighting Equipment Options
I usually place two softboxes at 45° angles on either side of the backdrop. Then I add a third light—either a strobe or a continuous panel—above the product for a gentle rim effect. Reflectors sit opposite each key light to bounce just enough fill into darker areas.
- Softboxes smooth out glare on shiny surfaces
- Reflectors in silver, gold or white help you tweak warmth and brightness
- Continuous LEDs match daylight so you spend less time fussing over white balance
Consistent placement of lights cuts editing time by up to 50%, according to experienced studios
Before we dive into camera settings, here’s a quick reference table that pairs your lighting rig with basic camera values:
Lighting and Camera Settings for Product Photography
| Setup Component | Recommended Option | Settings |
|---|---|---|
| Key Light | 2×500 W Softboxes | 45° angles, 1/4 power |
| Fill Light | White Reflector | Bounce only |
| Overhead Accent | LED Panel or Strobe | 1/8 power, 60° tilt |
Keep this chart handy whenever you switch products or backgrounds—it’s a reliable jumping-off point.
Camera Settings For Product Types
When you’re shooting small items—think rings or earrings—I dial the aperture to f/11–f/16 and stick with ISO 100. Shutter speed sits around 1/125 sec to freeze every little detail.
Bigger pieces call for shallower depth of field. I open up to f/5.6–f/8, then bump ISO only if I’m pressed for light. Always use a gray card on your first frame—that way your white balance is locked into the RAW file from the start.
Real-World Example And Workflow Tips
At a boutique jewelry studio, I positioned softboxes exactly 1 m from a ring and swapped in 5500 K daylight bulbs. The result? RAW files straight into ProdShot with zero shadow fixes needed.
Here’s a quick pre-shoot checklist I follow:
- Mount the camera on a tripod for consistent framing
- Clamp the backdrop taut to eliminate wrinkles
- Snap a test frame with a gray card for accurate color
- Tweak light power and review histograms on the camera screen
“A balanced lighting rig is the backbone of any consistent product shoot,” says veteran photographer Sam Lee
Stick to these steps and your AI editing will zip along, giving you a polished gallery that grabs clicks and drives sales.
Troubleshooting Lighting Inconsistencies
Even a well-planned setup can throw unexpected hotspots or color casts. Adding a soft grid to your overhead light narrows the beam and keeps the backdrop pristine. Don’t forget to scan the studio for stray reflections—sometimes a forgotten white wall is the culprit.
- Bounce cards lift shadow detail without extra fixtures
- Gels help you blend mixed color temperatures
Shooting a gray card helps auto-fix color in post.
Keep an eye on your histogram for clipped highlights. Small tweaks—just a few centimeters here and there—go a long way toward a perfectly even backdrop, ready for AI-driven editing in ProdShot.
Composition And Styling Techniques
Composition is where your backdrop photography starts to speak. Thoughtful framing can bring out every curve and contour of your product. Meanwhile, negative space acts like a spotlight, guiding the eye exactly where you want it.
It’s amazing how shifting from the rule of thirds to a centered layout changes the mood entirely. Slide a watch slightly off-center and you instantly elevate its perceived value. Simple moves become powerful storytelling tools.

Styling is just as crucial. Acrylic risers lift items off the backdrop, creating layers without stealing focus. Branded accents—like a subtle logo tag—keep your identity front and center.
To tame stubborn shadows on gadgets or jewelry, bring in a reflective fill card. A quick swap with a silver card softens harsh edges and brightens those hard-to-reach nooks.
"Good styling keeps the eye on the product, not the prop"
Portrait and flat-lay angles each have their moment. Portrait views emphasize height and texture on earrings or bottles. Flat-lays excel when you want to tell a broader story—think multiple items or lifestyle hints.
- A watch face looking straight up reveals every numeral at once
- An upright stack of plates shows edge thickness and craftsmanship
This mix keeps your gallery fresh and engaging.
Framing Methods To Highlight Texture
When you photograph knits, leave breathing room around folds. Negative space stops your image from feeling crowded, so you don’t need dozens of props to make an impact.
In the world of high-end electronics, less is more. A shadow gradient behind a sleek phone makes it pop, while a faint color panel in the background ties everything to your brand palette.
- Use clear acrylic risers to add dimension without color spill
- Position small props at thirds intersections for visual balance
- Rotate shadow cards between shots to experiment with fill ratios
Every tweak draws attention back to your star product. Treat styling as an ongoing experiment until details align perfectly.
Ready to see the impact on jewelry shoots?
Check out our guide on jewelry product photos for lighting and backdrop tips.
It’s packed with fresh ideas to supercharge your compositions.
Styling Hacks From Seasoned Pros
Long-time stylists often rely on reflective cards and micro flags for surgical control of highlights. Micro flags are tiny blockers that prevent stray light from bouncing where it shouldn’t.
Clear risers practically disappear under studio lights, giving your items a “floating” look. Mirrors, on the other hand, channel fill precisely to every curve and angle.
Maintaining a spotless backdrop is non-negotiable. Even a speck of dust shows up in high-res close-ups. A quick wipe and a clamp between setups keep your workflow smooth.
Strong composition means less rescue work later. With the basics nailed, AI tools can focus on refinement instead of damage control.
- Balance negative space and props to preserve visual hierarchy
- Test every angle—one shot might reveal a surprising highlight
- Watch reflections closely and adjust fill cards as needed
Elevate your catalog with confident styling decisions today.
Troubleshooting Common Issues In Product Photography
No matter how bulletproof your plan, shoots can throw curveballs—think backdrop wrinkles, rogue reflections, or sudden color casts. I once had a paper roll sag right before a major e-commerce launch, and trust me, stress levels soared.
That day taught me quick fixes are worth their weight in gold. A few simple tweaks can keep you on track and prevent your budget from spiraling.
To nip problems in the bud, smooth out any creases with tension clips or backdrop tape. Then run a focus check against a calibration chart before you fire the first shot.
Diagnosing Backdrop Imperfections
Wrinkles cast harsh shadows and tiny sags can warp your product’s silhouette. Before you hit record, slide your hand across the surface to catch hidden creases.
- Tension Clips hold heavy backdrops rock-solid on stands
- Backdrop Tape seals seams instantly and banishes wrinkles
- Sandbag Weights flatten fabric or vinyl when clamps alone don’t cut it
“A wrinkle in your background can mean hours of extra editing time,” warns photographer Jenna Lee.
If you spot odd color shifts, mixed lighting is often the culprit. Color-correcting gels let you balance daylight bulbs and tungsten fixtures on the fly.
| Gel Color | Use Case |
|---|---|
| CTO Orange | Warm up cool daylight shoots |
| CTB Blue | Neutralize yellow tungsten |
| CT Green | Correct LED panels |
Handling Lighting Failures
When a strobe or LED quits mid-session, the clock starts ticking. Once, a dead battery almost derailed a high-stakes campaign—until I swapped to a small continuous light setup and kept rolling.
If your lights flicker or die:
- Inspect power cables and swap out any blown fuses
- Reach for backup batteries or bring in a charged variable LED panel
- Rebalance your ratios with reflectors or compact diffusers
Lens calibration can save even more time. A SpyderLENSCAL sheet helps you fine-tune autofocus so every detail lands crisp and clear.
“Calibrate your lens monthly to avoid focus drift,” suggests gear technician Sam Ortiz.
For lightning-fast post-production and reliable turnaround, check out our guide to ProdShot product photo editing services
Action Plans For Rapid Recovery
A compact troubleshooting kit is a lifesaver. Here’s what I never leave home without:
- Reflector cards
- Cable ties
- Gaffer tape
Having these essentials on hand means you can rig a fix in seconds. Practice these little drills during routine shoots and you’ll build the muscle memory to handle any glitch.
Run quick pre-session checks, stash backup gear nearby, and you’ll breeze through wrinkles, reflections, or color shifts—often in under five minutes. Smooth sessions and consistent image quality? Absolutely within reach.
Preparing Images For AI Editing And Marketplace Requirements
Getting your backdrop photos ready for AI touch-ups and online marketplaces starts well before you hit the shutter. A few simple habits in the studio can save you hours in post-production—and help you avoid upload errors later.
Start by placing a color target or gray card in every shot. That little card locks in an accurate white balance, so you won’t chase weird tints in Lightroom. At the same time, embed key metadata tags—SKU, product name, copyright—right in the camera. That way, your images stay organized and ready for batch workflows.
Trend reports from 2024–2025 show a clear swing toward biodegradable, recycled, or multi-use backdrops. Studios that switch to reusable materials see lower per-shoot costs and stronger green credentials. Learn more about these backdrop trends on Color Experts BD.
How To Structure Folders And Files
Clear naming and folder hierarchies keep mistakes off your plates—and out of Amazon, eBay, and Shopify listings. When your system is consistent, AI editing tools spend less time dealing with missing data and more time making your images pop.
• Amazon: [SKU]_[color]_[view].jpg (for example, 12345_Black_Front.jpg)
• eBay: Use hyphens and keywords—model number, size, finish
• Shopify: Create folders named Originals, Retouched, Web, Mobile
Good file organization cuts listing errors by up to 40% in high-volume catalogs
If you work at scale, set up simple scripts or dive into Lightroom and Capture One presets to automate the process.
Export Settings And AI Workflow
Matching your exports to each marketplace’s specifications means your uploads glide right through. Keep your masters as 16-bit TIFFs for permanent archives, and export in sRGB JPEGs or PNGs for live sites.
| Platform | Min Resolution | Max File Size | Format |
|---|---|---|---|
| Amazon | 1600×1600 px | 10 MB | JPEG sRGB |
| eBay | 1200×1200 px | 7 MB | JPEG sRGB |
| Shopify | 2048×2048 px | 20 MB | PNG, JPEG |
Oversized files or the wrong color space often trigger automatic rejections. Batch-export presets in Lightroom or Capture One handle these rules at scale. Don’t forget to embed IPTC tags—brand, SKU, copyright—and your reviewer queue moves faster.
Integrating AI solutions like ProdShot can put the final shine on your shots. For a step-by-step demo of AI product photo generation, check out our guide on the AI product photo generator.
Key tasks before AI upload include:
- Double-checking color targets in every image
- Verifying that all metadata fields are complete
- Sorting exports into the right folders for each platform
Proper preparation means AI tools deliver polished, marketplace-ready images without manual tweaks
Finally, build these habits into your routine:
- Archive raw masters in 16-bit files
- Tag each image with IPTC for quick searching
- Conduct monthly audits to catch any compliance slips
Stick to these prep standards and you’ll see listing errors drop, editing time cut in half, and your backdrop photography workflow stay rock-solid—even as your catalog grows.
Frequently Asked Questions
Picking the right backdrop can make a world of difference. Glossy items love a mid-tone grey because it tames reflections and banishes hotspots. You’ll often see retouching time drop by 30% with that simple swap.
Here’s a quick reference:
- White Seamless Paper highlights matte finishes with clear edges.
- Light Grey Vinyl cuts glare on reflective surfaces.
- Charcoal Fabric brings drama and depth to dark, low-shine products.
Minimizing Editing Time With AI Tools
It may seem small, but including a color target in every shot speeds up AI platforms like ProdShot by 50% on average. Embedding metadata—think SKU and product name—means your shots file themselves correctly without extra clicks.
“A grey card in the corner not only locks white balance but also guides AI perfectly,” says photography expert Mia Chen.
Use this prep checklist to smooth out your AI edits:
- Attach a color or grey target beside each product.
- Lock white balance in RAW mode.
- Name files consistently (e.g., SKU_Color_View).
Achieving Sharp Focus With Compact Cameras
You don’t need a big rig to nail studio-grade detail. A sturdy mini tripod plus manual focus peaking set around f/11–f/16 keeps every contour crisp. Trigger the shutter remotely or use the timer to avoid handshake blur.
Pro tips:
- Enable grid lines to center your composition.
- Set shutter speed to at least 1/125 sec for freeze-frame clarity.
Choosing Seamless Paper Or Fabric Based On Volume
When you’re shooting dozens of items back-to-back, seamless paper rolls out smooth and crease-free. If you’re planning hundreds of images, fabric pays you back after a quick press. Many studios mix both to balance cost and efficiency.
- Combine paper and fabric to match your workflow.
- Use gels to balance mixed color temperatures.
Ready to level up your backdrop product photography?