
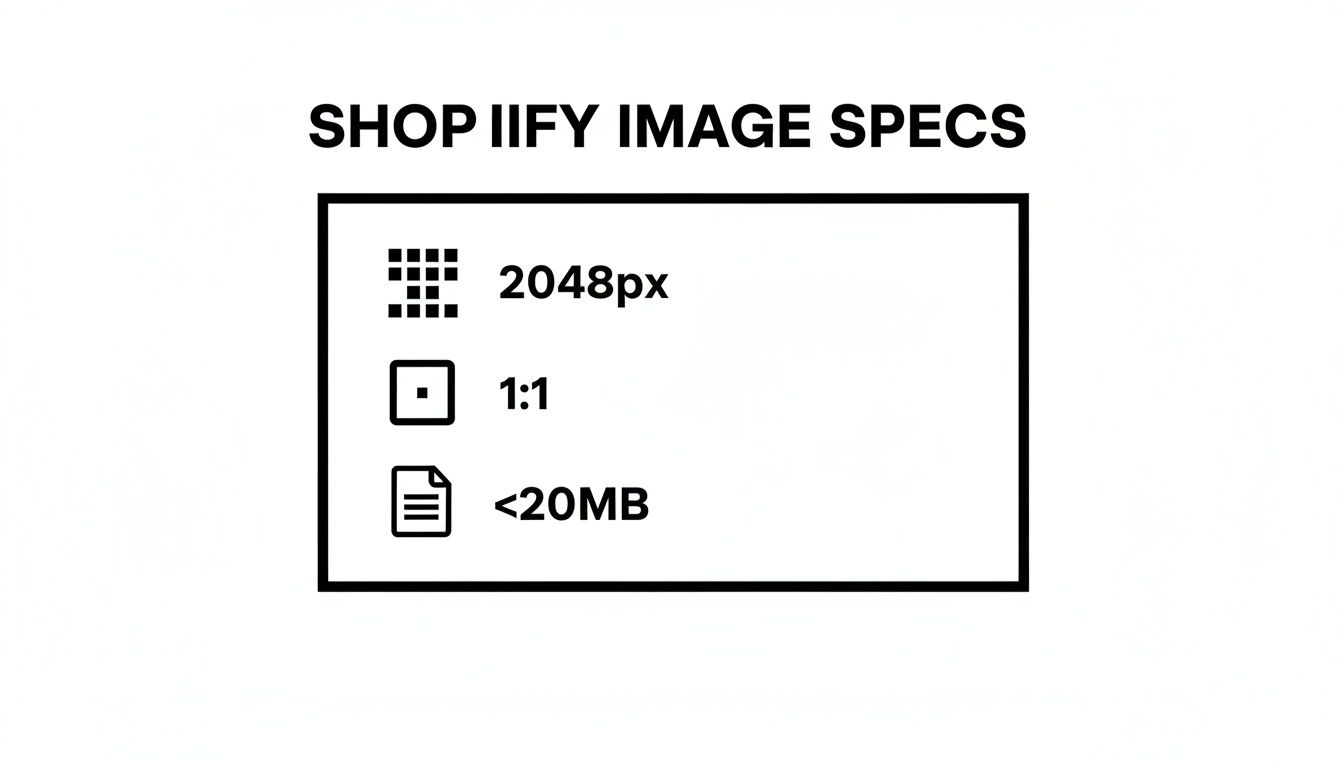
When it comes to the best product image size for Shopify, the number to remember is 2048 x 2048 pixels. Think of this as the gold standard for any square product photo you upload. Why this specific size? It’s all about delivering that crisp, high-resolution look that gives customers the confidence to click “add to cart.”
This resolution is large enough to look incredibly sharp on everything from a massive desktop monitor to a small phone screen, and it’s perfect for enabling a high-quality zoom feature. Nothing kills a sale faster than a blurry, pixelated image when a customer tries to get a closer look at a product detail.
Your Quick Guide to Shopify Image Sizes
Great visuals are the lifeblood of an online store, and getting the sizing right is the foundation of it all. You can spend ages choosing the ideal ecommerce platform, but small details like how your images are handled can make a huge difference in your day-to-day workflow and, more importantly, your customer’s experience.
For a quick reference, here’s a summary of the key recommendations for all your Shopify images.
Shopify Image Size Recommendations at a Glance
This table breaks down the optimal specs for the most common image types you'll be working with on your Shopify store. Sticking to these guidelines will keep your site looking professional and performing well.
| Image Type | Recommended Dimensions (Pixels) | Recommended Aspect Ratio | Ideal File Size |
|---|---|---|---|
| Product Images | 2048 x 2048 | 1:1 (Square) | Under 500 KB |
| Collection Images | 1600 x 900 | 16:9 (Widescreen) | Under 400 KB |
| Slideshow Images | 1800 x 1000 | 16:9 (Widescreen) | Under 500 KB |
| Blog Post Images | 1800 x 1000 | 16:9 (Widescreen) | Under 300 KB |
Following these specs helps ensure your images look their best without slowing down your site, which is crucial for keeping potential customers engaged.
Why 2048 x 2048 Pixels is the Sweet Spot
Shopify's own guidelines have cemented 2048 x 2048 pixels as the benchmark for square product images. While the platform can handle images up to 4472 x 4472 pixels and file sizes up to 20 MB, going that large is usually overkill and can hurt your site's loading speed.
The 2048px recommendation is a smart balance. It’s high-res enough for Shopify’s zoom function to work beautifully and ensures your photos are “retina-ready” for modern high-definition screens. Given that a staggering 87.6% of shoppers say product images are the most influential factor in their decision to buy, getting the specs right is non-negotiable.
Ultimately, focusing on three core rules—pixel dimensions, aspect ratio, and file size—is the key. When you nail these, your images will be sharp, load fast, and display perfectly across your entire store, creating a seamless and professional shopping experience.
Getting the Core Image Specs Right for Shopify
Nailing the basic requirements for your Shopify images is ground zero for building a store that looks professional. The right product image size isn't just about making things look pretty; it's a direct line to building customer trust and making sure your site runs smoothly. Let's dig into the core specs you absolutely need to get right.
This little cheat sheet from Shopify really drives home the point: consistency is king. While the exact pixel counts might shift a bit depending on your theme, the core ideas of using high-resolution photos and keeping your aspect ratios consistent never change.
The Sweet Spot for Dimensions and Resolution
Here's the number to remember: Shopify's official go-to recommendation is to upload your product images as 2048 x 2048 pixel squares. Why so big? This high resolution guarantees your photos will stay crisp and clear, whether they're viewed on a massive desktop monitor or one of today's fancy high-DPI "Retina" screens.
While Shopify technically lets you upload images up to 20 MB, you should never actually do that. It’s complete overkill and will absolutely murder your site's loading speed.
The zoom feature is a massive deal for online shoppers, but it won't even turn on unless your images are big enough. The absolute minimum is 800 x 800 pixels, but sticking to the 2048 x 2048 pixel recommendation gives customers a much more impressive, detailed zoom experience. With so many people shopping on phones that have incredibly sharp screens, a pixelated, undersized image is a fast way to get them to close the tab and abandon their cart.
Key Takeaway: Just aim for 2048 x 2048 pixels for your main product shots. It’s the perfect all-rounder size that works on every screen, makes the zoom feature look amazing, and basically future-proofs your images as screen technology keeps getting better.
The quality of your photos often says a lot about the quality of your brand. If you're looking for tips on creating that polished look, check out our guide on professional Shopify product photography. And to see how these visuals fit into the bigger picture, this comprehensive guide on social media image dimensions is a great resource.
Choosing the Right Aspect Ratio for Your Products
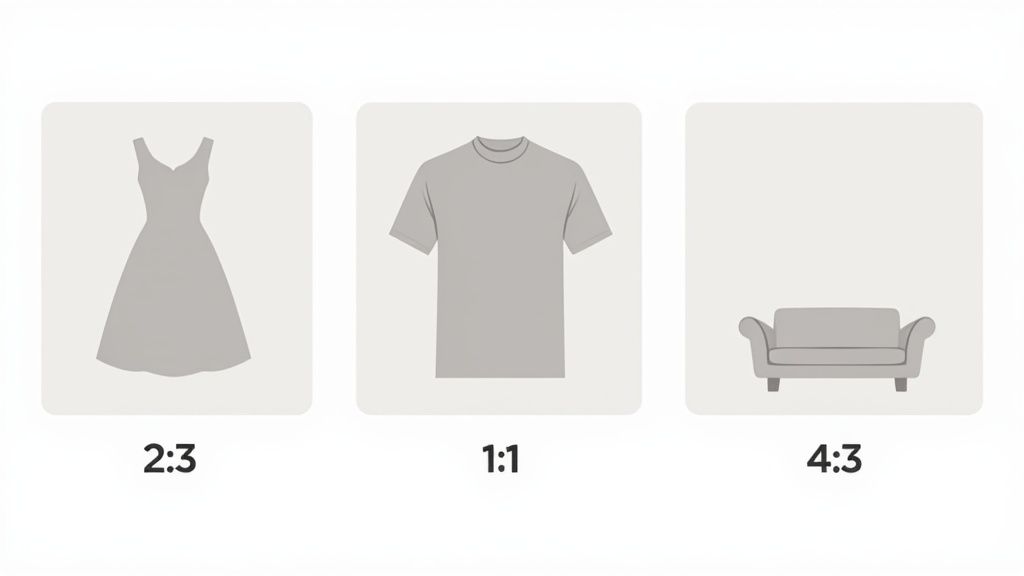
While a 1:1 square ratio is the universal standard for product images on Shopify, it’s not always the best fit for every single item you sell. Picking the right aspect ratio is all about showing off your products in the most flattering way possible, making sure customers can see exactly what makes them special.
A tall dress or a full-length coat, for instance, just looks better with a vertical 2:3 ratio (portrait). This orientation captures the entire item without a bunch of awkward empty space on the sides. On the flip side, wider products like a sofa or a piece of artwork are often better served by a horizontal 4:3 ratio (landscape), which really emphasizes their width.
Why Consistency Is Crucial
Here's the most important rule, no matter what ratio you land on: consistency. A collection page with a jumble of square, portrait, and landscape images just looks messy and unprofessional. That kind of visual chaos creates a jarring experience for shoppers and can make your whole store feel disorganized.
Keeping a uniform aspect ratio for all your product photos in a given collection creates a clean, professional grid that's a pleasure to browse. This polished look not only improves how customers see your brand but also encourages them to click and explore more.
For grid perfection, the 1:1 aspect ratio (e.g., 2048 x 2048 px) is our top recommendation for both product and collection images. It’s the standard for a reason, mirroring what works on huge platforms like Amazon and Instagram. Misaligned images can increase bounce rates by a staggering 32%, which is a big part of why Shopify leans this way. You can learn more about these e-commerce UX findings and see how they can improve your store.
Making the Right Choice
Ultimately, the best approach is to pick one single aspect ratio and stick with it for all your main product images. This simple decision will dramatically boost the visual appeal and professionalism of your entire store.
- 1:1 (Square): The safest, most versatile option. It works well for almost any product and guarantees a clean, uniform grid.
- 2:3 (Portrait): Ideal for fashion, apparel, and other tall items where you need to show off vertical detail.
- 4:3 (Landscape): Best for wide products like sofas, tables, or electronics that need that extra horizontal space to shine.
Optimizing Images for File Type and Load Speed
High-quality images are non-negotiable for a serious Shopify store, but they can't come at the expense of your site's performance. Getting the right product image size for Shopify is about more than just pixel dimensions; picking the right file format is a critical balancing act between visual clarity and lightning-fast load times.
Let's be clear: slow-loading pages are an absolute conversion killer. Studies have shown that a delay of just a few seconds can send bounce rates soaring by over 32%. This makes your choice of file format and how well you optimize its size a make-or-break step in getting your product photos ready.
Choosing the Best File Format
The most common image formats you'll encounter each have their own strengths, and knowing when to use which is a huge advantage. For most stores on Shopify, the decision really boils down to JPG, PNG, or one of the newer formats like WebP.
- JPG (JPEG): This is your go-to format for the vast majority of product photos. JPGs use what's called "lossy" compression, which is a fancy way of saying it drastically cuts down the file size while keeping complex, colorful images looking fantastic.
- PNG: Reach for a PNG file anytime you need a transparent background. This is perfect for your brand logo or for specific product shots where you want your website’s background color to show through. The trade-off is that PNG files are usually quite a bit larger than their JPG counterparts.
- WebP: This is a next-generation format developed by Google, and it's a game-changer. It offers much better compression than both JPG and PNG, often reducing file sizes by 30% or more without any noticeable hit to the quality.
Now for the good news: Shopify does a lot of the heavy lifting for you. Shopify's built-in Content Delivery Network (CDN) is smart enough to detect what browser a visitor is using. It then automatically serves up the most efficient file format, often converting your JPGs and PNGs to WebP on the fly to make your pages load faster.
Picking the right file format is the first step in balancing quality and performance. Below is a quick comparison to help you decide which one is right for each situation.
Comparison of Image File Formats for Shopify
| File Format | Best For | Key Advantage | Key Disadvantage |
|---|---|---|---|
| JPG (JPEG) | Standard product photos, complex images with many colors, lifestyle shots. | Small file size with excellent color depth and quality. The universal standard. | Does not support transparency. "Lossy" compression can degrade quality if over-compressed. |
| PNG | Logos, icons, product images requiring a transparent background, simple graphics. | Supports transparency ("alpha channel"). "Lossless" compression preserves perfect quality. | Significantly larger file sizes compared to JPG, which can slow down page loads. |
| WebP | All image types (can replace both JPG and PNG). | Offers superior compression (both lossy and lossless) and supports transparency. | Not yet universally supported by all old browser versions (though Shopify's CDN helps). |
| GIF | Simple animations, icons with very few colors. | Supports basic animation. | Very limited color palette (only 256 colors), resulting in poor quality for photos. |
Ultimately, sticking with high-quality JPGs for photos and PNGs for graphics with transparency will cover 99% of your needs, especially since Shopify will often serve them as WebP anyway.
The Importance of File Size
Even when you've picked the right format, the final file size is what really counts. A solid rule of thumb I've learned over the years is to keep your product images under 300 KB. This size hits that sweet spot between crisp quality and quick loading.
Sure, Shopify technically lets you upload files as large as 20 MB, but doing so will absolutely cripple your site's speed. Huge files hurt the user experience and can tank your SEO rankings. By compressing your images before you upload them, you stay in control of the final look and feel, ensuring your store stays zippy and responsive for every customer.
A Practical Guide to Resizing Your Product Images
Getting your Shopify product images right happens before you even think about uploading them. If you take a few minutes to prep your images correctly, you ensure they stay sharp, load fast, and don't get butchered by Shopify's own compression algorithms.
This quick walkthrough will cover the essential steps using the editing tools you probably already have. Whether you're a Photoshop pro, a Canva enthusiast, or just using a free online tool, the core principles are exactly the same. The goal is simple: lock in the right dimensions and file format, balancing pristine quality with a small file size before the image ever hits your media library.
Key Export Settings to Use
When you're ready to save your perfectly resized image, look for an "Export" or "Save for Web" option in your software. This gives you far more control than a simple "Save As" command and is crucial for getting things just right.
Here are the four settings you need to nail for every single product photo:
- Dimensions: Set your width and height to the target size. For most product photos, 2048 x 2048 pixels is the gold standard. This size is big enough for high-quality zoom and looks crisp on any screen.
- File Format: Always choose JPG (or JPEG) for photographic images. It’s the best format for compressing photos with lots of colors, which keeps your file sizes down without wrecking the quality.
- Quality Setting: You'll usually see a quality slider or percentage. A setting between 70-85% is the sweet spot. This can slash the file size dramatically with almost no visible difference to the naked eye.
- Color Profile: Make sure the color profile is set to sRGB. This is the standard for the web, and it guarantees your product colors look consistent no matter what browser or device your customer is using.
Pro Tip: Export two versions of the same image, one at 85% quality and another at 70%. Pull them up side-by-side. If you can't spot the difference, go with the smaller file. Your page load speed will thank you.
If you don't want to mess with complex software, a dedicated online tool to resize images can do all of this for you. These tools are built specifically for e-commerce, making the whole process practically foolproof. Mastering these simple export settings puts you in complete control of your store's visual quality and performance.
Uploading and Optimizing Your Images in Shopify
Alright, you’ve got your images perfectly sized and compressed. Now it's time for the final steps: getting them into Shopify and making sure they’re set up to bring you traffic. This isn't just a simple upload; it’s about arranging your photos to tell a story and giving search engines the right signals so they know what you're selling.
Getting your images onto a product page is a breeze. The Shopify admin lets you drag and drop your files right into the "Media" section. You can also just click to upload them the old-fashioned way. Once they're in, you can drag them around to set the order, which is more important than you might think.
Always put your absolute best, most compelling shot first. Why? Because that first image automatically becomes the thumbnail that shows up on your collection pages, in search results, and pretty much everywhere else. It’s your product’s first impression.
Don't Skip the Alt Text (Seriously)
After your images are uploaded, there's one more crucial task: adding descriptive alt text to every single one. Alt text is a short, simple description of what's in the photo. It does two hugely important things: it helps Google and other search engines understand your image, and it makes your site accessible for visually impaired shoppers using screen readers.
Adding it is easy. Just click on an image in the product editor, and a menu will pop up. You’ll see a field labeled "Image alt text"—that's where you work your magic.
A good alt text is specific. Instead of leaving the default filename like "IMG_8821.jpg," write something like, "Men's blue waterproof running jacket with hood." This one small change can make a big difference in how often your products show up in Google Image search.
Keeping Your Media Library Tidy
If you're running a store with a big catalog, keeping your media organized from the start will save you a world of headaches later on. While Shopify’s media library is straightforward, it doesn't have a lot of complex organizational tools.
The best practice is to get your file names in order before you upload. A consistent naming convention, like product-name-color-view.jpg (e.g., classic-tshirt-red-front.jpg), makes everything much easier to find and manage down the road.
This thoughtful approach ensures your perfectly sized product images are backed by solid on-page SEO, helping you pull in more customers from organic search. And if you find you need to make some last-minute tweaks after uploading, you can always look into a Shopify photo editor to handle edits directly within the platform.
Commonly Asked Questions About Shopify Image Sizes
When you're wrestling with the details of product images for your Shopify store, a few common questions always seem to pop up. Getting these right from the start helps you sidestep simple but frustrating mistakes and keeps your shop looking polished and professional.
Here are some direct answers to the most frequent issues merchants run into.
Does Shopify Automatically Resize My Images?
Yes, Shopify's platform is smart. It automatically creates different versions of your images to fit various spots in your store, like collection pages and product thumbnails. It also compresses them to keep your site loading quickly.
But you shouldn't rely on this feature alone. For the best, most consistent results, you always want to upload images that are already optimized. A 2048 x 2048 pixel image is the gold standard here. If you upload something that’s way too big or has a weird aspect ratio, Shopify's automated resizing can sometimes cause a noticeable drop in quality. Pre-sizing your images before you upload gives you complete control over the final look.
What Is the Best Image Size for Mobile Devices?
The best approach here is to upload a single, high-resolution image and let your store's responsive theme handle the rest. By starting with a 2048 x 2048 pixel photo, you're guaranteeing it has more than enough detail to look tack-sharp on any screen, especially those high-DPI displays found on modern smartphones.
Shopify’s Content Delivery Network (CDN) then works in the background, intelligently serving up the most appropriate file size based on what device the customer is using. This strikes the perfect balance between visual quality and performance, so your mobile shoppers get a crisp, clear image without having to download a massive file that slows everything down.
How Do I Add Alt Text for SEO?
Adding alt text is one of the simplest yet most powerful things you can do for your store's SEO. It's incredibly easy to do.
Inside your Shopify admin, just navigate to a product page and click on the image you want to edit. A dialog box will pop up, and you'll see a field labeled 'Image alt text'.
In that box, write a descriptive, keyword-rich phrase that accurately describes what's in the picture. For instance, instead of a generic filename like "IMG_1234.jpg," write something specific like "dark wash denim jacket with silver buttons." This not only helps search engines understand and rank your product images but also makes your site more accessible for everyone.
Stop wasting time on complicated photo editing. With ProdShot, you can turn simple smartphone pictures into professional, high-converting product shots in seconds. Get your free trial and see the difference AI can make at https://prodshot.net.