
Learning how to remove a white background from an image is a fundamental skill for anyone selling or marketing online. It really just boils down to a few key methods, from nearly instant AI tools to meticulous manual editing in software like Photoshop. Once you get the hang of it, you can turn cluttered, amateur photos into professional, versatile assets ready for just about anything.
Why Removing White Backgrounds Is a Game Changer
Before we jump into the "how," let's talk about the "why." Getting rid of a white background isn't just a technical tweak; it's a strategic move that can completely change the game for your e-commerce store, marketing campaigns, or design projects. A clean, isolated product image can seriously elevate your brand and have a real impact on your sales.
Think about the last time you were shopping online. The products that caught your eye probably had crisp, clear images, right? They were likely sitting against a clean white or even transparent background. This isn't just about looking nice—it drives conversions. When you strip away distracting backgrounds, you put your product center stage. It becomes the undisputed hero.
Elevate Your E-commerce Presence
If you're selling online, a pure white or transparent background is pretty much the standard. Major marketplaces like Amazon have strict rules that demand clean, professional-looking images. Following the official Amazon Product Image Requirements isn't just about compliance; it's about getting seen and making sales.
A consistent look across all your product shots also builds trust. It makes your brand feel polished and reliable. When a potential customer sees a cohesive gallery of images, it sends a strong message that you care about the details. This is where mastering background removal really pays off, and it's something we cover in-depth in our guide to https://prodshot.net/professional-amazon-product-photography.
Boost Brand Consistency and Marketing Flexibility
Beyond just your store, images with transparent backgrounds give you incredible flexibility. You can drop them into any design without those clunky white boxes messing with your color palette.
This freedom allows you to:
- Create Cohesive Ads: Place your product on branded backgrounds for your social media campaigns.
- Design Professional Graphics: Easily layer product images into website banners, email newsletters, and presentations.
- Maintain Brand Identity: Keep your visuals looking sharp and consistent everywhere, from your website to your promo materials.
Isolating a subject from its background isn't a new idea—it's evolved from old-school darkroom techniques to the digital magic we have today. The launch of Adobe Photoshop back in 1990 was a massive turning point, especially with its Magic Wand tool. What used to take ages could suddenly be done with a click. Now, modern AI tools have made the process even faster, cutting editing time by as much as 90% and helping brands boost sales by up to 25% on major e-commerce platforms.
By making your product the sole focus, you remove all the visual noise. You guide the customer’s eye exactly where you want it to go. This simple edit doesn’t just change an image; it changes how people see your entire brand.
Using AI Tools for Instant Background Removal
Let’s be honest: nobody has time to spend hours meticulously tracing around a product in complicated software. When you need a clean, professional-looking image—and you need it fast—AI-powered tools are your new best friend.
Modern AI has been trained on millions of images, teaching it to instantly tell the difference between your product and the background. This means what used to be a tedious manual process now happens with a single click. For e-commerce sellers, marketers, or anyone juggling a dozen tasks at once, this is a game-changer. Think about launching a new product line or whipping up a social media campaign on a tight deadline; the speed alone is a massive win.
The Power of One-Click Editing
The real beauty of using AI is just how simple it is. You upload your picture, the algorithm does its magic, and you download a ready-to-use image with a transparent background. The whole thing takes seconds.
This flowchart really breaks it down to the core decision every seller faces: do you want a pro look or a cluttered one?
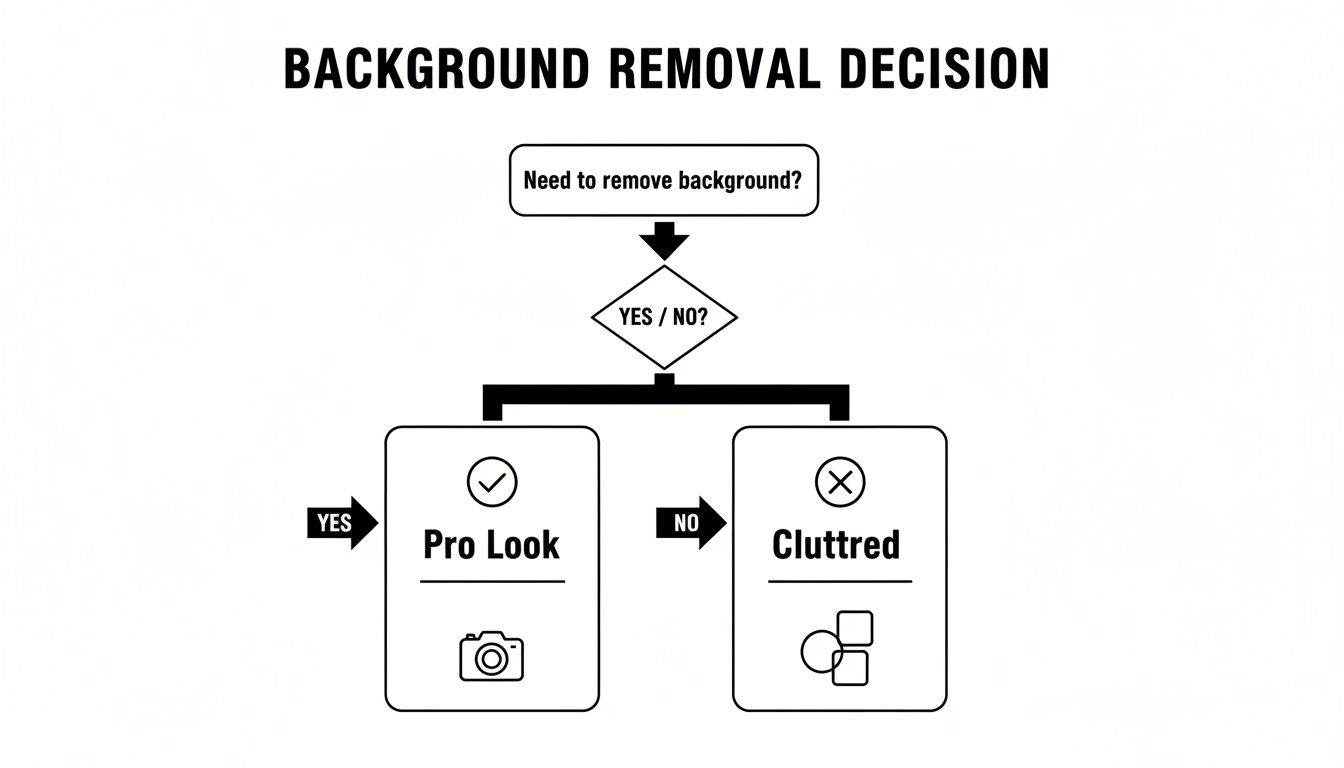
As you can see, getting rid of that distracting background is the most direct path to a polished, focused visual that lets your product shine.
These tools are built to be incredibly intuitive. Take an AI-driven platform like ProdShot, for instance. You can just drag and drop a photo and see the result instantly. There's no need to fuss with layers, masks, or path tools. The tech handles all the heavy lifting, freeing you up to focus on growing your business.
How AI Tackles the Tricky Stuff
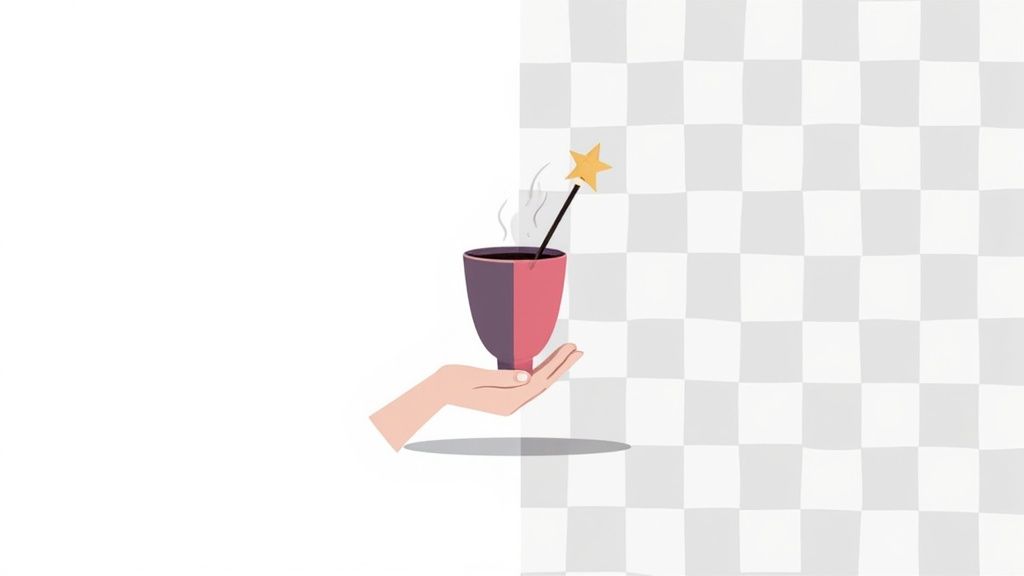
Okay, removing the background from a simple coffee mug is one thing. But what about more complex items?
This is where today's AI really impresses. It excels even with challenging details:
- Intricate Edges: Got a delicate necklace with a fine chain? Or maybe a fuzzy, knitted sweater? AI can intelligently trace these complex outlines without breaking a sweat.
- Subtle Shadows: Some of the smarter tools can even preserve a natural-looking drop shadow, which adds a fantastic sense of depth and realism to your final shot.
- Semi-Transparent Objects: Things like glassware or a bottle of perfume used to be a nightmare to edit manually. AI models now handle these semi-opaque areas with surprising accuracy.
When you're looking for a quick fix, AI image creation tools are specifically designed for this kind of high-speed, high-volume work.
The real magic here is how AI learns and improves over time. The more images these systems process, the better they get at distinguishing your subject from its surroundings, even in visually "busy" photos. The results you're seeing today are leaps and bounds ahead of what was possible just a couple of years ago.
AI Background Remover Tool Comparison
Not all AI tools are created equal. Some are lightning-fast but may struggle with hair, while others offer incredible precision but might take a few extra seconds.
| Tool | Best For | Ease of Use | Key Feature |
|---|---|---|---|
| ProdShot | E-commerce sellers | Excellent | Generates lifestyle backgrounds & shadows |
| remove.bg | Quick, simple removals | Excellent | Fast processing for general use |
| Canva | Integrated design workflows | Very Good | Background remover is part of a full suite |
| PhotoRoom | Mobile editing | Excellent | Powerful mobile app with batch processing |
This table gives you a quick snapshot, but the best tool for you really depends on your specific needs—whether that's processing 50 product shots a day or just cleaning up a single image for a presentation.
A Quick Walkthrough with an AI Tool
Let's run through a typical scenario. Most of these AI tools follow a similar, dead-simple process. The whole point is to get you from your original photo to a transparent PNG file as fast as humanly (or, well, artificially) possible.
Imagine you're an Etsy seller. You just snapped a decent photo of a handmade necklace on a white poster board, and you need it ready for your shop listing.
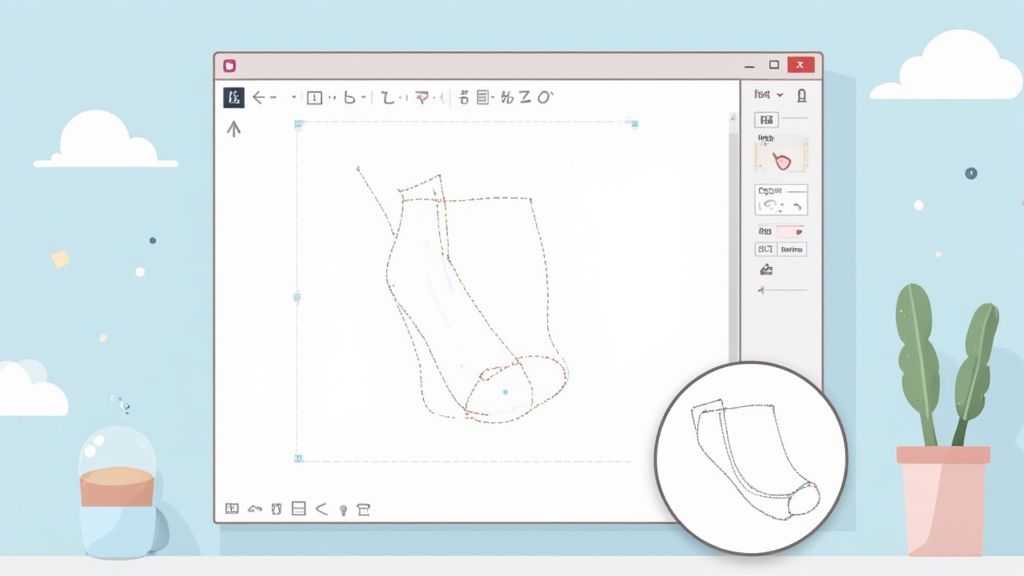
- Upload Your Image: First, you head over to your chosen AI tool. You'll see a big "Upload Image" button or a drag-and-drop area. Find that necklace photo and get it loaded up.
- Let the AI Work: The second your photo is uploaded, the AI springs into action. You'll probably see a quick progress bar for a few seconds while the system analyzes the image, identifies the necklace, and digitally snips it away from the background.
- Review and Download: In less time than it takes to make a cup of tea, you'll see a preview of your necklace on a transparent (checkerboard) background. If it looks good, just hit "Download." The image saves as a PNG file, which is the format that preserves transparency.
This entire workflow can take less than 30 seconds. For anyone managing a high volume of images, an AI product photo generator is more than just a tool; it's a massive time-saver that turns basic shots into polished, marketplace-ready visuals.
What you're left with is a super-versatile image. You can drop it onto any background, use it in marketing graphics, or upload it straight to your e-commerce store for a clean, consistent catalog. It's a simple, powerful fix for a common—and crucial—task.
The Pro Method: Manual Removal in Photoshop
When the quick AI tools just don't cut it, it's time to roll up your sleeves and jump into the industry standard: Adobe Photoshop. While AI offers incredible speed, manual removal is a craft. It’s for those times when you need absolute, pixel-perfect control over every edge and corner.
This is how professionals get it done when the final result is non-negotiable and the quality has to be top-notch.
Getting hands-on in Photoshop isn't just about tracing an outline; it’s about understanding light, shadow, and how different textures meet the background. It’s what separates a basic cutout from a seamless, believable composition. The desire for this kind of clean subject isolation has a surprisingly long history. Way back in the 1860s, photographers were already manipulating images to get rid of distracting backgrounds. By 1870, this technique was used in 25% of commercial portraits in London, helping to boost sales by as much as 40%. You can learn more about the long history of background removal and see how the need for precision has always been there.
Starting with the Quick Selection Tools
For images where your subject stands out clearly, Photoshop’s faster tools are your best bet to start. They're smart, they're quick, and they'll often get you 90% of the way there in a few clicks.
- Magic Wand Tool: The old-school classic for solid backgrounds. Just click on the white area, and it selects all the pixels of a similar color. It's brilliant for simple studio shots of products like books or electronics on a pure white backdrop. You can tweak the Tolerance setting to tell it how strict or loose to be with matching shades of white.
- Quick Selection Tool: This one acts more like a smart paintbrush. You drag it over your subject, and it intelligently finds and snaps to the edges. It’s way more flexible than the Magic Wand when the background has subtle shadows or isn't a perfectly uniform color.
Use these tools to get a rough selection down. From there, we can jump into the more powerful features to really dial it in.
My biggest tip for an efficient Photoshop workflow? Know which tool to start with. Don’t go straight for the most complicated method if a simple click of the Magic Wand can handle most of the heavy lifting. Start broad, then refine.
Mastering Layer Masks for Non-Destructive Editing
Okay, once you have that initial selection, whatever you do, don't hit the delete key. The professional approach is to use Layer Masks. Think of a layer mask as a reversible stencil for your image layer. It lets you hide parts of the layer instead of permanently erasing them.
Here's how it works: on the mask, painting with black hides that part of the image, while painting with white brings it back. This is what we call a non-destructive workflow. It means you can always go back and tweak the edges of your cutout without having to start from scratch. If you accidentally hide a piece of your product, just switch your brush to white and paint it right back in.
This is the only way to work on any serious editing project. It protects your original pixels and lets you make endless refinements—an absolute lifesaver when dealing with client feedback.
The Pen Tool for Ultimate Precision
When you need those perfectly crisp, clean lines—especially for hard-surfaced products like furniture, jewelry, or electronics—nothing beats the Pen Tool. This tool doesn’t care about pixels or colors. Instead, you create a vector path by placing anchor points one by one.
You literally click around your subject to create a flawless outline. You can make straight lines between points or click and drag to create buttery-smooth curves. It definitely has a steeper learning curve, but the Pen Tool gives you a level of accuracy that selection tools just can't match.
Once you’ve closed your path, you can easily turn it into a selection and use that to create your layer mask. For high-end commercial work, a clean path made with the Pen Tool is often the required standard.
Refining Tricky Edges Like Hair and Fur
Now for the really tough stuff. Details like wisps of hair, fuzzy blankets, or the soft edges of a sweater are notoriously hard to isolate. This is where Photoshop really flexes its muscles and leaves simpler tools in the dust. The Select and Mask workspace is your command center for this.
After you make a rough selection, pop into this dedicated mode to access a whole suite of specialized tools.
- Refine Edge Brush Tool: This is the magic wand you’ve been looking for. You just paint over the problem edges—like the fuzzy bits of hair against the white background—and Photoshop’s algorithm intelligently separates the fine details from the background.
- Decontaminate Colors: Ever notice that ugly color fringe or halo that appears around an object you've cut out? This feature is a lifesaver. It cleans up those leftover background colors from the edge of your subject, helping it blend much more naturally into a new background.
By combining an initial smart selection with the power of the Select and Mask workspace, you can tackle even the most brutal images and produce cutouts that look completely real. It’s this deep level of control that makes Photoshop the go-to for any project where quality simply can't be compromised.
Editing on the Go With Smartphone Apps
You don't always need to be chained to a desk with a beefy computer to get clean, professional-looking images. In fact, sometimes the best tool for the job is the one that's already in your pocket.
The explosion of powerful smartphone apps has put high-quality photo editing right in our hands. For social media managers, online sellers snapping product photos on the fly, or anyone needing a quick fix, these apps are absolute lifesavers. They pack surprisingly sophisticated AI into a mobile package, letting you remove white backgrounds from practically anywhere in just a few taps.
Top Mobile Apps for Background Removal
Diving into the App Store or Google Play can feel a bit overwhelming—every app seems to promise the same one-tap magic. But after trying dozens, a few consistently stand out for their reliability, ease of use, and most importantly, the quality of their results.
Here are some of the best apps I've found for both iOS and Android that really nail this task:
- PhotoRoom: This one is a fan favorite for good reason. Its AI instantly sniffs out the subject and strips the background, but it doesn't stop there. It also gives you a whole suite of templates and tools perfect for whipping up marketplace-ready product shots or social media graphics right in the app.
- Canva: While it’s known as a full-blown design platform, Canva’s mobile app includes a really effective background remover tool for Pro users. This is a no-brainer if you’re already using Canva for your marketing, as it keeps your entire workflow under one roof.
- Snapseed: This is a powerful, totally free photo editor from Google. It doesn't have a simple "remove background" button, but you can use its selection and masking tools for a more manual, controlled approach when you're on the move.
The right choice really boils down to what you need. Are you looking for a dedicated tool that does one thing perfectly, or a more integrated solution that fits into your bigger design process? Most have free versions, so it’s worth playing around to see which one clicks with your workflow.
This one-tap magic we have today has deep roots. Long before our digital tools, this was a painstaking, hands-on process. Back in the 1920s, Hollywood studios were on the cutting edge, with MGM manipulating around 15,000 images a year by 1930. They used airbrushing to remove entire sets from photos, a process that cost about $2 per image—that's roughly $40 in today's money. It wasn't until processes like Agfacolor Neu in 1936 that editing time was slashed by over 60%, paving the way for the accessible solutions we now have on our phones. You can read more in this historical overview of photo manipulation.
Combining AI Automation with Manual Precision
The real power of the best mobile apps is that they offer the best of both worlds: a lightning-fast AI removal followed by the option to fine-tune the results by hand. This hybrid approach is what gives you professional-level control from such a small screen.
A typical workflow looks something like this:
- Let the AI Do the Work: First, you let the app's artificial intelligence take the first pass. In seconds, it identifies your subject and gets rid of the bulk of that white background.
- Zoom In and Inspect: Next, you pinch to zoom right in on the edges. This is where you'll spot any little imperfections—areas the AI might have missed or, sometimes, parts it erased by mistake.
- Refine with Manual Tools: Using a resizable eraser brush, you can carefully clean up any stray white pixels around the edges. If the AI was a little too aggressive, you can switch over to a "restore" brush to paint back any parts of your subject that got accidentally zapped.
This blend of speed and control is the secret sauce for getting fantastic results on mobile. Let the AI do the heavy lifting to get you 95% of the way there, then use your own eye for that final 5% polish.
Overcoming Mobile Editing Challenges
Let's be honest, editing on a tiny screen has its own set of challenges. Fingers can feel clumsy for precision work, and it’s easy to miss small details that would be glaringly obvious on a big monitor.
But these are easy hurdles to clear with a few smart habits.
- Zoom In Aggressively: Don't be shy. You need to zoom way, way in to see and correct the tiny flaws along the edges of your product.
- Use a Stylus: If your finger feels more like a sausage than a scalpel, a simple capacitive stylus can give you a massive boost in precision for that fine detail work.
- Find Good Lighting: It's a lot easier to spot subtle imperfections on your screen when you aren’t fighting glare from the sun or a bright overhead light.
- The Black Background Check: Before you call it done, temporarily drop your cutout onto a solid black background. This simple trick makes any stray white pixels or halos pop, showing you exactly where you need to clean up.
By making these simple practices part of your routine, you can turn your smartphone into a seriously powerful and reliable editing tool, ready to produce clean, professional images whenever and wherever you need them.
You've nailed the background removal, which is a huge step, but the job isn't quite done. The final, professional polish comes from finessing the details and exporting your image with the right settings. This last stage is what really separates a decent cutout from a truly seamless one.
This is where you hunt down and eliminate any leftover artifacts, smooth out jagged edges, and make sure the final file is perfect for its intended use, whether that's an Amazon listing or a website banner. Getting this part right ensures all your hard work pays off.
Cleaning Up Halos and Jagged Edges
Ever remove a background and notice a faint, glowing outline around your subject? That’s often called a "halo" or "fringe," and it’s a dead giveaway that the image has been edited. It’s caused by tiny pixels from the old background stubbornly clinging to the edges of your subject.
Another common headache is jagged or "stair-stepped" edges, which are especially noticeable on curved objects. This usually happens when the initial selection wasn't quite smooth enough. Luckily, most editing software has tools to combat this:
- Feathering: This tool slightly softens the edges of your selection, helping it blend more naturally into a new background. Use it sparingly—just 1-2 pixels is often plenty.
- Edge Refinement Brushes: Tools like Photoshop's "Refine Edge" brush are fantastic. They let you paint over tricky areas like hair or fur, intelligently separating the subject from leftover background bits.
- Contract Selection: A simple but effective trick. Sometimes, just shrinking your selection by a single pixel before you create the mask can cleanly trim off that unwanted white fringe.
For truly advanced clean-up, especially when dealing with a high volume of images that need flawless edges, you might need some professional help. Exploring a service for product photo retouching can save you hours of meticulous, eye-straining work.
Choosing the Right File Format
This is a classic rookie mistake. You’ve done all the work to make the background transparent, but if you save it in the wrong format, that white background will pop right back into existence.
The golden rule for transparent images is to always, always save your file as a PNG (Portable Network Graphics). The PNG format is specifically designed to support an "alpha channel," which is the secret sauce that holds the transparency information.
If you save as a JPG, it will automatically fill any transparent areas with solid white, completely undoing all your hard work. JPGs are great for standard photos where you need small file sizes, but they simply don't support transparency.
Optimizing Your Export Settings
Once you've selected PNG, you still have a few crucial settings to dial in. The goal is to find the sweet spot between image quality and file size, ensuring your picture looks sharp without slowing down your website.
Here’s a quick checklist for exporting:
- Resolution: For web use, 72 DPI (Dots Per Inch) is the industry standard. It keeps the file size manageable while looking crisp and clear on screens.
- Compression: PNGs use lossless compression, meaning they reduce file size without wrecking image quality. You'll often see an option for "PNG-24," which offers the best quality and full transparency support.
- Dimensions: Resize your image to the exact dimensions it will be displayed at online. There's no point in uploading a massive 4000×4000 pixel image for a spot that only needs a 500×500 pixel thumbnail. That just kills your page load time.
Taking a moment to check these settings is the final step to creating a versatile, professional-grade asset. It ensures your image is optimized for performance and meets the technical requirements of any platform you upload it to, from Shopify to social media.
Optimal Export Settings for Different Platforms
Where you plan to use your image matters. Different platforms have their own best practices for image formats and settings to ensure your products look their best. Here’s a quick guide to some of the most popular ones:
| Platform | Recommended Format | Resolution (DPI) | Key Considerations |
|---|---|---|---|
| Amazon | PNG, TIFF, or JPEG | 72 DPI | Prefers a pure white background (RGB 255, 255, 255) for main images, but PNG is useful for branding assets. |
| Shopify | PNG or JPEG | 72 DPI | PNG is best for transparent backgrounds. Shopify also supports modern formats like WebP for better compression. |
| Etsy | PNG or JPEG | 72 DPI | PNG is ideal for products where you want to show them on different colored backgrounds in your listing. |
| Website (General) | PNG or WebP | 72 DPI | WebP is a great modern alternative to PNG, offering excellent quality with smaller file sizes. |
| Social Media | PNG or JPEG | 72 DPI | PNG for logos or graphics over images; JPEG for standard photo posts. Each platform has its own dimension specs. |
While these are general guidelines, always double-check the specific requirements for the platform you're using. Getting it right at the export stage saves you from having to re-do your work later.
Running Into Trouble? Let's Fix It.
Even when you have the best tools, you’re going to hit a snag eventually. Knowing how to handle the common hiccups when you remove a white background can save you a mountain of frustration and time. Let's walk through some of the questions I hear all the time.
Why Is My Background White Again After I Saved the Image?
This is, by far, the most common problem people run into. I see it constantly. The good news is the fix is almost always the same: you saved it in the wrong file format. If you export your image as a JPG (or JPEG), all that hard work you did to create transparency will just disappear.
The JPG format simply doesn't support transparency. It's built for photos, and its job is to fill in any empty space, which it does with a solid white color. To keep that beautiful transparent background, you have to save your work as a PNG (Portable Network Graphics). The PNG format is specifically designed with an "alpha channel," which is the technical bit that stores all the transparency information.
So, if you’re staring at a white background you thought you deleted:
- Hop back into whatever software or app you were using.
- Double-check that the background is actually transparent (you should see that classic gray and white checkerboard pattern).
- Find the Export or Save As option and make sure you select PNG as the file type.
Nine times out of ten, that simple switch is all it takes to solve the mystery.
What’s the Best Way to Cut Out Hair or Fur?
Ah, the final boss of background removal. Those fine, wispy details like hair, fur, or even the fluff on a sweater can feel impossible to isolate cleanly. Just clicking with a magic wand tool is a recipe for disaster—you'll end up with clunky, unnatural edges every time.
For these tricky subjects, you need to bring in the bigger guns.
In pro-level software like Photoshop, the Select and Mask workspace is your absolute best friend. After you make a rough selection, you'll use a tool called the "Refine Edge Brush" to just paint over those difficult areas. This tells the program to intelligently figure out which pixels are hair and which are background, and the results can be incredibly precise.
If you’re leaning on an AI tool, look for one that specifically boasts about its ability to handle complex edges. The top-tier AI background removers have been trained on millions of images of people and animals, which allows them to produce a perfect cutout with one click—something that felt like magic just a few years ago.
How Can I Remove a White Background for Free?
You absolutely do not need to pay a dime to get a fantastic result, especially for simpler product shots. There are plenty of great free tools out there that can get the job done fast.
Many online background removers will give you a certain number of free edits or let you download at a standard resolution. These browser-based tools are my go-to for quick jobs because you don't have to download or install anything. You just upload your photo, let the AI do its thing, and download your transparent PNG.
For more hands-on control, powerful desktop software like GIMP (GNU Image Manipulation Program) gives you a suite of tools that are very similar to Photoshop's, including layer masks and advanced selection options. It has a bit of a learning curve, for sure, but you get professional-grade power without the monthly bill. And for quick edits on your phone, dozens of mobile apps have free tiers that are perfect for knocking out images for social media or an online marketplace.
Still spending too much time tracing edges? ProdShot uses powerful AI to deliver perfect, professional-grade product photos in seconds. Stop the tedious editing and start growing your business. Try it for free and see just how easy it is to elevate your brand’s visuals.