
At its core, makeup product photography is about capturing cosmetics in a way that shows off their true color, texture, and finish to drive sales online. Think of it as the silent salesperson for your brand. It’s what turns a casual browser's curiosity into a confident purchase by showing exactly what they're getting.
Why Great Makeup Photography Is Your E-commerce Superpower
In the incredibly crowded online beauty market, your product photos are your most powerful sales tool. It's simple, really. When customers can't physically touch or swatch a shimmering highlighter or a creamy lipstick, your images have to do all the heavy lifting.
High-quality visuals build instant trust and communicate the value of your products far more effectively than any description ever could. They bridge that critical gap between the digital shelf and the customer's makeup bag.
This connection isn't just about looking professional; it translates directly into real business results. For anyone selling on platforms like Shopify, Amazon, or Etsy, exceptional photography is completely non-negotiable.
- It boosts your conversion rates. Striking images that accurately show color and texture give customers the confidence they need to click "add to cart."
- It slashes your return rates. When the product that shows up at their door matches the photo they saw online, customer satisfaction soars and returns plummet. It's a win-win.
- It builds your brand identity. Your photography style—whether it's minimalist, bold, or artistic—tells your brand's story and helps you stand out from the noise.
Your product photography's first impression is often measured by your Amazon Click-Through Rate (CTR). Getting a handle on the right main image optimization techniques to improve Amazon CTR is absolutely essential for grabbing a shopper's attention in a sea of search results.
The visual nature of e-commerce has made makeup photography a massive factor for sales, especially as the online beauty market continues to boom. Industry data shows cosmetic retailers pulled in a staggering $17.09 billion in online sales, proving just how much high-quality images drive conversions.
For independent sellers, this means elevating your photos from simple snaps to professional-level shots isn't just a nice-to-have—it's essential for survival and growth.
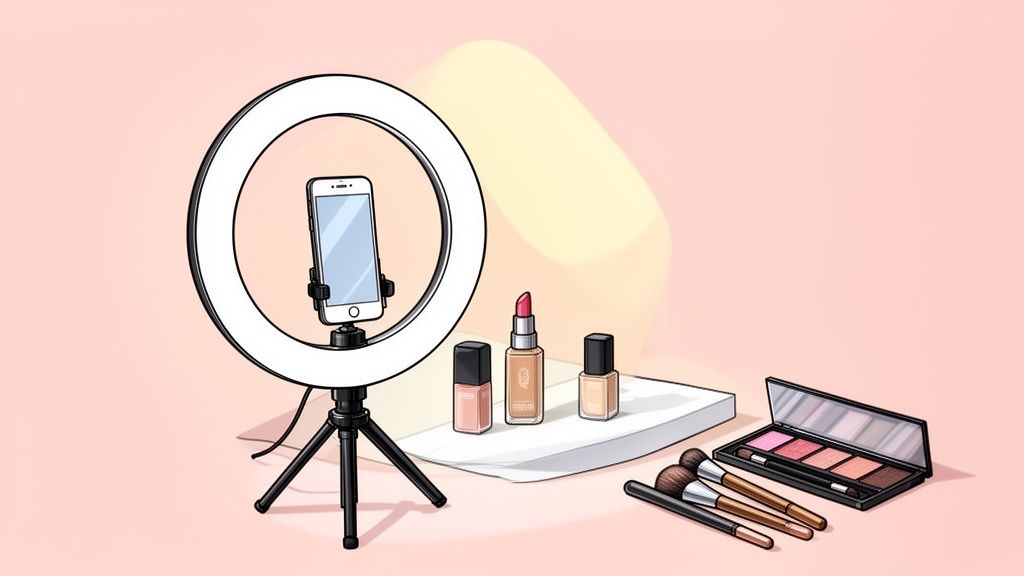
Your Essential DIY Photography Toolkit
You absolutely do not need a high-end studio to get professional-looking photos. In fact, you can create stunning makeup product photography with just a few smart, budget-friendly items you probably already have or can grab easily. The whole idea is to build a small, controlled environment where your products are the undeniable star of the show.
Your smartphone is the heart of this entire setup. Before you even think about buying a single accessory, let's get into your phone's camera settings. The first thing you should do is turn on the grid lines. Seriously, this is non-negotiable for applying basic composition principles like the Rule of Thirds. Next, get comfortable using manual focus by simply tapping on your screen. This one little action ensures the crispest details on logos or product textures are perfectly sharp, preventing the camera from accidentally focusing on the background instead.
Building Your Mini Studio
Okay, with your camera settings dialed in, let's pull together the physical toolkit. These items are cheap but will make a massive difference in your photo quality.
- A Sturdy Tripod: A tripod does more than just eliminate camera shake for crisp, clear photos. More importantly, it locks in your angle. This means you can make tiny adjustments to the product or lighting while keeping the frame exactly the same, which is the key to creating a cohesive gallery of images.
- White Foam Board: This is your new best friend. A big piece of white foam board from any craft store acts as a perfect, seamless background. You can also prop up a second piece to use as a "bounce card"—it reflects light back onto your product, softening any harsh shadows.
- Clamps or Tape: A couple of simple clamps or a roll of painter's tape are all you need to hold your foam board backdrop in place. You don't want it shifting around in the middle of your shoot.
The real secret to great DIY product photography is control. When you use a tripod and a fixed background, you’re creating a repeatable setup. That consistency is what separates amateur snapshots from a professional and trustworthy brand aesthetic.
Manipulating Light for Flawless Shots
Great lighting is everything, but you don't need to spend a fortune on it. Natural light pouring in from a large window is the best place to start. A word of warning, though: direct sunlight is way too harsh. It creates hard-edged shadows that will hide all the beautiful details of your products.
The trick is to soften that light with a diffuser. You can make one in seconds by hanging a thin white sheet over the window. This simple hack scatters the light, wrapping it gently around your products for a soft, flattering, and professional look.
If you want even more control, you can build a simple DIY light box. Just grab a cardboard box, cut out the sides and top, cover the holes with white tissue paper (to diffuse the light), and place a white foam board inside for the background.
While you're assembling your physical toolkit, don't forget that digital tools are just as important. You can explore categories for further tools and resources for creators to really level up your workflow and get those truly professional results.
Staging Your Products to Tell a Story
The very best makeup product photography starts long before you even touch your camera. The real magic? It happens in the staging. This is where you set the scene, prepare your products, and start telling a visual story that connects with your audience. It's your chance to go beyond a simple, flat product shot and create an image that actually makes someone feel something.
First things first: clean everything. And I mean everything. A stray fingerprint, a speck of dust, or a smudge can instantly kill an otherwise perfect shot. Grab a lint-free microfiber cloth and meticulously wipe down every compact, tube, and bottle. For stubborn smudges on shiny packaging, a little rubbing alcohol on the cloth is your best friend. This tiny step makes a massive difference, ensuring your products look absolutely pristine under the camera's eye.
Creating Visually Compelling Arrangements
Once your products are spotless, it’s time to get creative with composition. Don't just stick a lipstick tube in the middle of the frame and call it a day. Think about how you can arrange your products to highlight their best features.
- Showcase Texture: Got an eyeshadow palette or a pressed powder? Create a beautiful, controlled spill right next to the compact. This is a fantastic way to instantly show off the product’s texture and color payoff.
- Demonstrate Application: A perfectly imperfect lipstick smear on a clean surface can be way more compelling than just a closed tube. It gives a hint of that creamy, rich feel people are looking for.
- Group Products Logically: If you’re shooting a whole collection, arrange the items so they feel connected and cohesive. A slight overlap or a balanced cluster often looks much more natural and interesting than a stiff, formal lineup.
The point of staging isn't just to make things look pretty. It's about answering your customer's unspoken questions before they even ask them. A great texture shot shows them the color payoff. A clean, smudge-free bottle shows them you're all about quality. And a well-composed scene tells them what your brand stands for.
This flowchart breaks down the essential tools you'll need to create a controlled, professional-looking photo environment right at home.
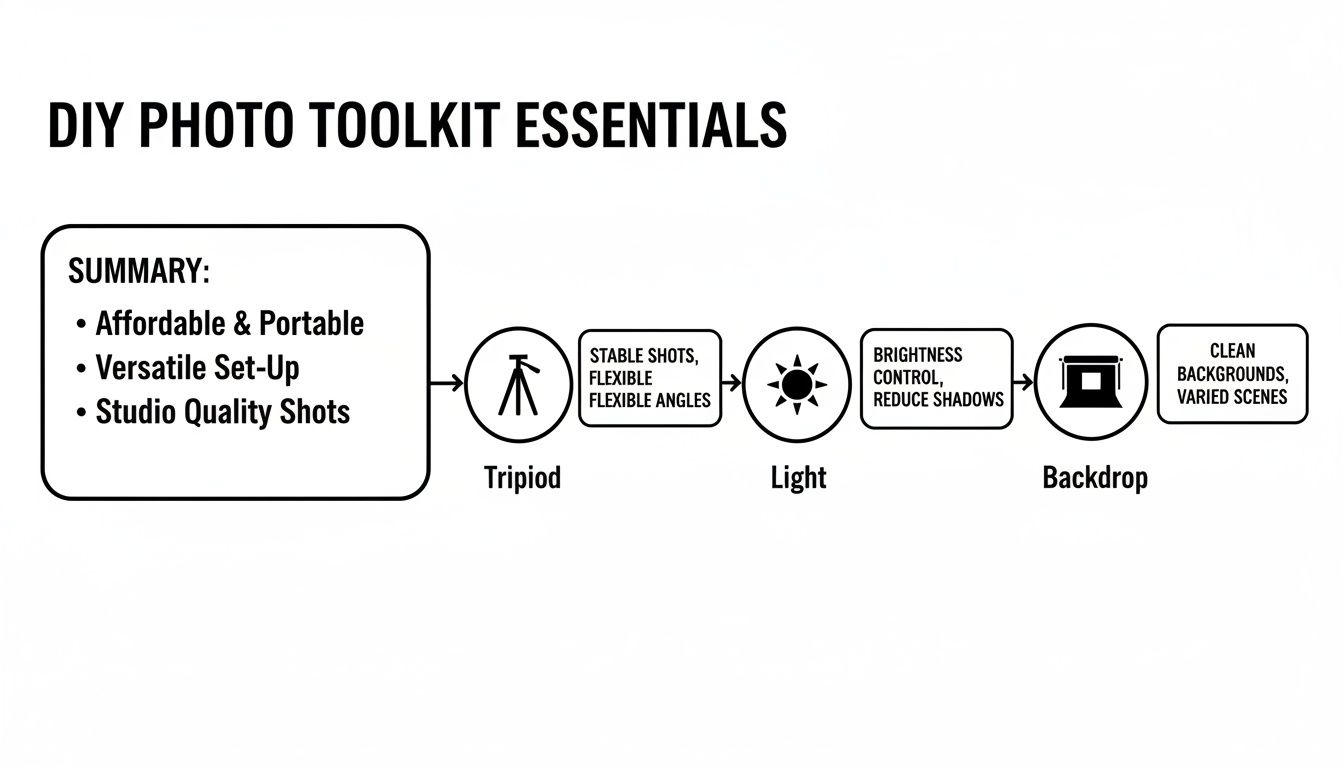
Honestly, just having a basic tripod, a good light source, and a clean backdrop gives you an incredible amount of control. It’s the foundation for staging your products with consistency and a professional touch.
Choosing Backgrounds to Set the Mood
The background you choose is a powerful tool for setting the mood and communicating your brand's unique vibe. A simple white background is always a great choice for clean, marketplace-ready shots, but don't stop there.
Think about the feeling you want to create. A slab of cool-toned marble, for instance, can instantly suggest luxury and sophistication. A rustic piece of wood, on the other hand, might give off a more natural, earthy feel.
A great background can completely transform your photo. Here's a quick guide to help you match your background to your brand's aesthetic.
Background Choices And Brand Mood
| Background Material | Brand Mood / Aesthetic | Best For Products Like |
|---|---|---|
| Clean White/Gray Paper | Minimalist, Modern, Crisp | Foundations, Skincare, Clinical Formulations |
| Marble or Stone | Luxurious, High-End, Elegant | Serums, Highlighters, Perfume Bottles |
| Raw Wood or Linen | Natural, Organic, Earthy | Clean Beauty, Lip Balms, Vegan Products |
| Colored Paper/Vinyl | Playful, Bold, Trendy | Colorful Eyeshadows, Lipsticks, Nail Polish |
| Mirrors or Acrylic Blocks | Sleek, Chic, Architectural | Lip Glosses, High-Tech Beauty Tools |
Remember, your background should always complement your product, never compete with it. By carefully selecting your staging elements, you can create powerful makeup product photography that not only looks incredible but also helps build a real connection with your customers. For more inspiration on what’s possible, take a look at these amazing beauty product photos.
Mastering Light and Composition
Alright, let's get into the good stuff. This is where we move from theory to the hands-on techniques that make a product photo pop. The way light and composition work together is what separates a basic snapshot from a stunning image that actually stops someone from scrolling. And the best part? It's less about having a fancy camera and more about knowing how to work with what you've got.
Honestly, the single best light source for DIY photography is free: natural window light. Its soft, diffused quality is just incredibly flattering for cosmetics. The key is to set up next to a big window, but not in the path of direct, harsh sunlight.
A cloudy day is a photographer's best friend. But if you're stuck with a bright, sunny day, just hang a thin white bedsheet or piece of parchment paper over the window. This instantly turns your window into a giant, professional softbox, wrapping the light beautifully around your products and dialing down those harsh shadows and reflections.
How to Really Use Window Light
The direction of your light source can completely change the vibe of your shot. Just by turning your product a little bit, you can create dramatically different looks without moving your setup an inch.
- Side Lighting: Position the product so the light from the window hits it from the side (think a 90-degree angle). This is my go-to for creating soft shadows that bring out texture. It’s perfect for showing off the creamy finish of a lipstick or the fine-milled texture of a pressed powder.
- Front Lighting: Have the product face the window directly. This gives you clean, bright, and even light across the board. It’s the best way to minimize shadows and nail color accuracy, which is absolutely critical for things like foundation and concealer.
Pro Tip: Your secret weapon for controlling light is a simple white foam board from a craft store. Place it on the side of your product opposite the window. It will bounce light back into the shadows, instantly brightening the whole image and giving it a much more polished, professional feel.
Want to go for a more dramatic, moody look? Swap that white foam board for a black one. It will absorb light instead of reflecting it, deepening the shadows and adding a high-contrast, luxurious feel that works great for high-end or evening-focused makeup lines.
Making Sense of Composition
Composition is simply the art of arranging things in your photo to make them look good. You don't need a degree in art history to get this right—just a couple of simple guidelines.
One of the most powerful principles is the Rule of Thirds. Imagine your phone screen has a tic-tac-toe grid on it (most camera apps have this as an overlay option). Instead of plopping your product right in the center square, try placing it along one of the lines or where two lines intersect. This small change makes the photo feel more dynamic and pulls the viewer's eye in more naturally.
Another powerful tool is negative space—that’s just the empty area around your product. Don't be afraid to leave some breathing room! It keeps the shot from feeling cluttered and makes your product the undeniable star. A clean, minimalist composition often reads as more sophisticated and high-end.
Tailoring Shots for Different Products
Every type of makeup has a unique story to tell, and your job is to highlight what makes it special. Think about what a customer really wants to see in that specific product.
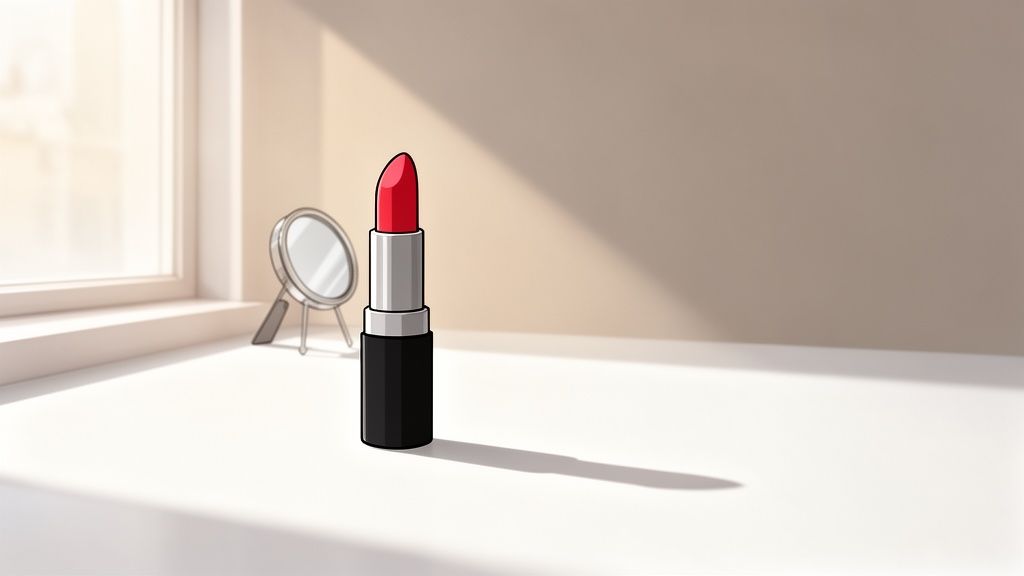
- Lipsticks: To nail that creamy texture, try a side-lit setup. Show the bullet sticking out of the tube a bit, and maybe even add a clean, artful smear on your surface to show off the true color payoff.
- Eyeshadow Palettes: It's all about the shimmer. You need to angle the palette so the light catches on any metallic or glittery shades. Shooting from a slightly higher angle often helps display the full range of colors clearly.
- Glass Bottles (Foundations, Serums): These guys are notorious for catching reflections. Your best bet is a large, diffused light source, like that sheet-covered window we talked about. You can also place white foam boards around the bottle to control what gets reflected in the glass, giving you a clean, elegant look without distracting glare.
When you start combining thoughtful lighting with a little bit of compositional strategy, your makeup photography will do more than just look professional—it will truly sell the quality and beauty of your products.
Polishing Your Images with AI Editing
Even if you nail the lighting and composition, the raw photo from your camera is rarely the final version. Post-production is where the magic really happens—it’s the last crucial step that turns a great shot into a polished, e-commerce-ready asset that actually converts. This used to mean long hours hunched over complex software, but now, AI-powered tools have put professional-level editing within everyone's reach.
With this approach, you can take the images straight from your smartphone and give them that final polish in minutes, not hours. It’s all about working smarter to get a clean, consistent, and appealing look across your entire product gallery, which is absolutely essential for building brand trust with your customers.
Streamline Your Workflow with AI
The real win with AI editing is efficiency and consistency. Instead of spending time manually tracing product outlines or tweaking dozens of sliders, you can let smart algorithms do the heavy lifting. This frees you up to focus on the more creative parts of your makeup product photography.
Here's where AI tools really make a difference:
- Automatic Background Removal: Instantly get that pure white or transparent background you need for marketplaces like Amazon or for a clean look on your Shopify store.
- Intelligent Enhancements: AI can analyze your photo and automatically adjust brightness, contrast, and sharpness to make your product pop without ever looking over-edited.
- Realistic Shadow Generation: A subtle, soft shadow grounds your product, giving it a three-dimensional feel so it doesn't look like it's just floating awkwardly in space.
This streamlined process is a total game-changer for busy entrepreneurs. It gets rid of the steep learning curve of traditional photo editing and lets you produce high-quality, consistent images whenever you need them.
The beauty industry’s move toward authentic, texture-focused makeup photography is completely changing how brands grab a buyer's attention—especially with a projected $650 billion global revenue boom by 2025. This trend is why you see so many macro shots of serums and powders; customers want to see the real deal. And it directly impacts sales. In the U.S., prestige eye makeup reversed declines, partly because of mascara imagery that really highlighted texture and volume.
A Mini-Tutorial for Polished Results
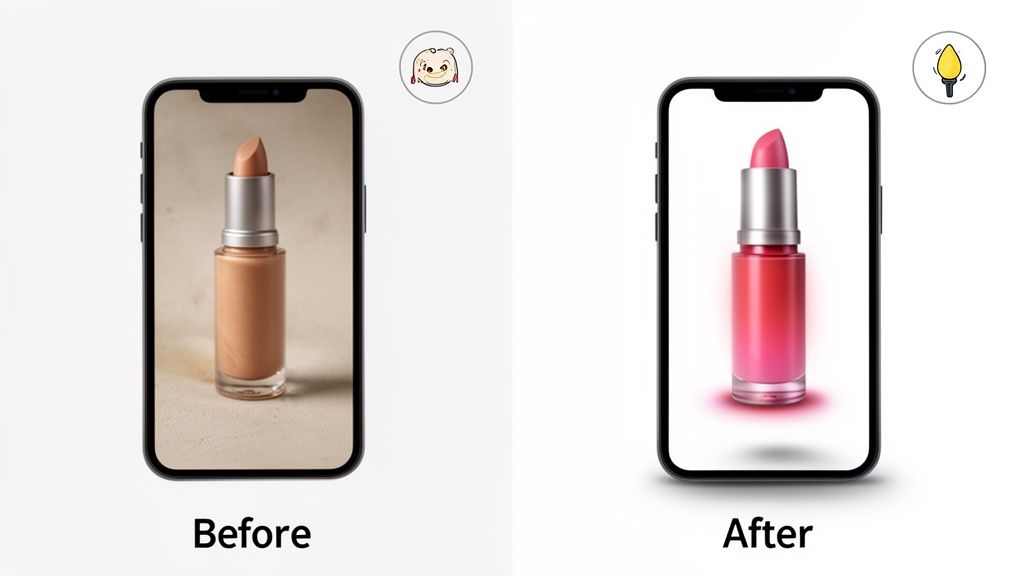
Let's say you just finished shooting a new lipstick. Instead of firing up some complicated desktop software, you can use a tool like an AI product photo generator to get images ready for your store in seconds. The process couldn't be simpler.
First, just upload your raw photo directly from your phone. The AI immediately gets to work, identifying the lipstick and perfectly removing the original background. From there, you can choose a clean white backdrop with a single click.
Next, the AI automatically enhances the lighting to make sure the lipstick's color is vibrant and true-to-life. It also subtly sharpens the details on the packaging and the texture of the lipstick itself. Finally, with one more click, you can add a soft, realistic shadow under the product to give it some weight and presence. The whole thing takes less than a minute, and you’re left with a polished, professional image that’s ready to upload and start selling.
Answering Your Top Makeup Photography Questions
Even when you've planned everything perfectly, questions are just part of the creative process. When you’re in the middle of a shoot and something isn't working, you don’t have time to research—you need answers, fast.
This is your troubleshooting guide for those moments. I’ve put together solutions for the most common headaches I see in makeup photography so you can solve the problem and get right back to creating.
How Can I Avoid Reflections On Shiny Makeup Packaging?
This is the big one. Reflections on glossy lipstick tubes, mirrored compacts, or chrome caps can ruin an otherwise perfect shot. The trick isn't to eliminate them but to control what they reflect.
Your best defense is to use large, soft, diffused light. Instead of hitting the product head-on, move your light source off to the side. If you're using a window, hang a thin white sheet over it to act as a giant diffuser.
Then, you can actively shape the reflections. Grab some cheap white or black foam boards and place them just out of the camera's view. A white board will create a clean, bright highlight, while a black board will add a sharp, dark line that beautifully defines the product's shape. This simple technique gives you incredible control right in the camera.
Don't fight the reflection—control it. By carefully placing bounce cards and diffusers, you're not just removing glare; you're actively shaping the light to define and flatter the product's form. This proactive approach saves hours of frustrating editing work.
What Is The Best Way To Show True Product Color?
Color accuracy is everything for cosmetics. Customers need to trust that the shade they see on screen is the shade they'll get. In fact, a whopping 93% of shoppers say visual appearance is the key factor in their buying decisions, and color is a huge part of that.
The most reliable way to nail true-to-life color is to shoot in soft, natural daylight. It’s the most neutral light source you have access to.
For guaranteed accuracy, place a white balance card (or even a plain piece of white printer paper) in your very first shot of the setup. Later, in editing, you can use that neutral reference point to correct the color balance for the entire batch of photos. One more tip: avoid colored backdrops or surfaces that can cast their hue onto your product and throw off its true shade.
Is A Tripod Really Necessary For Smartphone Photos?
Yes. Full stop. A tripod is non-negotiable if you want consistently sharp, professional-looking photos.
While modern smartphone cameras have amazing built-in stabilization, the tiniest handshake can introduce motion blur that you won't notice until you see the image on a larger screen. This is especially true for those detailed macro shots where you're trying to capture the subtle shimmer in an eyeshadow or the texture of a lipstick.
But a tripod does more than just prevent blur. It locks your composition in place. This means every photo in a series will have the exact same angle and framing, which is crucial for creating a clean, cohesive look on your website or social media feed. It might feel like an extra step, but the jump in quality is massive. And remember, while DIY photography is incredibly effective, understanding the cost of professional product photography can provide valuable perspective on the investment required for high-stakes campaigns.
Ready to transform your smartphone photos into professional, marketplace-ready images? With ProdShot, you can remove backgrounds, enhance lighting, and generate stunning visuals in seconds. Try ProdShot for free today and see how easy it is to elevate your brand.