
Blurring the background of a photo is the secret sauce that makes your subject the undeniable star of the show. You’ve seen it everywhere—that professional, polished look often called bokeh. You can get it right in your camera, create it later with editing software, or use slick AI tools to do it in seconds. Each path gets you to the same place: a clean, high-end image where your subject is perfectly separated from any distracting surroundings.
Why a Blurred Background Completely Changes Your Photos
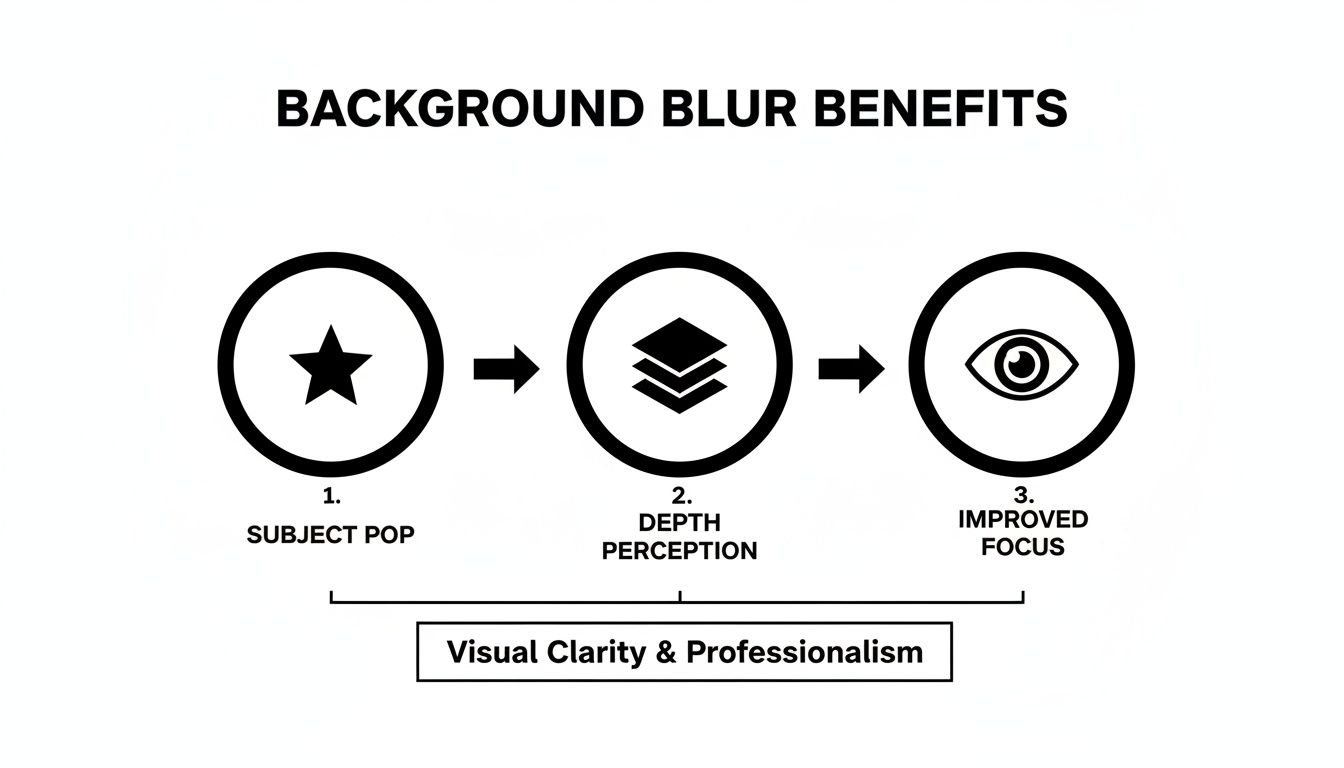
Ever wonder what gives professional photos that clean, almost magnetic pull? It’s often that beautifully blurred background. This isn’t just some artsy effect; it’s a powerful visual strategy that turns a regular snapshot into something truly captivating. A soft, out-of-focus background does a few key things all at once.
First and foremost, it eliminates distracting clutter. Imagine shooting a product photo on your kitchen counter. A quick background blur instantly makes the blender and the mail pile disappear, forcing the viewer's eye right where you want it: on your product. For anyone in e-commerce, this is huge—a clear product shot can be the difference between a browse and a buy.
It also creates a fantastic sense of depth and dimension. By separating the foreground from the background, the image feels more three-dimensional and immersive. The technique actually mimics how our own eyes work, focusing on one thing while the rest of the scene falls away softly. It just feels natural and looks professional.
For anyone selling online, from an Etsy maker to a major brand, mastering this is a game-changer. It makes your products look more premium, more desirable. And the best part? You don't need a fancy studio to pull it off. You can learn how to blur the background of a photo in three main ways:
- In-Camera Techniques: Using your camera’s settings like aperture and focal length.
- Editing Software: Manually adding blur effects in programs like Photoshop.
- AI-Powered Tools: Getting instant, perfect results with smart assistants.
A blurred background is the visual equivalent of turning down the noise to hear a single, clear voice. It ensures your subject—whether it's a person, product, or piece of art—is the only thing the viewer focuses on.
This is especially true if you’re aiming for professional Amazon product photography, where you have to fight to stand out in a sea of listings. By understanding these different methods, you can pick the workflow that fits your gear, skills, and timeline. Let’s dive into each one.
Getting That Creamy Background Blur Straight Out of the Camera
There's something incredibly satisfying about nailing that professional, buttery-smooth background blur right in the camera. It’s the kind of detail that elevates a simple snapshot into a truly stunning photograph. The secret isn't a fancy, expensive camera—it's all about mastering a single concept: depth of field.
Think of depth of field as the slice of your photo that’s perfectly sharp. To get that beautiful blur, you need a "shallow" depth of field, where only a sliver of the image is in focus. This makes your subject pop and everything else just melt away. It all comes down to the interplay between three key camera settings.
Master Your Aperture for a Shallow Depth of Field
The most direct lever you can pull to control background blur is your camera’s aperture. Measured in f-stops (like f/1.8, f/4, or f/11), the aperture is simply the opening in your lens that lets light through. It works a lot like the pupil of your eye, widening in the dark and shrinking in bright light.
A wide-open aperture—which, confusingly, means a smaller f-stop number like f/1.8 or f/2.8—creates a razor-thin depth of field. This is the magic setting for portraits and product shots. Only your subject stays sharp, while the foreground and background dissolve into a gorgeous, soft blur.
On the flip side, a narrow aperture (a larger f-stop number like f/8 or f/16) gives you a deep depth of field. This keeps almost everything in the frame sharp, from the flowers at your feet to the mountains miles away, making it perfect for landscape photography.
My Go-To Tip: If you're just starting to experiment, switch your camera to "Aperture Priority" mode (look for 'A' or 'Av' on the dial). You set the f-stop you want, and the camera handles the shutter speed to get the exposure right. It's the best way to practice and see the effect of aperture in real-time.
Use a Longer Focal Length to Compress the Scene
The focal length of your lens, measured in millimeters (mm), also has a massive impact on your background. Using a longer focal length, either with a telephoto lens or by zooming in, actually compresses the space between your subject and the background. This compression trick makes the background look closer, larger, and way more blurred.
Here's how it plays out:
- A wide-angle lens (think 24mm or 35mm) captures a huge scene, making the background seem farther away and keeping more of it in focus.
- A telephoto lens (like an 85mm, 135mm, or 200mm) has a much tighter field of view. It isolates your subject beautifully and turns the background into that creamy, abstract blur everyone loves.
Even if you're just using the standard 18-55mm kit lens that came with your camera, try shooting at the longest end (55mm). You'll be surprised at how much of a difference zooming in makes.
As you can see, a blurred background is more than just a pretty effect. It’s a powerful tool that forces the viewer's eye exactly where you want it to go.
Play with Distance for Maximum Impact
The last piece of the puzzle is also the most intuitive: distance. The physical space between your camera, your subject, and the background is just as critical as your settings. You can completely change the look of your photo just by taking a few steps.
There are two distances you need to manage:
- Camera-to-Subject: The closer you get to what you're shooting, the shallower your depth of field becomes. Physically moving nearer to your subject will make the background fall out of focus much more dramatically.
- Subject-to-Background: The more space you put between your subject and the background, the blurrier that background will be. If your friend is standing right in front of a brick wall, you'll see every brick. But if you have them step ten feet away from that wall, those bricks will transform into a soft, textured pattern.
Let’s say you're shooting a handmade mug for your online store. Don't just stick it on a table against the wall. Pull that table into the middle of the room. Place the mug near the edge and get down low to shoot. That extra distance you created between the mug and the wall is what will give you that professional, catalog-worthy blur.
To tie it all together, here’s a quick-reference guide for how these settings work.
Camera Settings for Maximum Background Blur
This table breaks down how to adjust your camera to get either a super-blurry background or a sharp-all-over look.
| Setting | For More Blur (Shallow Depth of Field) | For Less Blur (Deep Depth of Field) |
|---|---|---|
| Aperture (f-stop) | Use a wide aperture (small f-number like f/1.8) | Use a narrow aperture (large f-number like f/11) |
| Focal Length | Use a long focal length (e.g., 85mm or zoom in) | Use a short focal length (e.g., 24mm or zoom out) |
| Distance | Get closer to your subject and increase the distance between your subject and the background | Move farther from your subject and decrease the distance between your subject and the background |
By balancing these three elements—aperture, focal length, and distance—you gain complete creative control over your depth of field and can achieve that coveted background blur in any situation.
Sometimes, you just can't nail that perfect background blur in-camera. Maybe the lighting was off, you were in a rush, or you were shooting on a phone that lacks a decent portrait mode. Don't sweat it. Post-production gives you a second chance—and honestly, often a whole lot more control—to create that gorgeous, subject-popping blur.
Jumping into an editor is the way to go when you need absolute precision. This is how you make sure every edge looks clean and the final image feels completely natural, not like a cheap cutout. Let's walk through the best tools for the job, from the professional desktop titans to the surprisingly powerful apps on your phone.
Precision Blurring with Adobe Photoshop
When you need total, uncompromising control over your edit, Adobe Photoshop is still the king of the hill. It lets you create a background blur that perfectly mimics what a high-end camera lens can produce. The real magic happens when you combine its smart selection tools with its sophisticated blur filters.
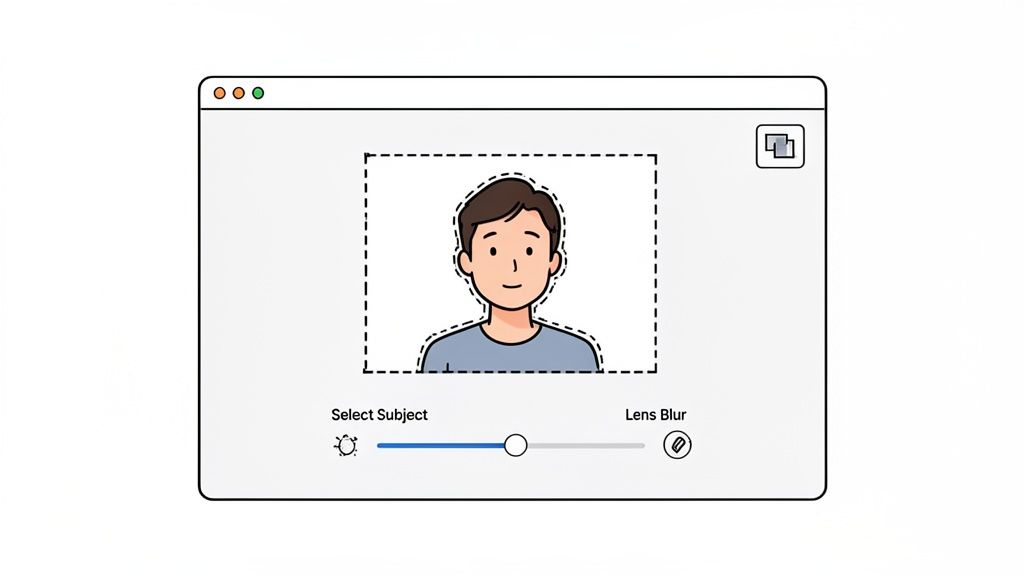
It all starts with isolating your subject. Photoshop’s Select Subject tool is a fantastic first step, using AI to instantly draw a rough outline around the main focus of your photo. It's rarely perfect, but it gets you 90% of the way there in a single click.
Now for the crucial part: refining that selection. This is what separates a professional-looking blur from an obvious, amateur edit. Jump into the Select and Mask workspace to fine-tune the edges. The Refine Edge Brush is an absolute lifesaver here, especially for tricky details like stray hairs or the soft fur on a pet. It intelligently separates those fine details from the background.
Once your subject selection is airtight, you'll inverse it to target just the background. From there, you could use a simple Gaussian Blur, but the Lens Blur filter is what you really want. It goes much further by simulating the optical qualities of a real camera lens, creating a far more authentic and pleasing bokeh. You can even tweak the blur radius, brightness, and the shape of the bokeh highlights.
Pro Tip: Never work destructively. Before you do anything, right-click your image layer and convert it to a Smart Object. This lets you go back and adjust the Lens Blur settings anytime you want without degrading the original photo. It's a non-negotiable step for any serious editor.
A Streamlined Workflow in Adobe Lightroom
For photographers who live inside their photo library, Adobe Lightroom offers a much faster workflow. While it doesn't offer the same pixel-level control as Photoshop, its masking tools have become incredibly powerful in recent years, letting you create a great background blur without ever leaving the app.
Lightroom's AI-powered masking can automatically detect the Subject or Background. Just one click, and Lightroom creates a surprisingly accurate mask over the area you want to edit.
With the background selected, you just need to play with a few sliders to create the effect:
- First, drag the Sharpness slider all the way down.
- Then, pull back the Texture and Clarity sliders to soften the background details.
This combination creates a smooth, beautifully blurred effect. It’s quick, intuitive, and perfect for when you need to edit a whole batch of photos and maintain a consistent look—a huge time-saver for product and portrait photographers.
Effortless Blurring on Your Phone with Mobile Apps
You definitely don't need a beast of a computer to get a professional-looking blur. There are tons of mobile apps with some seriously sophisticated tools that can get the job done in just a few taps.
Snapseed is a classic for a reason. Its "Lens Blur" tool is super intuitive. You just drop a point on your subject, and the app creates a radial or linear blur around it. You can pinch to change the focus area's size and swipe to adjust the blur strength. It's a quick and dirty way to draw attention right where you want it.
Other apps like Focos or AfterFocus give you more granular control. They let you literally "paint" the areas you want to keep sharp and the areas you want to blur. The app then builds a depth map to create a really convincing shallow depth of field. These are great for more complex images where the subject and background are a bit tangled.
For e-commerce sellers, these mobile tools can be a game-changer for getting product shots ready for listing. Finding a great Shopify photo editor can make it even easier to prep images that look professional and drive sales.
Whether you opt for the deep control of Photoshop, the speed of Lightroom, or the convenience of a mobile app, editing software puts the power back in your hands. You can salvage shots that didn't turn out quite right and creatively enhance your photos to bring your vision to life.
The Power of AI for Instant Background Blur
While getting the blur right in-camera or meticulously editing it later gives you total creative control, sometimes you just need it done now. This is where artificial intelligence has completely changed the game. Modern AI tools offer the fastest and most accessible path to a perfectly blurred background, letting anyone get studio-quality results without the technical headaches or expensive gear.
Think about an Etsy seller who just snapped a photo of their handmade jewelry on a cluttered kitchen table. In the past, they’d be looking at a long, frustrating editing session in Photoshop. Today, they can just upload that same image to an AI tool.
Within seconds, the AI intelligently identifies the jewelry, masks it perfectly, and swaps the messy background for a clean, beautifully blurred one. The final image makes the product pop, looking like it was shot in a professional studio. This isn't just about speed; it's about empowering creators to produce incredible work on their own terms.
The E-commerce Revolution and AI Blurring
The impact of AI on visual content has been massive, especially in the world of online retail. For sellers on platforms like Shopify and Amazon, blurring a background isn't just a stylistic choice—it's a proven sales driver.
Not long ago, professional studios had a monopoly on high-end product photography. AI tools have completely democratized this process. The image background remover market, which is the foundation for AI blurring, is expected to hit $500 million this year and is growing at an incredible rate. This boom is directly tied to AI's ability to first ditch distracting backgrounds and then add a realistic bokeh effect, no DSLR required. The data backs it up: high-quality images with clean, blurred backgrounds can boost conversion rates by up to 250%, turning casual browsers into buyers.
This shift means small business owners and solo entrepreneurs can now produce consistent, high-converting images that build a strong brand identity. All while saving countless hours and a ton of money.
How AI Background Blur Tools Work
So, how do these tools pull off in seconds what used to take a trained professional hours? The process is remarkably simple on the user's end, hiding a lot of sophisticated tech under the hood.
Most AI-powered platforms essentially follow a three-part logic:
- Subject Detection: The AI scans the image to identify the main subject—a person, a product, or even a pet. It then creates a pixel-perfect outline, or mask, around it, often far more accurately than a person could do by hand.
- Background Separation: Once the subject is locked in, the tool digitally lifts it away from the background. This is the same step where many tools offer background removal or replacement features.
- Intelligent Blurring: Finally, the AI applies a realistic blur to the isolated background. The best tools don't just apply a generic filter; they simulate the optical qualities of a real camera lens, creating natural-looking depth and bokeh.
The real magic of AI is its consistency and precision. It absolutely nails complex edges like hair, fur, or the intricate details on a product—the exact spots where manual selections often struggle and leave behind that ugly, unnatural "halo" effect.
A Practical Workflow for Product Photos
For anyone selling online, efficiency is everything. Let's walk through a real-world scenario using an AI tool like ProdShot.
A Shopify store owner needs to list a new handbag. They take a clear photo with their smartphone in their living room, messy couch and all. Instead of stressing about the background, they just upload the picture. The platform instantly removes the background and generates several options with clean, studio-style backdrops.
From there, they can pick a version with a soft, out-of-focus background that makes the handbag's texture and hardware stand out. The final result is a professional, on-brand image, ready for their product page in less than a minute. Our guide on using an AI product photo generator shows just how this simple process can completely transform an online store's look.
Even for those who stick with traditional software, AI is becoming a core feature. To see how artificial intelligence is streamlining background work, including advanced blurring techniques, check out this guide on AI's role in transforming backgrounds in Photoshop.
Ultimately, these tools are about more than just adding a blur effect. They're complete visual solutions that automate the most tedious parts of photo editing, freeing up sellers to focus on what really matters: growing their business.
Common Mistakes and Pro Tips for Flawless Blur
It’s one thing to apply a blur effect, but it's another thing entirely to make it look real. The difference between a quick, amateur edit and a truly professional-looking image often comes down to a few subtle details that are easy to miss. Honestly, knowing what not to do is just as important as knowing what to do.
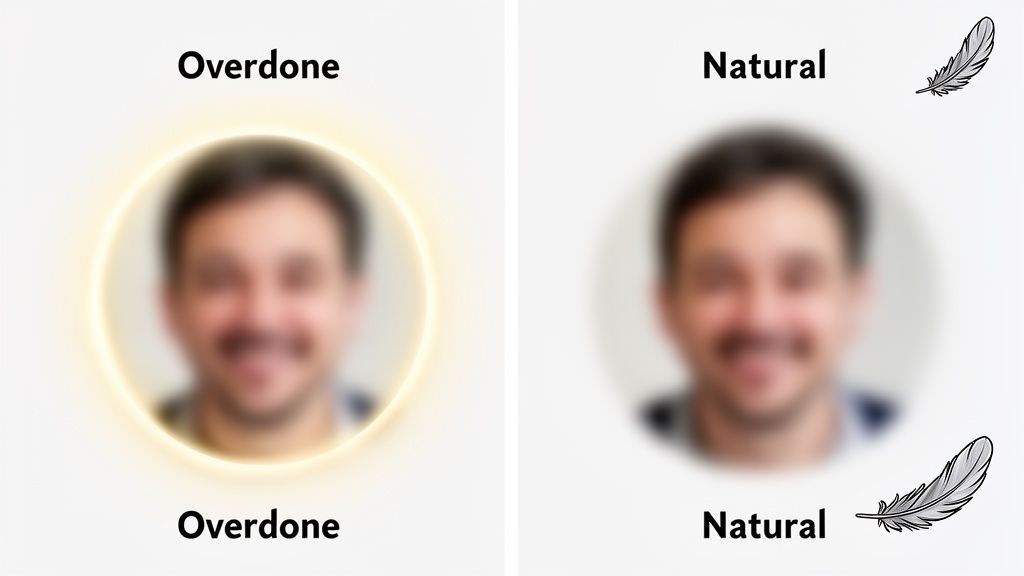
The most common mistake I see is simply overdoing it. It’s so tempting to slide that blur adjustment all the way to the max, but this usually just creates a background that looks like an artificial, smeared mess. A great blur should always be believable, just like what you'd get from a real camera lens.
Another dead giveaway of a rushed job is the dreaded 'halo' effect. This happens when the selection around your subject is too sharp and unforgiving, leaving a weird, glowing outline that just screams "this was edited." It completely shatters the illusion you’re trying to create.
Creating a More Natural and Believable Blur
To really make your images stand out, you have to start thinking like a photographer, even when you're just editing. The goal is a seamless, natural transition from your sharp subject to the soft background—no jarring edges allowed.
One of the best techniques for this is to feather your selection. Instead of that hard, cutting line, feathering softens the edges of your mask by just a few pixels. This tiny adjustment helps the subject blend beautifully into the blurred background, and it’s the perfect way to get rid of that harsh halo. Most editing software has this feature, so just start with a small pixel value and see how it looks.
Also, remember that not all blur is created equal. Adding a subtle vignette can work wonders. By gently darkening the corners of the image, you naturally draw the viewer's eye toward your subject in the center, giving it more punch without having to rely entirely on the blur effect.
Pro Tip: Don't apply a uniform blur across the entire background. In a real photo, things closer to the subject are less blurry than objects far in the distance. To mimic this, you can create multiple layers of blur—a lighter touch for the mid-ground and a stronger blur for the deep background. This simple trick adds a ton of realistic depth.
Elevating Your E-commerce and Product Photography
For anyone selling online, a blurred background isn't just a style choice; it's a powerful sales tool. Ever wonder why professional product photos always have that dreamy, soft background? It’s because the data shows it works, especially for Shopify store owners and agencies.
The e-commerce product photography market was valued at $0.85 billion this year and is projected to hit $2.38 billion by 2034, largely thanks to new AI-driven editing tools. Research shows that high-quality, focused images can boost e-commerce conversions by up to 250%. Shoppers retain 65% more information from visuals, and a staggering 60% of them base their buying decisions on the quality of the photos alone.
In a marketplace this competitive, consistency is everything. Using a uniform background blur style across all your product listings creates a cohesive and professional storefront that builds trust. It reinforces your brand and makes your entire product gallery feel more premium.
To get there, keep these best practices in mind:
- Establish a Style Guide: Pick a specific blur intensity and style, and stick to it. This makes sure every photo, whether it's for a new launch or an old favorite, has the same polished feel.
- Pay Attention to Lighting: The light on your product has to match the vibe of the background. A brightly lit subject against a dark, moody background just looks disconnected and fake.
- Use High-Quality Originals: A blur can't save a bad photo. Always start with a sharp, well-lit image of your subject to get the best possible result.
By dodging these common mistakes and using a few pro tips, you can turn a simple background blur into a defining feature of your photography. For more in-depth guides on photo editing, you can always check out Photo AI Studio's blog for more tips. Mastering these techniques will take your images from good to unforgettable.
Your Questions About Background Blur, Answered
Jumping into the world of background blur can definitely spark a few questions. Are you better off getting it right in-camera, or can you just fix it later? Can an app really compete with a pricey DSLR lens? You're not the only one asking. Let's tackle some of the most common questions I hear.
One of the biggest debates is whether to blur the background while shooting or handle it in post-production. Honestly, there's a place for both. Nailing the blur in-camera with the right settings will almost always give you the most authentic, natural-looking result. But let's be real—that's not always possible. Editing software gives you an incredible safety net, letting you salvage a photo with a distracting background or make precise creative tweaks after the fact.
How Much Blur Is Too Much?
It’s so tempting to crank that blur slider all the way up, but that’s a classic beginner mistake. When you overdo it, the subject looks like a cheap sticker slapped onto a smeared, meaningless backdrop. You'll often see an unnatural "halo" effect around the edges, which is a dead giveaway of a heavy-handed edit.
The secret is subtlety. A good background blur should look like it was created by a real camera lens. You want to soften the distractions, not obliterate them entirely. Aim for a blur that lets some of the environment's texture and shape peek through. It makes the final image feel intentional and professional, not like a digital accident.
Does Background Blur Actually Help Sales?
Without a doubt. What started as a darkroom trick is now a powerful, AI-driven strategy that’s changing the game for sellers on Etsy and Facebook Marketplace. The numbers don't lie—visual content where the subject is the clear hero gets 94% more views and is 40 times more shareable on social media.
For anyone selling on Amazon, where a staggering 60% of shoppers say high-quality photos are the most important factor, this is huge. A clean, blurred background makes your product pop, highlights key details, and can seriously help reduce bounce rates and boost those all-important click-throughs. If you want to dive deeper into the market trends for these tools, growthmarketreports.com has some great insights.
This isn't just about making things look pretty; it's a proven way to grab a customer's attention and drive real sales in a sea of online listings.
Can You Blur the Background on Any Photo?
Yep! With the right tools, you can add a beautiful blur to almost any photo you've already taken. While your smartphone's portrait mode needs to capture depth data during the shot to work its magic, editing software and AI tools don't have that restriction. They work by intelligently identifying your subject and then applying the blur to everything else.
The takeaway: Don't toss out a great photo just because the background is a mess. Modern editing apps are incredibly good at isolating subjects—even tricky ones with hair or fur—and adding a realistic blur in post-production. It’s a fantastic way to give old photos a second life.
So whether the picture was taken ten seconds ago or ten years ago, a professional-looking blur is always within reach.
Ready to create stunning, sales-driving product images in seconds? ProdShot uses AI to instantly remove and blur backgrounds, giving your products the professional look they deserve. Stop wasting time with complicated editing and start converting more customers. Try ProdShot for free and see the difference at https://prodshot.net.