
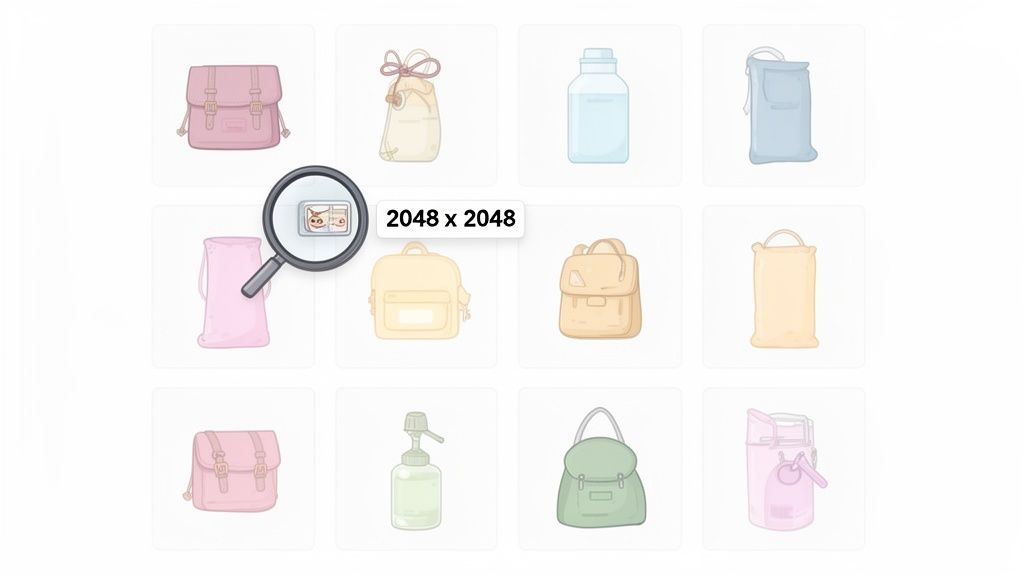
For the best possible mix of quality and load speed, the ideal size for most of your Shopify product photos is 2048 x 2048 pixels. Sticking to this square dimension keeps your images looking crisp and professional, even on high-resolution screens, and it gives you that all-important zoom functionality that helps convert curious shoppers into confident buyers.
Your Shopify Image Size Cheat Sheet
If there's one thing you can do to immediately improve your store's performance and professional look, it's getting your image sizes right from the get-go. Sure, Shopify does a pretty good job of automatically resizing images to fit different screens, but uploading an already-optimized file is a much smarter move. It prevents that grainy, pixelated look you get from quality loss and seriously speeds up your page load times—a huge factor in keeping potential customers from bouncing.
Think of this section as your no-fluff, quick-reference guide. It’s built to give you the exact specs you need for every type of image on your store, so you can stop guessing and start uploading with confidence.
The Three Pillars of Image Sizing
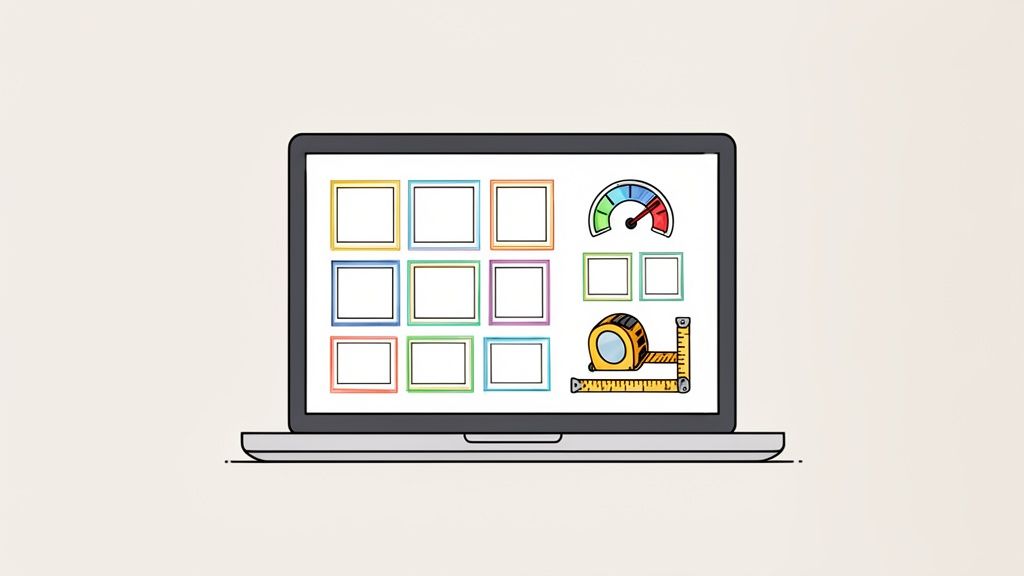
Before we jump into the full cheat sheet, let's quickly break down the three core elements you'll be dealing with for every single image. Each one plays a critical role in how your visuals look and perform.
- Dimensions (in Pixels): This is simply the width and height of your image. A 2048 x 2048 pixel photo is the sweet spot, providing plenty of detail for a great zoom experience without being excessively large.
- Aspect Ratio: This describes the relationship between the image's width and its height. A 1:1 ratio means you have a perfect square, which is the secret to creating that clean, uniform grid on your collection pages.
- File Size (in MB/KB): This is how much space the image file takes up. Shopify has a pretty generous 20 MB limit, but for the sake of your site speed, you should always aim to get your images well under 500 KB.
This quick visual breaks down the key numbers for a perfect product photo.

As you can see, hitting that "sweet spot" is all about balancing pixel dimensions, a consistent square ratio, and a lean file size. If you need a fast way to get all your photos to these exact specifications, an online image resizer designed for product photos can handle it for you automatically, ensuring every image in your catalog is perfectly optimized.
Why Image Size and Optimization Matters for Your Store
Before we jump into the exact pixel counts, let's talk about why this stuff is a cornerstone of a successful online store. Your images aren't just digital decorations. They're critical assets that have a direct, measurable impact on your store's speed, the customer experience, and ultimately, your sales. Getting the right image size in Shopify isn't just a technical detail to check off a list—it's a business fundamental.
Large, clunky images are almost always the main culprit behind slow-loading websites. Every extra second a potential customer has to wait for your page to appear, the chances of them clicking away skyrocket. It’s not just a feeling; studies consistently show that even a one-second delay can lead to a 7% reduction in conversions. For an online store, that translates directly into lost sales and a bounce rate that climbs higher and higher.
The Connection Between Speed and Sales
Slow load times don't just frustrate visitors; they can actually damage your brand's reputation, making you seem unprofessional or untrustworthy. Think about it from the customer's perspective. A fast, snappy website feels good to use. It creates a seamless shopping experience that builds confidence and encourages people to stick around and browse more of your products.
Honestly, optimizing your images is the single most effective thing you can do to boost your site speed. By shrinking the file size of your photos—without sacrificing that crisp, professional quality—you make sure your pages load almost instantly. This is where finding that perfect balance between pixel dimensions and smart compression becomes so crucial.
Shopify's Role and Your Responsibility
Now, Shopify does a pretty great job of automatically creating different versions of your images to work on various devices. But it's a huge misconception that you can just upload a massive, high-res file and let Shopify handle the rest without any consequences. Think of Shopify’s system as a safety net, not a replacement for good habits.
When you upload an oversized image, Shopify still has to process, compress, and store that enormous file. This often leads to a lower-quality result than if you had optimized it correctly from the start. By beginning with a properly sized and compressed image, you keep maximum control over the final look and squeeze out the best possible performance. For a much deeper dive into the nitty-gritty, check out this complete guide to image optimization for Shopify for some fantastic insights.
Key Takeaway: It's a simple chain reaction. Optimized images lead to faster load times. Faster load times create a better user experience, which lowers your bounce rate and directly boosts your conversion rate. Getting the image size right in Shopify is one of the most proactive steps you can take to build a more profitable store.
Mastering Your Shopify Product Image Dimensions
Think of your product images as your digital storefront window. They're often the single most powerful tool you have to convince a shopper to click "Add to Cart." That's why getting the product image size right isn't just a technical detail—it's a core part of your sales strategy. For the best results, the gold standard across the industry is a square image at 2048 x 2048 pixels.
Why that specific number? A couple of key reasons. First, it packs enough detail to power a crisp, high-quality zoom feature. Shoppers can get up close and inspect the details without hitting a wall of blurry pixels. Second, it just looks fantastic on modern high-resolution screens and Retina displays, giving your whole store a more premium, professional feel.
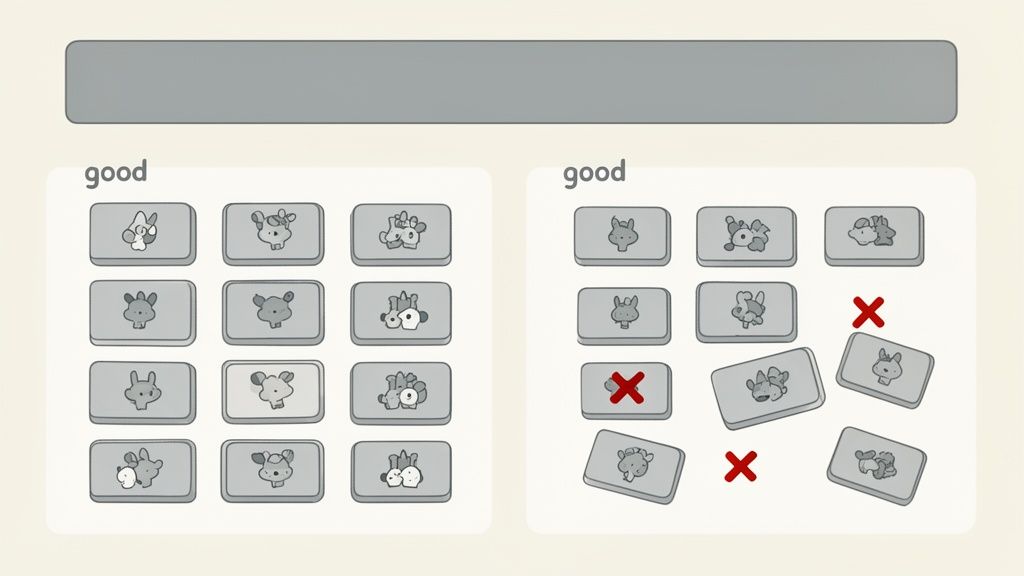
Why Consistency Is Key for Conversions
Beyond the quality of any single image, the real magic happens with consistency. A clean, organized product grid builds trust. When all your thumbnails line up perfectly with the same size and aspect ratio, it creates a much more pleasing and professional shopping experience. Messy, mismatched images, on the other hand, can make a collection page feel chaotic and subtly chip away at a customer's confidence in your brand.
The secret to getting that perfect alignment is sticking to the 1:1 square aspect ratio for all your main product photos. It's the great equalizer. This ensures that every item, whether it's a tall water bottle or a wide handbag, takes up the same visual real estate in the grid, making your collections a breeze to browse. This kind of uniformity is a hallmark of high-quality, professional Shopify product photography (learn more at https://prodshot.net/professional-shopify-product-photography) and has a direct impact on how shoppers perceive your store.
Understanding Aspect Ratios and Theme Layouts
While different Shopify themes can handle various aspect ratios, the square format is by far the safest and most effective choice for product images. You might be tempted to use a landscape (like 3:2) or portrait (2:3) image for a stunning hero shot, but they can create serious alignment headaches on collection pages where everything is displayed side-by-side.
- Square (1:1): The gold standard for product images. This is your ticket to perfect grid alignment and a clean, organized look on collection pages.
- Portrait (e.g., 2:3): You'll see this a lot in fashion to show off full outfits. It can work, but it often creates uneven rows on collection pages unless every single image shares the exact same ratio.
- Landscape (e.g., 3:2): Great for banners or wide shots, but it will likely lead to awkward white space above and below the image when squeezed into a square-based product grid.
Shopify does have some hard limits for uploads. The platform will stop you at 5000 x 5000 pixels and a 20 MB file size, but honestly, uploading files that big is just asking for trouble. Sticking to 2048 x 2048 pixels gives you all the quality you need while keeping file sizes reasonable, which is a huge win for your page speed.
Pro Tip: Always, always edit your images to a consistent aspect ratio before you upload them to Shopify. This puts you in complete control and stops your theme from making awkward cropping decisions for you. As you master these dimensions, it's also worth looking into new tools like the new Shopify video shopping cart integration that change how visual content is presented on your site.
Getting Your Collection and Featured Images Just Right
Think of your collection and featured images as the storefront of your digital shop. While individual product photos show the detail, these images organize your entire catalog. They’re the first thing a customer sees, creating that clean, professional first impression that makes them want to stick around and explore.
Consistency here is everything. When a customer lands on a collection page, they expect to see a neat grid of categories, much like walking into a well-organized store. If the images are all different sizes and shapes, it creates a chaotic, disjointed experience that just feels unprofessional. It can make people second-guess your brand and, ultimately, hurt your sales.
Optimal Dimensions for Collection Images
To get that perfect, satisfying grid alignment, the recommended collection image size in Shopify is 2048 x 2048 pixels. This perfect 1:1 square ratio is the same best practice we use for product images, which helps create a beautiful visual flow across your entire store.
This isn’t just a friendly suggestion—most Shopify themes are specifically built to handle square images in side-by-side displays. Using mismatched sizes can break your page layout, confuse shoppers, and send them clicking away. Stores that nail this visual consistency often see better add-to-cart rates because the shopping experience just feels smoother and more trustworthy. You can learn more about the impact of image optimization on conversions and how it influences what people buy.
Sizing for Banners and Blog Features
While square images are king for grids, banners and blog post headers need a different shape to make a real impact. These images usually stretch across the width of the page, grabbing attention and setting the tone for the content that follows.
- Blog Featured Images: For these, you’ll want a landscape aspect ratio like 3:2. A common dimension that works great is 1800 x 1200 pixels. It's big enough to look sharp without being so tall that it shoves your actual blog post content too far down the page.
- Collection Banners/Headers: These are typically even wider to create a dramatic, panoramic effect. A 16:9 aspect ratio is a solid choice here, with dimensions around 2500 x 1400 pixels. This panoramic look makes a powerful statement at the top of a collection page.
Key Takeaway: The golden rule is consistency. Stick to a 1:1 square ratio for any images that appear in a grid (like collections or related products). For wider placements like banners and blog headers, switch to a landscape ratio like 16:9 or 3:2. And always, always check your specific theme’s documentation for its own recommended banner dimensions, because they can definitely vary.
Choosing the Right Image Format and Compression
Getting your pixel dimensions right is only half the battle. The file format you choose has a massive impact on your store’s performance and how quickly your pages load for customers.
Think of it this way: not all image formats are created equal. Picking the right one is a crucial step in managing your image size in Shopify, directly affecting both visual quality and site speed. Each format has its strengths, and knowing when to use which is a simple trick that pays off big time.

Comparing Common Image File Types
For your Shopify store, you really only need to worry about three main formats: JPEG, PNG, and WebP. Using the right one ensures you get the best possible quality at the smallest file size.
- JPEG (or JPG): This is your workhorse for all complex photographs. Think product shots, lifestyle images, and banners. JPEGs are brilliant at handling millions of colors and subtle gradients, and their compression is fantastic for keeping file sizes small without a noticeable drop in quality.
- PNG: Reach for a PNG whenever you need a transparent background. This makes them perfect for logos, icons, or any graphic that needs to sit on a colored background without that ugly white box around it. The tradeoff is that PNG files are usually larger than JPEGs.
- WebP: This is a modern format from Google that essentially gives you the best of both worlds. It delivers excellent compression (often creating files 25-35% smaller than JPEGs) while also supporting transparency. The good news? Shopify automatically converts your images to WebP for visitors using a compatible browser, giving you a free speed boost.
Understanding Lossy vs. Lossless Compression
Compression is just the process of making your image files smaller. The two flavors, lossy and lossless, have a direct impact on both file size and image quality.
Lossy compression, which is what JPEGs use, intelligently removes some data from the image to shrink the file. While "losing" data sounds bad, a high-quality JPEG can be compressed quite a bit with almost no difference visible to the human eye. This is exactly why it's the standard for photos.
On the other hand, lossless compression—used by PNGs—reduces file size without throwing away a single pixel of data. Everything stays perfectly intact, which is why it's the go-to for logos and graphics where you need crisp lines and precise colors. Manually tweaking all this can be a real time-sink, but a good Shopify photo editor can automate the entire process, making sure you're always using the best format and compression level for every single image.
Boosting Your SEO with Strategic Image Optimization
Getting your image sizes right in Shopify is a big deal for site speed, but that's just scratching the surface. The impact goes way deeper, right into your store's search engine optimization (SEO). Every single image you upload is a fresh chance to signal to Google what your products and pages are all about, helping you climb the rankings and pull in more organic traffic.
Think of your product photos as valuable digital real estate, each one needing its own on-page SEO treatment. Search engines are brilliant, but they can't "see" a picture of a red running shoe and understand what it is. They depend entirely on the text-based clues you provide to figure out an image's content and how it relates to a search query. This is where a little strategic optimization becomes a seriously powerful tool.
Mastering Alt Text and File Names
Two of the most critical—and most frequently ignored—pieces of the image SEO puzzle are alt text and file names. Skipping these is like leaving free marketing opportunities on the table. It’s a simple fix with a big payoff.
- Alt Text (Alternative Text): This is a short, descriptive sentence that tells search engines what's in a picture. It’s also absolutely essential for accessibility, as screen readers use it to describe images to visually impaired users. Instead of leaving it blank or just stuffing it with keywords, write a clear, human-readable description.
- File Names: Before you even think about uploading, ditch those generic camera file names like
IMG_4581.JPG. A descriptive, keyword-rich file name gives search engines another strong signal about what the image shows.
Let's say you sell handmade leather wallets. Here’s how to put this into practice:
The "Don't Do This" Example:
- File Name:
product_image_01.jpg- Alt Text:
walletThe "Do This Instead" Example:
- File Name:
handmade-brown-leather-bifold-wallet.jpg- Alt Text:
Handmade brown leather bifold wallet with six card slots
That simple tweak transforms a generic file into a highly specific, keyword-targeted asset that can show up in both regular web searches and Google Image searches. By weaving relevant keywords naturally into your file names and alt text, you connect your visuals directly to your SEO goals, building a much stronger online presence that draws the right kind of traffic to your store.
Frequently Asked Questions About Shopify Image Sizes
Getting your images just right can feel like a moving target, especially when you're juggling quality, speed, and how things look across different devices. Let's clear up some of the most common questions Shopify store owners have. Here are the quick, straight-to-the-point answers you need to get it done and get back to business.
What Is the Best Image Size for Shopify Product Images?
The sweet spot, and the size we always recommend, is 2048 x 2048 pixels. Sticking to a square (1:1) aspect ratio is key.
This dimension gives you that crisp, professional quality on high-resolution screens and makes the zoom function look fantastic—no pixelation. For a customer who can't physically touch the product, that kind of detail builds a ton of confidence and is crucial for making the sale.
Does Shopify Automatically Resize Images?
Yes, it does. When you upload an image, Shopify creates a bunch of different versions behind the scenes. It then serves the most fitting size to your visitor, sending a smaller file to a phone and a larger one to a desktop.
But you shouldn't rely on this as your primary strategy. Always upload images that are already optimized. If you feed Shopify a massive, uncompressed file, its automatic compression can sometimes be a bit aggressive, leading to a noticeable drop in quality. Think of Shopify's resizing as a safety net, not a substitute for good practice.
Key Insight: Starting with an optimized image gives you full control over the final look and guarantees the best possible performance for your store.
How Do I Make All My Product Images the Same Size?
To get that clean, uniform look on your collection pages, you absolutely have to resize your images to the same aspect ratio before you upload them. The 1:1 square ratio is the industry standard for a reason—it just works.
You can use an image editor like Adobe Photoshop, a free tool like Canva, or an AI-powered product photography tool to crop all your images to the same dimensions, like 2048 x 2048 pixels. This consistency is non-negotiable for a professional-looking grid.
What Is the Difference Between Image Size and File Size?
This is a super common point of confusion, but the difference is simple and really important to understand.
- Image Size: This is all about the dimensions in pixels—for example, 2048px wide by 2048px high. It dictates how big the image looks on a screen.
- File Size: This is how much storage space the image takes up, measured in kilobytes (KB) or megabytes (MB).
Bigger pixel dimensions usually mean a bigger file size, but this is where optimization comes in. You can use compression to shrink the file size dramatically without changing the pixel dimensions at all. This is the core magic behind making a website fast and beautiful at the same time.
Stop wasting time and money on complicated photo shoots. With ProdShot, you can turn simple phone pictures into studio-quality product images in seconds. Let our AI handle the background removal, lighting, and optimization so you can focus on selling. Try it for free and see the difference at https://prodshot.net.