

Killer clothes photography all comes down to one thing: making your products look so good that people have to click "add to cart." This isn't just about snapping pictures. It's about showing the feel, the fit, and the quality of your apparel through a single, stunning image.
And the secret? It all starts before you even pick up your smartphone.
Nailing the Prep Work for Standout Product Shots
The difference between an amateur-looking shot and a professional, high-converting image is all in the preparation. This is where you set the stage for photos that don't just look great but also tell your brand's story and, most importantly, drive sales. Think of it like a theater production—without pristine costumes and the right props, the whole performance just falls flat.
Getting Every Garment Photo-Ready
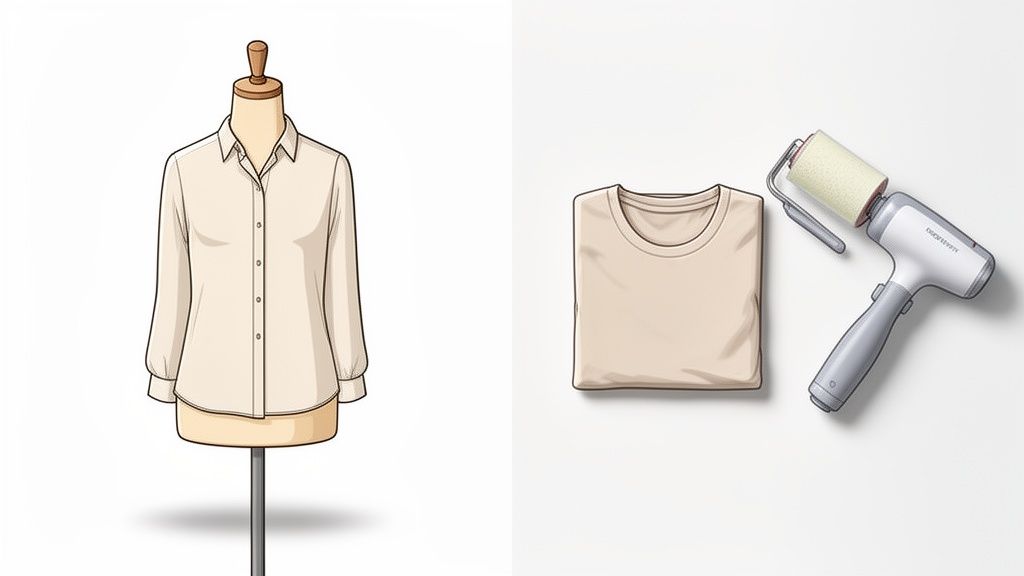
Your camera lens is brutally honest. It will pick up every single wrinkle, stray thread, and speck of dust. Getting this prep work right is non-negotiable if you want a polished final image that screams quality and care.
Here's your pre-shoot checklist:
- Steam or Iron: Every single item needs to be perfectly smooth. A handheld steamer is a lifesaver for delicate fabrics like silk or chiffon, while a good old-fashioned iron works wonders on cotton and linen.
- Lint Roll Everything: Go over the entire garment with a quality lint roller. Be extra vigilant with dark fabrics where lint and dust love to hang out.
- Manage Your Tags: Snip off any distracting price tags. If there are internal tags you need to keep, just use a bit of clear tape to tuck them away neatly out of sight.
This might feel tedious, but trust me, spending 10 minutes on prep will save you hours of frustrating editing later. Investing time here pays off massively. If you're weighing the DIY effort against hiring a pro, it's worth looking into the typical cost of professional product photography to see how the value stacks up.
Choosing Your Styling Method
How you display your clothes—on a model, a mannequin, or laid flat—says a lot about your brand and helps customers imagine themselves wearing the product. Each method tells a completely different story.
A live model brings your clothes to life, showing fit and movement in a way that builds a real emotional connection. On the flip side, a "ghost mannequin" gives you a clean, 3D look at the garment's shape without any distractions, making it a go-to for consistent catalog images.
Pro Tip: For flat lays, toss in a few simple props like a watch, a pair of sunglasses, or a book to create a lifestyle vibe. This helps shoppers see the item as part of a whole look, making it way more appealing.
Flat lay photography, where you arrange items on a surface, is fantastic for platforms like Instagram and Pinterest and is perfect for showing off entire outfits.
Selecting the Perfect Background
Your background should make the clothing pop, not compete with it. The product is the hero here. For most e-commerce platforms, a clean, seamless white or light gray background is the gold standard because it creates a consistent, distraction-free shopping experience.
You can easily pull this off on a budget with a big roll of white paper or even a poster board from a craft store. For lifestyle shots meant to tell a deeper story, pick a setting that matches your brand's vibe. A rustic wooden table could be perfect for a heritage denim brand, while a stark concrete wall might suit a modern, urban fashion line.
Whatever you choose, just make sure it's clean and makes your product look its absolute best.
Mastering Light and Equipment on a Budget
Let’s get one thing straight: killer clothes product photography comes down to one thing more than any other. Lighting.
You might think you need a fancy studio and a mountain of expensive gear to get professional-grade lighting, but that’s one of the biggest myths out there. With a few smart hacks and some affordable tools, you can make your apparel look incredible and make every little detail pop.
The quality of your images has a direct, measurable impact on your sales. There's a reason the ecommerce product photography market is exploding—a massive 67% of online shoppers say image quality is a make-or-break factor in their decision to buy.
It gets even more specific than that. High-resolution product images can drive 94% higher conversion rates compared to fuzzy, low-res shots. That’s a huge number, and it shows just how much great visuals matter. If you want to dive deeper into the data, check out this report on photography statistics.
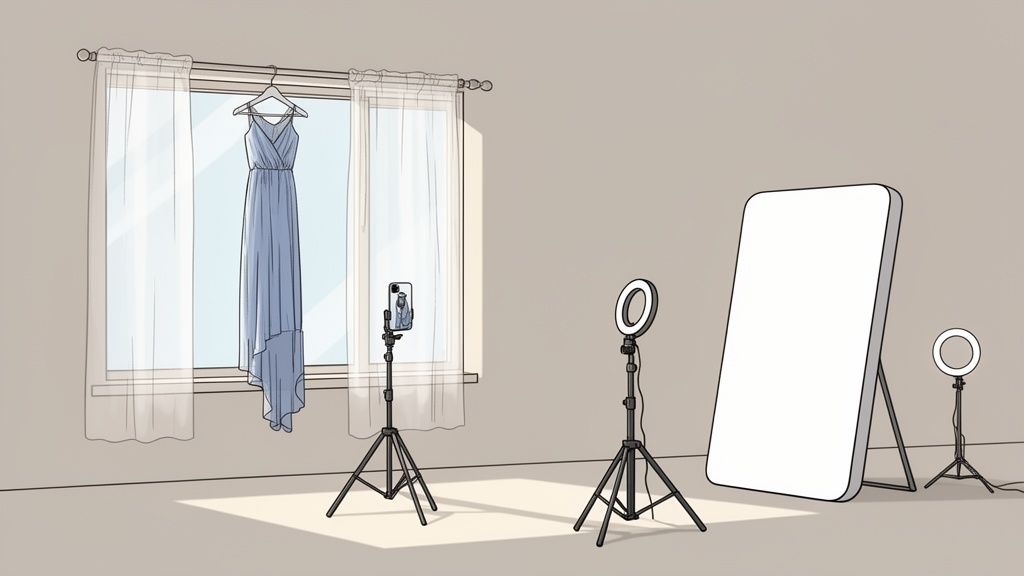
Harnessing the Power of Natural Light
The best light source you have access to is totally free: the sun. Natural light has a soft, flattering quality that’s tough to replicate with artificial lights. The key is learning how to control it.
Your first step is to find a large window that isn’t getting blasted with direct, harsh sunlight. A north-facing window is usually perfect because it gives you consistent, gentle light all day long. If all you have are windows with direct sun, no problem—you just need to diffuse it.
The easiest way to do this is to hang a plain white bedsheet over the window. Seriously. It acts like a giant softbox, scattering the light and killing those harsh shadows. This is exactly what you want for showing off the true color and texture of fabrics without making them look washed out.
Pro Tip: The "golden hour"—that magical time right after sunrise or just before sunset—is amazing for lifestyle shots. It gives everything a warm, inviting glow. But for clean e-commerce photos? An overcast day is your secret weapon. The clouds act as a massive, free diffuser.
Creating Your Own Lighting Setup on a Dime
As great as natural light is, it’s not always there when you need it. That’s where a simple, budget-friendly artificial lighting kit saves the day. You don’t need a complicated strobe system. A single ring light or a couple of small LED panels can do incredible things.
Here’s a dead-simple one-light setup that gets professional results:
- Your Main Light: Set up your ring light or LED panel at about a 45-degree angle to your product. This is your "key light," and it's doing most of the work. Placing it off to the side creates soft shadows that give the garment definition and shape.
- The Reflector Hack: Now, go to any craft store and buy a cheap piece of white foam board. Place it on the opposite side of your product, facing your key light. This foam board will act as a reflector, bouncing light back onto the garment and softening any shadows from your main light. It’s a simple trick that stops one side from looking too dark and makes sure the whole product is lit evenly.
This two-point system—one light and one reflector—is a classic technique that the pros use all the time. It’s unbelievably effective for creating bright, clean images that put your apparel in the spotlight.
Essential Accessories for Sharp, Stable Photos
Even with perfect lighting, a shaky hand can completely ruin an otherwise great shot. There are two cheap accessories that are non-negotiable if you want consistently sharp photos from your smartphone.
- A Sturdy Tripod: This is your most important tool for getting crisp images. A tripod gets rid of camera shake, which means you can use slower shutter speeds in lower light without your photos turning into a blurry mess. It also helps you keep your angles and framing consistent from one product to the next.
- A Bluetooth Remote Shutter: You’d be surprised, but even just tapping the capture button on your phone can create enough vibration to blur your image slightly. A remote shutter lets you take the picture without ever touching your phone, guaranteeing the sharpest possible photo every single time.
When you combine controlled lighting (natural or artificial) with these simple tools, you build a reliable setup that won’t break the bank. This foundation gives you everything you need to start capturing stunning clothes product photography that looks polished, professional, and ready to turn browsers into buyers.
Capturing the Perfect Shot with Your Smartphone
Forget everything you think you know about needing a bulky, expensive DSLR for killer product photos. Your smartphone is a powerhouse, packed with a camera more than capable of producing incredible, high-converting images for your clothing brand.
The real secret isn't the gear—it's moving beyond the simple point-and-shoot mentality. By taking control of a few key settings, you can produce clean, consistent, and stunning raw images that are primed and ready for the AI editing magic to come.
Fine-Tuning Your Smartphone Camera Settings
Before you even start thinking about styling or angles, let's get under the hood of your phone's camera app. Most modern phones, whether you're on an iPhone or an Android, give you way more manual control than you probably realize. Spending just a minute here will pay huge dividends in the quality and consistency of your final shots.
First thing's first: turn on the grid lines. This is a non-negotiable. That simple 3×3 overlay is a powerful tool built on the classic rule of thirds, helping you nail a perfectly centered product shot or create more compelling, dynamic compositions for lifestyle images. It’s a tiny tweak that instantly makes your photos look more balanced and professional.
Next up is locking your focus and exposure. On your screen, tap and hold on your product until you see a yellow box pop up, often with a message like "AE/AF Lock." This simple action is critical. It stops your camera from constantly trying to readjust the brightness and focus point every time there's a tiny bit of movement, ensuring every photo in a series looks consistent.
One of the most common mistakes I see e-commerce sellers make is pinching to zoom. This is digital zoom, which just crops and degrades the image quality. Don't do it. Physically move your tripod closer to the product to get a tighter shot. Your image quality will thank you.
Building a Comprehensive Shot List
Never go into a photoshoot blind. A well-planned shot list is your roadmap to success, guaranteeing you capture every angle a customer needs to see to feel totally confident hitting that "buy now" button. Think of it as visually answering all their questions before they even have a chance to ask.
The data backs this up. In 2024, the top fashion brands on Shopify and Amazon are featuring an average of 8 images per product—a massive leap from just a few years ago. Why? Because they know a complete visual story drives sales. The most effective shots are a mix of model photography (used by 95.6% of top brands), ghost mannequins or flat lays (both at 57.2%), and compelling lifestyle images (38.4%). If you want to dive deeper, check out these insightful fashion photography statistics to see how the pros do it.
To help you get started, I've put together a table of the essential shots you should be getting for every single piece of clothing.
Essential Shot List for Clothing Products
This isn't just a list; it's a blueprint for building visual trust. By providing a complete, 360-degree view of your product, you eliminate doubt and give customers the confidence they need to make a purchase.
| Shot Type | Purpose | Key Focus |
|---|---|---|
| The Full Front Shot | The primary "hero" image; gives a clear overview of the item. | The entire garment, clean and centered. |
| The 45-Degree Angle | Adds depth and shows how the garment fits from an offset view. | The product's silhouette and dimensional shape. |
| The Side Profile | Shows the fit and cut from the side. | How the garment hangs on the body, sleeve length, and overall shape. |
| The Full Back Shot | A non-negotiable view that many shoppers look for. | Any details on the back, the fit from behind. |
| Detail/Texture Close-Up | Highlights quality and unique features. | Fabric weave, stitching, button quality, zippers, or unique embroidery. |
| In-Context/Lifestyle | Helps customers visualize themselves wearing the item. | The garment in a real-world setting, showing movement and style. |
Treat this table as your minimum checklist for every product. Capturing these angles consistently will set your product pages apart and give you a robust set of visuals for marketing across all channels.
Nailing Different Photography Styles
How you present your clothing—on a model, laid flat, or on a ghost mannequin—says a lot about your brand. Each style has its own vibe and requires a slightly different approach to get it right with your smartphone.
For model photography, you're selling a feeling as much as a fit. Instead of having your model hold stiff poses, use your camera’s burst mode. Have them make small, natural movements and hold down the shutter button. This will give you a ton of options to choose from, and you'll almost always find a shot that feels more authentic and less staged. Your main goal here is to show how the fabric drapes and moves with a real person.
When you're shooting flat lays, your tripod needs to be positioned directly over the garment, pointing straight down. Use your phone's grid lines to make sure everything is perfectly square and aligned. The trick to a great flat lay is to give it some life; otherwise, it can look a bit sad and limp. I like to use a little tissue paper or some cotton balls stuffed underneath to create subtle volume and shape.
The ghost mannequin effect looks super professional and is easier than you think. It's a two-shot process. First, get a clean shot of the garment on the mannequin. Then, without moving your setup, turn the garment inside out and put it back on the mannequin to photograph the interior parts that were hidden, like the back of the collar or the cuffs. We'll stitch these together in the editing phase later on.
Your AI-Powered Editing Workflow for Pro Results
The photos you snapped on your phone are just the starting point—the raw ingredients. Now it's time for the real magic, where good shots become great, sales-driving assets.
This used to be the most brutal part of clothes product photography, a black hole of tedious, manual editing. Thankfully, we're in a new era. A fresh wave of AI-powered tools makes the whole process faster, smarter, and way more consistent.
Forget about complex software with a learning curve that feels like climbing a mountain. We're talking about smart tech that does the heavy lifting for you, letting you get that polished, professional look across your entire catalog in a fraction of the time. Let’s walk through how to turn those raw smartphone images into marketplace-ready masterpieces.
This simple three-step process is the core of great on-phone capture: dial in your settings, compose the shot, and then snap the picture.
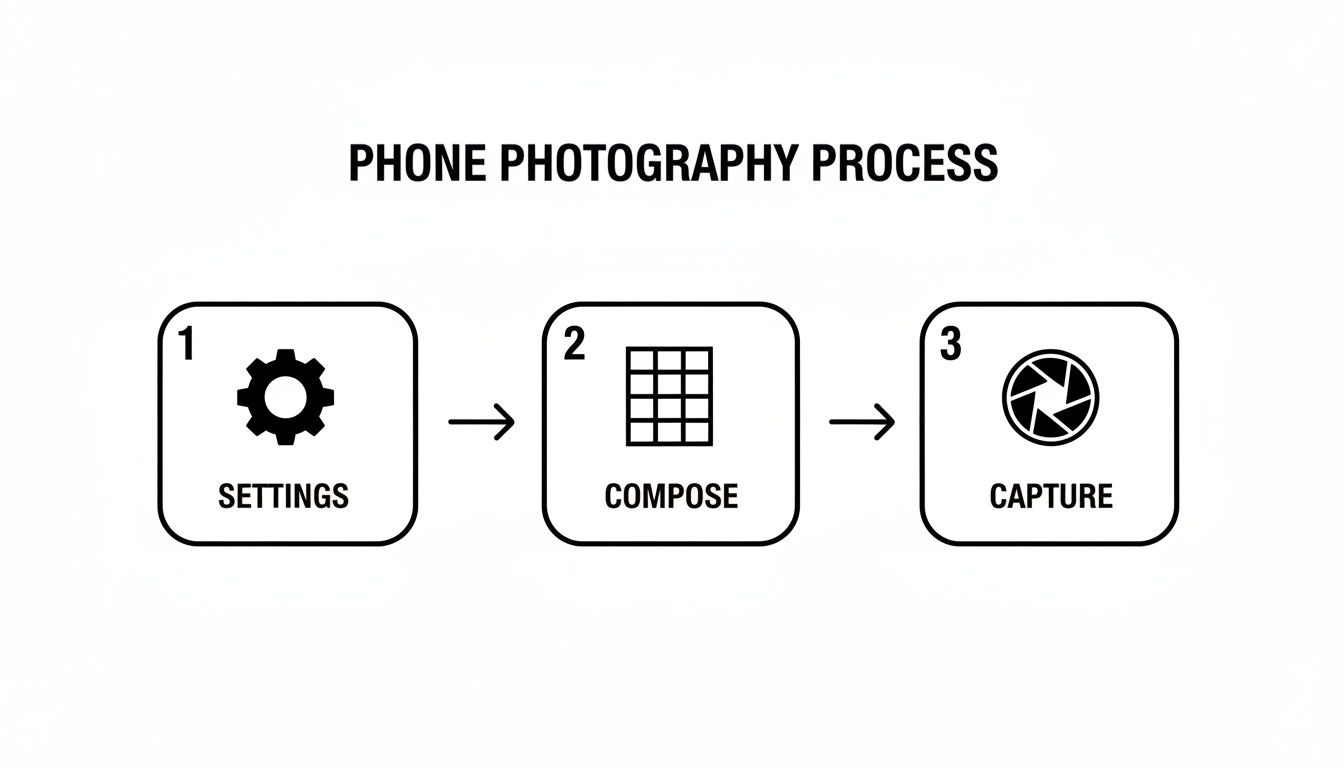
Nailing this basic flow ensures the images you bring into the editing suite are high-quality from the get-go.
One-Click Background Removal
The single biggest upgrade you can make to your e-commerce photos is creating a clean, consistent background. It makes your products the hero of the shot and gives your whole store a more buttoned-up, trustworthy vibe. Manually cutting out a product used to be a painstaking job that only a Photoshop wizard could love.
AI completely flips the script. Modern tools make this process automatic. You can upload a whole batch of photos, and the AI will intelligently trace and remove the background with stunning precision—even around fuzzy sweaters or loose threads. This is a massive time-saver and ensures every photo meets the strict background requirements of platforms like Amazon.
For anyone who wants to skip the shoot altogether, it’s worth checking out an AI product photo generator that builds images from the ground up, background included.
Effortless Lighting and Color Correction
Getting color right is non-negotiable. If that vibrant red sweater in your photo shows up as a dull maroon on your customer's screen, you’re practically inviting a return. Bad lighting is just as damaging, washing out textures or hiding key details in dark shadows.
AI editing apps can analyze your image and fix these problems with a single click.
- White Balance: This is the key to making sure your whites are actually white, which locks in the accuracy of every other color. AI can instantly spot and neutralize any weird color cast from your lights.
- Exposure & Contrast: With one slider or an "auto-enhance" button, you can rescue underexposed photos, pull details out of the shadows, and add just the right amount of contrast to make your product really pop off the screen.
These tools are incredibly good at restoring a photo to its true-to-life look, ensuring what your customer sees is what they actually get.
Key Insight: The goal here isn't to create some hyper-stylized, artsy image. It's all about color accuracy. Your photos need to be a faithful representation of the real item to build trust and keep those return rates down.
Smart Retouching for Minor Imperfections
Even with the most careful prep, tiny flaws will sneak into your shots. A stray piece of lint you missed, a little scuff on a button, or a small wrinkle that popped up can be surprisingly distracting.
This is where AI-driven retouching tools shine. Forget clumsy clone stamps. These features are "content-aware," meaning you can just click on an imperfection, and the AI will intelligently fill in the spot by sampling the surrounding texture and color. The flaw just… vanishes.
The key is to use this power for good, not evil. Fix only what's distracting, without changing the fundamental look or feel of the garment.
Exporting for Peak Performance
You're almost there. The final step is exporting your beautifully edited images with the right settings for each platform. This is a critical detail that many sellers overlook, and it directly impacts visual quality and site speed. A file that’s too big will grind your page to a halt; one that’s too compressed will look pixelated and cheap.
Here are the go-to export settings for the big e-commerce players:
| Platform | Recommended Dimensions | Max File Size | File Type |
|---|---|---|---|
| Shopify | 2048 x 2048 pixels (for square) | Under 20 MB | JPEG or PNG |
| Amazon | At least 1000 pixels on the longest side | Under 10 MB | JPEG, TIFF, or GIF |
| Etsy | At least 2000 pixels on the shortest side | Under 10 MB | JPEG, PNG, or GIF |
And one last pro tip: always choose the sRGB color profile when you export. It's the standard for the web and ensures your colors look consistent no matter what browser or device someone is using. Stick to these specs, and your photos will look sharp, load fast, and be perfectly optimized to convert.
Optimizing Your Images to Boost Visibility and Sales
Getting your edited photos uploaded is a great feeling, but the job isn't quite done. The last step—optimizing your images—is where you turn those beautiful visuals into assets that actually work for you, attracting customers and driving sales.
Think of it this way: proper optimization makes sure your clothes product photography gets discovered by search engines, loads instantly for impatient shoppers, and truly connects with your target audience. Skipping this is like designing a gorgeous storefront but forgetting to unlock the door.
Mastering the Fundamentals of Image SEO
Before you upload a single photo, you have to start thinking like a search engine. A generic file name like IMG_8821.jpg means absolutely nothing to Google. It's a huge missed opportunity for free visibility.
Instead, come up with a simple, descriptive naming convention. A format like [Brand Name]-[Product Name]-[Color/Style] is perfect. For example, a file named modern-thread-wool-blazer-charcoal.jpg is instantly clear to both search engines and people. It's a tiny tweak with a massive impact on how easily your products get found.
The next piece of the puzzle is your alt text (or alternative text). This is the description that shows up if an image can't load, and it's what screen readers use to describe the photo to visually impaired users. It's absolutely essential for both accessibility and SEO.
Your alt text should be a clear, concise description that naturally works in your keywords.
- Bad Alt Text: "blazer"
- Good Alt Text: "Model wearing a charcoal gray wool blazer from Modern Thread."
- Excellent Alt Text: "Full-length shot of a woman wearing the Modern Thread charcoal gray wool blazer with matching trousers in an office setting."
That level of detail gives search engines the context they need to rank your image properly.
Your product images are one of your best tools for attracting organic traffic. Treat file names and alt text as prime real estate for telling search engines exactly what you're selling.
Why Page Speed and Image Compression Matter
In e-commerce, speed is everything. If your product page takes more than a couple of seconds to load, you've likely lost a customer. And what's the biggest culprit for slow pages? Bloated, high-resolution image files.
This is why image compression is non-negotiable. The goal is to shrink your image file size as much as possible without any noticeable drop in quality. A fast-loading site keeps shoppers happy and engaged, which also boosts your search engine rankings. If you need a quick fix, a good online image resizer can handle this for you in seconds.
The data backs this up. Content with relevant images gets 94% more views, and brands have seen conversions jump by up to 30% just by showing products from multiple angles. When you consider that half of all online shoppers say high-quality photos are more important than product descriptions, it's clear that optimizing these assets is a must.
Platform Image Specification Quick Guide
Every e-commerce platform has its own "sweet spot" for image dimensions and file types. Uploading images that are too big will slow down your site, while images that are too small will look blurry and unprofessional. Here’s a quick reference to get it right on the most popular platforms.
| Platform | Recommended Dimensions (pixels) | Max File Size | File Type |
|---|---|---|---|
| Shopify | 2048 x 2048 (for square images) | < 20 MB | JPG, PNG, GIF |
| Amazon | Min. 1000 on longest side; 1600+ preferred | < 10 MB | JPG, TIFF, PNG |
| Etsy | 2000 on the shortest side | < 10 MB | JPG, PNG, GIF |
| WooCommerce | 800 x 800 (or larger) | Varies | JPG, PNG |
Sticking to these guidelines ensures your photos look crisp and load quickly, giving customers the best possible experience on your site.
A/B Testing to Discover What Converts
Finally, don't just guess what works—test it. A/B testing (or split testing) is a powerful way to figure out what your customers actually respond to by showing different versions of an image to see which one performs better.
You can test all sorts of things with your photography:
- Model vs. Flat Lay: Does showing your clothes on a person drive more sales than a styled flat lay?
- Studio vs. Lifestyle: Does a clean, white background convert better than an aspirational lifestyle shot?
- Main Image Variations: Does a close-up detail shot grab more attention as the main image compared to a full-length view?
By analyzing the results, you can make data-driven decisions that directly lift your conversion rates. Take a look at successful boutiques on Instagram for inspiration on how they mix different visual styles to keep their audience engaged. This is how you turn your photography from a simple product showcase into a strategic growth engine.
A Few Common Questions About Clothes Product Photography
Diving into clothes product photography for the first time? You're going to have questions. Everyone does. Getting straight answers to the most common hurdles can save you a ton of guesswork and help you dial in your process faster. Let’s tackle some of the things people ask most.
How Do I Photograph Dark Clothing Without Losing Detail?
This is a classic. Photographing dark clothes, especially black or navy blue, is tough because the fabric just eats light, hiding all the beautiful textures and seams. The secret isn't more light, it's smarter light.
Instead of one harsh light source, you want soft, diffused light coming from a couple of different angles.
Try this: position your main light at a 45-degree angle to the garment. Then, grab a simple white foam board from a craft store and place it on the opposite side to act as a reflector. This bounces soft light back into the shadows, a technique called fill lighting. It works wonders for revealing the fabric’s texture and all those important construction details.
When you get to editing, resist the urge to just crank up the brightness slider. That’ll just turn your rich black fabric into a washed-out gray. Instead, gently lift the shadows and bump up the clarity just enough to make the details pop without wrecking the color.
Should I Use a Model or a Mannequin for My Photos?
Honestly, this comes down to your brand and your budget. There’s no single right answer.
Using a model is fantastic for showing how a garment actually fits, drapes, and moves on a real person. It creates an emotional connection and helps customers picture themselves wearing your clothes. The downside? It costs more and takes more work to coordinate hiring, styling, and directing.
Mannequins, especially if you’re using the "ghost mannequin" technique, are a super clean, consistent, and budget-friendly option. This style puts 100% of the focus on the product itself—its shape, its form—with zero distractions.
Here's what I've seen work really well for a lot of successful brands: a hybrid approach. They'll use a model for the big, eye-catching "hero" shots on their homepage and social media. Then, for the individual product listings, they switch to a mannequin or a flat lay to show all the nitty-gritty details. It’s the best of both worlds.
What Are the Biggest Mistakes to Avoid in Fashion Photography?
I see the same three pitfalls trip people up over and over again. Avoiding them will put you way ahead of the curve.
First is inconsistent lighting. Harsh, direct light creates ugly, distracting shadows. But on the flip side, underexposed shots hide details and just make your products look cheap. Aim for soft and even.
Another huge one is inaccurate color. If that vibrant blue dress in your photo shows up at the customer's door looking dull and muted, you’re practically begging for returns and bad reviews. Always set a proper white balance on your camera and double-check your colors on a calibrated screen during editing.
Finally, a lack of detail shots is a massive missed opportunity. Customers online are hungry for information. They want to see everything before they click "buy." Show them close-ups of the fabric, the quality of the stitching, the buttons, the zippers. Your job is to provide a complete visual story that answers their questions before they even have to ask.
Transform your smartphone pictures into professional, high-converting images in seconds. With ProdShot, you can automatically remove backgrounds, enhance lighting, and get marketplace-ready photos without any technical skills. Try it for free and see the difference AI can make for your store at https://prodshot.net.