

Chroma key photography is a simple but powerful technique where you shoot a product against a solid-colored background—usually a vibrant green or blue—to make it incredibly easy to cut out later. This gives you complete creative control to drop in any background you want for your final product photos.
Why Green Screens Are An Ecommerce Game Changer
At its heart, using a green screen is all about efficiency and flexibility.
Imagine you're launching a new line of handbags. Instead of setting up and paying for multiple photoshoots—one for a summer beach vibe, another for a slick winter city campaign—you shoot everything just once against a green screen. Suddenly, that single set of images can be repurposed for any ad, social media post, or banner you can think of. It's a massive time and money saver.
For anyone selling online, this is where it really shines. You can instantly generate those clean, marketplace-ready images with pure white backgrounds that platforms like Amazon and Shopify demand. We actually have a whole guide on how to remove the background from your Shopify images that digs into perfecting this exact workflow. This approach makes your product the undeniable hero of every shot, with zero distractions.
The Shift from Blue to Green
You might have heard of blue screens, which were the old standard, especially back in the days of film. But with the switch to digital cameras, green pretty much took over. This wasn't just a random color preference; it's all about how digital camera sensors work.
Modern cameras use something called a Bayer pattern filter to see color. This grid is twice as sensitive to green light as it is to red or blue. That means the camera captures a cleaner, brighter, and more detailed green channel, even with less light. This small technical detail is why the industry moved from blue to green—it just gives digital systems more information to work with.
Understanding why green works better with today's cameras is the first step to avoiding common headaches. It’s this foundational knowledge that helps you prevent noisy images and messy edges, leading to a much cleaner and faster editing process down the road.
To help you decide what's right for your specific products, let's break down the key differences between green and blue screens.
Choosing Your Chroma Key Color
| Factor | Green Screen | Blue Screen |
|---|---|---|
| Camera Sensitivity | Ideal for digital cameras. Captures a brighter, cleaner signal with less light, resulting in less noise. | Better for film. Requires more light with digital cameras to get a clean key, which can cause issues. |
| Color Spill | Can create a noticeable green halo on reflective or light-colored products. Harder to key out of green items. | Less spill and it's easier to color correct. A better choice if you're shooting green products (plants, apparel). |
| Common Scenarios | The go-to for most digital product photography and general-purpose studio work due to its efficiency. | Often used for darker scenes or when shooting products with green elements. Also common for clothing. |
| Lighting Needs | Requires less light, which is a huge advantage in smaller studios or with more affordable lighting setups. | Needs about one full stop more light than green to be properly exposed, increasing lighting demands. |
Ultimately, while green is the modern standard for a reason, knowing when to pull out a blue screen is a mark of a pro.
Mastering this technique gives you a serious leg up. To really get the most out of chroma key, it's worth getting familiar with the fundamentals of lighting, keying, and even how AI tools are changing the game. Diving into an ultimate guide to green screen backgrounds can give you that extra context to nail your setup every single time. A little preparation here is the key to creating flawless composites that look truly professional.
Building Your Home Studio For Perfect Keys
You absolutely don't need a Hollywood budget to pull off professional-grade chroma key images. A smart home studio setup is way more about solid technique than it is about expensive gear. Even if you're a small e-commerce seller, you can achieve those flawless, crisp cutouts.
Your first big decision is the backdrop, and you've got a few practical options.
If you're tight on space or need to pack up your studio after a shoot, a collapsible fabric green screen is a fantastic choice. These things are a lifesaver. They usually come with their own stands, pop open in minutes, and fold away neatly when you're done. Perfect for anyone who doesn't have a dedicated shooting area.
On the other hand, if you do have a dedicated space, painting a wall with specialty chroma key paint is the gold standard. This gives you a permanent, perfectly smooth surface. You completely eliminate the wrinkles and creases that are the eternal headache of fabric backdrops. For a deep dive into your options, it's worth checking out a practical guide to photography backdrops and stands.
Lighting The Scene For A Clean Key
Let me be blunt: your lighting is the single most important part of getting a good key. Get this wrong, and everything else is a struggle. The goal is simple: light the green screen evenly, and light your product separately. Uneven lighting creates shadows and hotspots, which turns the background removal process into a total nightmare in post.
A tried-and-true setup uses four lights:
- Two Background Lights: Stick one light on each side of the green screen, aimed right at it. Your goal is to wash that entire surface in even light, creating a solid, consistent color for your software to grab onto.
- One Key Light: This is your main light for the product itself. Position it off to one side to create shape, texture, and dimension.
- One Fill Light or Reflector: Place this on the opposite side of your key light. Its job is to soften up any hard shadows on your product, giving it a more polished look.
Here's the secret to a clean key: distance. You need to position your product at least six to eight feet away from the green screen. This physical separation is your number one defense against "color spill"—that nasty green halo that bounces off the background and contaminates the edges of your subject.
This diagram breaks down the basic flow from the initial shot to the final composite image.
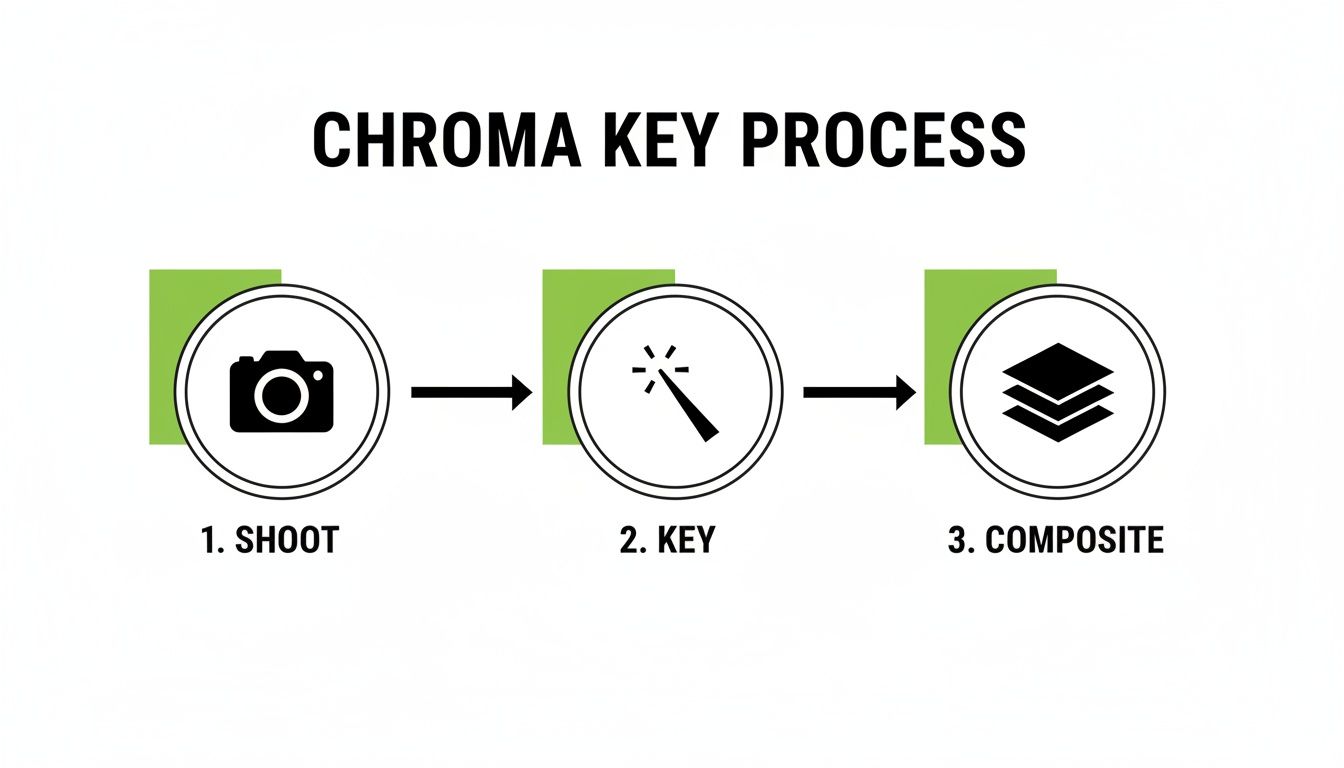
As you can see, it's a three-part process. A great final image depends just as much on a good shot as it does on the keying software and the final composition.
Avoiding Common Setup Mistakes
Nailing your home studio setup is a one-time investment that pays off big time in efficiency later. When you look at the cost of professional product photography, you can see just how much you save by getting this right in-house.
The most common mistake I see is people trying to light the product and the background with the same lights. This is a recipe for disaster, pretty much guaranteeing color spill and an uneven background. Always treat them as two entirely separate lighting scenarios.
Here’s another pro tip: use a light meter or even a smartphone app to check for consistent light levels across your entire green screen before you start shooting. This five-minute check can literally save you hours of frustrating cleanup work in Photoshop. By focusing on an evenly lit, wrinkle-free background and maintaining that crucial distance, your home studio will be churning out perfect keys every time.
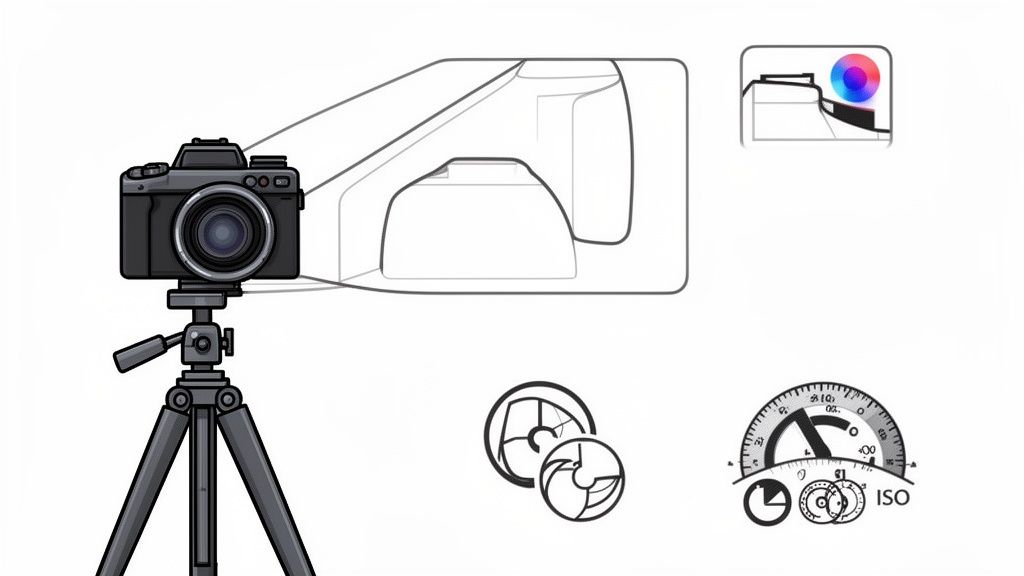
Nailing Your Camera Settings For Clean Edges
If there's one thing I've learned from years of doing this, it's that getting your settings right in the camera is the single best way to avoid a post-production nightmare. A clean shot is the foundation of a clean key. Sure, the basics like a low ISO to kill noise and a deep enough depth of field to keep your product sharp are important, but the real magic for chroma key photography is in the more technical stuff that defines how your camera sees color.
Think of it like this: your camera is grabbing a massive amount of data. Your keying software needs as much clean, detailed color information as it can get to do its job properly. When the software has to guess where your product ends and the green screen begins, you get those fuzzy, jagged edges and nasty green halos we all hate.
This is where your file format becomes a total game-changer. Standard JPEGs might be convenient, but they use heavy compression that literally throws away critical color detail to keep file sizes small. For chroma keying, that's a disaster waiting to happen.
Unlocking Better Edges With Bit Depth And Chroma Subsampling
To capture the absolute best data, you need to get familiar with two key concepts: color depth (or bit depth) and chroma subsampling. They sound intimidating, but the idea is simple: they determine how much color information your camera actually records.
The modern professional standard is shooting in 10-bit color depth, not 8-bit. The difference is staggering: 10-bit gives you 1.07 billion colors compared to just 16.7 million in 8-bit. That’s a 64-fold increase in color information, which dramatically cuts down on problems like color banding.
Likewise, the chroma subsampling format matters a ton. A 4:4:4 format is the gold standard, but a 4:2:0 format—common in many consumer cameras—can lose up to 70% of the color data. You can find some deep dives on these specs from industry experts if you really want to geek out.
The takeaway is this: Shooting in a RAW format or a high-quality video codec (like ProRes 422 or higher) that supports 10-bit color and better subsampling gives your software far more precise data to work with. This directly translates to cleaner edges on tricky textures like fabric, hair, or intricate jewelry.
Shooting Techniques For Tricky Products
Even with perfect settings, some products are just plain difficult. Here’s how I handle them in the studio:
- Reflective and Metal Items: Green spill is your mortal enemy here. The first step is to increase the distance between your product and the screen. Then, use black cards (we call them "flags") just out of frame to block any green reflections. A circular polarizing filter on your lens is also an incredible tool for cutting down glare and reflected color.
- Translucent or Glass Products: With glass, the goal is to define the edges without losing that cool transparency. A strong backlight, or "rim light," is your best friend. I'll position a light behind the product (out of shot, of course) to create a bright, crisp outline that separates it cleanly from the green background. This makes keying so much easier.
- Fuzzy or Hairy Items: For things like sweaters or faux-fur blankets, any motion blur will absolutely destroy your edges. You need a faster shutter speed (think 1/125s or higher) and a rock-solid tripod. The combination of a data-rich file and a perfectly crisp, motion-free shot is the only way to preserve all those fine, wispy details.
By prioritizing these data-rich formats and tweaking your technique for each product, you're working smarter, not harder. You're setting yourself up so that when you get to the editing stage, you're not fighting with the software—you're just revealing the perfect cutout that was there all along.
From Manual Editing To AI Automation
Once you’ve nailed your shots, the next job is to actually get rid of that green background and isolate your product. For years, this meant diving into software like Adobe Photoshop or DaVinci Resolve for a manual, and often painstaking, process.
This classic technique is called chroma keying. In short, you tell the software what color to remove—in this case, green—and it makes that color range transparent. It's an incredibly powerful tool, but getting it right takes practice. A lot of practice.
The Manual Keying Workflow
The old-school manual workflow has a few distinct stages. It usually starts with an initial selection using a tool like Photoshop's "Select > Color Range" or the "Keylight" effect in After Effects. But that first click rarely, if ever, gives you a clean result.
From there, the real work begins. You start the meticulous process of tweaking and refining the edges of your selection. This means fiddling with settings like tolerance, softness, and feathering to clean up the mask. You’ll also need to deal with spill suppression, a fancy term for getting rid of that faint green halo that reflects onto the edges of your product. Trying to get this perfect on something complex, like a fuzzy sweater or a piece of intricate jewelry, can eat up a ton of time and requires a really sharp eye.
The single biggest headache with manual keying is consistency. Trying to get the exact same edge quality across hundreds of product photos is a massive challenge. It requires intense focus and skill, creating a major bottleneck for anyone selling at scale.
The Rise of AI-Powered Solutions
This is exactly where AI automation completely changes the game for e-commerce sellers. Instead of spending hours tweaking sliders and painting masks by hand, modern platforms use trained algorithms to do all the heavy lifting in seconds.
These AI-driven tools aren't just selecting a color; they're understanding the image. They can intelligently tell the difference between your product and the background, preserving tiny details like natural shadows and textures without any human input. This leap from manual labor to smart automation is a huge boost in productivity for anyone using chroma key for photography.
Here's a look at what a modern AI tool's interface looks like—it's all about speed and simplicity.
An interface like this transforms a once-complex task into a simple drag-and-drop action, delivering pro-level results almost instantly. To see how far this tech has come, you can check out how an AI product photo generator can build entire lifestyle scenes from just one photo.
The advantages are undeniable. What used to take a skilled photo editor several minutes (or even hours) per image can now be done for an entire batch of photos at once. For online sellers, this translates to faster product launches, way lower editing costs, and a consistently professional look across your entire store. The choice between manual and AI really comes down to your product volume, budget, and how comfortable you are with the technical side of things.
Solving The Most Common Green Screen Problems
Even when you think you’ve nailed the setup, you're bound to run into a few frustrating hiccups with green screen. Knowing how to spot and fix these issues on the fly is what really separates the good results from the great ones. Think of this as your field guide for troubleshooting the most common chroma key headaches.

The undisputed number one problem is an unevenly lit background. This is what causes those splotchy patches, dark corners, and distracting hotspots that completely throw off your editing software. An inconsistent background leads to a messy, painful keying process.
The fix, almost every time, is to tweak your background lights. Try moving them further back or adding another layer of diffusion to soften their output. Your mission is to get a flat, even, consistent shade of green from edge to edge.
Another classic issue is color spill. This happens when that bright green screen reflects onto your product, creating a faint green halo around the edges. It looks unnatural and can be a real pain to clean up later.
Tackling Color Spill And Fuzzy Edges
To beat color spill, your first line of defense is simply distance. Get your product at least six to eight feet away from the green screen. It sounds basic, but this one step drastically cuts down on how much green light can bounce back onto your subject.
If that pesky green glow still lingers, especially on shiny or reflective products, a backlight can be a game-changer. A small light aimed at the back of your product creates a subtle rim of light that overpowers the spill. This gives your keying software a crisp, clean edge to lock onto.
It's tempting to think you can fix major lighting or spill problems with software alone. But even the best spill suppression tools have their limits. A clean shot straight out of the camera will always produce a better final image and save you hours of post-production headaches.
Blurry or jagged edges are another common complaint I hear. This usually boils down to one of three culprits:
- Motion Blur: Your shutter speed is too slow. Lock your camera down on a tripod and bump that shutter speed up to at least 1/125s to freeze the action.
- Low Resolution: The image just doesn't have enough pixel data for the software to work with. Always shoot in your camera's highest possible resolution.
- Heavy Compression: Shooting in a format like JPEG can bake in compression artifacts that degrade edge detail. Opt for RAW whenever possible to give yourself the most data to work with.
When you run into trouble, it's helpful to have a quick checklist to run through.
This table covers the most frequent issues and how to solve them right on set.
Quick Fixes for Chroma Key Issues
| Problem | Cause | Solution |
|---|---|---|
| Uneven Background | Hotspots, shadows, or inconsistent lighting on the green screen. | Adjust background lights. Move them farther away or add diffusion to soften the light. |
| Green Color Spill | Green light reflecting from the screen onto the product. | Increase the distance between the product and the screen (6-8 ft minimum). Add a backlight to create a clean edge. |
| Blurry/Jagged Edges | Shutter speed too slow, low image resolution, or high compression. | Use a tripod, increase shutter speed to 1/125s+, and shoot in RAW at max resolution. |
| Wrinkles or Seams | Fabric screen is not stretched tightly, causing shadows. | Steam or iron the backdrop before shooting. Use clamps to pull it taut on the stand. |
Getting these things right during the shoot isn't just about solving problems in the moment. It's about setting yourself up for a fast, clean, and professional workflow when you get to the editing stage.
Your Top Chroma Key Questions, Answered
As you start working more with green screens, a few common questions always seem to surface. It doesn't matter if you're a seasoned pro trying to dial in your process or just getting your feet wet; a few solid answers can clear up a lot of frustration. Let's tackle some of the most common ones we hear from product photographers.
Can I Really Use a Green Screen for Shiny Stuff Like Jewelry?
Yes, you can—but you have to be extra careful. Shooting reflective products is all about controlling what they "see," and the last thing you want is a big green blob reflected on that brand-new silver watch.
The trick is distance. Back your product as far away from the green screen as your space allows. Then, instead of hitting it with direct light, use large, soft light sources coming from the sides or above. To mop up any lingering green spill, get creative with black cards (we call them "flags" in the studio) just out of the camera's frame. These will absorb stray light and kill those reflections. A polarizing filter on your camera lens is also your secret weapon here; it can work wonders to cut down unwanted glare.
What’s the Absolute Minimum Lighting I Need?
You don't need a truckload of expensive studio strobes to pull off a clean key. For a really solid, no-frills setup, you'll want at least three lights. Two of them are just for the green screen. Point one at each side to wash it in smooth, even light. The goal is to make it look like a flat, shadowless green wall.
Your third light is the key light, and its only job is to light your product. Now, if you want to make your life way easier in post-production, add a fourth light—a "rim light." Place it behind and slightly above your product. It creates this beautiful, subtle outline that pops the subject right off the background, giving your editing software a crystal-clear edge to work with.
Do I Need a Pro-Level Camera for This?
Honestly? Not anymore. While a DSLR or mirrorless camera offers more manual control and bigger files, the cameras in modern smartphones are incredibly capable, especially when you pair them with a good lighting setup and smart editing software.
The key is to use an app that lets you control things like ISO, shutter speed, and focus manually. And no matter what, lock your phone down on a tripod to keep things tack-sharp. At the end of the day, your lighting and a stable camera will have a much bigger impact on your final image than the camera brand will. A perfectly lit shot from a phone will beat a poorly lit one from a high-end camera every single time.
The quality of your lighting and the stability of your camera are far more critical than the price of the camera body. A clean, evenly lit background is the foundation of a successful chroma key, regardless of the gear you're using.
Why Do My Edges Look Jagged or Blurry After I Remove the Background?
If you're getting crunchy, blurry edges, the problem almost always started back when you were shooting. Low-resolution images are a big offender; there just isn't enough pixel information for the software to draw a clean line.
Another common culprit is motion blur, which happens when your shutter speed is too slow or the camera isn't perfectly still. A sturdy tripod and a faster shutter speed will solve that. Also, shooting in a high-quality format like RAW instead of a compressed JPEG will give you much more detail to work with along the edges. Finally, not having enough separation between your product and the backdrop can cause that soft, fuzzy edge that’s so tough to key out cleanly.
Ready to skip the complex setup and manual editing? ProdShot uses AI to turn your simple product photos into stunning, marketplace-ready images in seconds. Get professional results without the hassle. Start your free trial at https://prodshot.net and see the difference.