
When it comes to selling clothes online, your product photos are everything. It’s not just about taking a quick picture; it’s about creating an experience that shows off the fit, fabric, and feel of your apparel. Think of it this way: your photos have to do the work of a physical fitting room, giving shoppers the confidence they need to hit that "buy" button.
Why Better Apparel Photos Mean More Sales
In a sea of online stores, your photos are your best salesperson. They’re the very first thing a potential customer sees, and often, the only thing they’ll look at before deciding whether to buy from you or a competitor. Great visuals do more than just show off your inventory—they build trust, communicate your brand’s quality, and have a direct impact on your revenue.
Because a shopper can't physically touch the material or try on a sweater, your images have to answer all their unasked questions in a single glance:
- What’s the texture like? A crisp, close-up shot can communicate the softness of a cashmere blend or the sturdy weave of denim.
- How does it fit and drape? Showing a garment on a model or even a ghost mannequin helps customers visualize how it hangs and moves on a real body.
- Is the color true to life? Good lighting is non-negotiable. It ensures the "emerald green" dress they see on their screen is the same one that shows up in the mail.
The Real Cost of Poor Photography
The link between photo quality and sales isn't just a theory—it's backed by data. A staggering 75% of online shoppers say they rely on product photos when deciding to buy.
And if you get it wrong? The consequences are real. A whopping 22% of all online apparel returns happen because the item looked different in person than it did in the photos.
This is where you can really build trust—or break it. Stunning photos are a core part of any strategy to improve ecommerce conversion rates because they prove you're a legitimate, quality-focused brand.
In e-commerce, your images act as your digital salesperson. If they're unconvincing, blurry, or misleading, you're not just losing a sale; you're losing customer trust that is incredibly difficult to win back.
The good news? You don’t need a massive budget or a fancy studio to create photos that sell. While understanding the typical cost of professional product photography is useful for context, you can get incredible results with the smartphone you already have. This guide will walk you through exactly how to turn that device in your pocket into a powerful tool for creating visuals that don't just compete, but actually convert.
Prepping and Styling Garments Like a Pro
The real difference between an amateur snapshot and a professional apparel photo often comes down to the work you do before you even pick up your phone. You can have the best lighting in the world, but if your garment is wrinkled, dusty, or poorly styled, the shot is already ruined. Think of proper preparation as the non-negotiable first step.
Before anything else, give every garment a thorough inspection under bright light. This is where you'll spot the little things you might otherwise miss—loose threads, faint smudges, or tiny dust particles. A lint roller will become your absolute best friend in this process.
From there, it’s all about getting the fabric perfectly smooth. Steam or iron every single piece meticulously. Trust me, the camera magnifies every crease and wrinkle, so don't cut corners here.
Choosing Your Styling Method
Once your garment is looking pristine, it's time to decide how you're going to present it. The most successful brands rarely stick to just one style; they use a mix to give customers a complete feel for the product.
In fact, research shows that a whopping 76.1% of top fashion e-commerce brands use more than one photography style. The average product page features 8 images, with model photography being the most common choice.
Here are the three core methods you’ll want to get comfortable with:
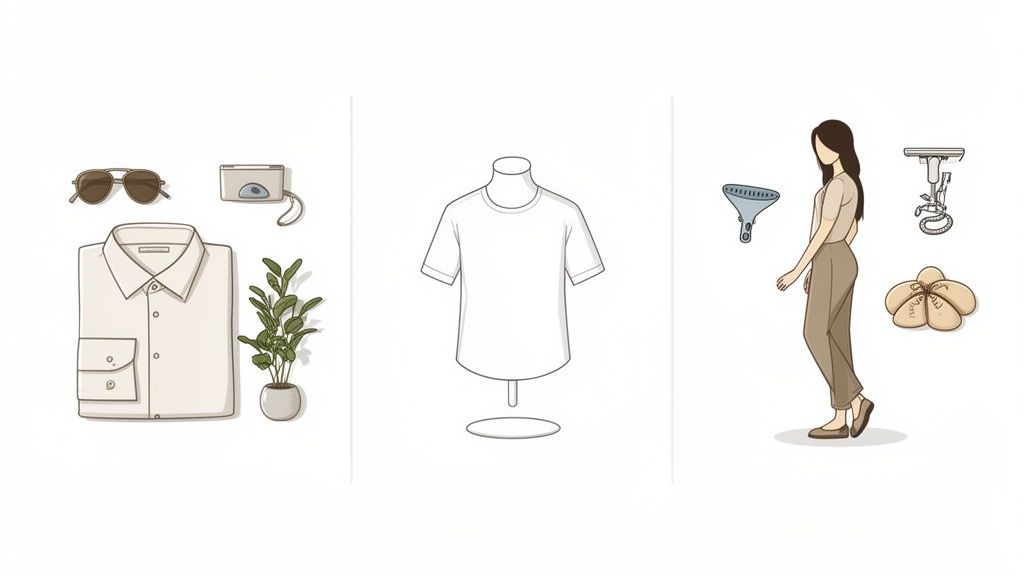
- Flat Lay Photography: This is where you lay the garment flat on a surface and shoot from directly overhead. It's fantastic for showing off entire outfits, t-shirt graphics, and accessories.
- Mannequin Photography: Using a mannequin gives a realistic idea of the product's shape and fit without the extra work of coordinating a model shoot. It's also the go-to method for creating that clean "ghost mannequin" look.
- On-Model Photography: This is the gold standard. It shows customers exactly how an item fits, drapes, and moves on a real person, helping them picture themselves wearing it.
Creating Compelling Flat Lays
A great flat lay is so much more than just a shirt on the floor—it tells a story. Always start with a clean, neutral background. A simple white poster board or a textured wooden surface works wonders to make the apparel pop.
To keep the garment from looking limp and lifeless, use a bit of tissue paper or thin cardboard inserts. Gently stuffing the torso of a shirt or the legs of a pair of jeans gives them just enough dimension to look real. It's a small trick that makes a huge difference.
Finally, arrange the garment to look natural, not stiff. A perfectly folded shirt can look a little sterile. Instead, try giving the sleeves a slight curve or adding a gentle fold at the hem to suggest a bit of movement.
Pro Tip: When styling a flat lay, consider adding one or two relevant props to build some context. For a sundress, you might toss in a pair of sunglasses and a straw hat. The goal is to enhance the main product, not overpower it.
Styling on Mannequins and Models
If you're using a mannequin, get familiar with pins and clips. Use them on the backside of the garment to create a perfectly tailored fit, smoothing out any bunching fabric for a clean, flattering silhouette. Nailing this technique is fundamental for all types of fashion product photos because it ensures the garment’s shape is shown at its absolute best.
For on-model shoots, the focus shifts to posing. Guide your model into poses that highlight the clothing's best features. A hand tucked into a pocket can show off the fit of a great pair of pants, while a subtle turn of the body can reveal the beautiful drape of a dress. Your goal is to create a look that feels both natural and aspirational, forging an emotional connection between the customer and your product.
Getting Light and Composition Right on Your Phone
Your smartphone camera is a beast, but you only unleash its full power when you feed it good light. Forget about dropping cash on fancy strobes or complicated gear. The best light source for incredible apparel product photography is probably just outside your window, and it's free.
Natural light is your best friend. It’s soft, flattering, and shows colors way more accurately than the lamps in your house, which have a nasty habit of casting weird yellow or blue tints on everything.
The secret is finding diffused light. Think of the soft, even light you get on a slightly overcast day, or the light coming through a window that isn't getting blasted by direct sun. Harsh, direct sunlight creates ugly, dark shadows that swallow up important details and make your fabrics look cheap.
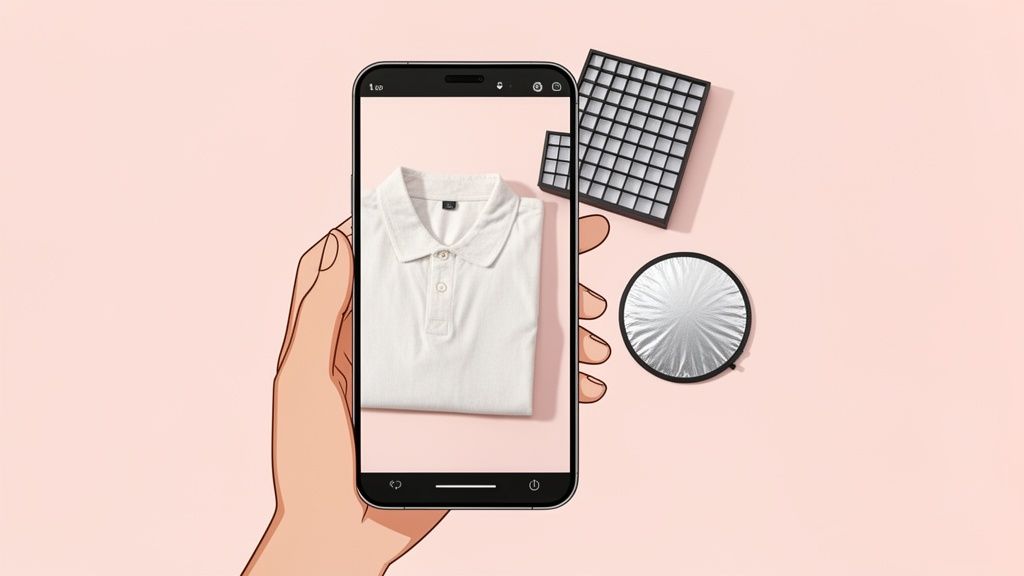
Your Simple DIY Window Studio
You can pull together a pro-level lighting setup for under $30. All it takes is a window, a table, and a couple of cheap items to shape the light.
- Find Your Spot: Set up a table so it's sitting at a 90-degree angle to a large window. This side-lighting technique creates gentle shadows that give your clothing shape and dimension, preventing that flat, boring look.
- Bounce That Light: Grab a cheap white foam board (or even just a big piece of white poster board) and place it on the side of the garment opposite the window. This is your reflector. It will bounce light back into the shadows, brightening up the whole product for a clean, even look.
- Soften It Up: If the sun is still a little too intense, you can easily make a diffuser. Just hang a thin white bedsheet or a plain white shower curtain over the window. This instantly softens the light and mimics the look of a professional photography studio.
Seriously, Do This: Turn off every single other light in the room. When you mix the natural light from your window with the artificial light from your ceiling fixtures or lamps, you completely confuse your phone's white balance. The result? Funky, inaccurate colors in your photos—a guaranteed way to get customer returns.
With this simple rig, you have total control. You can create the soft, beautiful light that makes apparel look its best. Now, let's get your phone's camera settings dialed in.
Taking Back Control of Your Smartphone Camera
Your phone's camera app wants to do everything for you. For professional results, you need to tell it who's boss by taking manual control over two critical things: focus and exposure.
First, tap the screen right on your product. You'll see a yellow box or circle pop up. This locks the focus on that exact spot, making sure the most important part of your garment—like a logo, a unique button, or a cool fabric texture—is perfectly sharp.
Right next to that focus box, you’ll see a little sun icon or a slider. That’s your exposure control, which is just a fancy word for brightness. Don't be afraid to slide it up or down. You want to make the whites in the image look bright and clean, but not so bright that you lose the fabric's detail. Photographers call this "exposing to the right."
Locking these two settings is a game-changer. It stops the camera from freaking out and changing things every time you move an inch, giving you consistent, professional-looking photos for your entire collection.
Composing Your Shot to Make People Click
Composition is just how you arrange things in the photo. It’s the difference between a random snapshot and a deliberate, high-end product photo that makes someone want to buy.
A classic trick that always works is the rule of thirds. Just imagine your screen has a tic-tac-toe grid on it. Instead of sticking your shirt right in the dead center, try placing it along one of the lines or at a point where two lines cross. This simple tweak makes the whole photo feel more dynamic and interesting to look at.
Another powerful move is to use negative space. That’s just the empty area around your product. You don't need to fill the entire frame. Leaving a bit of breathing room actually helps draw the customer's eye right to the apparel and gives off a cleaner, more premium vibe. It’s a subtle thing, but it makes your product the undeniable hero of the shot.
A Smart Editing Workflow for Pro Results
Taking the photo is only half the battle. The real magic happens in the editing room, where you turn a good raw image into a polished, e-commerce-ready asset that actually drives sales. Nailing down an efficient workflow will save you countless hours and ensure every piece of product photography apparel on your site looks consistently professional.
The good news? You can kick off this whole process right on your phone. Basic adjustments should always be your first stop. Before you even think about more advanced tools, pop open a free app like Snapseed or just your phone's built-in editor to make a few critical tweaks.
Get these three things right from the start:
- Brightness (Exposure): Gently bump up the brightness until your white background looks clean and crisp. Just be careful not to "blow out" the highlights—that's when you lose all the beautiful fabric details.
- Contrast: A little touch of contrast goes a long way. It makes the colors pop and gives the image a bit more depth, helping the garment stand out.
- White Balance: This one is crucial for accuracy. Fix any weird color casts so your whites are truly white and the product's color is 100% true to life.
This quick process is the foundation. Getting your lighting and setup right makes the editing stage so much easier and more effective.
As you can see, a great final image always starts with solid fundamentals, which directly feed into a smoother editing workflow.
The Power of AI in Modern Editing
Once you've made those initial adjustments, it's time to let AI do the heavy lifting. Manually cutting out backgrounds used to be a soul-crushing task that required real skill. Today, AI-powered tools have made this step practically instantaneous.
Tools like ProdShot were built for exactly this. You can upload your image, and with a single click, the AI perfectly removes the background, leaving you with a clean, isolated product on a transparent layer. This is non-negotiable for creating those clean, white-background shots required by marketplaces like Amazon.
The biggest bottleneck for e-commerce sellers used to be post-production. AI editing completely removes that barrier, allowing anyone to achieve studio-quality results without ever touching complex software like Photoshop.
But it's not just about removing backgrounds. These tools can generate entirely new ones. You can instantly place your apparel against a solid color, a subtle gradient, or even a realistic lifestyle backdrop that fits your brand's vibe. For instance, a raw photo of a hoodie taken in your living room can become a professional shot on a clean white background and a lifestyle image against a minimalist studio wall in seconds. A good Shopify photo editor bakes these features right in to get your products from photo to live listing in a flash.
From Raw Photo to Marketplace Ready
Let's walk through a real-world example. You just snapped a photo of a t-shirt on a mannequin using your window-light setup.
- On-Phone Tweak: First, you open it in your phone’s editor. You bump the brightness slightly and correct the white balance to make the white shirt look pure white. Simple.
- AI Enhancement: Next, you upload the edited photo to an AI tool. It automatically removes the background and the mannequin, creating that slick "ghost mannequin" effect.
- Asset Creation: From that one enhanced image, you generate three final assets: one with a pure white background for your main product shot, one with a light gray background for a category page, and a third placed on a new, AI-generated textured backdrop for social media.
This entire process can take less than five minutes.
By combining quick mobile edits with powerful AI tools, you build a fast, repeatable system. And when you also nail the technical details, like the perfect Shopify image sizes, you're creating a seamless experience for your customers and delivering high-converting images every single time.
Common Apparel Photography Mistakes to Avoid
Sometimes, knowing what not to do is even more valuable than getting everything right. You can nail the styling and have perfect lighting, but a few classic mistakes can tank the entire shoot, making your brand look amateur and undoing all your hard work. Steering clear of these pitfalls is non-negotiable for creating product photography apparel that actually sells.
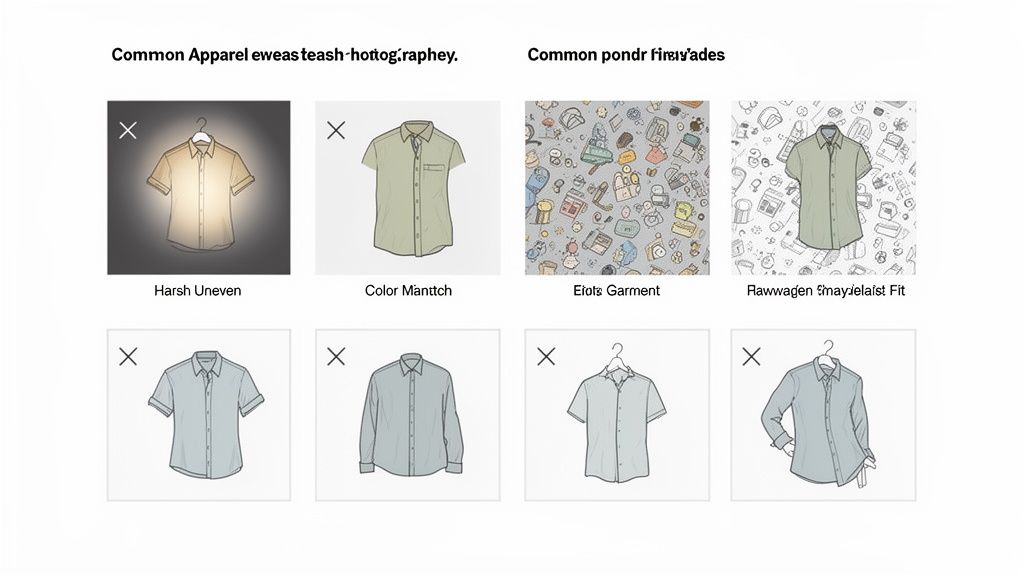
One of the most common—and jarring—errors is inconsistent lighting. When a customer clicks from a brightly lit t-shirt to one that’s dim and full of shadows, it just feels unprofessional. That lack of consistency sends a subtle signal that you might not care about the details.
Another massive problem is getting the color wrong. This is usually a white balance issue, where your phone’s camera gets confused by different light sources. This one mistake is a direct line to more product returns. No one who orders a navy blue sweater wants to open a box to find a purple one.
Distracting Backgrounds and Awkward Angles
A busy background is probably the fastest way to lose a potential customer. Your living room couch, a messy desk, or some random outdoor scene pulls focus from the only thing that matters in the photo: your product. Always, always go for a clean, neutral background that lets your apparel be the star.
Unflattering angles are just as bad. They can completely warp how a garment is supposed to look and fit. Shooting from too low can make a piece look bulky and strange, while a weird top-down angle can flatten out all the beautiful details. You have to experiment to find the perspective that shows how the clothes actually look on a body.
Forgetting to capture the details is a huge missed opportunity. Shoppers want to see the texture of the fabric, the quality of the stitching, and unique features like buttons or zippers. These close-up shots are what bridge the gap between browsing and buying.
Overlooking the Growing Demand for Quality
In a market that's getting more crowded by the day, professional-looking visuals are no longer just a "nice-to-have." The e-commerce product photography market now accounts for about 45% of the entire $5.1 billion commercial photography industry and is on track to hit $275.4 million by 2030. That growth is fueled by shoppers who expect and demand better images, especially for clothes. To see more on this, you can discover more insights about product photography statistics.
Avoiding these simple mistakes helps you meet—and beat—those rising customer expectations. Here’s a quick mental checklist to run through during your next shoot:
- Lighting Check: Is my lighting consistent from one product to the next?
- Color Accuracy: Do the colors in the photo look true to life?
- Background Clarity: Is my background simple and totally free of distractions?
- Flattering Angles: Does this angle show the garment's true fit and shape?
- Detail Shots: Did I get close-ups of the fabric, stitching, and key features?
By actively dodging these easy-to-make but costly errors, you immediately elevate your brand. You’re providing a visual experience that builds trust, cuts down on returns, and ultimately, drives more sales.
Frequently Asked Questions
Jumping into apparel photography for the first time always brings up a few questions. I've been there. Here are the most common things e-commerce sellers ask, along with some straight-to-the-point advice to get you started and help you fine-tune your shoots.
How Many Photos Should I Use for Each Clothing Item?
The magic number is between 5 to 8 high-quality images for every single product you list. Think of it this way: you’re trying to replicate the in-person experience of picking an item off the rack, feeling it, and trying it on. More photos bridge that digital gap.
A killer image set always covers these bases:
- The Hero Shot: Your main image. A crisp, full view of the garment on a model, mannequin, or as a perfect flat-lay.
- Detail Shots: Get in close. Show off the texture of the fabric, the quality of the stitching, a unique button, or the zipper pull. These little things scream quality.
- Back and Side Views: Don't leave customers guessing. Show them how the garment fits and drapes from every angle.
- Lifestyle Context: Give the piece some life. Show it being worn in a real-world setting to help shoppers imagine themselves wearing it.
This mix answers questions before a customer even has to ask them, building the confidence they need to make a purchase.
By providing a variety of detailed images, you're doing more than just showing off a product. You're eliminating the doubt that makes a customer hesitate. Fewer questions lead to fewer abandoned carts and more sales.
What Is the Best Background for Apparel Photos?
For your primary product shots, a clean, non-distracting background is the undisputed champion. There's no room for debate here. Pure white or a very light, neutral gray is the industry standard for a reason.
This approach is mandatory on marketplaces like Amazon and a best practice for any Shopify store. It puts your product front and center, keeps colors true, and gives your entire shop a cohesive, professional vibe. Save the creative, colorful backdrops for your Instagram feed; your main listing photos need to be all about clarity.
Can I Get Professional Photos with Just My Phone?
Absolutely. The gap between modern smartphone cameras and DSLRs has narrowed to a sliver. The secret to professional-looking product photography for your apparel isn't about how much you spent on your camera—it's all about your technique.
When you master the fundamentals of good lighting, take the time to style your garments meticulously, and develop a smart editing workflow, your phone is more than capable of producing stunning, high-end images. It's your eye for detail, not the brand of your camera, that makes your apparel pop and drives sales.
Ready to turn your own phone snaps into gorgeous, sales-driving product photos? With ProdShot, you can remove backgrounds, perfect the lighting, and generate studio-quality images in seconds. Try it for free and see the difference.