
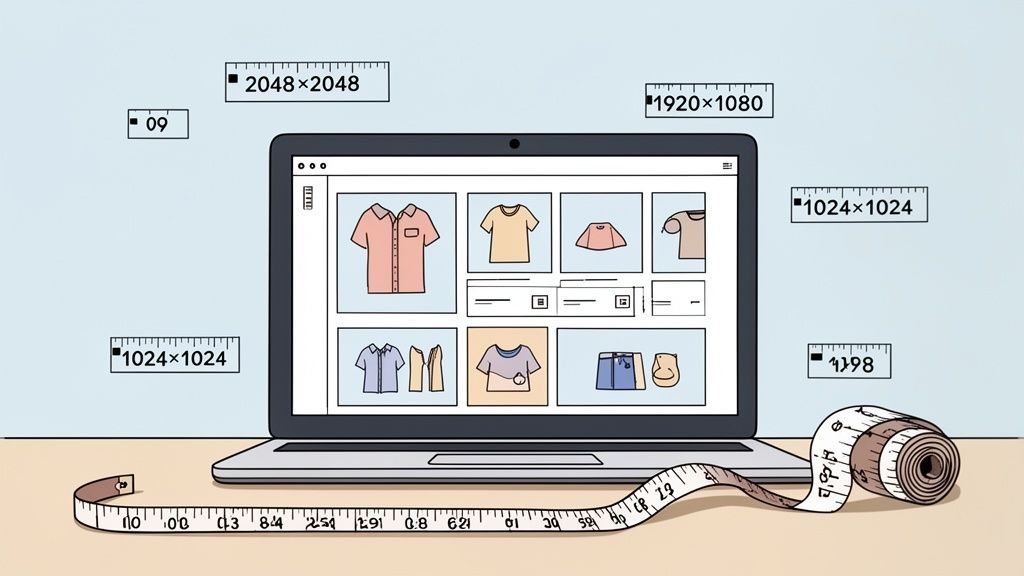
If you only remember one thing from this guide, make it this: for Shopify product images, 2048 x 2048 pixels is the gold standard. A high-resolution square format like this is your ticket to sharp, professional-looking photos that work beautifully with Shopify's zoom feature and keep your collections looking clean and uniform.
Why The Right Image Size Is Your Conversion Superpower
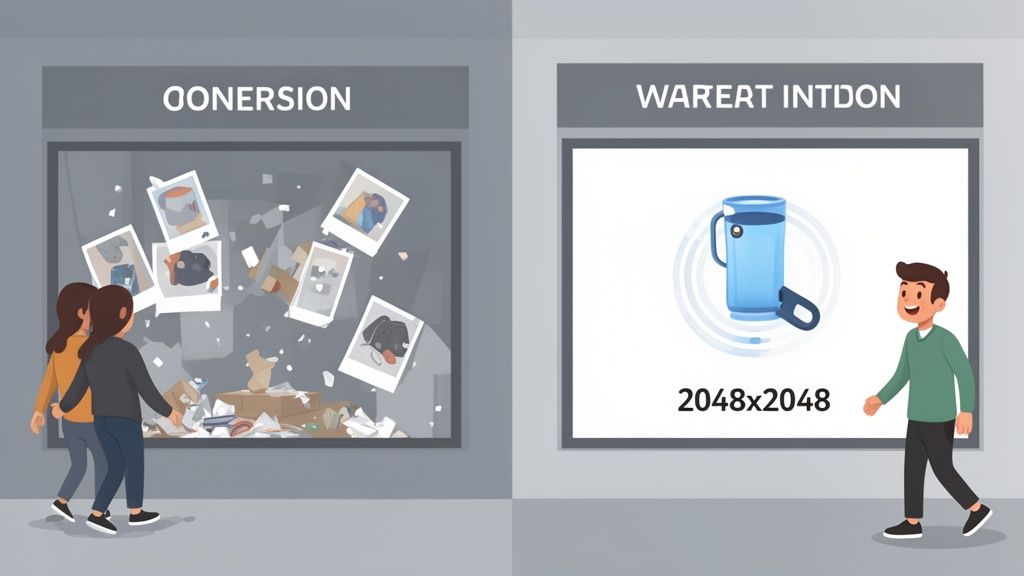
Think of your Shopify store as your brick-and-mortar dream shop. Your images are everything—the window display that draws people in, the stylish product packaging, and the way items are presented on the shelves.
If that display is blurry, pixelated, or takes forever to load, it's the digital equivalent of a messy shop with dirty windows. It immediately signals a lack of care and professionalism, sending potential customers clicking away before they even think about buying.
Getting your image sizes right on Shopify isn't just a technical box to check. It's a core part of your sales strategy. The dimensions you choose and how you compress your files have a massive impact on two things that make or break an online store: user experience and site speed. Nail these, and you're building the foundation for a store that converts.
The Clear Link Between Images and Sales
When a shopper can't get a good look at your product, they hesitate. Doubt creeps in. But when they see crisp, high-quality images that load in a flash, it builds instant trust. It lets them zoom in and inspect every detail, just like they would if they were holding it in their hands.
In fact, some studies have shown that stores adopting the 2048 x 2048 pixel recommendation can see their page load speeds improve by up to 34%. That's a direct line to better conversion rates.
This is where image optimization becomes your best friend. To create a store that’s both beautiful and blazingly fast, you really only need to get a handle on three key ideas:
- Pixel Dimensions and Aspect Ratio: This is just the size and shape of your image. Keeping these consistent is what creates that clean, professional grid that makes browsing a pleasure.
- File Type (JPG vs. PNG): Knowing when to use which format is a simple trick to balance image quality with file size, so your pages stay fast without looking muddy.
- Compression and File Size: This is the magic of making your image files (the kilobytes or KB) as small as possible without turning your beautiful photos into a pixelated mess.
Optimizing your images isn't just about making things look pretty. It's about respecting your customer's time. A fast, clear, and professional site is a site that sells.
Of course, images are just one piece of the puzzle. For a deeper dive into boosting your store's performance, check out these 10 Proven E-commerce Conversion Rate Optimization Tips. And remember, great optimized images start with great source material. Getting the fundamentals of professional Shopify product photography right will make everything else downstream so much easier.
Getting to Grips with Digital Images
Before we jump into the perfect image sizes for your Shopify store, we need to get on the same page about how digital images actually work. It might sound a bit technical, but I promise it’s straightforward. Nailing these core ideas will help you make smart decisions that go way beyond just memorizing a few numbers.
Think of any digital photo as a giant mosaic made of thousands of tiny, colored squares. Each one of those squares is a pixel. When you cram enough of them together, they trick our eyes into seeing a smooth, detailed picture.
That's all we mean when we talk about pixel dimensions, like 2048 x 2048 pixels. It's just a simple count of how many of those little squares make up the image's width and its height.
Pixel Dimensions: The Building Blocks of Quality
Imagine you’re building something with Legos. If you only use a handful of big, chunky bricks, your final creation will look blocky and rough. But if you use thousands of tiny little bricks, you can create smooth curves and incredible detail.
Pixels work the exact same way.
- Low Pixel Count: An image with just a few pixels (say, 300 x 300) is like that blocky Lego sculpture. If you try to stretch it out, you start seeing the individual "bricks." The result is a blurry, jagged mess that we call pixelated.
- High Pixel Count: An image packed with pixels (like our 2048 x 2048 example) is the detailed masterpiece. It has more than enough building blocks to look sharp and clear, even when a customer zooms in for a closer look on your product page.
This is the single most important reason to always start with a high-resolution image. You can always shrink a big, detailed picture down without losing quality, but you can never, ever add detail to a small image that wasn't there in the first place.
Aspect Ratio: The Shape of Your Canvas
While pixel dimensions tell you how much detail is in an image, the aspect ratio tells you about its shape. It’s simply the proportional relationship between the width and the height.
A perfect square, for instance, has a 1:1 aspect ratio because its width and height are identical. That widescreen TV in your living room probably has a 16:9 aspect ratio, making it much wider than it is tall. Getting a handle on how these different shapes display is crucial for any kind of visual content; even a comprehensive guide to vertical video dimensions stresses how important it is to match your content's shape to the platform it's on.
On your Shopify store, keeping your aspect ratios consistent is the secret sauce for creating that clean, professional, and satisfying grid on your collection pages.
File Types: Choosing the Right Container
Finally, think of file types as different kinds of containers for all those pixels. For Shopify, you really only need to worry about two: JPG and PNG. Each one has a specific job.
JPG (or JPEG): This is your go-to for almost all product photography. It uses what's called "lossy" compression, which is a bit like vacuum-sealing clothes for a suitcase. It cleverly removes some unnecessary data to make the file a lot smaller, usually with no noticeable drop in quality. This is exactly what you want for fast-loading product photos.
PNG: This container uses "lossless" compression, meaning it keeps every single pixel perfectly intact. But its real superpower is its support for transparency. If you have a logo or an image that needs to sit on top of a colored background without a white box around it, PNG is your only option. That perfect quality comes at a cost, though—PNG files are almost always larger than JPGs.
When someone lands on your Shopify store, your product and collection images are doing all the heavy lifting. They're your silent salespeople, your digital window display, and often, the final push a customer needs to hit that "Add to Cart" button. Getting these images right isn't just a tiny detail—it's everything.
The undisputed king of Shopify product images is the 2048 x 2048 pixel square. That number isn't just pulled out of thin air; it’s a strategic choice that unlocks the platform's best features and builds serious shopper confidence. Think of this high-resolution square as the master key to your store's visual potential.
So, why this exact size? First and foremost, it’s all about Shopify's powerful zoom feature. When you upload an image with this much detail, customers can mouse over it and see every stitch, texture, and nuance with perfect clarity. This is huge. It mimics the real-world experience of picking up a product and examining it up close, which is a massive trust-builder and helps melt away any hesitation to buy.
The Power of the Perfect Square
Beyond just the zoom, sticking to a consistent square format brings an immediate sense of order and professionalism to your collection pages. When every product is framed in the same 1:1 aspect ratio, you get a clean, uniform grid that’s incredibly easy for shoppers to scan.
This visual rhythm gets rid of that chaotic, thrown-together look that comes from mismatched image shapes. It lets your products be the star of the show and makes browsing your store feel organized and intentional, not jarring and amateur.
To really nail these ideas, it helps to understand the moving parts of any digital image. This map breaks it down nicely.
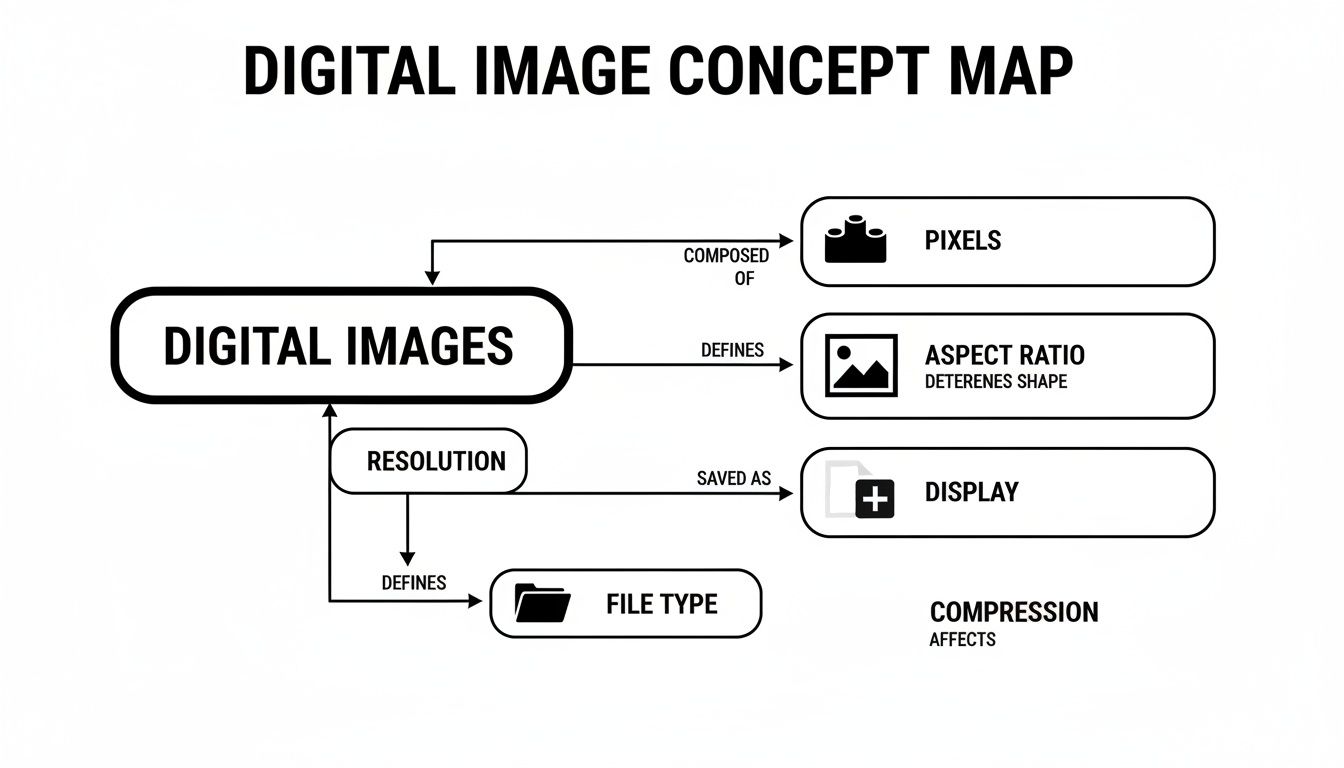
As you can see, the pixels are the basic building blocks, the aspect ratio gives it shape, and the file type is the container holding it all together. Getting these three things right is the secret to a perfect Shopify image.
Center Your Product for Success
One of the most common mistakes people make with square images is bad cropping. Shopify often uses automatically cropped versions of your images for thumbnails in places like the cart or at checkout. Because of this, what's sitting in the center of your image is critically important.
Always make sure your product is perfectly centered with a good amount of "safe space" or padding all around it. Picture a circle in the middle of your square—the most important parts of your product need to fit inside it. This simple habit stops key features from getting awkwardly chopped off when your image shows up in smaller sizes across your store. If you need a hand with this, a good Shopify photo editor can help you get the framing just right.
Optimizing Your Collection Images
While individual product photos do best with the strict 2048 x 2048 pixel rule, collection images give you a bit more room to be creative. These are the images that represent a whole category, and they often work best as lifestyle shots that tell a story or set a mood.
A great collection image doesn't just show products; it sells a feeling. It helps a customer imagine how your products will fit into their life, making the entire category more appealing.
A square is still a solid, safe bet here, but you can definitely experiment with other aspect ratios for collection images—as long as you keep them consistent across your entire site.
- 1:1 Ratio (Square): The standard recommendation is 1024 x 1024 pixels. This keeps that clean, grid-like look and ensures everything feels balanced.
- 3:2 Ratio (Landscape): Dimensions like 1800 x 1200 pixels are fantastic for showing products in a wider setting, like a full furniture set in a living room.
- 2:3 Ratio (Portrait): A size like 1200 x 1800 pixels is perfect for fashion, where showing a full outfit on a model makes a much bigger impact than a simple square.
The real key is consistency. If you pick a landscape ratio for one collection, stick with it for all of them. This is what gives your store that polished, intentionally designed feel.
Creating High-Impact Hero Banners and Slideshows
While your product photos are all about the details, your hero banners and slideshows are pure brand storytelling. Think of this space as your digital billboard—it’s the very first thing visitors see. Its entire job is to grab their attention, set the mood, and make a powerful impression that gets them excited to see what else you have.
Unlike the fairly rigid rules for product shots, the perfect hero image size for Shopify is completely tied to your theme. Every theme is built differently, with its own unique layout for these huge, full-width sections. If you upload an image with the wrong dimensions, you’ll end up with awkward cropping, pixelation, or stretched-out visuals that instantly hurt your brand’s credibility.
Finding Your Theme's Golden Ratio
Your first stop should always be your theme’s documentation. Seriously. Theme developers almost always spell out their specific recommendations for banners and slideshows. You can usually find this by going to Online Store > Themes in your Shopify admin and clicking the "Documentation" or "Support" link for your theme.
That said, a fantastic universal starting point for any full-width hero image is 1920 x 1080 pixels. This is your standard 16:9 aspect ratio, which looks great on most modern desktop screens and gives you plenty of resolution to look sharp and professional.
If you’re totally lost and can't find any specific guidance, this size is a reliable and safe bet. It gives you a high-quality foundation that Shopify can then adapt for all the different screen sizes out there.
The Mobile-First Design Challenge
The real test for any hero image is how it holds up on a phone. That wide, cinematic banner that looks incredible on your desktop can get absolutely butchered when it's squeezed onto a narrow, vertical mobile screen. Shopify's responsive design will automatically crop the sides of the image to make it fit, which can easily chop off your product or the entire focus of the photo.
Your hero image has to deliver its core message instantly on any device. If your call-to-action or key visual is cut off on mobile, you've lost a massive opportunity to engage a huge chunk of your audience.
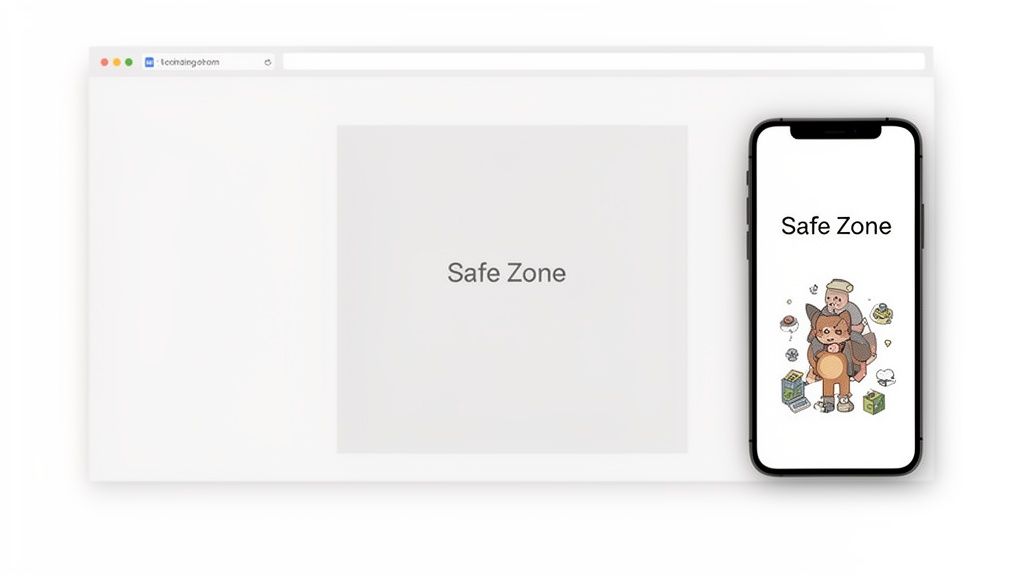
This is where the concept of a "safe zone" becomes your most valuable tool. Picture a box right in the center of your desktop banner. Every single essential element—text, logos, buttons, and the most critical part of your product—needs to live inside this central area.
By keeping everything important packed into the middle third of your image, you ensure that even when the sides get cropped away on a phone, your core message stays perfectly visible. This one technique is the secret to creating banners that just work everywhere.
Best Practices for Banners and Slideshows
To make sure your hero images are always doing their job, stick to these simple but powerful guidelines:
- Prioritize Visuals Over Text: Try to avoid embedding lots of text directly into your image file. Many Shopify themes let you overlay live text and buttons right on top of the banner. This is way better for SEO and ensures your text will always be readable and scale correctly on mobile.
- Use High-Quality Imagery: This is your store's main event, so don't skimp. Use professional, compelling photos or graphics that truly represent your brand. A blurry or generic hero image will do more harm than good.
- Keep File Sizes in Check: High resolution is great, but a massive file will slow your homepage to a crawl. Always compress your hero images before uploading, aiming for a file size under 500 KB if you can, without wrecking the quality.
- Test on Multiple Devices: Before you hit publish, always use your theme's preview feature. See how that banner looks on a desktop, a tablet, and a phone. It's the only way to be 100% sure your "safe zone" is working and the image is having the impact you want.
How to Optimize Images for Speed and Performance
Having stunning, high-resolution images is a huge win, but there's a catch. If those beautiful photos are too large, they can slow your website to a crawl, and nothing sends a potential customer clicking away faster than a page that won’t load.
The secret is finding that sweet spot between gorgeous image quality and small file size.
Think of it like packing a suitcase. A high-resolution image is like throwing your entire wardrobe in—you have everything, but it's heavy and a pain to carry around. What you need for your website is a perfectly packed carry-on that's light, fast, and has everything you actually need. This is exactly what image compression does for you.
Lossless vs. Lossy Compression
There are two main ways to "pack" your image files, and they each have a different philosophy.
-
Lossless Compression: This is like vacuum-sealing your clothes. Everything is still there, down to the last thread, but it's squeezed into a much smaller space. You lose absolutely zero quality. PNG files use this method, which is why they look so crisp and are perfect for logos or graphics with sharp lines.
-
Lossy Compression: This is more like deciding you don't really need five gray t-shirts that all look the same. It cleverly removes tiny, often unnoticeable bits of data to make the file significantly smaller. JPGs use this approach, which is why they are the go-to for most product photos where a massive speed boost is way more valuable than some imperceptible detail.
For your Shopify store, aiming for file sizes under 100 KB is a game-changing goal. Smaller files mean faster loading times, a much better user experience, and even a little nod from search engines.
Don’t make your customers wait. A fast website feels professional and trustworthy. A one-second delay in page load time can slash conversions by up to 7%.
Shopify’s Built-In Performance Boosters
The good news is that Shopify does a lot of the heavy lifting for you behind the scenes. When you upload a high-quality JPG or PNG, Shopify gets to work creating optimized versions of it automatically.
Shopify is smart enough to detect what browser your visitor is using. If it’s a modern one like Chrome, Firefox, or Edge, it serves up a next-generation WebP image. WebP files are fantastic, often shrinking file sizes by another 25-35% compared to a JPG, all without any noticeable drop in quality. It’s like getting a free speed upgrade for most of your visitors.
Another clever trick up Shopify's sleeve is lazy loading. Instead of trying to load every single image on a page at once (which can really bog things down), it only loads the images currently visible on the screen. As a visitor scrolls, new images pop into existence just before they're needed. This makes a huge difference for the initial page load time, especially on long collection pages packed with products.
For a quick and easy way to optimize your images before you even upload them, a dedicated online image resizer can ensure you’re starting with the best possible file.
Don't Sacrifice the Zoom
While speed is critical, the zoom feature on product pages is a powerful tool for sealing the deal. Customers want to see the details, and for zoom to work its magic, your images need to be at least 800 x 800 pixels.
But if you really want to impress, go for 2048 x 2048 px. This allows for a truly detailed, crystal-clear experience when they zoom in. A survey of 15,000 merchants found that stores enabling zoom with correctly sized images see 32% higher add-to-cart rates. To dive deeper into how sizing impacts sales, you can read the full research about these findings on GemPages.
Got Shopify Image Size Questions? I've Got Answers.
Let's be honest, figuring out all the different image sizes can feel like a headache. There's a lot of conflicting advice out there. So, let's cut through the noise and get straight to the answers you're looking for.
Think of this as your cheat sheet for solving the most common image puzzles Shopify store owners face. Getting these details right is the difference between a store that looks amateur and one that looks like a million bucks.
What's the Absolute Best Size for Shopify Product Images?
You want the gold standard? It's 2048 x 2048 pixels. A perfect square.
This size is king for a few simple reasons. First, it’s high-resolution enough to make Shopify's zoom feature work beautifully. When a customer can zoom in and see the fine texture of a fabric or the tiny details of a handmade item, their confidence soars. It’s the closest you can get to them holding it in their hands.
Second, an image this sharp looks incredible on every device, from massive retina desktop screens to the latest tablet. You're future-proofing your store. Finally, keeping all your product images square creates that clean, professional, and satisfying grid on your collection pages.
Sure, Shopify says you only need 800 x 800 pixels for zoom to work, but trust me, aiming for 2048 x 2048 px is the pro move.
Should I Be Using JPG or PNG for My Images?
Great question. The answer depends on what the image is for, but there's a simple rule of thumb.
For almost every single one of your product photos, JPG is your best friend. JPGs are masters of compression, meaning they create much smaller file sizes with almost no noticeable drop in quality. Smaller files mean faster loading pages, and faster pages keep shoppers from bouncing.
So, when do you use PNG? Only when you absolutely need a transparent background. Think logos, icons, or maybe a product shot where you want your theme's background to peek through. Just remember, PNGs are heavier files, so use them sparingly to keep your site zippy.
Key Takeaway: Use JPGs for all your photos to keep your store fast. Only pull out the PNGs for images that must have a transparent background.
How Do I Figure Out the Right Image Sizes for My Specific Theme?
While the 2048 x 2048 px rule is a lifesaver for product photos, things get tricky with banners, slideshows, and hero images. Those sizes are almost always unique to your specific theme.
Don't guess. The most reliable place to find the exact dimensions is in your theme’s own documentation.
- From your Shopify admin, go to Online Store > Themes.
- Find your active theme and click the link for "Documentation" or "Support."
The people who designed your theme know it best, and they provide these guides for a reason. Following their recommendations for big, full-width images will save you from the nightmare of awkward cropping and ensure your homepage looks absolutely stunning.
Does Shopify Automatically Resize Images for Me?
Yes, it does. When you upload a big image, Shopify works its magic in the background, creating a whole set of smaller versions. It then cleverly serves up the right size for the right situation—a tiny thumbnail in the cart, a medium one on a collection page, and so on.
But there’s a catch. Shopify can't create detail out of thin air. If you upload a small, fuzzy image to begin with, it has nothing to work with. When it tries to display that image in a larger spot, it's going to look blurry and pixelated every time.
This is exactly why you always start with a large, high-quality source file. Give Shopify a masterpiece to work with, and you can trust that every version it creates will look sharp and professional across your entire site.
Stop wasting time on complicated editing software. With ProdShot, you can turn simple smartphone pictures into professional, high-converting product photos in seconds. Our AI handles the background removal, lighting adjustments, and optimization, so you can focus on selling. Try ProdShot for free and see the difference.