
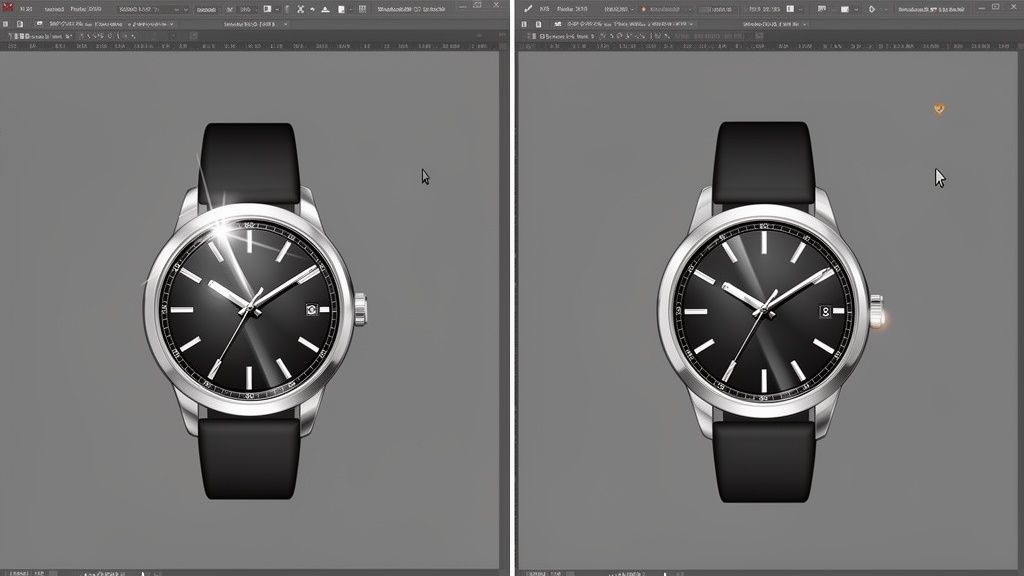
Ever spotted a perfect product photo, only to be distracted by a weird reflection? It’s a common headache. A stray glare can instantly make a great shot look amateur.
Fortunately, you can remove reflections in photoshop, whether you're using a quick AI fix like Reflection Removal for big, soft glares or getting hands-on with tools like the Clone Stamp for tiny, precise spots. The best move really just depends on the kind of reflection you're up against.
Why Distracting Reflections Hurt Your Sales
That little glint on a watch face or the window showing up in a wine bottle isn't a minor imperfection—it's a sales killer, especially on competitive platforms like Amazon and Shopify.
Clean, professional images build trust. It's as simple as that. When a potential customer sees a distracting reflection, it can make the product feel cheap or the seller seem unprofessional. That's a surefire way to lose a sale before you even have a chance.
This guide will show you exactly how to tackle these problems. We’ll cover the most effective Photoshop methods, from the almost-magic AI tools to the tried-and-true manual techniques. You'll learn which tool to grab for which problem, whether it’s a tiny pinpoint of light or a huge, distorted mess.
Choosing Your Reflection Removal Method
Here’s a quick rundown of the most common Photoshop tools for tackling reflections. This table should help you pick the right tool for the job based on what you're trying to fix.
| Method/Tool | Best For | Difficulty Level | Time Investment |
|---|---|---|---|
| Generative Fill (AI) | Large, complex reflections on varied surfaces | Beginner | Low (Seconds) |
| Reflection Removal (AI) | Large, soft reflections on uniform surfaces | Beginner | Low (Seconds) |
| Clone Stamp Tool | Small, hard-edged spots; replicating texture | Intermediate | Medium |
| Healing Brush Tool | Small to medium spots on textured areas | Beginner | Low |
| Patch Tool | Medium-sized reflections on clean backgrounds | Beginner | Low |
| Frequency Separation | High-end retouching on skin or glossy surfaces | Advanced | High |
Each tool has its place, and knowing when to use which is half the battle. For most e-commerce sellers, the AI tools and the Healing Brush will handle the majority of issues quickly and effectively.
A Visual Guide to Your Workflow
Before you even click a tool, the first step is to figure out what kind of reflection you're dealing with. Different problems really do need different solutions.
This decision tree gives you a simple way to think about it. Are you dealing with a tiny, sharp dot or a big, soft glare?
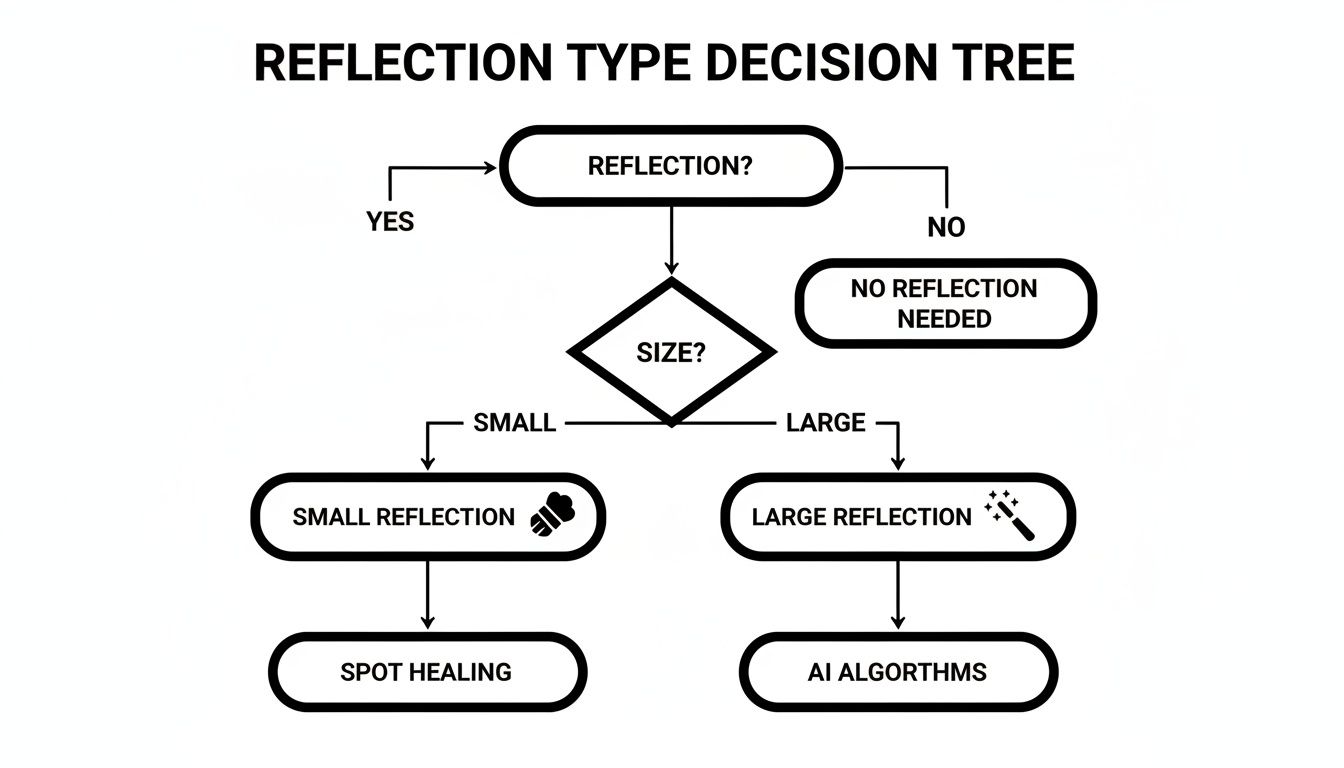
The main takeaway is straightforward: small, hard-edged spots are perfect for manual tools where you need control, while large, soft glares are where AI can really shine and save you a ton of time.
These little visual flaws have a bigger impact than you might think. A Jungle Scout analysis found that a staggering 70% of product photos on major marketplaces have noticeable reflections. Even worse, those photos see a 22% lower click-through rate.
The bottom line is clear: removing reflections isn’t just about making a photo look better. It’s a crucial step in optimizing your listings for maximum engagement and sales in a competitive online market.
Beyond just the photos, remember that high-quality visuals contribute to your site's overall performance and how customers perceive your brand. Getting this right is a key part of good online marketing, which pairs nicely with learning some SEO basics for small businesses.
Using AI for Near-Instant Reflection Removal
For those big, soft reflections that seem to wash across a glass surface, Adobe has come up with something that feels a lot like magic. I'm talking about the AI-powered Reflection Removal tool tucked away inside Adobe Camera Raw (ACR). It's built to intelligently find and just… erase those distracting glares with a couple of clicks. Seriously, it turns what used to be a tedious, painstaking job into a fix that’s almost instant.
The whole process is incredibly straightforward. Forget spending ages with the Clone Stamp or Patch Tool. You just need to open your image through ACR. The best way to do this is by opening your image as a Smart Object. This simple step keeps the entire Camera Raw editing process non-destructive, meaning you can always double-back and tweak the settings without permanently baking them into your photo.
Accessing and Using the Tool
Once your image is up in the Camera Raw interface, head over to the Remove panel. You’ll see a simple checkbox labeled “Reflection.” The moment you click it, the AI kicks in and starts analyzing the scene. It’s smart enough to figure out what’s a reflection and what’s the actual detail underneath, effectively wiping away the glare while rebuilding the hidden parts of the image.
It works exceptionally well in a few common scenarios:
- Shooting through a shop window to get a clear shot of the products inside.
- Photographing framed artwork where your room lights or windows bounce back at you.
- Product shots of items sitting behind a glass or clear plastic panel.
This tool is a massive advantage for online sellers. We know that optimized images can boost sales by 14-30% on Amazon, and with 93% of Shopify buyers saying visuals are the main deciding factor, getting rid of distracting glare is non-negotiable. If you want to dive deeper, you can learn about Adobe's approach to reflection removal on their blog.
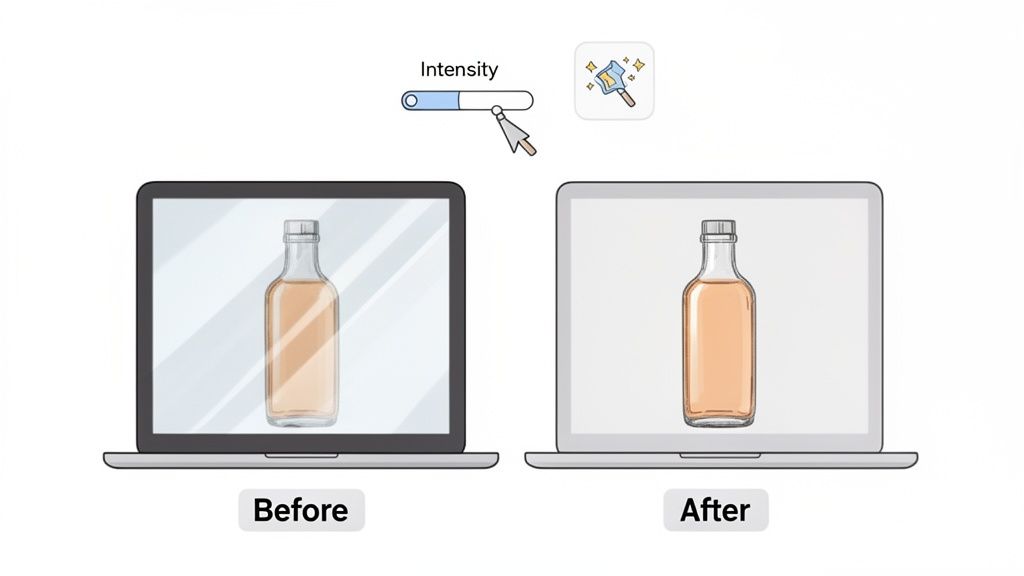
Fine-Tuning and Knowing Its Limits
After the AI does its thing, you're not just stuck with the result. An Intensity slider pops up, giving you the power to fine-tune the effect. Sometimes, completely obliterating a reflection can make an image look a bit fake. This slider lets you dial the effect back, reintroducing just a hint of that reflection to make the final shot more believable.
It's really important to know where this tool shines and where it's going to struggle. It was specifically trained for those broad, soft, diffuse reflections you see through glass. It was not built to handle the tiny, sharp specular highlights on metal or the complex, warped reflections you’d find on a curved chrome teapot.
For those tougher jobs, your manual techniques are still the way to go. But for its intended purpose, Reflection Removal is a total game-changer. It automates a genuinely difficult task, freeing you up to focus on the more creative parts of your edit. While manual tools will always give you ultimate precision, letting AI handle the right kind of problem can radically speed up your workflow.
And if you want to see what else AI can do for your e-commerce images, check out our guide on using an AI product photo generator to create incredible visuals from scratch.
Manual Techniques for Absolute Precision
While AI is a fantastic shortcut, it doesn't always nail the pixel-perfect results you need for high-stakes product photography. When you absolutely need total control—especially for tricky items like jewelry or sunglasses—it’s time to roll up your sleeves and lean on classic Photoshop techniques.
These methods take more patience, sure, but the reward is a flawless, professional finish that automated tools just can't always deliver.
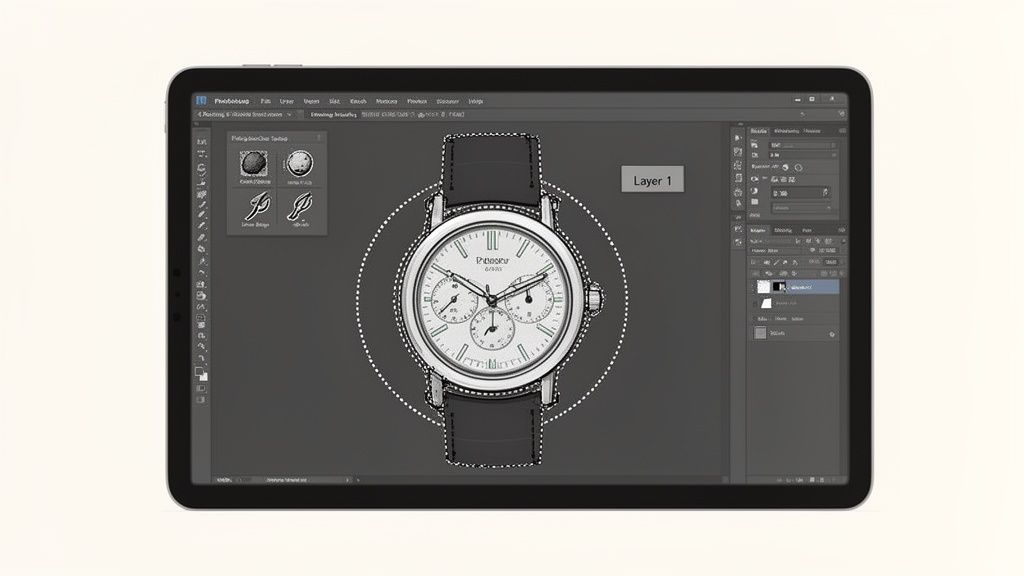
At the heart of manual reflection removal are two trusty tools: the Clone Stamp and the Healing Brush. Think of them as your digital scalpels for precision work. The number one rule? Always, always work on a new, separate layer. This non-destructive workflow is your safety net, letting you tweak, adjust, or even scrap your work without ever damaging the original photo.
When you're using the Clone Stamp, your source point is everything. Don't just grab a sample from the area right next to the reflection. Instead, hunt for a clean patch of texture and color that perfectly matches what you imagine is underneath the glare. Hold down Alt (or Option on Mac) to set your source, then gently paint over the problem spot.
Mastering Texture and Color Separately
Here's a powerful trick for complex surfaces, a simplified version of what pros call frequency separation. The goal is to separate an object's texture from its color and light, allowing you to edit one without messing up the other. It sounds technical, but the idea is simple: you can paint over a reflection's color without destroying the underlying texture, like wood grain or brushed metal.
Let’s walk through it.
- First, duplicate your layer twice. You should have two copies sitting above your original. Let's name the top one "Texture" and the one below it "Color."
- Next, blur the Color layer. Hide the "Texture" layer for a moment and select your "Color" layer. Go in and apply a Gaussian Blur just enough to smudge out the fine details of the reflection.
- Now, isolate the Texture. Make the "Texture" layer visible again. Head up to
Image > Apply Image. In the box that pops up, set the Layer to "Color," Blending to "Subtract," Scale to 2, and Offset to 128. Finally, change this layer's blend mode to "Linear Light."
With that set up, you can now select the "Color" layer and use a soft brush or the Clone Stamp (just make sure it's set to sample "Current Layer") to paint over the reflection. You'll see the glare vanish while the original surface texture from your "Texture" layer stays perfectly intact. It’s like magic.
Precise Selections and Blend Modes
For reflections stuck on very defined shapes, like the lens of a pair of glasses, the Pen Tool is your best friend. Carefully draw a precise path around the reflection, turn it into a selection, and then apply your removal technique on a new layer. This keeps your edits contained and prevents them from spilling onto other parts of the image.
Combining a precise selection with different blend modes gives you another layer of control. After you remove a reflection, the area can sometimes look a little flat or unnatural. You can fix this by creating a new layer, painting in some subtle color or light with a soft brush, and then setting that layer’s blend mode to 'Color,' 'Luminosity,' or 'Soft Light' to bring back some natural-looking dimension. For more deep dives into product photo retouching, our detailed guides can walk you through even more advanced methods.
Sometimes, you don't need to completely obliterate a reflection—just softening its impact is enough. You can learn how to blur backgrounds in your photos like a pro, which uses similar principles of selection and careful adjustment. Mastering these hands-on skills is really the cornerstone of high-end editing and ensures every single detail is perfect.
Advanced Strategies for Complex Surfaces
Let's be honest, some surfaces are just plain difficult. When you're shooting highly reflective, curved, or complex items like chrome, intricate jewelry, or glass bottles, the simple tools often don't cut it. This is where you graduate from quick fixes to professional-level compositing and reconstruction.
The best work here actually starts before you even launch Photoshop. A circular polarizing filter (CPL) on your camera lens is a secret weapon. The trick is to take multiple shots of your product, but with each shot, you give that filter a slight turn. Every rotation shifts or completely knocks out reflections on a different part of the surface.
Once you're back at your computer, you can stack these images as different layers in Photoshop. From there, it’s all about using layer masks to paint in the cleanest parts from each shot. This compositing method lets you build a perfectly reflection-free image that looks completely natural. It’s the go-to technique for high-end product and jewelry product photos, where absolute clarity is non-negotiable.
Rebuilding with Vanishing Point
But what do you do when a reflection is covering a surface with a distinct pattern, like a phone screen or a patterned gift box? If you just clone over it, you'll obliterate the design underneath. This is the perfect job for the Vanishing Point filter, a seriously powerful tool built to handle perspective.
You start by creating a perspective plane that perfectly matches the angle of the surface in your photo. Once that grid is locked in, you can use the Clone Stamp tool inside the filter. The magic is that Photoshop automatically scales and skews whatever you clone to match the perspective flawlessly. You can grab a clean piece of the pattern and paint it right over the reflection—it will look like it was always there.
Restoring Form with Dodging and Burning
You've done the hard work and removed the reflection, but now the area looks… flat. Lifeless. A real-world object has subtle highlights and shadows that give it shape, and an aggressive reflection removal can wipe those out. The final step is to bring that three-dimensional form back using dodging and burning.
Dodging (lightening) and burning (darkening) are classic darkroom techniques that are just as vital in digital editing. By subtly painting highlights and shadows back in, you can restore the object's original shape and make your edit totally invisible.
It’s pretty simple to do non-destructively. Create a new layer, fill it with 50% gray, and set its blend mode to "Overlay." Now, grab a soft brush with a super low opacity—think 1-3%—and paint with white to dodge (add highlights) or black to burn (add shadows). This method lets you carefully sculpt the light, ensuring your final product photo isn't just reflection-free but also looks dynamic and real.
How to Prevent Reflections During Your Photoshoot
Let’s be honest: the best way to remove reflections in photoshop is to not have them in the first place. While Photoshop is an incredible tool, you’ll save yourself hours of painstaking editing by making a few smart adjustments during the actual shoot. Getting it right in-camera always produces a more natural, professional-looking result.
It all starts with understanding what I like to call the "family of angles"—the relationship between your camera, your light source, and your product. A nasty, direct reflection is just a mirror-like bounce. It happens when your camera is sitting at an angle that’s equal and opposite to your light source. To kill that reflection, you just have to break the angle. Move your camera, or move your light. It's that simple.
Control Your Light and Environment
One of the easiest wins is to take control of what your product "sees." Even if you’re working in a simple home studio, you can use cheap materials to manage and absorb stray light.
- Black Foam Boards: These are your best friends for killing reflections. Position them strategically around your product to absorb light, stopping bright walls or windows from showing up on your glossy surfaces.
- White Foam Boards: Use these to bounce soft, clean light back into the shadows. This technique can create a beautiful, controlled highlight that overpowers smaller, distracting reflections from the room.
The whole point is to create a lighting setup you can actually predict. When you surround your product with neutral surfaces, any reflections that do sneak in are clean and simple, not a chaotic mess of your living room's colors and shapes.
A classic mistake I see all the time is lighting a reflective product head-on. That’s a guaranteed recipe for a direct reflection of your light source. Instead, try lighting from the sides, the top, or even slightly behind the product to build shape and dimension without creating that awful glare.
The Power of Diffusion and Polarization
Softening your light source is an absolute game-changer. A harsh, direct light creates those sharp, intense specular highlights that are a nightmare to edit out later. By diffusing that light, you’re effectively making the light source bigger and softer, so it wraps around your product more gently.
You don't need a ton of expensive gear for this. A professional softbox is fantastic, of course, but you can get surprisingly good results just by hanging a plain white sheet between your light and your product.
For the ultimate in-camera reflection control, however, nothing beats a Circular Polarizing Filter (CPL). This is a special filter that screws right onto the front of your lens. As you rotate it, it actively cuts down on reflected light from non-metallic surfaces like glass, water, and most plastics. It works by blocking the polarized light waves bouncing off these surfaces. With a simple twist, you can dial down or completely eliminate reflections, saving yourself from a massive editing headache.
Frequently Asked Questions About Removing Reflections
Even when you've got your Photoshop workflow down, some situations can still feel like a real headache. Let's tackle some of the most common questions that come up when you need to remove reflections in photoshop, so you can handle whatever your images throw at you.
What Is the Fastest Way to Remove a Simple Glare Spot?
For those small, annoying hot spots of glare on a product, the Spot Healing Brush Tool is your best friend. It’s built for exactly these kinds of quick, content-aware fixes and takes almost no time at all.
The pro move here is to always work non-destructively. Create a new, blank layer before you do anything else. Head up to the top toolbar and make sure the "Sample All Layers" box is ticked. This lets you paint on your empty layer while the tool intelligently borrows texture and color from the original image underneath. Just paint over the spot, and watch Photoshop work its magic.
Can I Remove Reflections from Sunglasses or Eyeglasses?
You absolutely can, but be prepared for a bit of a marathon, not a sprint. This is one job where AI tools often fall short because they can't quite handle the subtle curves and tints of lenses. A manual, hands-on approach almost always yields better results here.
Your first step should be to grab the Pen Tool and trace a super-precise selection around the lens. Then, on a new layer, you'll want to meticulously paint over the reflection using the Clone Stamp and Healing Brush tools, carefully sampling from clean areas of the glass.
A common mistake is leaving the repaired area looking flat. To bring back that natural look, add another new layer and paint in a subtle gradient that mimics the original lens tint. Setting this layer's blend mode to 'Color' or 'Overlay' is the key to making it look realistic.
How Do I Fix Reflections on Plastic Packaging?
Reflections on clear or glossy packaging are one of the toughest challenges. You're not just covering up a reflection; you're trying to reconstruct what the packaging and the product underneath it are supposed to look like.
It's worth giving the AI-powered Reflection Removal tool in Adobe Camera Raw a shot first; sometimes it pulls off a miracle. If it doesn't quite get you there, it's time to fall back on the trusty Clone Stamp Tool on a fresh layer.
After you've painted over the reflection, the spot will probably look a little dead and unnatural. To bring back that characteristic plastic shine, create one more layer. With a soft, white brush at a very low opacity (think 5-10%), gently paint in a new, subtle highlight where the light would logically hit the package.
Are There Good Photoshop Alternatives for Removing Reflections?
Absolutely. If you're an e-commerce seller who needs great results without getting bogged down in Photoshop's steep learning curve, AI-powered photo editing platforms are a game-changer. These tools are built from the ground up for product photography.
Many of them let you upload a photo and the AI handles everything—not just reflection removal, but also cutting out the background, adding realistic shadows, and fixing the color. They're designed to churn out marketplace-ready images in seconds, which is a massive time-saver when you've got a business to run.
Tired of spending hours in Photoshop? ProdShot uses AI to turn your simple product photos into stunning, marketplace-ready images in seconds. Say goodbye to reflections, remove backgrounds, and create professional visuals without the learning curve. Try it for free at https://prodshot.net.