
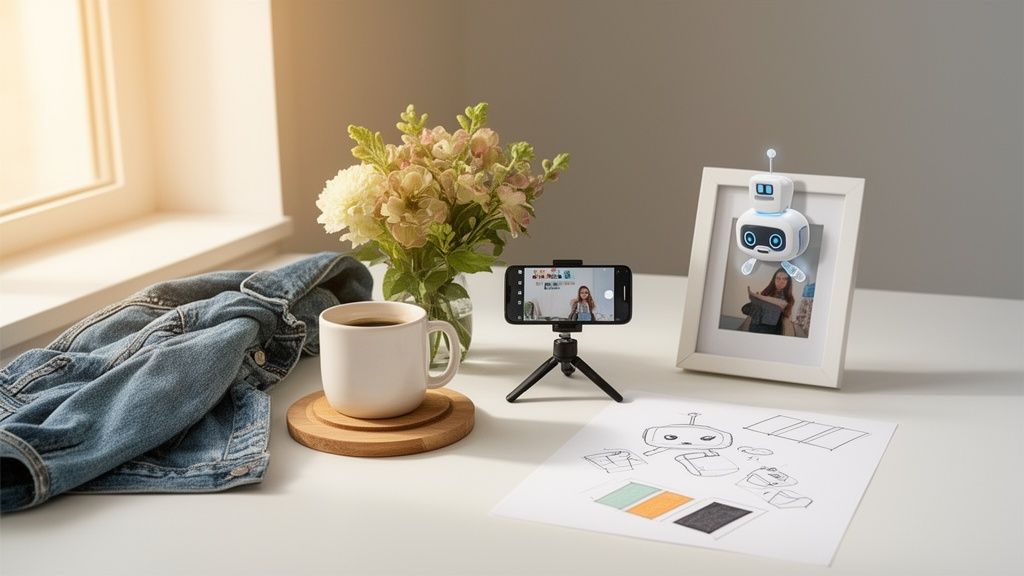
Product lifestyle photography isn’t just about taking pretty pictures. It’s about placing your product in a real-world setting so customers can instantly see it as part of their world. This is how you move beyond a simple studio shot on a white background and start telling a story that builds a connection and, most importantly, drives sales. For any brand on visual-heavy platforms like Shopify, Amazon, or Etsy, this isn't a "nice to have"—it's a must-have.
Why Lifestyle Photos Are Your Secret Sales Weapon
A standard product photo shows what you're selling. A great lifestyle photo shows your customer why they should care. That's the magic. It creates an emotional bridge, turning a simple object into a solution, an experience, or something to aspire to.
When people see your product in a scene they recognize, they’re not just looking at features; they're picturing a better version of their own life. This visualization is an incredibly powerful sales tool. It answers those silent questions customers have: "How big is that throw blanket on an actual couch?" or "How does that dress really flow when you walk?" By providing that context, you build the trust and confidence needed to click "buy."
Here's a quick breakdown of how lifestyle shots solve common ecommerce problems far better than their studio counterparts.
Comparing Lifestyle vs Studio Shot Impact
| Ecommerce Challenge | Studio Shot Solution | Lifestyle Shot Solution |
|---|---|---|
| Communicating Scale | Shows the product against a blank canvas, often requiring dimension text. | Shows the product next to familiar objects (a hand, a coffee mug, a sofa), providing instant, intuitive scale. |
| Building Emotional Connection | Relies on the product's features alone to attract buyers. | Creates a mood and tells a story, connecting with the customer's aspirations and desires. |
| Demonstrating Use Cases | The customer has to guess how the product fits into their daily routine. | Clearly shows the product in action, sparking ideas and showing its real-world value. |
| Justifying Price Point | A premium product can look sterile and generic. | A high-end setting and quality styling reinforce the product's premium value and justify the price. |
Ultimately, lifestyle photography makes your product feel tangible and relatable in a digital world, which is a huge advantage.
Build Trust and Reduce Returns
One of the biggest hurdles in ecommerce is that customers can't physically touch or try out a product. Lifestyle images tackle this head-on by setting clear, realistic expectations.
This is especially critical in categories like fashion, where high return rates are often caused by a disconnect between a flat studio image and how the garment actually fits and feels in real life. Getting the visuals right directly combats this. In fact, compelling professional photos can secure 47% more online views and boost inquiries by as much as 39%. That's a direct line from better images to better business.
The goal of lifestyle photography isn't just to display a product; it's to sell a feeling. When a customer connects with the story you're telling, the purchase becomes an emotional decision, not just a logical one.
Connect Emotionally with Your Audience
At the end of the day, people buy from brands they feel a connection with. Showing your product in a carefully styled scene—a cozy living room, a bustling city street, a serene yoga studio—communicates your brand's personality without you having to say a single word.
This is where understanding the principles of Conversion Rate Optimisation (CRO) can really pay off, helping you turn those inspired viewers into loyal customers. And if you're trying to figure out the budget, our guide on the cost of professional product photography can help you weigh the investment.
Crafting Your Pre-Shoot Creative Blueprint
Every fantastic lifestyle shoot I've been a part of started with a solid plan. Seriously. Just showing up and "winging it" is the fastest way to get generic photos that don't speak to anyone. This planning phase is where you make the calls that ensure your final images connect with your dream customer and feel 100% on-brand.
Before you even think about picking up a camera or buying a single prop, you have to get laser-focused on two things: your brand’s personality and your target audience.
Is your brand sleek and modern, or is it more rustic and cozy? Are you selling to a 25-year-old city dweller or a 40-year-old suburban parent? The answers to these questions will guide every single choice you make, from the color scheme to the type of models you hire.
Nail Down Your Visual Vibe
Once you know who you’re talking to, it’s time to create a mood board. Pinterest is my go-to for this, but the trick is to be intentional. Don't just pin a bunch of pretty pictures. Your board needs to be a focused collection of inspiration that sets a clear direction for the shoot.
I like to organize my boards into a few key sections to keep things clear:
- Color Palette: Pin images that capture the exact hues and tones you're after. Are we talking warm, earthy tones or something bright and punchy?
- Lighting Style: Collect examples of lighting that fits the mood. Do you want that soft, dreamy look from a big window, or are you going for more dramatic, moody shadows?
- Textures & Materials: Gather shots that feature textures that align with your brand—think rough linen, smooth marble, or warm, reclaimed wood.
- Composition Ideas: Find and save photos with interesting angles, framing, or layouts that you’d like to try yourself.
This visual roadmap is what keeps your shoot feeling cohesive and on-brand, rather than a random collection of disconnected images.
The whole point is to create a visual story that pulls the customer in, makes them feel something, and gets them to click "buy." This process is all about connection.
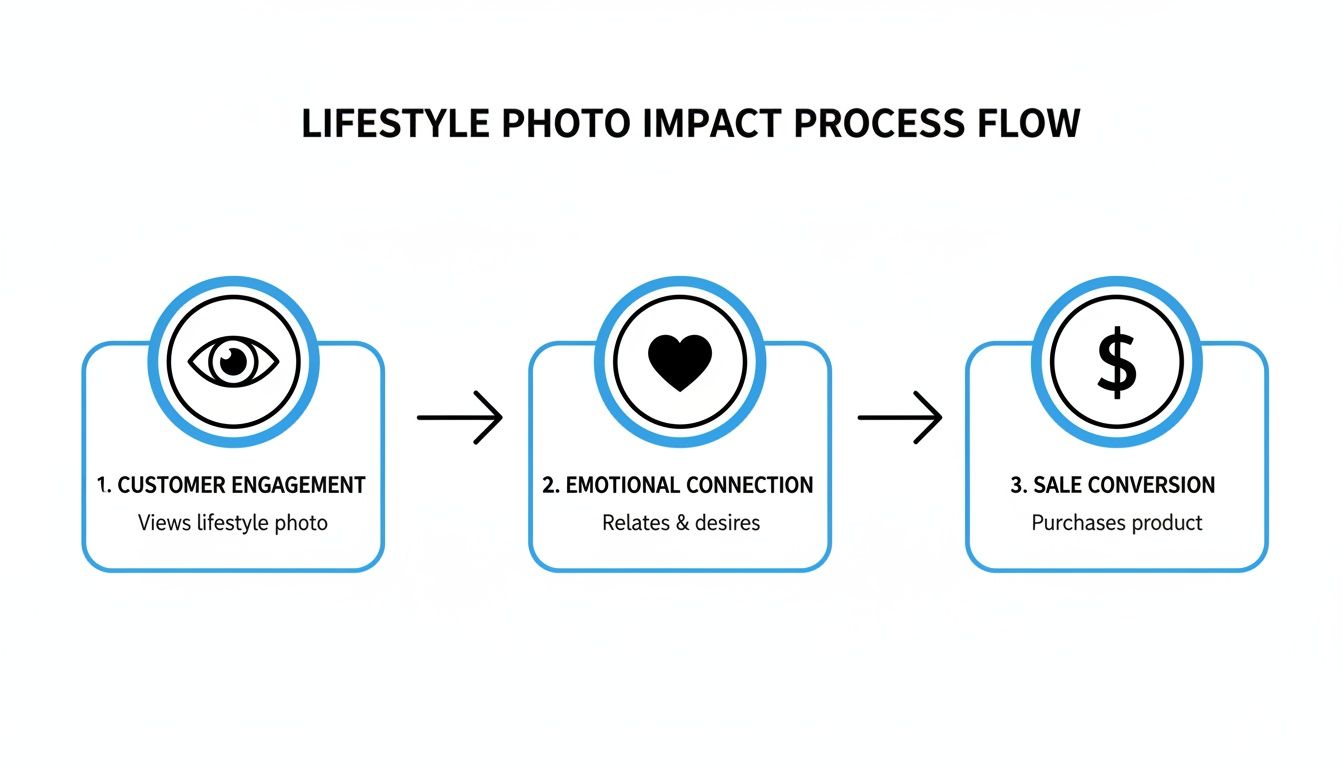
As you can see, that initial visual appeal is just the hook. The real magic happens when you create an emotional response that makes the purchase feel not just logical, but necessary.
Source Props and Backdrops With a Story in Mind
Your props are there to support the product, never to steal the spotlight. The best props feel like they naturally belong in the scene and help tell the story of your product in someone's life.
For a skincare brand, this might be a few fresh botanicals and a simple ceramic dish. For a new tech gadget, it might be a sleek Moleskine notebook and a steaming cup of coffee on a clean desk.
Think of props as the supporting cast. They exist to make your product—the star of the show—look even better. Every single item in the frame should have a clear reason for being there.
You also don't need to blow your budget. I've found some of my best props at thrift stores, fabric shops, and even just by raiding my own kitchen cabinets. A simple piece of linen or a textured placemat can make for a beautiful, inexpensive backdrop that adds a ton of depth and character to your photos.
Getting Professional Shots with Just Your Smartphone
Let's get one thing straight: you absolutely do not need a bag full of expensive gear to create stunning product lifestyle photos. The incredibly powerful camera sitting in your pocket is more than capable of producing high-converting images. You just have to know how to use it.
The real secret isn't the camera body; it’s about understanding light, composition, and a few key settings.
Forget about complex lighting kits for now. The best light for your products is often free, beautiful, and streaming right through your windows. Natural light gives you a soft, authentic look that’s surprisingly difficult to replicate, even with high-end equipment. The trick is learning how to shape it.
Instead of plopping your product directly in a harsh sunbeam, hunt for indirect light. Think of a north-facing window or a spot just outside the main patch of sun. This diffused light wraps gently around your product, softening shadows and creating a flattering, professional-looking glow.
Master Your Smartphone's Camera Settings
Modern smartphone cameras are incredibly smart, but they get even better when you take the wheel. Don't just point and shoot. A few quick adjustments in your settings can elevate your images from simple snapshots to deliberate, compelling compositions.
Here are a few non-negotiable settings I tell everyone to master:
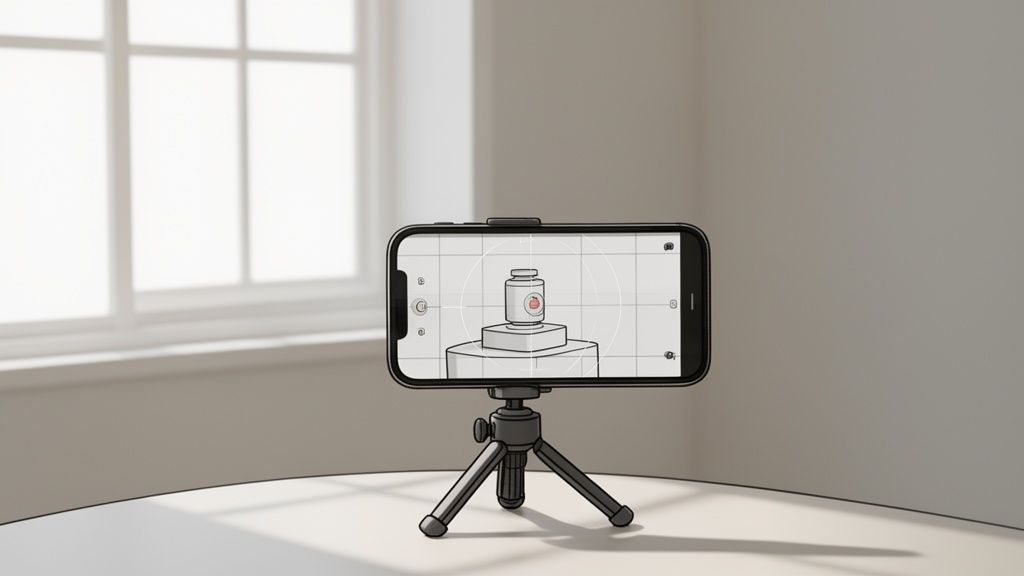
- Gridlines: Turn this on immediately. You can usually find it in your main camera settings. The grid is your best friend for nailing strong compositions based on the Rule of Thirds. Placing your product or key elements along these lines or at their intersections instantly makes your photos more dynamic and balanced.
- AE/AF Lock: Ever have your phone frustratingly refocus or change the brightness right as you're about to snap the perfect shot? Tap and hold on your product to lock the Auto Exposure and Auto Focus. This keeps your product perfectly sharp and the lighting consistent, even if you shift the camera slightly.
- Exposure Slider: Once the focus is locked, you’ll likely see a small sun icon. This is your secret weapon. Slide it up or down to manually brighten or darken the scene before you take the picture. This simple tweak gives you so much creative control over the final mood of the photo.
Making these small adjustments is a total game-changer. They provide the consistency and precision that separate amateur shots from professional lifestyle photography.
Use Angles to Tell a Better Story
The angle you shoot from can completely change how a customer perceives your product. A simple shift in perspective can make an item feel heroic and aspirational or grounded and approachable. Don't just stand there—move around and experiment.
For example, shooting a skincare bottle from a slightly low angle can make it feel more prominent and luxurious. On the other hand, a top-down "flat lay" is perfect for showing all the components of a gift set or the beautiful ingredients of a food product in a clean, organized way.
Your goal is to find the angle that best serves the product's story. Does it need to look powerful, delicate, or practical? Your camera's position is a primary tool for communicating that message to your customer.
Try these angles in your next shoot:
- Eye-Level: This is the most common and relatable angle. It makes the viewer feel like they are right there in the scene with the product.
- High Angle (45 degrees): Looking slightly down on the product is great for showing context, like a beautifully styled coffee table or a countertop scene.
- Low Angle: This perspective makes the product feel more significant and dominant in the frame. It's perfect for those impactful hero shots.
By combining an understanding of natural light with these manual camera controls and creative angles, your smartphone becomes a legitimate tool for creating truly compelling product lifestyle photography.
Mastering On-Set Styling and Composition
This is where all that planning pays off and your vision starts to come to life. Getting the styling right on set isn't about creating a flawless, sterile environment. It’s about building an authentic scene that tells a story—a story where your product is the hero, supported by props and a composition that feels both aspirational and completely natural.
A classic rookie mistake is over-styling. Jamming too many props into a shot just creates visual noise that pulls focus from the product. Instead, I always tell people to think like a minimalist storyteller. Every single item in the frame needs a reason to be there, whether it's adding context, introducing texture, or helping to show scale.
The best product lifestyle photography looks completely effortless, as if you just caught a real moment and someone stepped out of the frame a second ago.
Category-Specific Styling That Converts
You wouldn't style a delicate gold necklace the same way you’d style a chunky ceramic vase, right? Let's get into some practical tips for a few of the most popular e-commerce categories.
For Jewelry & Accessories
Reflections are your biggest enemy here. My go-to move is to use soft, diffused light from a window instead of harsh, direct sunlight. This simple change cuts down on those distracting glares immediately.
- Show the Scale: A necklace gets lost on its own. It looks so much more appealing styled on a simple neckline or draped over a beautiful tray next to a pair of earrings. This gives shoppers an instant sense of its size.
- Bring in Natural Props: A simple piece of linen, a ceramic ring dish, or even a model’s hand can create a stunning, textured backdrop. It really makes the metal or gemstone pop.
- Tell Its Story: Is it an everyday piece? Style it next to a coffee cup and a journal. Is it meant for a special night out? Pair it with a silk blouse or a clutch.
For Home Decor
Here, authenticity is everything. Your job is to create a "lived-in" vignette that helps customers easily picture the item in their own home.
- Create Groupings: Don't just plop a vase down by itself. Style it with a couple of books and a small decorative object on a mantle or side table. Make sure you vary the heights and textures to keep things interesting.
- Add Some Life: A few fresh stems of eucalyptus or a single flower can bring a static scene to life. For things like blankets or pillows, drape them casually over a chair—don't fold them perfectly.
- Think in Layers: Layers add depth and make a scene feel real. Try placing a rug under a coffee table, stacking a few magazines, and then placing your product (like a candle) right on top.
This illustration breaks down the idea of framing, showing how even simple, natural elements can make a home decor product feel much more inviting.

See how those blurred leaves in the foreground create depth? It’s a simple trick that pulls the viewer's eye right to the product.
Your Go-To Composition Checklist
Amazing styling can completely fall flat without a strong composition. Before you start snapping away, run through this quick mental checklist. It will help you build frames that are dynamic and guide the viewer's eye exactly where you want it to go.
A well-composed photo isn't just organized; it's persuasive. It leads the customer's eye on a specific journey, with your product as the final, compelling destination.
- Find Your Leading Lines: Use the natural lines already in your scene—the edge of a table, the pattern on a rug, the arm of a sofa—to draw the eye directly to your product.
- Use Natural Framing: Try positioning your product so it’s framed by other things in the scene. Shooting through a doorway or between some house plants is a great way to add depth and focus attention.
- Create Negative Space: Don't be afraid to leave some empty areas in your shot! This "breathing room" is crucial. It keeps the shot from feeling cluttered and helps your product stand out.
Nailing these on-set skills is vital for every product, but it's an absolute game-changer for categories like clothing. If you're selling apparel, you can find more specific advice in our post on creating amazing fashion product photos. When you combine smart styling with thoughtful composition, you create images that stop the scroll.
Polishing Your Shots with Smart AI Tools
Alright, the on-set work is done and you've got your shots. Now comes the magic—the part where good photos are transformed into images that actually stop people from scrolling. Not too long ago, this meant sinking hours into complex software like Photoshop, but that's just not the case anymore. AI tools have completely changed the game.
Platforms like ProdShot offer a straight line to a professional finish. The whole workflow is designed for speed, letting you skip all the tedious manual edits. You can take the raw photos straight from your smartphone, upload them, and let the tech do the heavy lifting.
And we're not talking about just a few minor tweaks. These tools handle complex jobs like flawless background removal, smart lighting adjustments, and pro-level color grading in seconds.
Instantly Create Hundreds of Lifestyle Scenes
One of the most powerful things about AI editing is the ability to drop your product into a massive library of ready-made lifestyle scenes. Think about it: you take one simple photo of your product on a plain background, and in an instant, you can see it sitting on a sleek marble countertop, a rustic wooden table, or a modern office desk.
This is a game-changer for creating visual variety without ever needing to do a reshoot. You can generate tons of options for different needs:
- A/B Testing Ads: Want to know which background your audience responds to? Test a dozen of them and find out.
- Marketplace Listings: Create unique images for your Shopify, Amazon, and Etsy stores to break through the noise.
- Seasonal Campaigns: Drop your product into a festive holiday scene or a sunny summer backdrop with just a click.
This approach saves a staggering amount of time and money. A traditional photoshoot can easily run into the thousands and take weeks to coordinate. AI flips that script. We've seen studios using AI cut their production time by 90% and slash costs by a massive 70%. This makes high-end imagery available to brands of any size.
The real advantage here is scale. Instead of walking away from an expensive photoshoot with five final images, you can now generate hundreds of on-brand, high-quality options from a single smartphone picture.
A Modern Workflow Built for E-commerce
The process itself couldn't be simpler. You upload your original photo, and the AI instantly recognizes the product, cuts it out from the background, and gets it ready for a new setting. From there, you can browse thousands of backdrops or even use a text prompt to generate a custom scene that fits your brand's vibe perfectly.
This is a huge leap for e-commerce brands trying to keep their content fresh without breaking the bank. For a deeper dive into how this works, exploring a guide on AI Powered Content Creation can provide some fantastic insights.
This new wave of technology gives you the power to create incredible product lifestyle photography without needing a studio, models, or a huge budget. To see just how fast you can turn your own images around, check out our guide on using an AI product photo generator.
Got Questions? I've Got Answers
Stepping into lifestyle photography for the first time, you're bound to have questions. Everyone does. I've heard them all, from "What do I do when it's dark and gloomy?" to "How can I get great shots without spending a ton on props?" Let's tackle some of the most common hurdles you might face.
Think of this as your personal cheat sheet for those moments when you're about to start shooting and suddenly feel stuck.
"Help! My Lighting Is Terrible."
Bad lighting is probably the number one frustration I hear about, but you have more power here than you realize. When you're dealing with a dark, overcast day, your first instinct might be to flip on all the overhead lights in the room. Don't do it. That's a recipe for harsh shadows and weird color casts.
Instead, work with the light you have. Get your entire setup as close as you can to the biggest window in the room. Even on a gray day, that natural light is going to be softer and more appealing than almost any lamp you own. To take it a step further, grab a simple piece of white foam board (or even a sturdy sheet of paper) and use it as a bounce card. Angle it opposite the window to kick some of that soft light back into the shadows and make your product glow.
"My Prop Budget Is Basically Zero. What Now?"
I'll let you in on a little secret: you don't need a big budget for props. In fact, some of the best, most authentic props are probably things you already own. The real trick is to pick items that tell the right story and complement your product instead of competing with it.
Here are a few places to look for props that won't cost you a dime:
- Raid your kitchen: A simple ceramic mug, a rustic wooden cutting board, or a crinkled linen napkin can add a touch of warmth and real-life context.
- Borrow from nature: A few fresh flowers from the garden, an interesting stone, or a piece of weathered driftwood are completely free and bring an organic, grounded feel to your photos.
- Go treasure hunting at a thrift store: You can find incredible character pieces for just a few dollars. Think old books with beautiful covers, unique trays, or small, interesting dishes.
The most important thing to remember is that props should feel like they belong there. One perfect, thoughtfully chosen item will always beat a dozen random objects that just create visual noise. Your goal is to add context, not clutter.
"How Do I Keep the Product from Getting Lost in the Scene?"
This is a great question. With a whole lifestyle scene built around your product, it's surprisingly easy for the product itself to get lost in the shuffle. The key to making it the undeniable star of the show is all about smart composition.
First, use the Rule of Thirds. Instead of plunking your product right in the middle of the frame, place it where your camera's gridlines intersect. It’s a tiny adjustment that instantly makes the photo feel more balanced and professional. You can also use leading lines—things like the edge of a desk, the arm of a chair, or the pattern on a rug—to create a visual path that points directly to your product.
And my favorite trick? Use a shallow depth of field to create a soft, blurry background. This makes your subject pop right off the screen. Most smartphones have a "Portrait Mode" that does this for you automatically, and it works like a charm.
Ready to skip the manual edits and generate stunning, high-converting product shots in seconds? With ProdShot, you can turn your simple smartphone photos into thousands of professional lifestyle scenes instantly. Try ProdShot for free today and see how easy it is to create scroll-stopping images for your store.