
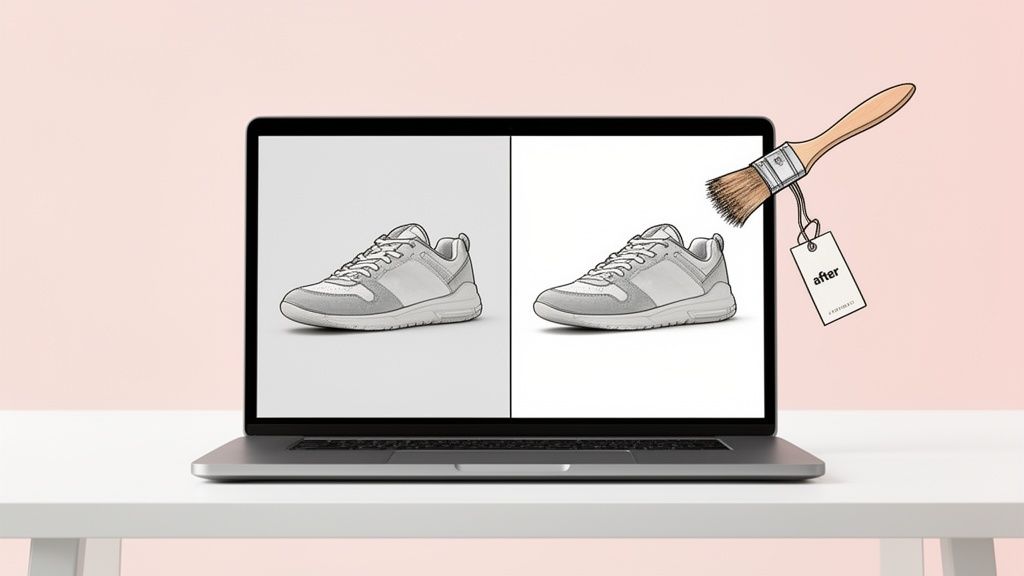
Using an AI tool to remove objects from a photo is one of the fastest ways to turn a cluttered product snapshot into a clean, professional image that actually sells. This process uses artificial intelligence to erase distracting elements—think props, weird reflections, or even dust bunnies—making your product the undeniable hero of the shot.
Why Clean Product Photos Drive E-commerce Sales
In e-commerce, your product photo isn’t just part of the sales pitch—it is the sales pitch. Before a customer reads a single word of your description, they’ve already formed an opinion based on that first image. A cluttered, distracting photo can instantly create doubt.
Think about the last time you were shopping online. Did a product with a messy background or an awkward reflection make you feel confident hitting "Add to Cart"? Probably not. Our brains are wired to seek clarity and avoid confusion. When a potential buyer has to mentally filter out distractions, it creates what experts call "cognitive load."
High cognitive load makes the buying decision harder. By removing unnecessary objects from your photos, you simplify the visual information, allowing the customer's brain to focus solely on your product's value and appeal.
This isn't just about making things look pretty; it's about building trust and telling the customer's eyes exactly where to look. A clean image signals professionalism and attention to detail, qualities that shoppers subconsciously transfer to the product itself.
The Psychology of a Distraction-Free Image
When you use AI to remove objects from a photo, you're doing more than just tidying up. You're tapping into key psychological triggers that drive buying behavior. A clean visual environment helps shoppers imagine the product in their own lives, without the clutter of someone else's setup.
This is where the power of a dedicated AI tool to remove objects from a photo becomes so obvious. It lets sellers:
- Boost Perceived Value: A cleanly presented product often feels like it's higher quality and worth a higher price.
- Increase Customer Trust: Pro-level images suggest a reputable brand, which reduces that "should I really buy this?" anxiety.
- Guide Shopper Focus: With no visual noise, you can direct a customer’s attention straight to your product’s best features.
- Improve Conversion Rates: By making the decision easier and more appealing, clean photos directly lead to more sales. It's that simple.
Leveling the Playing Field for All Sellers
Just a few years ago, getting this level of quality meant expensive studio time, professional photographers, and skilled photo editors. That was a huge barrier for small businesses and independent sellers on platforms like Etsy, Shopify, or Facebook Marketplace.
AI object removal tools completely change the game.
They let anyone with a smartphone produce images that can compete with major brands. You no longer need a perfect setup to get a perfect shot. A stray prop, a distracting power cord, or an unwanted reflection can be zapped in seconds. This accessibility allows sellers to maintain a polished, consistent brand identity across their entire product catalog—something that's absolutely critical for building a loyal customer base and standing out in a crowded market.
Here’s how you can get your photos ready for AI object removal, making sure the final result is clean, professional, and ready for your storefront.
How to Prep Your Images for AI Object Removal
The quality of your final, AI-edited image is decided long before you ever click "upload." I like to think of it like cooking a great meal—you have to start with high-quality ingredients. It’s the same with photo editing. Giving the AI a clean, clear starting point makes the whole process faster, more accurate, and saves you a ton of time on manual cleanup.
A little bit of prep work really does go a long way. This isn't about needing a pro photography setup; it's about making a few smart choices that help the AI understand exactly what it's looking at.
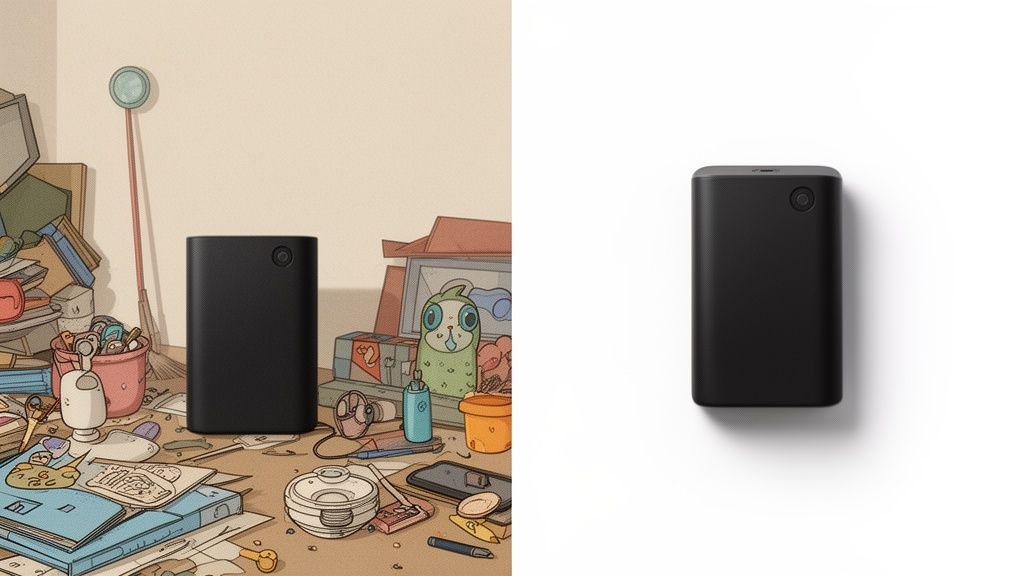
For instance, try shooting against a simple background. A busy, patterned wall can seriously confuse an AI, making it tough to tell where the object you want to remove ends and the background begins. You end up with sloppy edges and weird-looking patches. A plain wall or a solid-colored sheet is your best friend here.
Start with High-Quality Source Files
This is the golden rule of any kind of photo editing: start with the best possible source file. An AI can’t magically invent detail that isn’t there. A high-resolution photo gives the algorithm more pixel data to work with, which is absolutely critical when it’s trying to rebuild a background.
Always shoot in the highest resolution your camera or smartphone offers. You’re aiming for a crisp, clear image without any digital noise or motion blur. When the AI removes something, it samples the nearby pixels to create a seamless fill. If the source image is low-res and blurry, this becomes nearly impossible, and you’ll get a smudged, artifact-heavy mess.
- File Formats: Stick with JPEG or PNG. They’re universally supported and hold all the detail you need for AI processing.
- Avoid Compression: Try not to edit and re-save the same image over and over before using an AI tool. Each save can degrade the quality a little bit.
Control Your Lighting and Shadows
Lighting is another make-or-break factor. Uneven light creates harsh, dark shadows that can be just as distracting as the object you’re trying to remove. These shadows can trip up the AI, making it hard to separate the unwanted element from the background.
Think about it: when an AI has to remove both an object and its complicated shadow, it's doing two difficult jobs at once. It has to take out the item and convincingly recreate the light source. This just increases the odds of a weird, unnatural-looking result.
Your goal should be soft, diffused light that illuminates your product evenly. You'd be surprised, but a simple setup next to a window on an overcast day often works much better than direct, harsh sunlight. By minimizing tricky shadows from the get-go, you make the AI's job a whole lot easier.
For Shopify store owners looking to dial in their setup, our guide on choosing a Shopify photo editor offers more tips on getting that perfect shot. This level of prep is becoming standard practice. In fact, the AI Image Editor Market—which includes these powerful object removal tools—is projected to hit USD 5.7 billion by 2033, which shows just how vital clean visuals have become for e-commerce. You can read more about this market growth on worldwidemarketreports.com.
Using AI Tools to Remove Unwanted Objects
Alright, now for the fun part—letting the AI do the heavy lifting. Once you've got your photos prepped, using an AI tool to clean them up feels a little like magic. This is where you can take a good shot and make it absolutely perfect for your store, all without needing to be a Photoshop wizard.
The secret sauce here is a technology called inpainting. When you highlight something you want gone, the AI doesn’t just smudge the area. It’s much smarter than that. It looks at all the pixels around your selection—the colors, the lighting, the textures—and then generates a brand-new background to fill in the gap. A good tool does this so seamlessly that you'd never know something was there in the first place.
Your goal is simple: give the AI a clear, clean selection to work with. The more precise you are with your highlighting, the better the final image will look.
This is why that initial prep work we talked about is so important. A good foundation makes the AI's job much easier.
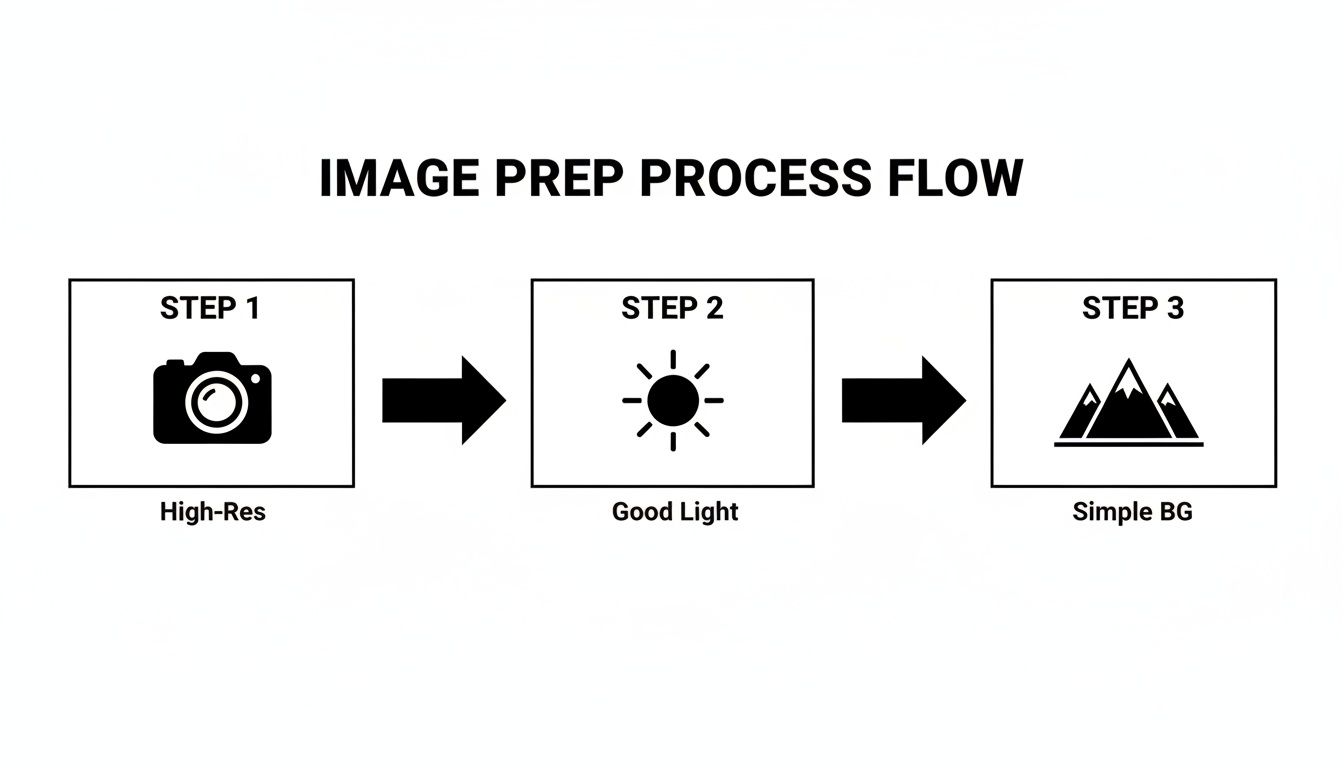
Stick to this simple flow—High-Resolution, Good Light, Simple Background—and you'll give any AI removal tool its best shot at creating a flawless image.
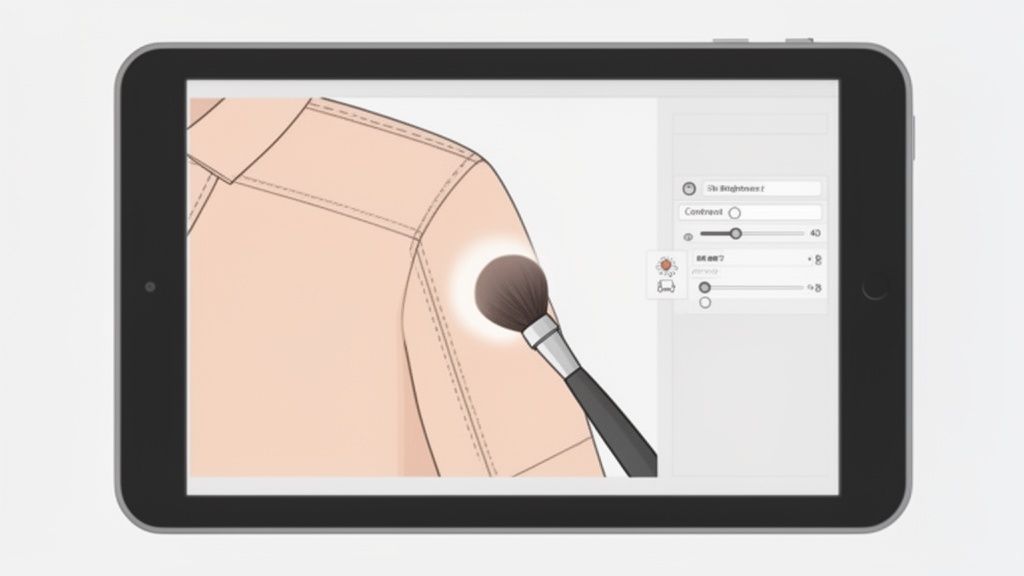
Getting a Feel for the Selection Brush
In any object removal tool, your main weapon is the selection brush. Just think of it as a digital highlighter you use to tell the AI, "Hey, this part needs to go." How you handle this brush makes all the difference.
For tiny imperfections, like a stray thread on a sweater or a speck of dust on a watch face, you’ll want to zoom way in. This lets you get incredibly precise. Most tools also let you change the brush size, which is a huge help.
- Use a smaller brush for fine details and tight corners. This is key to avoiding accidentally painting over part of your actual product.
- Use a larger brush for bigger distractions, like a prop you left in the background or a piece of tape on the floor.
Don't sweat it if your first attempt isn't perfect. Nearly every tool has an eraser function, so you can easily clean up your selection before you hit the "remove" button. The trick is to cover the entire object plus a tiny sliver of its immediate border.
Tackling Common Product Photography Headaches
Let's look at a couple of real-world situations where an AI tool to remove objects from a photo is an absolute lifesaver for e-commerce sellers.
Scenario 1: The Pesky Price Tag
You've snapped a beautiful photo of a vintage handbag, but the old, faded price tag is still hanging off the strap. Instead of trying to rip it off and potentially damaging the item, you can just zap it digitally.
- Pop the photo into your AI editor.
- Zoom in nice and close on that tag.
- Pick a brush size that’s a bit bigger than the text but still fits comfortably within the tag's borders.
- Carefully paint over the whole tag. Don't forget its shadow!
- Click remove, and watch the AI intelligently rebuild the leather texture that was hidden behind it.
Removing little things like price tags or scuffs does more than just clean up a photo. It shifts the customer's focus from the item's past to its future with them. It's a small edit that makes your product feel more valuable.
Scenario 2: The Unwanted Reflection
You're shooting a glossy ceramic vase, and you can see the reflection of your phone or camera staring back at you. It’s a classic problem that can instantly make a photo look amateur. With an AI tool, you can just paint right over that reflection. The AI will analyze the curve of the vase and the nearby highlights to generate a clean, natural-looking surface.
The time saved here is massive. Recent industry data shows that AI enhancement tools, including object removal, are being adopted quickly, with 38% of businesses using them because they can slash editing time by an average of 45%. You can dive deeper into these trends by reading the full report on autophoto.ai.
The Power of Batch Processing for Big Catalogs
If you have a store with hundreds, or even thousands, of products, editing photos one by one is a non-starter. This is where batch processing changes everything.
Let's say you photographed an entire collection of necklaces using the same little display stand in every single shot. Instead of opening each photo to remove that stand, a batch workflow lets you apply the same edit to the entire folder at once. You just define the area to remove on one image, and the AI takes care of the rest.
This feature can turn days of tedious work into a few minutes of setup. It's one of the most effective ways to keep your brand's look consistent while clawing back an incredible amount of your time.
And if you're looking to create amazing product shots from the ground up, you might want to explore an AI product photo generator. It's a great complementary tool that helps you build the perfect scene from scratch, so there’s even less to remove later.
Refining Your AI-Edited Photos for a Professional Finish
Using a tool to remove objects from a photo with AI gets you about 95% of the way there. But that last 5%? That’s where your human eye comes in, adding the final polish that turns a good photo into a great one.
This is the quality control step that a machine just can't replicate. It’s what turns an automated edit into a professional, high-converting product shot that builds trust with your customers.
Even the most sophisticated AI can leave behind subtle digital clues. Your job is to spot and correct these tiny imperfections, ensuring the final image is completely seamless.
Identifying Common AI Artifacts
Once you've run the AI tool, the first thing you need to do is zoom in. I mean really zoom in. Scan the area where the object used to be and look for the tell-tale signs of an automated edit.
You're basically hunting for anything that breaks the natural pattern of the background. A keen eye can spot these minor issues in seconds, and thankfully, fixing them is usually a quick job.
Here are the most common artifacts to watch for:
- Subtle Blurring: Does the area where the object was removed look a little softer than its surroundings? This often happens when the AI has to generate a large patch of a complex texture, like wood or fabric.
- Mismatched Textures: Look closely at patterns. Sometimes, the AI-generated fill doesn't perfectly align with the existing wood grain or fabric weave, creating a noticeable break.
- Faint Outlines: You might see a very faint "ghost" of the removed object's edge. This is often caused by an imprecise initial selection that didn't quite cover the whole object.
- Unnatural Color Patches: Occasionally, the AI might generate a fill that’s a slightly different shade or temperature, creating a discolored spot that just feels off.
A customer might not consciously notice a slightly blurry patch, but their brain registers it as "not quite right," which can subtly erode trust in your product's quality. Catching these tiny flaws is what elevates your product photography.
Manual Touch-Ups for a Flawless Blend
After you’ve spotted an artifact, a couple of simple manual tools will help you blend it in perfectly. The two most effective tools you'll find in most editors are the Clone Stamp and the Heal Brush.
The Clone Stamp tool is like a pixel-perfect copy-and-paste. You select a clean "source" area of the image and then simply paint over the flawed section. It's fantastic for rebuilding sharp lines or extending a precise pattern.
The Heal Brush is a bit smarter. It also samples pixels from a source area, but it intelligently blends them with the color and lighting of the destination. This makes it ideal for smoothing out mismatched textures on surfaces that aren't perfectly uniform. If you want to get better at telling AI what to do, learning about mastering AI prompts can give you more control over the results.
Final Adjustments to Make Your Product Pop
With the area seamlessly repaired, your final step is to make the whole image vibrant and eye-catching. This is less about fixing problems and more about enhancing what’s already there.
Simple tweaks to brightness, contrast, and color balance can make a huge difference. For a complete look at the entire process, our guide on product photo retouching is a great resource: https://prodshot.net/product-photo-retouching.
- Brightness: Gently increase the brightness to make your product look clean and well-lit. Just be careful not to blow out the highlights and lose important details.
- Contrast: Adding a little contrast makes colors richer and helps your product really stand out from the background.
- Color Saturation: A slight boost in saturation can make your product look more appealing, but don't go overboard. The goal is to look true-to-life, only better.
These finishing touches ensure your professionally edited image is ready to grab shopper attention and compete on marketplaces like Shopify or Amazon.
Getting Your Clean Images Marketplace-Ready
So, you've used AI to zap away all the distracting junk from your product photo. The image looks clean, but the job isn’t quite finished. A perfect photo is only useful if it’s properly set up for the e-commerce platform you’re selling on.
Every marketplace, whether it's Amazon, Shopify, or Etsy, has its own rulebook for images. If you ignore them, you risk slow-loading pages, wonky-looking pictures, and a bad first impression for your customers. Think of this final optimization step as the bridge that carries your hard work all the way to a sale.
Nailing the Technical Specs for Each Platform
This is where a little prep work saves you a ton of headaches later. Every platform has a "sweet spot" for things like image size, file dimensions, and shape. An image that looks incredible on your Shopify site might get horribly cropped or compressed on Etsy.
- Resolution and Dimensions: You want customers to be able to zoom in and see the details. A good rule of thumb is to make your images at least 1000 pixels on the longest side. For a platform like Amazon, I’d even push that to 2000 pixels to really make the zoom feature pop.
- File Size: This is always a balancing act. You need great quality, but massive files will grind your page speed to a halt. I always aim to keep product photos under 500 KB.
- Aspect Ratio: Consistency is your best friend here. A 1:1 square ratio is usually a safe bet for most platforms. It creates a really clean, uniform grid on your category pages that just looks professional.
A fast website is non-negotiable. Shoppers have zero patience, and studies have shown that even a one-second delay can tank your conversion rates. Getting your images right is one of the easiest wins for keeping your site zippy and your customers happy.
If you really want to get into the weeds of making your site faster, learning how to optimize images for web performance is a game-changer. It’s all about compression and picking the right file format, which is essential knowledge for any serious online seller.
The Undeniable Power of a Pure White Background
There’s a good reason why a pure white background (that’s RGB 255, 255, 255) has become the industry gold standard. It’s simple: it removes every possible distraction and puts your product on a pedestal. This clean, consistent look not only screams professionalism but also helps your listings show up in filtered searches on places like Google Shopping.
After you remove objects from a photo with an AI tool, replacing the original background with pure white is the natural next move. It gives your entire store that high-end catalog feel that builds instant trust.
And getting this professional finish is becoming easier every day. AI-driven workflows are taking over the industry. By 2028, experts predict a 40% reduction in manual editing time for photography studios, all thanks to smart tools that automate the grunt work. For sellers using platforms like ProdShot, this can slash costs by 60-70% and potentially triple conversion rates, just by having perfectly clean, well-lit photos.
Building a Brand Gallery That Clicks
Finally, step back and look at your product gallery as a whole. When someone lands on your store, what do they see? It should be a visually consistent, professional collection. Every image should share the same aspect ratio, background, and lighting style.
This harmony isn’t just for looks. It sends a powerful message that you’re a serious seller who sweats the details. It builds a memorable brand identity that keeps people coming back and makes them feel confident hitting that "buy now" button.
Got Questions About AI Object Removal? We’ve Got Answers.
Jumping into AI-powered photo editing can feel a little daunting, and it's smart to have questions. This isn't just another complicated piece of software; it's a practical tool that solves very real problems for e-commerce sellers every single day.
Let's clear up some of the most common things people wonder about when it comes to using AI to clean up their product photos.
Can AI Really Get Rid of Tricky Things Like Shadows and Reflections?
Yes, and honestly, this is where modern AI tools are a complete game-changer. They are incredibly good at removing visual clutter that used to take a skilled designer hours of painstaking work in Photoshop. The secret sauce is the quality of the AI model doing the work.
When it comes to weird shadows, a powerful AI doesn't just slap a grey patch over them. It actually looks at the light, texture, and color of the surrounding area to generate a fill that looks like the shadow was never there to begin with. It understands context, which makes all the difference.
Reflections are another classic headache, especially on shiny products. A high-quality AI can erase your camera's reflection from a chrome faucet while keeping that authentic, glossy finish intact. This works because the AI has been trained on millions of images, teaching it how to tell the difference between a product’s real surface and the distracting things reflected on it.
An AI’s ability to handle complex removals comes down to its training. The more examples of shadows and reflections it’s seen, the better it gets at making your product photos look seamless and professional.
Will AI Object Removal Mess Up My Image Quality?
This is a big one, and the short answer is no—as long as you’re using a professional-grade tool and following a couple of simple rules. A good AI object remover is built from the ground up to preserve image quality.
The magic is that the technology rebuilds the pixels behind whatever you removed. It’s not just smudging or blurring the area; it's a creative process of generating a new, clean background that matches perfectly.
To make sure you get a crisp, clean result every time, just remember these two things:
- Start with a Good Photo: Always upload a high-resolution image. This gives the AI more data to work with, which means a much cleaner and more detailed final edit.
- Export the Right Way: When you're finished, save your image as a high-quality JPEG or PNG. This stops compression from creating weird artifacts and ruining all that hard work.
You should never have to choose between a clean photo and a sharp one. A quality tool gives you both.
How Is This Different From a Background Remover?
Great question. While you absolutely need both tools in your e-commerce toolkit, they do two completely different jobs. Think of it as the difference between a sledgehammer and a scalpel.
A background remover is your sledgehammer. Its one and only job is to isolate your product and get rid of everything else. This is what you use to get that clean, white background shot required by marketplaces like Amazon.
An object remover, however, is your scalpel. You use it for precise, surgical edits inside the photo. It’s for erasing a distracting price tag, a stray piece of dust, or a prop you no longer want, all while leaving the original background untouched. It’s all about refining the little details, not replacing the whole scene.
Can I Fix a Bunch of Photos at Once?
You bet. For anyone managing more than a handful of products, this is one of the most powerful features. Most modern AI photo platforms offer batch processing.
Let's say you shot 50 new rings, and the same distracting display stand is in every single photo. Instead of opening and editing each image one by one, batch processing lets you apply the same “remove stand” command to all 50 photos at the same time.
This turns what would have been a long, tedious afternoon of clicking into an automated task that’s done in minutes. It's a massive time-saver and helps keep your product listings looking consistent and professional.
Ready to see how fast and easy it is to clean up your product photos? ProdShot uses advanced AI to remove unwanted objects, change backgrounds, and create stunning, sales-driving images in seconds. Try it for free and give your products the spotlight they deserve. Find out more at https://prodshot.net.