
Let's be honest, learning how to take great product photos with your phone is one of the most powerful things you can do for your online store. Why? Because high-quality images are your best, most tireless salesperson. They build trust, squash customer hesitation, and flat-out lead to more sales. It's one of the most impactful skills any online seller can master.

Why Better Photos Mean More Sales
Before we even get into camera settings, let's talk about the massive impact your visuals have. Good product photos aren't just a "nice-to-have"—they're the engine of your e-commerce success. They work 24/7 to convince and convert your customers.
The reality is, your images are doing all the heavy lifting before anyone even reads your carefully crafted product description.
In the blink-and-you'll-miss-it world of online shopping, you've got milliseconds to make a first impression. Shoppers make snap judgments about your product's quality and your brand's trustworthiness based almost entirely on your photos. Crisp, clear, well-lit shots scream professionalism and care, telling buyers you stand behind what you sell.
The Psychology of a Purchase
Great photos do more than just show what an item looks like. They have to bridge the gap between the screen and the real world. Since a customer can't physically touch or hold your product, your images must do that work for them.
- Builds Instant Trust: Photos that look professional make your whole business feel more legitimate and reliable.
- Reduces Purchase Anxiety: By showing multiple angles, close-up details, and the product in use, you're answering a customer's unspoken questions and getting rid of doubt.
- Lowers Return Rates: When people have a clear and accurate idea of what they're buying, they are way less likely to be disappointed when it shows up at their door.
A shopper judges your product's quality in just 50 milliseconds. They form these "thin-slice" impressions instantly, which means they demand sharp, zoomable images that give them a sense of the in-store experience.
The Data-Backed Impact
This isn't just a gut feeling; the numbers back it up. Compelling visuals are directly tied to higher conversion rates and more revenue.
In fact, a whopping 87% of online consumers say high-quality product images are a major factor in their buying decisions. In today's visual-first e-commerce world, it's simply non-negotiable.
The investment you make in learning this skill pays for itself almost immediately. While you might wonder about the cost of professional product photography, getting the hang of it with your smartphone delivers an incredible return without that hefty price tag. To really understand how great photos translate into business results, it's worth learning more about leveraging High-Impact Visuals in Digital Marketing.
Building Your DIY Photography Studio on a Budget
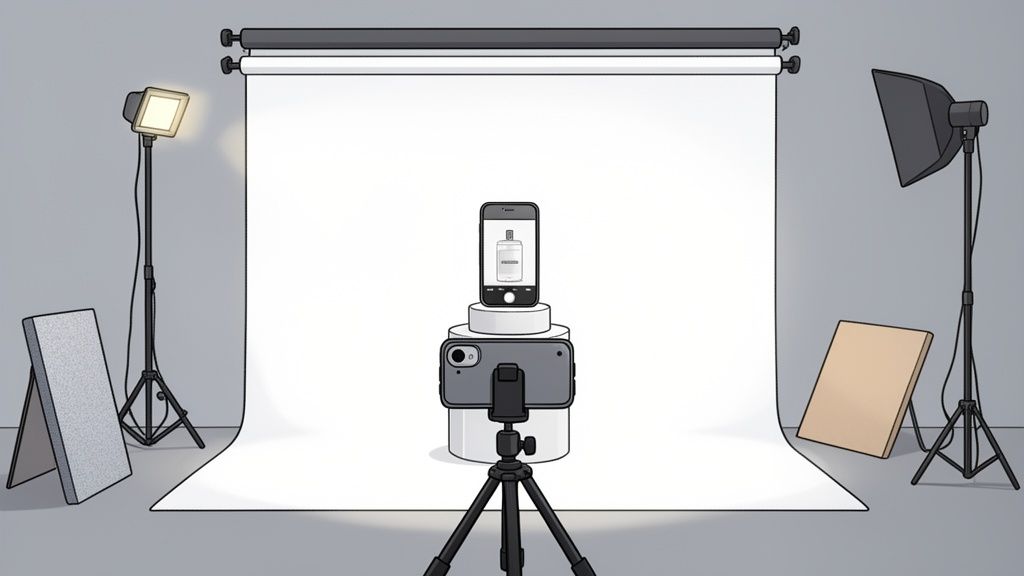
Let’s get one thing straight: you absolutely do not need to rent a pricey studio to get polished, professional-looking product photos. You can build an incredibly effective, low-cost setup right in your home or office, and chances are you already own most of what you need.
It all starts with getting your product camera-ready.
Before you even touch your phone, your product has to be immaculate. This simple prep work is the secret sauce that separates amateur shots from the real deal. If you’re shooting apparel, that means steaming out every single wrinkle and running a lint roller over the fabric one last time. For jewelry, electronics, or anything with a reflective surface, it’s all about wiping away every fingerprint and speck of dust with a microfiber cloth.
This might feel a bit tedious, but trust me, it will save you a massive headache during editing. There's nothing worse than zooming in on a great shot only to find a stray thread or a smudge you missed. That often means a full reshoot.
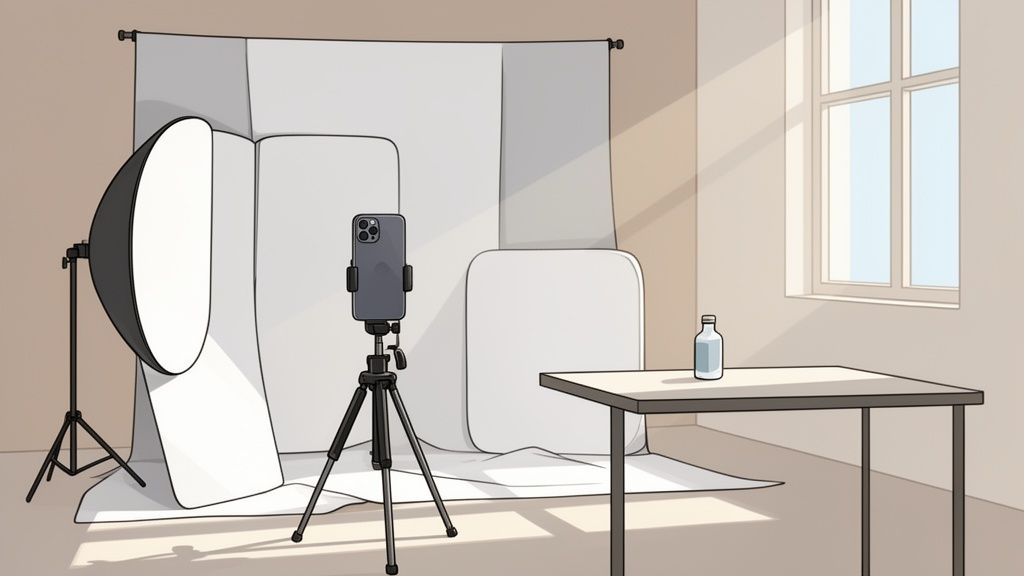
Your Most Valuable Tool: Natural Light
The single most important element in any kind of photography is light. Your best source? It’s completely free.
Find the biggest window you have—that’s your new best friend. The soft, diffused light that streams through a window is far more flattering for products than any harsh overhead bulb or, god forbid, your phone's built-in flash.
Set up your little shooting space right next to that window. The key is to avoid direct, harsh sunlight, which creates ugly, sharp shadows. An overcast day is actually perfect. The clouds act like a giant, natural softbox, scattering the light evenly and softly. You want that gentle light to fall across your product from one side.
The biggest mistake I see beginners make is underestimating the power of good light. Just by placing your product next to a window and turning off all the other artificial lights in the room, you can improve your photos by 90%. This one simple change creates a clean, natural look that’s surprisingly hard to replicate, even with expensive gear.
Your Essential DIY Product Photography Toolkit
You don’t need to spend a fortune gathering your gear. A few key items are all it takes to create a versatile and consistent shooting environment. Here’s a quick checklist of what you’ll need to get started.
| Essential Item | Budget-Friendly DIY Option | Why It Matters for Great Photos |
|---|---|---|
| Camera | Your Smartphone | Modern phone cameras are more than powerful enough for crisp, high-res e-commerce photos. |
| Stabilizer | A Basic Tripod for Phones | Eliminates camera shake, ensuring your photos are sharp and blur-free. Frees up your hands! |
| Light Reflector | White Foam Board or Poster Board | Bounces natural light back onto the product, softening shadows for a balanced, pro look. |
| Background | A Large Sheet of White Poster Board | Creates a seamless, clean "infinity sweep" that keeps the focus entirely on your product. |
This simple toolkit is really all you need to start taking incredible photos. By controlling your light, stabilizing your shot, and ensuring your background is clean, you’ve replicated the core principles of a professional studio for just a few bucks. The focus stays right where it should be: squarely on your product.
Getting the Most Out of Your Smartphone's Camera
The camera sitting in your pocket is ridiculously powerful. Before you even think about downloading a third-party app, the first real step toward amazing product photos is getting a handle on your phone's built-in camera settings. These aren't complicated tweaks; they're simple adjustments that give you a massive amount of creative control.
The single most important trick to learn is how to lock your focus and exposure. Left to its own devices, your phone's camera is pretty smart, but it's still just guessing what the most important part of the scene is.
To take charge, just tap and hold on your product right on the screen. You'll see a yellow box (or a similar icon) pop up, often with a little sun symbol next to it.
This simple action does two crucial things at once. First, it locks the focus exactly where you tapped, making sure your product is perfectly sharp. It also locks the exposure, so the brightness won't jump around while you're trying to frame the perfect shot. Once it's locked, you can just slide your finger up or down to manually adjust the brightness until it looks just right.
The Settings You Should Always Check
Once you've got the tap-and-hold move down, there are a few other settings that can make a huge difference in your final images. Think of these as the foundational tools you'll use for every single shoot.
Here are the non-negotiables:
- Turn Off the Flash. This is the golden rule. Your phone's built-in flash is harsh, creating ugly shadows, blowing out colors, and adding a cheap-looking glare. Good, soft, natural light is always the better option.
- Turn On the Gridlines. Dive into your camera settings and flip this on. A simple 3×3 grid will appear on your screen, and it's an absolute game-changer for composition. It helps you perfectly align your product and use classic principles like the rule of thirds.
- Shoot in High Resolution. Poke around in your settings and make sure your camera is set to capture photos at its highest possible quality. This gives you way more detail to work with and lets you crop and edit later without the image falling apart.
If you take away only one thing, make it this: never, ever use digital zoom. Pinching to zoom absolutely destroys your image quality, leaving you with a blurry, pixelated mess. If you need a tighter shot, just move your phone closer.
The Problem with Digital Zoom
It's so tempting to just pinch the screen to get a closer look at a detail, but it's a habit you need to break. Digital zoom isn't like a real optical zoom lens you'd find on a bigger camera. All it does is crop into the image from the sensor and then blow up the pixels, which immediately tanks the resolution.
Imagine taking a small photo and just stretching it to make it bigger—it gets soft, fuzzy, and grainy. By physically moving your phone, you're using the full power of the camera's sensor every single time. This ensures you capture a crisp, high-resolution file that can actually stand up to editing, preserving that professional quality you're working so hard to achieve.
A great product photo does more than just show off what you're selling—it tells a story and makes the customer feel something. This is where the real art of styling and composition comes into play. How you arrange your products and frame your shots can make all the difference, highlighting their best features and creating a genuine desire to buy.
The whole point is to move beyond a simple, sterile image and create a visual experience. Let's break down how to pull this off for some of the most popular ecommerce categories, turning your quick smartphone snaps into photos that actually sell.
Jewelry: All About the Sparkling Details
When you're shooting jewelry, the entire game is about capturing sparkle and intricate details. These are small, delicate items, so your composition has to draw the eye right to the craftsmanship without any distractions.
- Get in Close: Use your phone’s macro mode or just physically move closer. You want to capture every fine detail of the metalwork, the facets on the gemstones, and any unique textures.
- Simple Props for Scale and Elegance: A velvet jewelry bust, a simple ceramic dish, or even a natural element like a smooth stone can add a touch of luxury and context. Just make sure the prop complements the jewelry, it shouldn't steal the show.
- Play with Light: Angle your light source to catch the facets of a gem. You’re hunting for those little glints and flares that scream quality and brilliance.
Apparel: The Flat Lay and Beyond
For clothing, your job is to communicate texture, fit, and style in a single glance. The flat lay is a classic for a reason—it’s clean, easy to put together, and shows the entire garment clearly.
To nail the perfect flat lay, start by laying the item on a clean, neutral background like a white poster board or a light-colored wood floor. Take the time to carefully smooth out every single wrinkle and fold.
Then, add a few props to tell a story. For a summer dress, maybe add a pair of sunglasses and a straw hat. For a cozy sweater, a mug of coffee and an open book create a warm, inviting vibe.
Don’t just lay the clothing perfectly flat. Give it some life by creating gentle, natural-looking folds. Slightly scrunching the sleeves or creating a soft "S" curve in a pair of jeans adds dimension and makes the garment look way less stiff.
Home Goods and Decor: Selling an Atmosphere
With home goods, you’re not just selling a product; you’re selling a vibe. Your photos need to help customers imagine the item in their own space. That means creating lifestyle scenes that feel both aspirational and authentic.
If you’re selling a ceramic mug, don’t just shoot it against a white background. Place it on a wooden coffee table next to a book and a cozy blanket. If it's a throw pillow, put it on a nicely styled sofa or armchair.
The key is to create a believable context that shows the product in its natural habitat. This approach answers the customer's biggest question—"How would this look in my home?"—before they even have to ask.
The Power of Multiple Angles
No matter what you sell, a single photo is never enough. Shoppers need to see a product from a few different perspectives to feel confident enough to click "buy." Your goal is to give them a complete visual tour of each item.
This isn't just a good idea; it's what modern shoppers expect. Data shows that ecommerce brands now use an average of eight product images per listing. It's not just about more photos, it's about having the right photos. The most successful online stores mix it up, using clean hero shots, detailed macro images, and lifestyle photos to crush customer uncertainty. To dig deeper into how visual variety impacts sales, you can explore these insights on fashion photography statistics.
A solid shot list for any product should include:
- The Hero Shot: Your main image, usually on a clean, white background.
- Angle Shots: Show the product from the front, back, and sides.
- Detail Shot: A close-up that highlights texture, materials, or craftsmanship.
- Lifestyle Shot: The product in a real-world setting, showing it in use.
- Scale Shot: An image that helps customers understand the product’s size, often next to a common object.
This comprehensive approach builds a powerful visual story. By thinking ahead and answering your customer's questions with your photos, you build the trust needed to turn a casual browser into a happy customer.
Polishing Your Photos for a Professional Finish
Snapping a sharp, well-lit photo is a great start, but the real magic—the part that turns a good picture into a sales-driving asset—happens during the edit. This is where you bring everything together, ensuring every image on your site looks clean, professional, and consistent. The best part? You don't need a fancy desktop setup to get amazing results.
A smart editing process can take an already good photo and make it absolutely irresistible. It all begins with a few essential tweaks you can make right on your phone before handing off the heavy lifting to more powerful tools.
Quick Fixes on Your Smartphone
Before you jump into anything complex, nail the fundamentals. Your phone's built-in photo editor, whether you're on iOS or Android, is surprisingly good for these first crucial adjustments. These simple moves clean up the image and give you a solid base to build on.
Your first step should always be to crop and straighten the shot. Use the editor's gridlines to get your product perfectly centered and make sure all the lines are straight. It's a tiny change that instantly makes your photo look more deliberate and professional.
Next, turn your attention to the lighting. Gently bump up the brightness to give the photo a clean, airy feel, which is especially important for those classic white background shots. Then, add just a touch of contrast to make the colors pop and keep the image from looking flat or washed out. The key here is subtlety—you don't want to crank these sliders to the max.
The infographic below gives a great visual of how to think about styling your shots, which sets the stage for a successful edit.

This approach reminds us to capture a full story for the customer, starting with the main hero shot and adding different angles and lifestyle photos to fill in the details.
Streamline Your Workflow with AI
Once you've got the basics down, it's time to bring your images up to marketplace standards. This is where things like background removal and perfect lighting come into play—tasks that can be a real headache to do by hand.
This is where an AI tool like ProdShot completely changes the game. Instead of spending ages carefully tracing around your product, you can just upload your photo and let the AI do the tedious work in a matter of seconds.
Here’s how it simplifies everything:
- Perfect Background Removal: The AI is smart enough to find your product and cut it out with clean, precise edges, leaving you with a perfect transparent background.
- Realistic Shadow Creation: It can add natural-looking shadows that make your product feel grounded, adding a sense of depth and realism that a simple cutout just can't match.
- Intelligent Lighting Adjustments: The software looks at your image and applies smart fixes to balance the lighting, making sure your product looks its absolute best.
The real goal of editing is consistency. When every single product in your store shares the same clean background, consistent lighting, and professional polish, you build incredible trust. It makes your whole brand feel more credible and high-end. AI tools make achieving that consistency practically effortless.
The demand for this level of quality is only growing. In 2025, the global e-commerce product photography market was valued at USD 0.85 billion, and it's expected to explode to USD 2.38 billion by 2034. This just goes to show that for online sellers, professional-looking images aren't a luxury anymore—they're a core part of a winning business strategy.
Meeting Marketplace Requirements
Every e-commerce platform—Amazon, Etsy, Shopify—has its own specific rules for product images. If you don't follow them, you risk having your listings taken down. Manually resizing and reformatting every single photo for every platform is a necessary but painfully slow process.
Tools like ProdShot have built-in templates optimized for the big players like Amazon, Shopify, Etsy, and eBay. This means you can get perfectly compliant images ready to upload in minutes, not hours.
Here’s a quick look at what some of the top marketplaces require.
Marketplace Image Requirements At a Glance
Navigating the different image rules for each platform can be confusing. This table breaks down the key specs for major marketplaces, showing you exactly what you need to aim for. An AI tool can automate this entire process, ensuring every image you upload is perfectly compliant without you having to think about it.
| Marketplace | Minimum Resolution | Required Background | Accepted File Types |
|---|---|---|---|
| Amazon | 1000px on longest side | Pure White (RGB 255, 255, 255) | JPEG, TIFF, PNG, GIF |
| Shopify | 2048 x 2048px for square | Any, but consistent is key | JPEG, PNG, GIF, TIFF, HEIC |
| Etsy | 2000px on shortest side | Any, but clean is recommended | JPEG, PNG, GIF |
| eBay | 500px on longest side | Any, but uncluttered is best | JPEG, PNG, TIFF, GIF |
Once your edits are done, making sure your images are optimized is the final, crucial step. For Shopify sellers, getting the dimensions right is key; learning more about Shopify image sizes will help make your products look their best.
By blending simple on-phone tweaks with the power of AI, you can build a fast, repeatable workflow that produces stunning, conversion-driving images for your entire store. For a deeper dive, check out our guide on product photo editing services.
Common Questions About Smartphone Product Photography
Even with a solid plan, jumping into product photography with your smartphone can feel a little daunting. It's totally normal to wonder if your phone is really good enough or if you're missing some secret trick the pros use. We get it.
We've pulled together the most common questions we hear from sellers to give you clear, straight-to-the-point answers. Think of this as your quick-start guide to bust any myths and help you start shooting with confidence.
Can I Really Get Professional Photos With Just a Smartphone?
This is the big one, and the answer is a hard yes. Modern smartphone cameras are absolute powerhouses, packed with tech that honestly blows away expensive "pro" cameras from just a few years back. The secret isn't in the gear; it's in how you use it.
Your success really boils down to nailing three simple things:
- Lighting: Using soft, natural light from a window is the single biggest game-changer.
- Stability: A basic tripod gets rid of blur and makes every shot tack-sharp.
- Editing: This is where the magic happens, turning a good photo into a fantastic one.
That final step is where AI-powered tools come in. They take your clean, well-lit smartphone shot and add that professional polish, like a perfect background removal or balanced lighting, creating an image that can go head-to-head with anything from a professional studio.
What Is the Biggest Mistake to Avoid?
Without a doubt, the most common and costly mistake is poor lighting. More specifically, using your phone's built-in flash. It's the fastest way to make a great product look cheap. That harsh, direct light creates ugly glare, deep shadows, and throws all your colors off.
The second killer mistake is a busy, distracting background. Your product is the star of the show, period. A cluttered backdrop with random objects or competing colors just confuses the customer and pulls their attention away from what you're trying to sell. Always, always go for soft, diffused light and a clean background.
How Many Photos Should I Have for Each Product?
You should aim for a gallery of 5 to 8 photos for each product. This isn't just a random number—it's about telling a complete visual story that answers your customer's questions before they even have to ask. Getting this right builds a ton of confidence and is proven to cut down on returns.
Your photo set should be a virtual tour of your product. Each image needs to answer a question: What's the back look like? How big is it? What's the texture like up close?
A solid photo gallery always includes:
- A main "hero" shot on a clean, white background.
- Shots from different angles—back, sides, top, you name it.
- A close-up detail shot to show off texture, materials, or quality craftsmanship.
- A scale shot to give a sense of size, maybe next to a common object.
- An "in-context" or lifestyle photo showing the product in action.
This approach gives shoppers the clarity they need to hit that "buy" button. And if you want to make sure all those images meet platform rules, our guide on using an image resizer for e-commerce can help you get the dimensions perfect every time.
Ready to stop stressing about photography and start selling more? With ProdShot, you can turn your simple smartphone pictures into flawless, marketplace-ready product photos in seconds. No studio, no drama. Try it for free and see how easy it is to build a beautiful online store at https://prodshot.net.