
Got a great image for your presentation that’s being ruined by a distracting background? We’ve all been there. You don’t need to jump over to Photoshop to get a clean, professional look. PowerPoint actually has a few surprisingly powerful tools built right in.
The trick is knowing which one to use. Picking the right tool from the start is the difference between a quick, two-second fix and a frustrating ten-minute battle with your mouse.
Your Quick Guide to PowerPoint Background Removal
Before we get into the step-by-step, let's look at the game plan. PowerPoint gives you three distinct ways to tackle background removal, and your choice will come down to the kind of image you're working with.
Choosing Your Background Removal Method
Think of it like a toolbox. You wouldn't use a sledgehammer to hang a picture frame. The same logic applies here. Your main options are:
- Remove Background: This is PowerPoint's smartest tool. It uses AI to automatically detect the background, which is a lifesaver for complex images like product photos or headshots with busy scenery behind them.
- Set Transparent Color: The one-click wonder. This tool is perfect for images with a simple, solid-colored background, like a logo or a basic graphic. It’s incredibly fast when the conditions are right.
- Crop to Shape: This is more of a creative design trick than a true background removal tool. It lets you mask your image inside a shape (like a circle or a star), instantly hiding everything outside the shape's boundaries.
To make it even easier, here’s a quick decision tree to help you choose the right path every time.

As the chart shows, the path is pretty clear. If you have a solid color to remove, "Set Transparent Color" is your best friend. For anything with a more complicated or multi-colored background, the "Remove Background" feature is your go-to.
PowerPoint Background Removal Methods at a Glance
This table breaks down the three built-in tools so you can quickly decide which method is the best fit for your image.
| Method | Best For | Effort Level | Practical Use Case |
|---|---|---|---|
| Remove Background | Complex images with varied backgrounds (people, products) | Medium | Removing the outdoor background from a headshot. |
| Set Transparent Color | Simple graphics with a single, solid-color background | Low | Making the white background of a company logo transparent. |
| Crop to Shape | Creating stylized profile pictures or design elements | Low | Cropping a team photo into a perfect circle for an org chart. |
Once you've nailed the background removal, always check your image dimensions. You often need to resize your images to fit perfectly into your design or e-commerce listing without losing quality.
The Automatic Remove Background Tool
For more complex images, like a product photo or even a headshot, PowerPoint’s built-in automatic tool is your best bet. You’ll find it under the Picture Format tab, and it uses a simple form of AI to do most of the heavy lifting.
Once you’ve selected your image and hit Remove Background, PowerPoint gives it a first pass. It will paint everything it thinks is the background in a bright magenta, leaving your main subject untouched. This initial guess can be a decent starting point, but it's rarely perfect.
Now, here's the catch. The accuracy of this tool has been a source of frustration for a long time. It was first introduced back in Office 2010, and its edge detection can feel pretty clunky. In fact, a whopping 68% of users report being unhappy with the quality, which is a real problem for e-commerce images where you need crisp, clean lines. You can see a great breakdown of its performance issues on the Brightcarbon blog.
Refining Your Cutout
This is where you'll need to do a bit of manual work. To clean things up, the Background Removal tab gives you two main options:
- Mark Areas to Keep: Use this to bring back parts of your subject that PowerPoint accidentally colored magenta.
- Mark Areas to Remove: This lets you get rid of any leftover background pieces the tool missed.
I like to think of these as a digital pencil and eraser. Say you're trying to isolate a product and the shadow from the original photo is still there. Just grab the 'Mark Areas to Remove' pencil and draw a small line over it. The tool will then re-evaluate and update the magenta selection.
Here’s a look at how you can use these refinement tools to guide the AI and get a much cleaner result.
By adding these manual marks, you’re essentially giving PowerPoint more information to work with, which almost always leads to a better final image.
Pro Tip: For the best results, try using the free PowerPoint for web version. It's powered by a more advanced, cloud-based AI that often produces much cleaner cutouts with way less manual cleanup compared to the desktop app.
While this tool is fine for a quick presentation slide, it's often not quite good enough for creating professional product photos. If you're spending more time cleaning up edges than you'd like, you might want to look into an AI product photo generator to get perfect results in seconds.
The Set Transparent Color Trick: For Quick & Easy Edits
Sometimes, the full-blown Remove Background tool is just overkill. If you’re working with a simple logo, an icon, or any graphic with a solid, single-color background, there’s a much faster way to get the job done.
This is where PowerPoint’s Set Transparent Color tool comes in handy. It’s a little-known feature that’s perfect for one specific job: making a single, solid color vanish instantly.

Think about that company logo you just downloaded—the one with the plain white box around it. This tool lets you zap that background so the logo can sit cleanly on your slide, no matter the color or design behind it.
How to Find and Use It
This tool is a bit hidden, which is probably why so many people miss it. It’s not in the main background removal area.
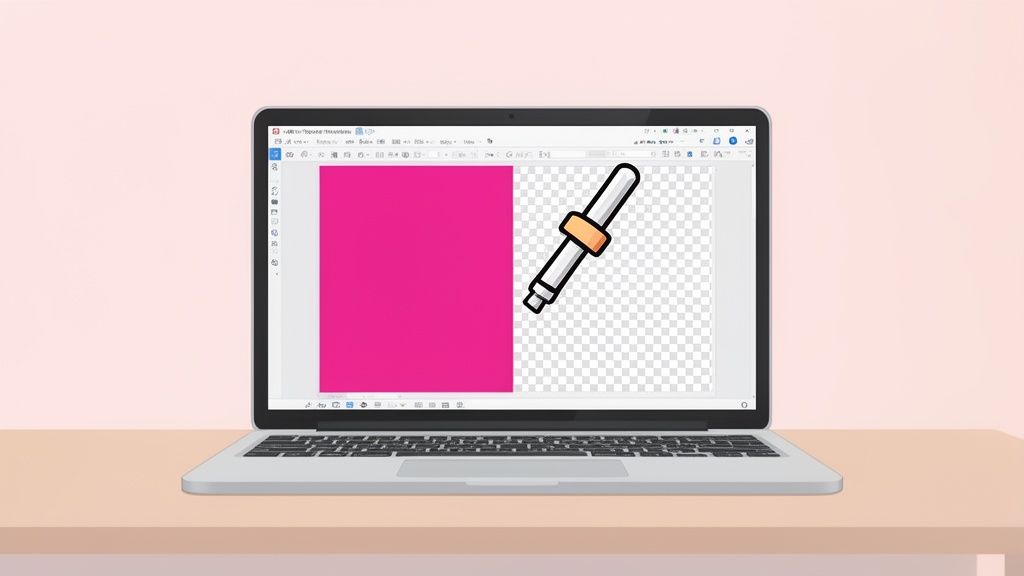
First, select your image. Then, head over to the Picture Format tab that appears in the ribbon. From there, click the Color dropdown menu. You’ll find Set Transparent Color waiting for you at the very bottom of the list.
Once you click it, your cursor will transform into a little eyedropper. Just click on the solid color you want to eliminate, and—poof!—it’s gone. It’s an incredibly quick fix when you’re working with the right kind of image.
The key to remember is that this tool is brutally literal. It only removes the exact color pixel you click on. That’s what makes it perfect for simple graphics with a true, solid background, but a complete failure on anything more complex.
Know Its Limits
This tool's greatest strength is also its biggest weakness: it’s a one-click, one-color solution.
If your image's background has even the slightest gradient, different shades, or shadows, this method is not for you. It will only remove the one specific shade of the pixel you click, leaving you with a spotty, pixelated mess. My advice? Stick to using it for what it does best: cleaning up simple logos and icons in a flash.
Creative Background Removal with Shape Masking

Sometimes, removing a background isn't about perfectly isolating a product, but about creative presentation. This is where shape masking comes into play, turning a standard rectangular photo into a much more dynamic design element. Think of it less as cleaning up an image and more about framing it with style.
This technique uses PowerPoint's Crop to Shape feature to mask your image within a specific boundary like a circle, star, or even an arrow. You aren't actually deleting the background; you’re just hiding everything outside your chosen shape. It's a fantastic way to create polished visuals without jumping into complex editing software.
The Power of Cropping to a Shape
This is my absolute go-to method for creating sleek, uniform headshots for a company's "About Us" or team slide. Masking each person's photo inside a circle instantly gives the whole page a cohesive, professional look. It also works wonders for product slides, where you can use an arrow shape to crop a product detail, making it a visual call-out that points directly to a feature description.
The process itself is incredibly simple.
- First, get your image onto the slide.
- Select the image to bring up the Picture Format tab.
- Find the Crop button, click the small dropdown arrow, and hover over Crop to Shape.
- Just pick any shape from the gallery—a circle, a teardrop, you name it.
This simple action instantly reframes your image. It’s a design-first approach that elevates the entire look and feel of your slide, turning a boring photo into an intentional part of your presentation's story.
When PowerPoint Is Not Enough for E-Commerce Sellers
PowerPoint's background removal tools are handy for quick fixes in a presentation. But when you’re running a serious e-commerce business, they start to fall apart. For sellers on platforms like Shopify, Amazon, or Etsy, visual consistency isn't just a nice-to-have; it's how you build a brand that customers trust.
Relying on a tool made for slide decks can leave you with inconsistent results and hours of frustrating manual work.
Spending even a few minutes trying to perfect the edges on every single product photo is a recipe for lost productivity. If you're processing dozens of images for a new product launch, that time explodes. Let's be honest—PowerPoint was never built to be a professional photo editor for online stores.

The Smart Shift to AI-Powered Tools
This is the point where successful sellers make a strategic shift in their workflow. Instead of wrestling with a general-purpose tool, they turn to dedicated AI background removal services. Solutions like ProdShot are designed from the ground up for one thing: creating pixel-perfect e-commerce images in seconds.
The difference in quality and speed is night and day. Where PowerPoint struggles with soft edges or tricky details, a purpose-built AI isolates your product flawlessly on the first go. This isn't just about saving a few minutes; it’s about getting hours of your week back.
E-commerce is a numbers game. Amazon and Etsy sellers upload a staggering 2.5 million images every single day. The average small retailer loses 12 hours a week on manual editing tasks. AI tools completely change this, with fashion brands reporting a 35% sales uplift from cleaner, more professional visuals.
Moving to a specialized tool is a business decision that pays for itself. It ensures your entire product catalog has a cohesive, professional look that builds customer trust and can directly boost conversions.
Your product photos are your digital storefront, and they need to look impeccable. If you're finding PowerPoint's results aren't cutting it, the first step is always learning how to take good product shots.
Ultimately, the goal is to work smarter, not harder. By automating the tedious job of background removal, you free yourself up to focus on what actually grows your business: marketing, customer service, and finding new products.
If you’re ready to stop fussing with manual edits, exploring dedicated product photo editing services is a huge step forward for your brand.
Common Questions About Removing Backgrounds in PowerPoint
Even when you know the steps, removing a background in PowerPoint can throw you a curveball. Let’s walk through some of the most common hangups people run into and get you back on track.
Can You Make a JPEG Background Transparent?
Absolutely, but it’s a two-part trick. JPEGs don't support transparency on their own, so when you use PowerPoint's "Remove Background" tool, you're really just creating a temporary, edited version of that image for your slide.
To make that change permanent and use the image elsewhere, you need to save it in the right format. Right-click your edited picture, hit Save as Picture, and—this is the crucial part—choose PNG (*.png) from the file type dropdown. If you save it as a JPEG again, you’ll be right back where you started with a solid white background.
Why Is the Remove Background Button Grayed Out?
This is a classic, and the fix is usually simple. The Remove Background button is often grayed out because you haven’t selected the right kind of object. The tool is specifically designed to work on a single raster image, like a JPG, PNG, or GIF.
If the button is disabled, take a look at what you’ve actually clicked on. It’s probably one of these:
- A vector graphic (like an SVG or WMF)
- A shape that has an image fill
- A simple text box
- A group of multiple objects
The solution? Just ungroup the items or click to select only the single image you want to edit. If you're dealing with a vector graphic, a quick workaround is to cut it (Ctrl+X) and use the Paste Special option to paste it back as a picture. That converts it into a format PowerPoint can work with.
Key Takeaway: If the "Remove Background" button is unusable, the problem isn't the tool—it's what you've selected. Make sure you're working with a single, editable image.
How Can I Get a Cleaner Automatic Cutout?
Getting a crisp, clean cutout starts long before you even touch the "Remove Background" button. Honestly, the quality of your original image is 90% of the battle. You need a photo where your subject has clear, well-defined edges that create a sharp contrast with the background.
Don't be afraid to give the image a little prep work, either. Head over to the Picture Format > Corrections menu and try bumping up the contrast. This one small tweak can work wonders by helping PowerPoint's AI find the edges much more accurately.
Of course, getting a clean edit is just one piece of the puzzle. Learning how to take good product pictures from the start will improve every single step that follows. A great photo always produces a great final result.
Tired of wrestling with PowerPoint's limitations? ProdShot uses advanced AI to create pixel-perfect, professional product photos from your smartphone pictures in seconds. Stop wasting time on manual edits and start creating images that sell. Try ProdShot for free today at https://prodshot.net.