
Selling a candle online isn't about selling wax in a jar. It's about selling an experience. Your job is to capture the warmth, the soft glow, and the entire mood of a flickering flame and translate it into a single, compelling image that makes a customer feel something. Done right, your photos sell comfort, luxury, and those quiet moments of peace we all crave.
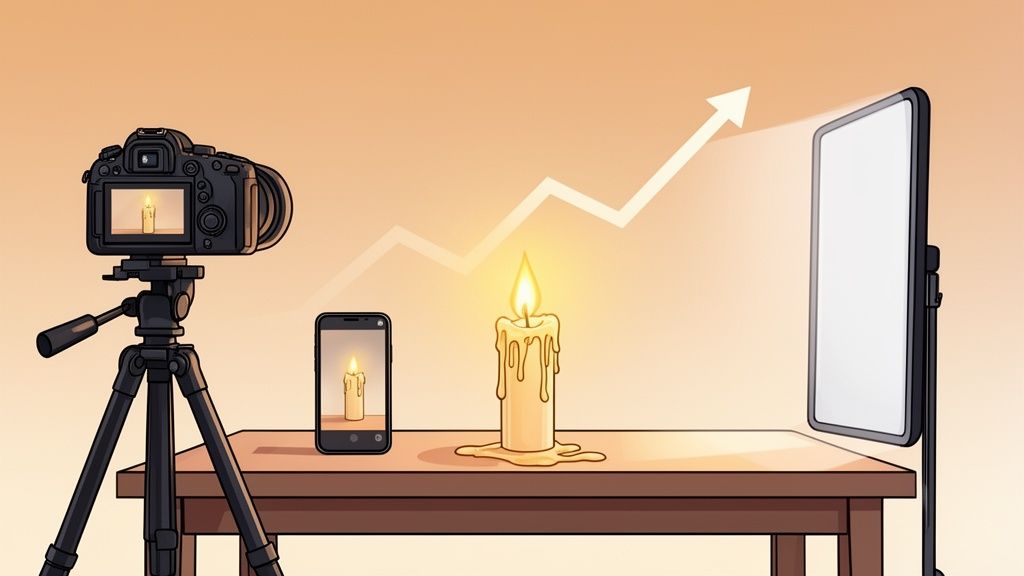
Why Great Candle Photos Drive Online Sales
In a crowded online marketplace, your product photos are your single most important salesperson. This is especially true for an emotional, aesthetic product like a candle. A quick snapshot simply won’t cut it; you need images that tell a story and convince a shopper to choose your candle over hundreds of others.
The opportunity here is massive. The global candle market was valued between USD 10.5 billion and USD 15.3 billion in 2024, and it's still growing fast. That kind of market size means the competition on platforms like Etsy, Shopify, and Amazon is fierce. Your visual presentation is what will set you apart.
Selling an Experience, Not Just a Product
Customers aren't buying scented wax. They’re buying the feeling it promises. Your photography needs to bridge the gap between their screen and their living room.
- Capture the Ambiance: The real magic is in the soft glow and the mesmerizing dance of the flame. This is what creates the mood.
- Showcase the Texture: Get close and highlight the details of the wax. Is it perfectly smooth, rustic and textured, or does it have a crystalline finish? Macro shots make the quality feel tangible.
- Highlight the Vessel: The jar or container is a piece of home decor. Treat it that way. Your photos should show off its unique design, material, and craftsmanship.
By focusing on these three elements—ambiance, texture, and the vessel—you stop selling a simple product and start offering a coveted experience. This is how you dramatically increase your candle's perceived value.
When you're figuring out how to market your candles, it helps to think like an artist. Many of the same principles from learning how to sell art online apply directly here, especially when it comes to visual storytelling. Both disciplines rely on turning a physical, sensory object into a desirable digital image.
Ultimately, your goal is to make someone feel like they already know and want your candle before they’ve even held it. Superior candle photography doesn't just show what your product looks like; it shows how it will make the customer's life better.
Mastering Light to Capture Ambiance and Detail
If you get one thing right in your candle photography, make it the lighting. It's what separates a lifeless, flat photo from one that makes a customer feel the warmth and smell the scent. To get those pro-level shots, you need to be in control of the light. A classic three-point lighting setup is the perfect place to start.
Your key light is your main workhorse. Place it at a 45-degree angle from your candle. This is the light that will carve out the shape of the vessel and pick up all those beautiful textures in the wax. It creates the primary shadows that give your candle dimension and a sense of form.
Next up is the fill light. Set this one up on the opposite side of your key light. Its whole job is to soften the shadows your key light created. Without a fill light, you risk getting harsh, distracting dark spots, especially on shiny glass jars. The fill light makes sure every part of your product is visible, without any jarring contrast.
Adding Depth and Capturing the Flame
The final touch is the backlight. By placing this light behind your candle, you create a subtle separation from the background. It can produce a lovely, almost ethereal glow or a crisp "rim light" that outlines the edge of the vessel. This is a pro move that adds a ton of depth and makes your candle really pop off the page.
Now, let's talk about the flame. It's so easy to mess this up. Most cameras on auto-mode will see that bright spot and turn it into a completely blown-out, white blob, losing all the beautiful color and flicker.
The secret is spot metering. On your camera or smartphone's Pro Mode, tap on the flame to tell the camera to expose for that specific spot. Yes, the rest of your scene will go dark, but don't panic. You've just preserved the flame's gorgeous shape and color. You can easily bring back the light to the rest of the image in post-processing.
This is all part of selling the complete candle experience, which boils down to three key visual elements: the ambiance, the texture, and the vessel itself.

When you nail these three pillars in your photos, you’re no longer just listing a product; you’re inviting the shopper into an immersive, sensory experience.
Managing Reflections on Glass and Metal
Glass jars and shiny metal lids can feel like your worst enemy. They act like tiny mirrors, reflecting you, your camera, and everything else in the room. The goal isn't to kill all reflections—that would look unnatural. The goal is to control them.
A large diffuser is non-negotiable here. Whether it's a professional softbox, an umbrella, or even just a clean white bedsheet hanging between your light and the candle, you need one. It takes that harsh, direct light and turns it into a soft, beautiful wash. This creates smooth, clean highlights instead of those sharp, distracting glares.
Your camera angle is just as important. A few small adjustments can make a huge difference.
- Shoot from a slightly higher angle. This simple trick can often move the reflection of your camera lens right off the product.
- Use a longer lens and step back. This helps minimize any weird distortion in the candle's shape and makes any remaining reflections much smaller and less noticeable.
- Use black or white cards (flags). Place these cards just out of the camera's view to strategically block reflections or to create clean, intentional lines of light on the glass.
By combining smart lighting control with thoughtful positioning, you can finally conquer those tricky reflections and get the stunningly clean photos your candles deserve.
Camera Settings for Flawless Candle Shots
Nailing the right camera settings for candle photography is all about one thing: mastering the light. The real challenge is capturing that cozy, warm ambiance without completely blowing out the flame's detail or losing the texture on the candle itself. Let's walk through the essential settings for both dedicated cameras and smartphones.
If you're shooting with a DSLR or mirrorless camera, your first move is to switch to Manual Mode (M). This gives you direct control over the "exposure triangle"—aperture, ISO, and shutter speed—so you can dial in the perfect shot.
Start by setting your aperture. You’ll want a wide aperture, somewhere in the f/1.8 to f/4 range. This does two critical things at once: it floods the sensor with light (essential for a dim scene) and creates a shallow depth of field. That’s what gives you that beautiful, creamy background blur, known as bokeh, making your candle the undeniable hero of the image.
Next up is shutter speed. You need a slow enough speed to gather light, but if you go too slow, the flame’s flicker will turn into a blurry mess. I’ve found the sweet spot is usually between 1/60th and 1/125th of a second. This is just fast enough to freeze the flame's delicate movement while still letting in plenty of light.
Dialing in ISO and Focus
Your ISO determines how sensitive your camera is to light. For candle photos, you want to keep this as low as you possibly can to avoid grainy, distracting noise. Start with your camera's base ISO, which is usually 100 or 200. Only bump it up if the photo is still too dark after you've set your aperture and shutter speed. A tripod is your best friend here, as it lets you use a slower shutter speed without having to crank the ISO.
When it comes to focus, skip the autofocus. AF systems almost always struggle in low light, constantly "hunting" back and forth and leaving you with a soft image. Switch to manual focus and dial it in directly on your candle’s label or the unique texture of the wax to guarantee your product is tack-sharp.
Pro Tip: Use your camera's Live View mode. You can digitally zoom in on the screen to check your manual focus with incredible precision, making it much easier to get things perfectly crisp.
Smartphone Photography Settings
Shooting with your phone? Forget the default camera app. Open up "Pro Mode" or download a third-party app that gives you manual controls. You'll be adjusting the same core settings.
- White Balance: Auto white balance gets confused by the warm candlelight and often makes photos look too blue or weirdly orange. Set it manually to a preset like "Tungsten" or "Incandescent." For even more control, use the Kelvin scale and aim for around 2800K to capture the true color.
- Exposure: Tap and hold on the flame itself. You should see a little sun icon or a slider appear. Drag it down to manually decrease the exposure. This single move is what stops the flame from becoming a blown-out white blob, preserving its beautiful shape and color.
Of course, settings are only part of the equation. The right gear can make all the difference, so check out this Guide to Finding a Good Camera for Product Photos That Sell to make sure your setup is ready for e-commerce. Getting these settings right will take your candle photos from simple snapshots to professional images that truly captivate your customers.
Styling and Staging Your Candles Like a Pro

The story your candle tells begins long before anyone lights the wick—it starts the moment a customer sees your photo. Styling isn’t just about adding pretty props; it's about building a scene that communicates your brand’s entire vibe and the specific experience your candle offers.
Your goal is simple: make someone see your candle and immediately picture it in their own home.
Think of your candle as the main character and your props as the supporting cast. Every item in the shot needs a reason to be there, contributing to the mood without stealing the show. A clean, minimalist background might work for a main Amazon image, but a cozy, lived-in scene is what really connects with shoppers on a platform like Etsy.
Choosing Props That Tell a Story
The props you select should tie directly into the candle's scent, theme, or the feeling you want to create. This is where you move from just taking pictures to creating compelling product photography. Your props should whisper, not shout.
For a lavender-scented candle, you could surround it with:
- Raw Ingredients: A few elegant sprigs of dried lavender.
- Complementary Decor: A well-loved paperback and a delicate teacup to paint a picture of a relaxing evening.
- Textiles: A soft, chunky-knit blanket to scream warmth and comfort.
On the other hand, a coffee-scented candle feels right at home next to a handful of dark-roasted coffee beans, a ceramic mug, and a rustic wooden table. Authenticity is everything. The scene should feel like a natural extension of the product itself.
The best staging looks completely effortless. It gives the candle context and emotion, helping customers see it not just as an object, but as a piece of the lifestyle they're aspiring to.
Great styling is a huge part of the equation. If you're looking for more ways to make your products look irresistible, check out our guide on home decor product photos for even more visual marketing tactics.
Tailoring Visuals for Different Markets
Don't forget to think about where you're selling. An Instagram flatlay has to be bold and graphic to stop the scroll, while a lifestyle shot for your own online store should feel aspirational but still totally achievable. You have to match the visual language of the platform and what its users expect to see.
Understanding your audience is also critical if you're selling globally. North America, for instance, sells over 1.1 billion candle units a year, with a massive 35% of those sales happening around the holidays.
Europe's market is even bigger, with 1.3 billion units sold, but shoppers there often put a higher value on artisanal and decorative qualities. Meanwhile, many Asia-Pacific markets prefer clean, minimalist aesthetics.
By tailoring your photography—getting festive for North America or leaning into craftsmanship for Europe—you can build a much stronger connection with customers, wherever they are.
Capturing a Full Suite of E-Commerce Images

Let's be real—one photo just doesn't cut it anymore. To get a shopper to click "add to cart," you need to tell a complete story with your images. Think of your product gallery as a visual sales pitch, answering every question a customer might have before they even think to ask it.
Your first and most important shot is the hero shot. This is your candle, all by itself, against a clean, uncluttered background. No distractions. Its only job is to present the product clearly and professionally. This is the image that will represent you on marketplaces like Amazon and is often the first impression you'll ever make.
Creating Context with Lifestyle and Scale Shots
Once you’ve nailed that clean hero shot, it's time to add some personality. A lifestyle image does exactly that by showing your candle in its natural habitat—maybe it's on a nightstand next to a good book, adding ambiance to a bubble bath, or sitting on a beautifully set dinner table. These shots sell the experience, helping customers picture your product in their own home.
Next up is the scale shot, and this one is crucial for managing expectations. We’ve all been there—ordering something online only to be shocked by its actual size. You can easily avoid this by placing your candle next to a universally recognized object. A coffee mug, a popular smartphone, or even a hand holding the candle gives an instant, undeniable sense of its true dimensions. It’s a simple move that prevents customer disappointment and potential returns.
Highlighting Details and Showcasing Variety
To really convince a shopper of your candle's quality, you need to zoom in. This is where your gallery goes from good to great. Consider adding a few of these shots to round out your listing:
- Group Shots: If you sell a collection of scents or offer various sizes, photograph them together. This is a fantastic way to show off your range and can subtly encourage customers to buy more than one.
- Close-Up (Macro) Shots: Get right in there and show what makes your candle special. Is it the unique texture of the hand-poured wax? The crackle of a wooden wick? The intricate design on your label? These details communicate craftsmanship.
This kind of premium presentation is absolutely vital in the luxury candle market, which is on track to grow at a 14.5% CAGR and hit USD 2,054.3 million by 2032. For sellers trying to justify a higher price point on sites like Etsy, high-quality images that showcase the fine details are your best sales tool. You can discover more insights about luxury candle market growth and see just how big the opportunity is.
For those all-important hero shots, an AI tool like ProdShot can be a game-changer. It instantly removes the background from your photos, giving you that crisp, professional look that marketplaces require. Applying these kinds of professional Shopify product photography techniques really makes your brand stand out from the crowd.
By building a complete image gallery—from the clean hero shot to the detailed macro—you’re creating a rich shopping experience. You aren't just showing a candle; you're demonstrating its quality, its size, and the place it will have in your customer's life.
Let ProdShot Handle the Final Polish
Getting that perfect shot is a great start, but it’s the final edits that really make a candle photo sell. Post-processing used to mean hours spent fighting with layers and masks in Photoshop, but honestly, who has time for that? Today, smart AI tools can do all the heavy lifting, taking your raw images and turning them into perfect, marketplace-ready shots in just a few minutes.
This is a game-changer, especially for creating those clean, white-background "hero" images that giants like Amazon require. Getting that look by hand is a painstaking process of tracing and masking. An AI tool just gets it done, letting you get back to the more creative parts of running your business.
The point of editing isn’t to fake a great photo. It’s about bringing out the best in what you already captured. You want to make the flame’s glow feel warmer, the wax texture look more real, and the jar’s colors pop, all while keeping it looking authentic.
A tool like ProdShot is the perfect way to do this. You just upload your candle photo, and the AI instantly gets to work, cleanly and accurately removing the background. In a single step, you have a professional-looking image that meets the strict guidelines of most e-commerce sites.
Fine-Tuning Light and Color the Easy Way
With the background out of the way, you can start making your candle look its absolute best. Forget confusing menus and adjustment layers. Simple sliders let you dial in the most important details of your candle shot. The secret is making small adjustments that have a big impact.
Here’s how to make your candle photos really shine:
- Warm Up the Flame: Give the color temperature a slight nudge to bring out that cozy, inviting glow. It’s a tiny tweak that can completely change the mood of the photo.
- Make the Colors Richer: Use a saturation slider to make the wax or vessel color more vibrant. Just be careful not to push it too far—you’re aiming for rich, not radioactive.
- Brighten and Add Contrast: A little boost in brightness makes the whole image feel more polished. Adding a touch of contrast will help your candle stand out and look more defined.
This is all about getting professional results without the headache. What used to take an hour of manual editing can now be done in under a minute. Our guide to product photo editing services has even more tips for getting top-tier results fast.
Building a Cohesive, Professional Look
Consistency is everything when you're building a brand. When every photo in your shop—from hero shots to lifestyle images—shares the same clean background, lighting, and color style, it builds a sense of trust and professionalism. Trying to match every photo by hand is not only tedious but also rarely comes out perfectly consistent.
This is where an AI-powered workflow really proves its worth. You can apply similar adjustments to all your images with just a few clicks, creating a unified look across your entire product line. Whether it's your main product shots, detailed close-ups, or lifestyle scenes, they’ll all feel like they belong to the same high-quality brand. This doesn't just look better; it gives customers confidence and can directly lead to more sales.
Ready to see what your candle photos can look like? With ProdShot, you can get professional, marketplace-ready images in seconds, no experience required. Try ProdShot for free and watch your products come to life.