
It happens to everyone. You snap a fantastic photo, but a weird camera angle or some bad lighting gives you a double chin you don't actually have.
While the fastest fix is usually an AI editor or a mobile app, getting a truly professional and natural result means rolling up your sleeves and learning some subtle retouching skills in a program like Photoshop.
Your Guide to Flawless—and Natural—Portraits
Let's get one thing straight: the "double chin" you see in a photo is almost always a camera trick. It’s an illusion created when a 3D face gets squashed into a 2D image. It has very little to do with your actual weight or age.
This guide will show you how to get your photos looking the way they should.
- For Entrepreneurs and Professionals: A polished headshot for your website or LinkedIn profile projects confidence and builds instant trust.
- For E-commerce Sellers: If you’re modeling your own products, your photos need to look clean and professional to drive sales.
- For Content Creators: Keeping a high-quality, consistent look across your social media is non-negotiable.
The goal here is refinement, not a total transformation. We want authentic but enhanced. The best edit is always the one you don’t have to make, which is why posing and lighting are your first line of defense. A simple trick like pushing your head forward slightly and tilting it down can instantly define your jawline before you even press the shutter.
The camera adds 10 pounds—it’s not just a saying. Whatever is closest to the lens will appear larger. This is why a low camera angle is often unflattering; it exaggerates the area under the chin. A skilled photographer corrects for this distortion both during the shoot and in post-production.
We’ll dive into a whole range of techniques, from the industry-standard software the pros use to lightning-fast mobile apps and clever AI editors. The point isn’t to change how you look. It's about removing a distracting flaw so the photo shows the real you—the one your friends and family see every day.
Professional Retouching with Photoshop
For those who want total creative control and a truly flawless finish, nothing beats good old Adobe Photoshop. This is where you can remove a double chin from a photo with a level of artistry that one-click apps just can’t replicate. We're moving beyond obvious, heavy-handed edits and into the world of professional, subtle portrait enhancement.
My personal workflow is built on a simple rule: make small, incremental changes. The goal isn't to create a whole new person, but to polish the portrait while honoring their natural look. This is how you get a final image that's both believable and beautiful, not warped.
Gently Reshaping with the Liquify Tool
The first tool I usually reach for is the Liquify filter, specifically the Forward Warp tool. The trick here isn't to hack away at the jawline. Think of it more like gently tucking in a loose thread on a piece of clothing. You’re guiding the existing shape, not inventing a new one.
I can't stress this enough: always work on a duplicated layer. It’s your safety net, allowing you to easily tone down the effect later if you get carried away. Using a large brush with very low pressure, I make tiny, careful nudges along the jaw and under the chin. You absolutely have to keep an eye on the background—any strange warping is a dead giveaway of a rushed job.
The secret to a natural-looking liquify edit is subtlety. If you can clearly see the change you’ve made, you’ve probably gone too far. The best edits are felt, not seen, enhancing the portrait without screaming "this was photoshopped!"
This level of detail has become more critical as "selfie awareness" has grown. A 2017 study found that 55 percent of facial plastic surgeons were seeing patients who wanted to look better in their selfies. That was a huge jump from the previous year and shows just how much people care about their digital appearance, making skilled photo editing an essential craft.
Sculpting with Light and Shadow
After any minor reshaping, the real magic begins with Dodge and Burn. This is a classic, non-destructive technique where you essentially paint with light and shadow to create the illusion of depth and contour. It’s far more believable than just pushing pixels around.
Here’s my setup: I create two new layers, both filled with 50% gray. I set the first layer's blending mode to 'Overlay' for dodging (lightening) and the second to the same for burning (darkening). Armed with a soft brush at a very low flow (think 1-3%), I gently paint a subtle shadow right along the jawline and under the chin. This deepens the natural contours, making the area look more defined and naturally receded.
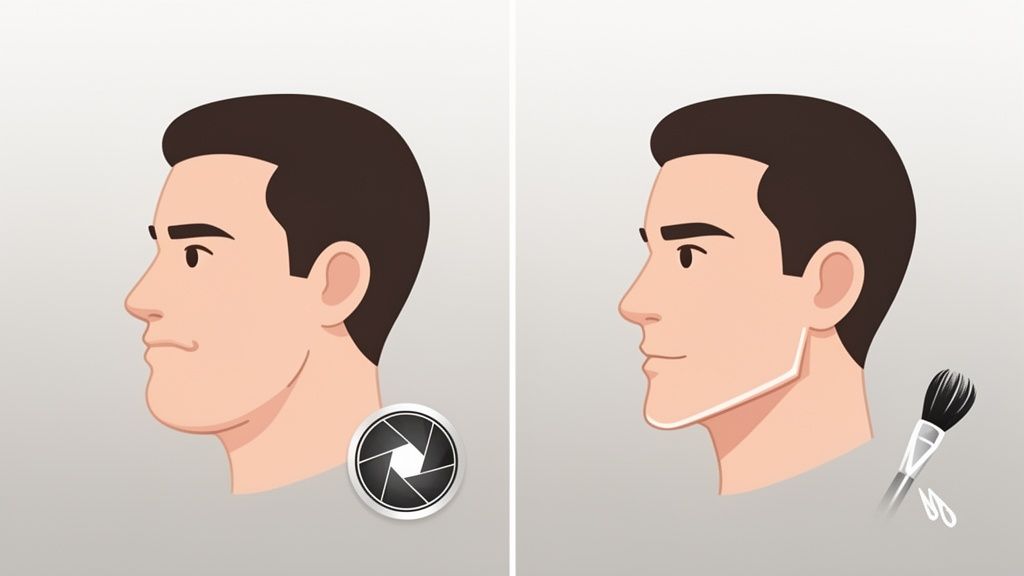
The infographic below really nails the core goals of what we're trying to accomplish with professional photo editing.

It’s not just about making a technical change; it’s about achieving a natural result that helps the person in the photo feel great.
Finalizing with Healing and Cloning
The last part of the process is cleanup. Sometimes, the Dodge and Burn work can bring out or create some minor textural weirdness in the skin. This is where the Healing Brush and Clone Stamp tools become your best friends.
I use these tools to polish off any remaining distractions, like tiny blemishes or patches of uneven skin that the new lighting might have highlighted. Once again, it's all about being precise and subtle.
- Healing Brush: This is my go-to for most skin fixes. It’s fantastic for blending texture and color from a source area to a target spot, making it look seamless.
- Clone Stamp: I save this for more delicate work where I need to copy pixels exactly as they are—perfect for rebuilding a sharp edge or fixing a complex pattern in clothing.
By combining these three techniques—Liquify, Dodge and Burn, and cleanup—you can skillfully and naturally reduce the appearance of a double chin. Sure, this manual process takes more time, but the results are on another level, giving you a professional finish that AI tools are still trying to catch up to. For anyone who works with models in their photos, mastering these skills is a game-changer; you can learn more in our deep dive on product photo retouching. This careful workflow is the key to creating portraits that are both flattering and genuinely authentic.
Quick Fixes: Using Mobile Apps and AI for Fast Edits

Let's be honest—not everyone has the time or patience to master Photoshop. When you're a busy entrepreneur or content creator, speed is non-negotiable. This is where mobile photo editing apps and dedicated AI tools really shine, offering a way to remove a double chin from a photo with just a few taps.
These tools are built for immediate results. They're perfect for when you need to get that new profile picture or product shot live right now. The real trick is knowing which apps to trust and, more importantly, how to use them without making your subject look obviously fake or plastic. Your goal is always a subtle enhancement, not a total facial overhaul.
Trying Out Popular Mobile Editing Apps
You’ve probably seen apps like Facetune and Fotor that are packed with powerful reshaping and refinement features. They usually work with a simple slider, which gives you a surprising amount of control over how intense the edit is. The secret is finding that sweet spot for a natural-looking adjustment.
Here’s a quick rundown of what to look for when you're browsing the app store:
- Jawline/Chin Tool: Hunt for a specific feature labeled "Jaw," "Chin," or "Reshape." These are engineered for exactly this task.
- Automatic Detection: The best apps automatically find the jaw and chin for you, which makes the whole process a lot faster.
- Slider Control: Steer clear of apps that only give you an on/off filter. A slider lets you dial the effect in. A good rule of thumb is to never push it past 30-40% if you want a believable result.
The single biggest mistake I see people make with these apps is going overboard. A subtle, well-done edit is completely invisible. A heavy-handed one becomes a distraction that undermines the professional look you were going for.
When comparing these tools, pay attention to their pricing. Many work on a freemium model—basic edits are free, but the really precise tools for sculpting a jawline are often locked behind a subscription. It's always a good idea to test the free version on your own photos first to see if it works well before you decide to pay.
Photo Editing Tool Comparison for Double Chin Removal
Choosing the right tool depends entirely on your needs—are you prioritizing granular control, speed, or cost? This table breaks down the main options, from the professional standard of Photoshop to the latest AI editors.
| Tool | Best For | Ease of Use | Level of Control | Natural Result Quality | Cost |
|---|---|---|---|---|---|
| Adobe Photoshop | Professional photographers needing maximum precision. | Difficult (Steep learning curve) | Complete | High (User-dependent) | Subscription ($) |
| Mobile Apps (e.g., Facetune) | Quick social media edits and casual portraits. | Easy | Moderate (Slider-based) | Good (If not overdone) | Freemium/Subscription |
| Dedicated AI Tools (e.g., ProdShot) | E-commerce sellers and marketers needing fast, consistent results. | Very Easy (Often one-click) | Low (Automated) | Very High (Context-aware) | Per-image/Subscription |
Ultimately, a professional retoucher will always get the best results with Photoshop, but the time investment is significant. For most people, a dedicated AI tool offers the best balance of speed, quality, and ease of use, delivering pro-level results without the learning curve.
The Rise of Single-Click AI Editors
A new wave of AI-powered tools is completely changing the game. Platforms like ProdShot are trained on millions of images, which gives them an incredibly sophisticated understanding of facial structure, anatomy, and lighting. Instead of you having to manually push pixels around, these tools can automate the entire process with stunning accuracy. You can see how a modern Shopify photo editor uses this tech to deliver professional results in seconds.
These AI editors are fantastic at creating consistent, realistic results with just one click. This automated workflow saves a massive amount of time, a huge advantage for anyone running an e-commerce shop or managing a busy social media feed. Because the AI understands how light and shadow work together to create dimension, the final edit often looks far more natural than a quick manual fix ever could.
Whether you're using AI for refinement or generating images from scratch, achieving a life-like result is everything. For those curious about the creative power of AI, exploring some Midjourney prompts for photorealism is a great way to start perfecting your portraits.
Shoot Smarter: The Best Edit Is No Edit
After countless photoshoots, I can tell you the most effective trick for getting rid of a double chin in a photo: make sure it never shows up in the first place. A few simple adjustments before you press the shutter can save you hours of tedious editing later. Trust me, getting the shot right in-camera is always the best way to work.
The biggest secret weapon in my posing arsenal? Have your subject extend their head slightly forward and tilt their chin down. I know, it sounds and feels a little like a turtle peeking out of its shell. It’s awkward for a second, but it works wonders by instantly stretching the skin under the jaw and creating a much sharper, more defined jawline.

This one simple motion can be the difference between a fantastic, flattering shot and one that’s destined for heavy-handed editing. It's a small, weird-feeling change that delivers a huge, natural-looking improvement.
Master Your Angles and Lighting
Your camera angle is just as important as the pose. A universally flattering technique I use all the time is to shoot from just slightly above your subject's eye level. This angle naturally elongates the neck and helps carve out the jawline, instantly minimizing any looseness under the chin.
On the flip side, shooting from a low angle is almost always a terrible idea. It foreshortens the neck and makes the area under the chin the star of the show. Photography 101: whatever is closest to the lens appears largest. Don't let that be someone's chin.
Lighting also plays a massive part in sculpting the face. A simple but incredibly effective setup is to position your main light source higher than your subject. This creates soft, beautiful shadows under the chin and jawline, adding dimension and depth that visually slims the entire area. You’re aiming for gentle contouring, not harsh, dramatic shadows that scream "I'm being lit from above!" Learning how to look better in photos through these simple angle and lighting tricks will drastically cut down your time in post-production.
Practical Tips for Flattering Portraits
When you combine good posture, smart angles, and thoughtful lighting, you start capturing much stronger images right out of the gate. This proactive approach doesn't just save time; it produces more authentic and believable results.
- Posture is Key: It sounds obvious, but it's crucial. Ask your subject to sit or stand up straight, with their shoulders back and relaxed. Good posture alone can do wonders for lengthening the neck.
- The "Peach Hold": Here’s another great cue I use. Ask the subject to imagine they're holding a small peach under their chin. This gets them to create that slight downward tilt and forward projection without overthinking it.
- Clothing Choices Matter: A simple wardrobe suggestion can make a big difference. Darker tops or V-necks tend to create a slimming effect. On the other hand, light-colored crew necks can sometimes bounce light back up onto the chin, killing those natural shadows you worked so hard to create.
The best edit is the one you don't have to make. Mastering these simple on-set techniques means your source photos will be stronger, requiring only minor touch-ups instead of major digital surgery.
By shooting smarter, you get to spend less time fixing problems and more time enhancing an already great image. Before you even think about opening an editing app, give these practical tips a try during your next shoot. And when you're done, if you find yourself with huge files, a good image resizer can be a lifesaver for managing them.
Keeping It Real: The Art of Subtle Retouching
When you set out to remove a double chin from a photo, you're walking a fine line. The aim isn't to create a new person, but to show them at their absolute best. Think of it this way: great editing is invisible. It’s about clearing away minor distractions so the subject’s confidence can take center stage.
This is all about the art of subtlety. Your audience, and especially customers if you're a brand, has a sharp eye for authenticity. They can sniff out a heavy-handed edit from a mile away, and that can break trust in an instant.
The real goal is to create a photo that looks like it was simply taken on a great day—you know, with perfect lighting, a flattering angle, and after a good night's sleep. It's about correction, not fabrication.
Common Retouching Mistakes to Avoid
I’ve seen it all, and a few common blunders can instantly scream "this has been photoshopped!" If you want a professional, believable result, these are the traps you absolutely have to sidestep.
- The "Instagram Jaw": This is a classic sign of over-enthusiastic Liquify use. You end up with a jawline that's unnaturally sharp or perfectly straight. Real faces have gentle curves and a bit of softness.
- Warped Backgrounds: It’s an amateur move, but so easy to do. Forgetting to scan the background for distortions is a dead giveaway. That slightly bent doorframe or wavy pattern behind the person's head will undo all your hard work.
- Erasing All Texture: Skin has pores, fine lines, and character. When you smooth it into a plastic, doll-like finish, it just looks fake. Don't erase the texture that makes someone human.
Here's the ultimate test for any edit: does it look real? If you can immediately tell what was retouched, you’ve pushed it too far. The best edits are felt, not seen.
The Ethics of Authentic Editing
In the e-commerce and brand-building world, transparency is your currency. Your photos are a promise you make to your customers, and that promise has to be built on trust. While editing is a standard part of the process, it crosses a line when it starts misrepresenting a person or a product.
This shift toward authentic self-presentation isn't just a feeling; it’s reflected in consumer behavior. The global market for non-surgical fat reduction, for example, is projected to hit USD 8.74 billion by 2034. People are actively investing in their appearance, which shows just how important it is for e-commerce sellers to present themselves and their products honestly, yet in the best light. You can find more insights on this trend and its impact on online business over at secta.ai.
Ultimately, your edits should always respect the subject. That means keeping permanent features like scars or birthmarks unless someone specifically asks you to remove them. Instead, focus on the temporary stuff—a stray hair, a blemish, or a shadow from bad lighting. This approach ensures your final image is both polished and genuine, helping you build a much stronger connection with your audience.
Common Questions About Editing a Double Chin
Got a few nagging questions? You're not alone. Let's tackle some of the most common hurdles people run into when they’re trying to get a clean, natural-looking jawline in their photos.
Can I Get Rid of a Double Chin in a Video?
The short answer is yes, but it’s a whole different ballgame. Editing a still photo is one thing; editing dozens of frames per second is another. This kind of work usually requires motion tracking in beefy software like Adobe After Effects to make sure the edit sticks to the subject as they move.
Sure, some mobile apps have those real-time "beauty filters" that can slim a jawline on the fly, but the results often look wobbly and artificial. For a truly professional result on video, this is a job you'll want to hand off to a dedicated video editor.
What’s the Fastest Free Way to Do This?
For a quick fix on the go, your best bet is a mobile app. I'd point you toward Snapseed or the free version of an editor like Fotor. Snapseed has a surprisingly useful 'Head Pose' tool that lets you subtly shift the person's head angle, which can often be enough to minimize a double chin.
Most of these apps also have a 'Reshape' or 'Liquify' feature. The trick is to be incredibly gentle—just a tiny nudge is all you need. Another route is to try an online AI photo editor; many offer free trials that can deliver shockingly good results in seconds.
Pro Tip: Never, ever edit on your original image. Always work on a copy or a separate layer. After you've made your adjustments with a liquify tool, dial back the opacity of your edited layer to somewhere between 50% and 70%. It’s the easiest way to blend your work and avoid that "over-edited" look.
How Do I Make Sure My Edits Aren't Obvious?
This is the million-dollar question. The goal is for no one to know you were there. Keeping your edits believable comes down to a few key principles.
- Respect the Curve. A real jawline is never a perfectly straight, sharp line. It has a natural, gentle curve. As soon as you create a hard, straight edge, you’ve given the game away.
- Zoom Out. Constantly. It’s so easy to get lost in the pixels when you’re zoomed in at 300%. Make it a habit to zoom back out to see the full picture. Does the edit hold up in the context of the whole photo? That's the only thing that matters.
- Put Texture Back. Sometimes, pushing pixels around can smooth the skin and make it look a bit plasticky. If you notice this, add a tiny bit of grain or noise over the edited area. This helps the retouched skin blend seamlessly with the texture of the surrounding areas.
Ready to create stunning, professional-grade product images without the hassle? ProdShot uses advanced AI to turn simple snapshots into conversion-optimized visuals in seconds. Start your free trial today and see the difference for yourself!