
When you're selling jewelry online, your photos have to do more than just show a product. They need to capture the soul of the piece—the tiny facets of a gemstone, the delicate texture of hand-worked metal, the satisfying weight of a quality clasp. This is the world of macro photography, and getting it right is the secret to making your jewelry look absolutely irresistible.
It's all about creating images so detailed and crisp that customers feel like they're holding the piece in their own hands.
Why Flawless Macro Photos Are Non-Negotiable

In the hyper-competitive online jewelry market, your product photos are everything. A potential buyer can't feel the weight of a necklace or see a diamond sparkle under a jeweler's loupe. Your images have to do all of that heavy lifting.
Getting macro photography right isn't just a nice-to-have skill; it's a core part of your business. It's how you communicate the craftsmanship, quality, and value that make your prices feel right. A blurry, poorly lit photo doesn't just look bad—it actively tells customers your product might be cheap, eroding trust before they've even clicked "add to cart."
The High Stakes of Jewelry E-commerce
The market reality here is tough. The online jewelry world is on track to be a $300 billion industry by 2026, but it struggles with an incredibly low conversion rate of just 1.1%.
Why? A huge part of the problem is that standard product photos just don't cut it. They fail to show the intricate details shoppers need to see before they're willing to make a high-value purchase. This is a massive wake-up call for anyone selling on Shopify, Etsy, or Amazon. Every single pixel counts when you're trying to convince a customer your piece is worth their hard-earned money.
For an online jewelry store, a photo that fails to show the precise cut of a diamond or the texture of a hand-hammered finish isn't just an image—it's a lost sale. High-quality macro shots are your most powerful tool for overcoming this digital barrier.
Turning Browsers into Buyers
At the end of the day, exceptional product images are what turn casual browsers into loyal customers. When people can clearly see every tiny detail, their confidence skyrockets. This is why it's so critical to treat your Amazon product photography as a performance tool, not just a creative afterthought.
Great macro shots get a few key jobs done:
- They Build Trust: Clear, detailed photos prove you're proud of your work and have nothing to hide.
- They Justify the Price: When the quality is visible right on the screen, the price tag makes perfect sense.
- They Cut Down on Returns: Accurate visuals mean customers know exactly what they’re getting, leading to fewer surprises and more happy reviews.
Sure, a professional photoshoot can feel like a big expense, but the return on that investment is undeniable. Getting a handle on the typical cost of professional product photography helps frame it as a necessary cost of doing business. Industry data shows that high-resolution images that let customers zoom in on the details can boost conversions by as much as 30%.
Before we dive into the how-to, let's quickly compare the two main paths you can take. This will help you decide which approach is the best fit for your budget and goals.
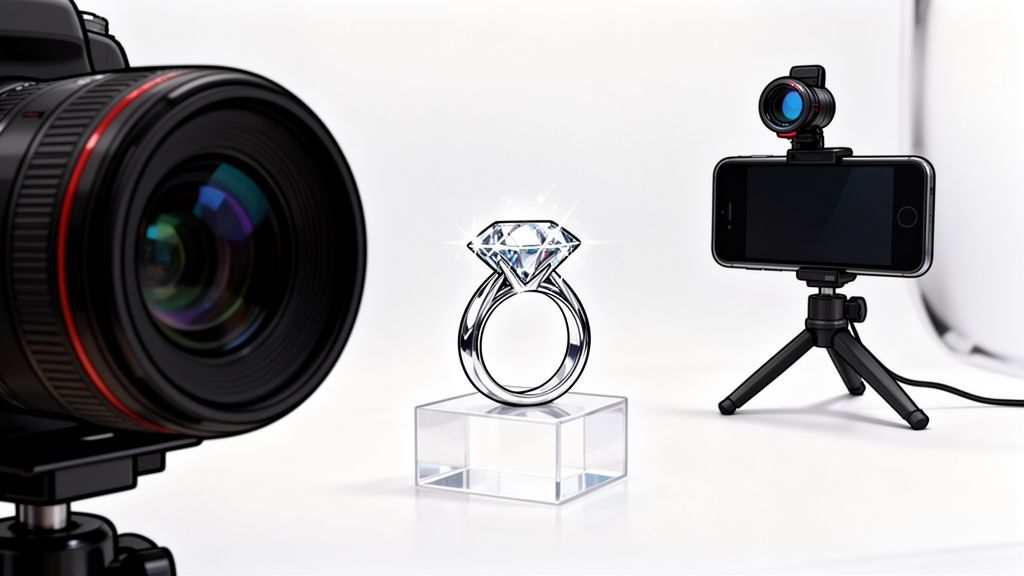
Jewelry Photography Showdown: DSLR vs. Smartphone
| Factor | DSLR/Mirrorless Camera | Smartphone with AI Tools |
|---|---|---|
| Initial Cost | High: ($500 – $3000+) for camera body, macro lens, lighting, and accessories. | Low: Uses your existing phone. AI tools like ProdShot are subscription-based. |
| Learning Curve | Steep: Requires understanding of aperture, shutter speed, ISO, and manual focus. | Minimal: Point-and-shoot simplicity, with AI handling the complex edits. |
| Image Quality | Highest Possible: Unmatched detail, resolution, and control over depth of field. | Very Good: Modern phones have excellent cameras; AI cleans up backgrounds and enhances quality. |
| Flexibility | Total Creative Control: Full control over lighting, angles, and focus stacking for pro-level results. | Good: Great for standard on-white and lifestyle shots. Less control over artistic effects. |
| Speed & Workflow | Slower: Involves shooting, transferring files, and manual editing in software like Photoshop. | Fast: Shoot, generate, and download finished photos in minutes, directly on your device. |
| Best For | Brands where ultimate image quality is the top priority and budgets are larger. | Startups, Etsy sellers, and brands needing a fast, affordable, and scalable solution. |
Both routes can lead to fantastic results. Your choice just depends on balancing your resources—time, money, and technical skill—with your business needs. Now, let's get into the nitty-gritty of making it happen.
Building Your Macro Photography Toolkit

Putting together the right kit for macro jewelry photography doesn't have to drain your bank account. The real goal is to be strategic, picking tools that give you ultimate control over detail and light, whether you're working with a hundred-dollar budget or several thousand.
Think of it less like buying a generic camera kit and more like building a specialist’s workshop. You don't need every tool under the sun, just the key pieces that get the job done right. For jewelry, this means gear that can get incredibly close, kill any camera shake, and tame those tricky reflections.
The DSLR and Mirrorless Camera Path
If you're chasing the absolute highest image quality, a DSLR or mirrorless camera is the place to start. But the camera body is only one piece of the puzzle—for macro work, the lens is where the magic really happens.
A dedicated macro lens is the gold standard here. These are the only lenses that can achieve a true 1:1 magnification, which is what you need to capture the tiny facets on a gemstone or the intricate details of an engraving in true-to-life size. For jewelry, most pros stick to lenses with a focal length between 60mm and 105mm. Shorter lenses can sometimes cause softness around the edges, while longer ones give you a more comfortable working distance and help minimize distortion.
While a full-blown professional setup can run upwards of $5,000, you absolutely don't need to spend that much today. Modern tools are closing the gap, making top-tier results more accessible than ever. You can even dig into the details of how AI is shifting photography costs in this 2025 research paper.
Beyond the lens, there are two other pieces of gear I'd consider non-negotiable for getting crisp, professional shots.
A Sturdy Tripod: At extreme magnifications, the tiniest tremor from your hand will turn your photo into a blurry mess. A solid tripod locks the camera in place, which is absolutely critical for the razor-sharp focus that jewelry photography demands.
A Remote Shutter or Timer: Believe it or not, just pressing the shutter button can introduce enough shake to ruin a shot. A simple remote shutter—or even your camera's built-in two-second timer—eliminates that risk entirely, guaranteeing your images are as sharp as possible.
The Modern Smartphone Workflow
Don't sleep on the powerful camera you already carry in your pocket. With just a couple of smart accessories, the latest smartphones are more than capable of producing incredible macro shots that look perfect on any e-commerce storefront.
The secret weapon for smartphone macro is a high-quality clip-on macro lens. I'd strongly suggest you avoid the cheap plastic lenses that come in those all-in-one kits. Instead, invest in a single, quality glass lens made specifically for macro photography. It'll give you the magnification you need without turning your image into a soft, blurry mess.
And just like with a "real" camera, stability is everything. A small, adjustable smartphone tripod is a must-have for holding your phone perfectly still while you dial in your composition and focus.
Pro Tip: Whether you’re using a DSLR or a smartphone, a tiny dab of dental wax or museum putty is your best friend. It’s the secret to propping up rings, earrings, and pendants at the perfect angle without them tipping over, giving you complete control over your shot.
Mastering Your Lighting Setup
No matter what camera you're using, your lighting will make or break your jewelry photos. The reflective surfaces of metals and gemstones are a unique challenge, making your lighting choices absolutely critical.
You really have two main paths for creating that soft, flattering light every product photographer is after:
A Lightbox (or Light Tent): This is my go-to recommendation for anyone starting out. It's a simple cube made of white translucent fabric. You place your jewelry inside and shine your lights through the fabric walls, which diffuses and softens the light beautifully. It's the most foolproof way to get even, professional lighting and kill harsh reflections.
A Ring Light or LED Panels: A ring light can work well for some pieces, but be warned—it often creates a tell-tale circular reflection on very shiny items. I find that using one or two small, diffused LED panels gives you way more flexibility to shape the light, control shadows, and add a sense of dimension to the piece.
For a beginner, a lightbox is the easiest and most effective way to get your feet wet. It simplifies the entire process and delivers consistently great results, freeing you up to focus on what really matters: your composition and focus. With these tools in hand, you're ready to start shooting.
Mastering Light and Composition for Dazzling Shots
Alright, you've got your gear. Now comes the fun part—the part where we move from just taking pictures to actually crafting an image. This is where the magic really happens. When it comes to macro photography jewelry, light and composition aren't just technical details; they're your most powerful tools for making someone fall in love with a piece.
You can have the best camera in the world, but without the right light, you've got nothing. For jewelry, our goal is almost always the same: soft, beautiful, diffused light. Harsh, direct light is the enemy. It creates ugly hotspots, distracting reflections, and deep, detail-hiding shadows that kill the luxury feel you're going for.
Controlling Light for Perfect Illumination
Think of your job as wrapping the jewelry in a gentle blanket of light. This is exactly why a simple lightbox or a light tent is such a game-changer for so many sellers—it's built to do just that. You place your lights outside the tent, shine them through the fabric, and instantly you've got a soft, even glow.
This simple trick is the key to taming the super-reflective surfaces of polished metals and brilliant gemstones. That soft light cuts down the glare and lets the true color, texture, and craftsmanship of the piece really come through.
I like to think of light as a sculptor's chisel. You can use small, white foam core boards or even just a folded piece of white paper as reflectors. Bouncing light back into specific spots can make all the difference. Try placing a tiny reflector opposite your main light to gently fill in a shadow—you'll see a diamond's facets immediately pop with more life.
A classic rookie mistake is lighting the piece from just one direction. This makes it look flat and uninteresting. A much better approach is to use a main light source and then add either a reflector or a second, weaker "fill" light. This creates those subtle gradients and soft shadows that give the jewelry a sense of depth and make it feel real and tangible to the viewer.
Composing Shots That Tell a Story
Composition is simply how you arrange everything in the frame to guide the viewer's eye and create a more compelling image. Forget rigid rules like the rule of thirds for a moment. Jewelry often calls for its own creative approach.
Don't just stick the piece in the center of the frame and call it a day. Think about how the jewelry is meant to be worn or how it naturally flows.
- Leading Lines: A necklace chain can be arranged in a sweeping curve that leads the eye straight to that gorgeous pendant. It’s a classic and effective trick.
- Dynamic Angles: Instead of shooting a ring head-on, try a three-quarter angle. I use a tiny dab of dental wax or museum putty to hold a ring at that perfect angle, letting me show off both the main stone and the intricate details along the band.
- Negative Space: Don't be afraid of empty space! Sometimes, placing a pair of earrings off-center with plenty of clean background around them gives the shot a much more sophisticated, high-end vibe.
Your composition should do more than just look pretty; it should answer the questions a customer has. Show the clasp on the bracelet. Show the back of the earring. Think like a buyer.
Using Props to Add Context and Luxury
Props should be used carefully. The wrong prop can be a huge distraction, but the right one can add a touch of class, give a sense of scale, or help build your brand's unique identity.
Here are a few ideas for props that I've found work really well in macro photography jewelry:
| Prop Type | Purpose & Example |
|---|---|
| Textural Surfaces | Adds depth and a tactile feel. A piece of dark slate or rich velvet can create a beautiful contrast with shiny metal. |
| Geometric Blocks | Creates clean lines and modern compositions. Small acrylic or marble blocks are perfect for elevating a piece and adding interesting angles. |
| Natural Elements | Evokes an organic or romantic feel. A single, clean flower petal or a smooth river stone can add context without being distracting. |
When you use props, just remember the golden rule: they must complement the jewelry, not compete with it. Keep the colors neutral and the textures subtle. The jewelry must always, always be the hero of the shot.
By thoughtfully combining soft light, dynamic composition, and a few subtle props, you stop being a documentarian and start becoming a storyteller, creating images that feel aspirational and irresistibly valuable.
Nailing Perfect Focus with Stacking
Let's talk about the single biggest headache in macro jewelry photography: getting the entire piece tack-sharp.
You’ve set up your lighting, composed the perfect shot of a beautiful engagement ring, and click. You zoom in, and… only the main diamond is sharp. The rest of the band just fades into a frustrating blur. Sound familiar?
This isn't your fault; it's physics. When you're shooting this close up, your shallow depth of field means the area of sharp focus is incredibly thin—sometimes just a few millimeters deep. For any piece with depth, like a ring or a dangling earring, one shot just won't cut it.
The solution, and the technique the pros swear by, is called focus stacking.
So, What Is Focus Stacking?
It sounds more complicated than it is. The idea is pretty simple: you take multiple photos of the same piece, but you slightly shift the focus point in every single shot.
You might start with the prong closest to the camera in focus, take a picture, then adjust your focus a millimeter back, and take another. And another. And another. You keep going until you have a series of photos where every single part of the jewelry is perfectly sharp in at least one of the frames.
After that, you use software to stitch these "slices" of focus together. The program scans each image, cherry-picks the sharpest parts, and combines them into one final photo. The result? A composite image where the entire piece is stunningly sharp, from front to back.
Before you start snapping those focus shots, your lighting and setup need to be locked in. A controlled environment is non-negotiable for the consistency you'll need.

Think of this process—a solid lightbox, some well-placed reflectors, and supportive props—as the foundation. Once this is set, you don't touch it. This creates the perfect stage for capturing the multiple, identical images required for a clean focus stack.
The Pro Workflow: DSLR and Mirrorless Cameras
For anyone shooting with a DSLR or mirrorless camera, this is where you get incredible control and the absolute best results. Grab your tripod and a remote shutter—they are 100% essential. The camera cannot move even a fraction of an inch between shots.
Here’s the general flow I follow:
- Dial in your aperture. Something sharp like f/8 or f/11 is the sweet spot. It gives you a decent depth of field for each individual slice without the softness that creeps in at super-narrow apertures like f/22.
- Focus on the very front. Switch to live view and zoom all the way in. Manually focus on the part of the jewelry closest to your lens. Fire your first shot with the remote.
- Adjust, shoot, repeat. Now, without moving the camera, gently turn the focus ring just a tiny bit to move the focal plane deeper into the piece. Take another shot. Keep repeating this rhythm—focus, shoot, focus, shoot—until you've covered the entire depth of your jewelry. For a typical ring, this could be anywhere from 10 to 40 images.
A little secret from the studio: using a focusing rail makes this a whole lot easier. It's a piece of gear that sits between your tripod and camera, letting you move the entire camera forward in tiny, precise steps instead of turning the lens ring. It’s a game-changer for accuracy and repeatability.
The Smartphone Stacking Workflow
And yes, you can absolutely do this with your smartphone! The principle is identical, even if the method is a little different. Most modern phone cameras give you manual focus control just by tapping the screen.
- Lock it down. First, get your phone on a sturdy tripod. No hand-holding here.
- Tap, tap, tap. Open your camera app. Tap the part of the jewelry closest to you to set focus, and take your first picture.
- Shift your focus point. Now, tap a spot slightly further back on the piece and snap another photo. Keep doing this, moving your focus point incrementally through the object until you've covered it all.
The real key here is to take enough photos. You want to make sure there are no "gaps" in focus between your shots. When in doubt, take more images than you think you need. It’s always better to have too many than too few.
Putting It All Together in Software
Once you have your sequence of images, it’s time for the magic. The two most popular tools for this are Adobe Photoshop and Helicon Focus. Both automate the heavy lifting of aligning and blending your images.
In Photoshop, for instance, you’d load your files into a stack (File > Scripts > Load Files into Stack) and then run the "Auto-Blend Layers" command. The software takes over, analyzing and merging everything into a single, perfectly sharp final image.
The difference is truly night and day. You go from a good photo to a professional, commercial-quality image that shows off every last facet and detail. It’s how you get those jaw-dropping shots you see in high-end catalogs.
AI-Powered Editing for Flawless Product Photos
You’ve captured your raw macro photos, and now comes the final polish—the part that turns a good image into a great one. For most sellers, this is where the real work begins. It used to mean spending hours hunched over complex software like Photoshop, meticulously tracing backgrounds, fixing colors, and stamping out every tiny speck of dust. That editing time is a massive bottleneck, especially when you have a business to run.
This is exactly where AI-powered editing has completely flipped the script. It’s a smarter, faster way to get professional results without the headache. Imagine taking a decent smartphone shot of a necklace on your kitchen table, uploading it, and getting back a perfect, studio-quality image in just a few seconds.
It’s not just about speed, either. It’s about getting consistent, high-quality results every single time. Tools like ProdShot use artificial intelligence to handle the most tedious parts of photo editing automatically. The AI can instantly identify your jewelry, remove the background with stunning accuracy, and place it on a clean white backdrop that’s ready for platforms like Amazon or Etsy.
The Power of Automated Enhancements
Beyond just yanking out the background, these AI tools perform a whole suite of adjustments that feel like the work of a professional retoucher. It’s like having an expert photo editor on call 24/7.
Here are a few of the key tasks the AI takes off your plate:
- Intelligent Lighting Correction: The AI looks at the light in your original photo and automatically balances it out. It gets rid of harsh shadows and brightens up dull spots, creating even and flattering light across the whole piece.
- Color and Vibrancy Boost: This is huge for jewelry. The AI enhances gemstones and metals to show their true, vibrant colors without ever looking fake or oversaturated. For macro photography jewelry, accurate color builds customer trust and reduces returns.
- Detail Sharpening: The AI is smart enough to selectively sharpen the most important details—like tiny engravings, metal textures, and gemstone facets—to make sure your macro shots are incredibly crisp and clear.
This automated process ensures every single product photo on your site has a cohesive, professional look. That consistency is what builds a strong, recognizable brand. For example, ProdShot's AI can transform a simple photo into something truly ready for the marketplace, generating a clean, reflective surface that adds a touch of luxury. The final result is a polished shot that looks like it came from a high-end studio, but it was created in a tiny fraction of the time.
A Real-World Scenario for Etsy Sellers
Let’s put this into perspective. Picture an Etsy seller who just finished a batch of 20 new earring designs for a big weekend sale. In the past, photographing and editing all of them would have been a multi-day nightmare. They’d have to shoot each pair, transfer the files, manually cut out every background in Photoshop, and then spend hours color-correcting and cleaning up each image.
With an AI workflow, the whole process is different. The seller can shoot all 20 pairs in less than an hour, using just their smartphone. Then, they upload the entire batch to a tool like ProdShot.
Within minutes, the AI delivers 20 perfectly edited images—all with clean white backgrounds, balanced lighting, and an extra bit of sparkle. The seller can get them uploaded to their Etsy store immediately, way ahead of the weekend rush.
This isn’t about cutting corners or sacrificing quality. It's a strategic move to make your workflow far more efficient. You can get new products listed faster while keeping your visual quality incredibly high. For anyone trying to scale their online store, that's a game-changing advantage.
This approach frees you from the editing desk and lets you get back to what you do best: creating beautiful jewelry. If you want to see how this could work for your business, you can learn more about how an AI product photo generator can fit into your workflow.
You’ve captured the perfect shot. The gemstone sparkles just right, the metal has a beautiful sheen, and every intricate detail is razor-sharp. But your job isn’t quite done. A stunning photo only starts making you money once it’s properly prepared for its final destination: your online store.
Getting your images ready for platforms like Shopify, Amazon, or Etsy is the final, crucial step. It’s all about making sure your hard work translates into sales by loading fast and looking incredible on every device.
Honestly, poorly optimized images are a silent killer of conversions. Think about it—if a potential customer has to wait even a few extra seconds for a high-res photo to load, they’re gone. To make sure your dazzling jewelry photos load in a snap, you need to optimize images for web performance.
Getting the Technical Details Right
Before you even think about uploading, every image needs a quick technical check-up. Each platform has its own quirks, but sticking to these general rules is a solid foundation for getting fast, crisp images every time.
- File Format: Almost always, you'll want to save your images as a JPEG. It gives you the best mix of quality and small file size. Only use PNG if you absolutely need a transparent background.
- File Size: This one's a biggie. Aim to keep your main product shots under 500 KB. Anything bigger, and you risk slowing your page down to a crawl.
- Image Dimensions: For the longest side of your image, a dimension of at least 2000 pixels is the gold standard. This gives shoppers that crisp, high-quality zoom they expect.
Pay close attention to your platform’s specific guidelines. Amazon, for example, is notoriously strict. An image that doesn't meet their technical specs can be rejected, delaying your product launch.
Tailoring Your Images for Each Platform
Beyond the tech specs, the real pros tailor their image gallery to the unwritten rules and culture of each marketplace. A one-size-fits-all approach just doesn't cut it.
Amazon, for instance, is all about uniformity. They demand that your main "hero" image has a pure white background (RGB 255, 255, 255). No ifs, ands, or buts. This creates that clean, consistent look Amazon is known for. The good news? Your secondary images are where you can get creative with lifestyle shots, scale comparisons, and detailed close-ups.
On the other hand, platforms like Shopify and Etsy are where your brand's personality can really shine.
- Shopify: This is your home turf. Mix clean, on-white product shots with branded lifestyle photos that tell your brand's story and create a specific vibe.
- Etsy: Shoppers here are looking for the story behind the product. They love seeing the "maker." Don't be afraid to include behind-the-scenes photos, pictures of your unique packaging, or shots that emphasize the handmade artistry of your jewelry.
Your goal is to build a gallery that answers every question a customer might have before they even think to ask it. You can dive deeper into building out the perfect image set in our complete guide to jewelry product photos. By optimizing for both the tech and the platform strategy, your beautiful macro photography will become your most powerful sales tool.
Common Questions About Macro Jewelry Photography
Even after walking through the entire process, it's completely normal for a few questions to still be rattling around in your head. Getting into the nitty-gritty of macro jewelry photography can feel a little overwhelming, so let's clear up some of the most common hurdles jewelry sellers run into.
One of the first questions I always get is about the budget. Is it even possible to get professional-looking shots without dropping a ton of cash on gear? Absolutely. While a high-end DSLR and a true macro lens will give you the ultimate level of quality, you can get fantastic results with a modern smartphone, a good clip-on macro lens, and a simple lightbox. The real secret isn't the price tag on your camera—it's having full control over your lighting and making sure your setup is rock solid.
Getting The Sparkle Just Right
Another huge challenge is capturing that brilliant fire in gemstones without blowing out the shot with harsh, distracting glare. So, how do you make a diamond really dance for the camera? It all comes down to the angle of your light.
Instead of blasting your jewelry with direct light, use a small, focused light source (like a penlight) from the side. Move it around slowly until you see the facets catch the light and create that perfect, brilliant sparkle. Diffused main lighting keeps reflections soft, while this small, hard light adds the "pop."
Finally, what's the single biggest mistake I see beginners make? Trying to get the entire piece perfectly sharp in a single photo. Even the pros with the best gear on the market can't get an entire ring perfectly sharp with just one click. The laws of physics and shallow depth of field just won't allow it.
Keep these key takeaways in mind, and you'll be ahead of the game:
- Embrace focus stacking: It’s the only reliable way to get that tack-sharp, commercially appealing look from the front of the piece all the way to the back.
- Control your light: Soft, diffused light is your best friend for killing harsh reflections and getting even exposure.
- Stability is non-negotiable: A tripod is a must-have for both cameras and smartphones. Any little shake will introduce blur.
By really nailing these core techniques, you can sidestep the most common frustrations and start producing beautiful, sales-driving images every single time.
Ready to skip the tedious editing and get flawless jewelry photos in seconds? With ProdShot, you can upload your raw images and let AI handle the background removal, lighting, and final polish. Transform your simple snapshots into studio-quality images today at https://prodshot.net.