

Introduction
In the competitive domain of Etsy, product photos are pivotal in capturing buyer interest and boosting sales. Etsy reports that 90% of buyers deem photo quality a key factor in purchase decisions. This detailed guide delves into photo editing strategies that enable you to craft compelling images, optimizing your listings for success.
Understanding Etsy’s Image Requirements
Before diving into editing, familiarize yourself with Etsy's image standards:
- Resolution: Minimum 2000 pixels on the shortest side ensures the zoom function works effectively. (EditThisPic)
- Aspect Ratio: While Etsy showcases a 4:3 ratio, maintaining square images (1:1) guarantees uniformity across all devices. (PureProduct)
- File Formats: JPEG, PNG, and GIF (static) are accepted, with JPEG being optimal for quality and size balance.
Essential Photo Editing Techniques
1. Cropping and Composition
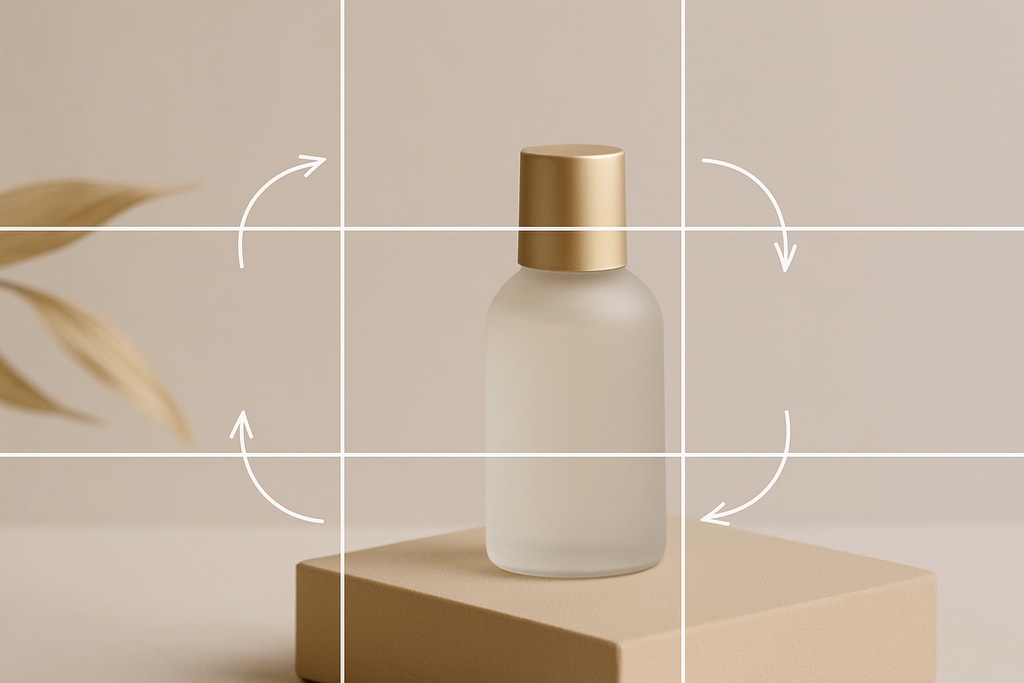
Understanding composition in product photography is vital:
- Center Your Product: Position your product centrally for immediate focus.
- Use the Rule of Thirds: Utilize the grid system to place subjects strategically, enhancing visual appeal.
Practical Example: When photographing a handmade mug, use the mug handle as a key feature aligning with one of the grid's intersections to draw attention.

2. Adjusting Brightness and Exposure
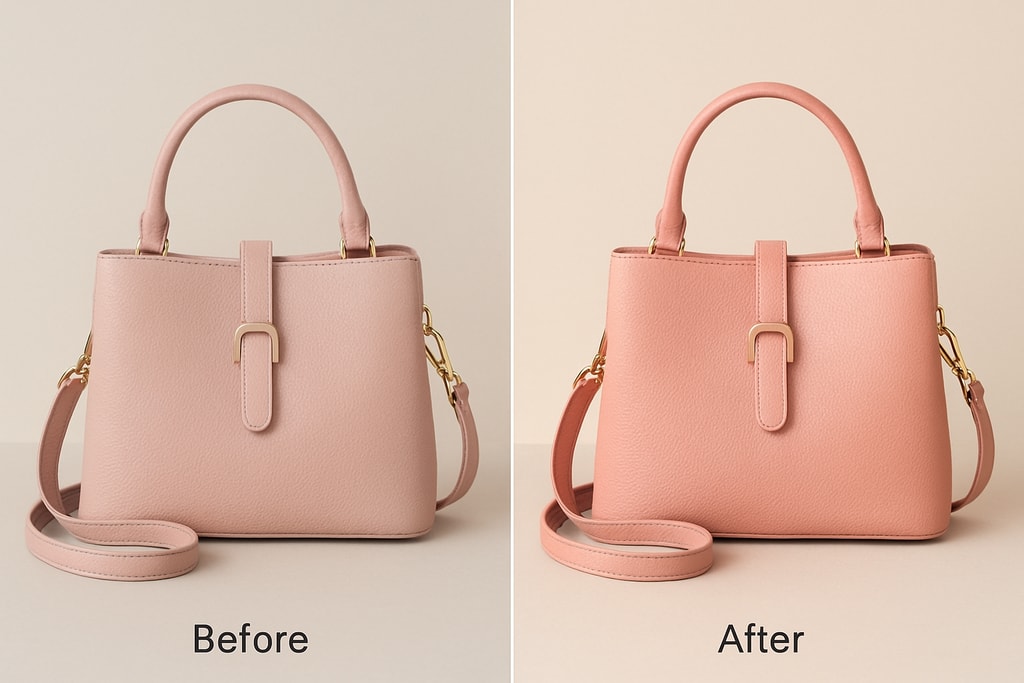
Bright, well-exposed photos attract and engage viewers:
- Increase Brightness: Illuminate your product without losing detail.
- Correct Exposure: Balance exposure to ensure clarity without washing out the image.
Mistake to Avoid: Overexposure can lead to an unnatural, harsh appearance, so adjust carefully.

3. Enhancing Contrast and Sharpness
Depth and clarity are enhanced through contrast and sharpness adjustments:
- Boost Contrast: Slight Contrast elevation adds depth without altering natural tones.
- Sharpen Details: Tactical sharpening highlights textures, such as intricate embroidery details.
4. Correcting White Balance
Accurate color representation builds customer trust:
- Neutralize Color Casts: Adjust to reflect true colors.
- Use Gray Cards: Capture a gray card in your setup to ensure reliable color correction.
Decision Criteria: If products frequently appear warmer or cooler in lighting, prioritize white balance in edits.
5. Background Cleanup
A pristine background ensures that the focus remains on your product:
- Remove Distractions: Editing tools can eliminate unnecessary elements.
- Blur Backgrounds: A slight blur helps highlight your product by creating separation.
Practical Editing Workflow
1. Setup: Photograph with a neutral background and adequate lighting to minimize initial editing needs. 2. Editing Tools: Utilize software like Adobe Lightroom for flexibility, or Snapseed for quick adjustments. 3. Batch Edits: Maintain uniformity by repeating edits across similar product images.
Consistency Across Listings
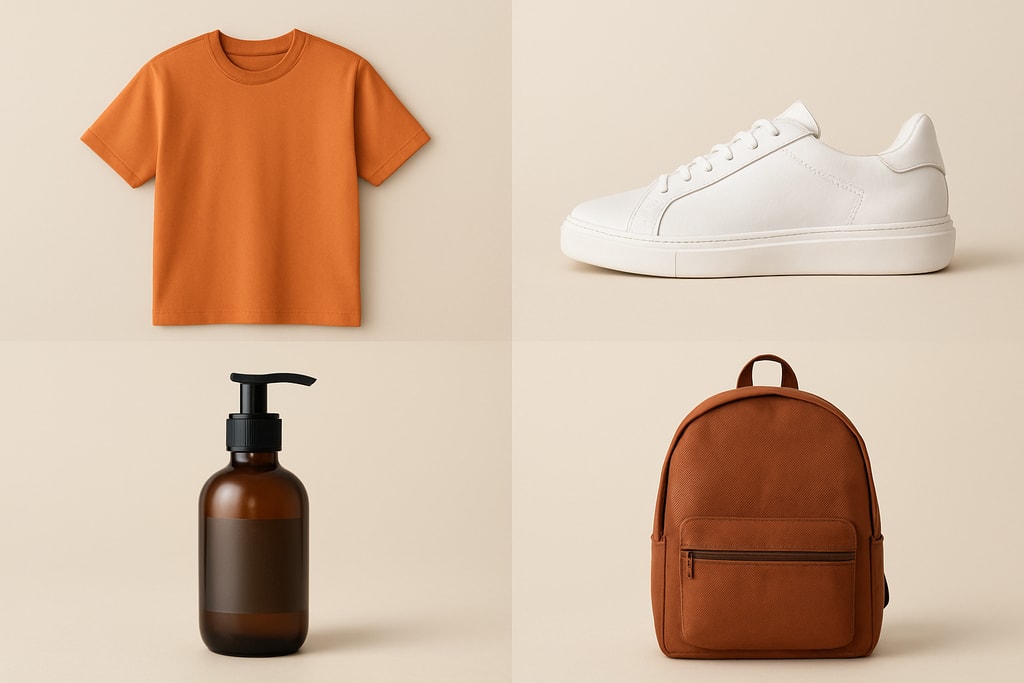
A unified photo style bolsters brand professionalism and recognition:
- Use Similar Backgrounds: Consistent use of backgrounds enhances visual cohesion.
- Consistent Lighting: Uniform lighting allows for a standard visual theme across listings.

Choosing the Right Editing Tools
Various tools suit different skill levels and needs:
- Adobe Lightroom: Offers in-depth options, useful for advanced users.
- Canva: Simplifies design for novices with templates and presets.
Marketplace-Specific Advice: For sellers on multiple platforms, consider cross-platform compatible tools.
Mistakes to Avoid
- Over-Editing: Excessive filters or edits can misrepresent your product, leading to buyer dissatisfaction.
- Neglecting File Size: Large files can slow down your listing loading times, affecting customer experience.
Enhancing Mobile Photography
Apps like Snapseed or Adobe Lightroom Mobile provide robust features, making mobile editing efficient and effective.
Advanced Techniques: Filters and Effects
While subtlety is key, well-applied filters can enhance mood and consistency:
- Use Sparingly: A light filter can enhance warmth or focus, but you'll want to avoid altering the fundamental colors.
The Importance of Thumbnails
Your thumbnail is a shopper’s first visual interaction:
- Showcase Best Angle: Select a thumbnail that highlights unique product features.
- Ensure Clarity: Crisp, clear thumbnails improve click-through rates.
Interactive FAQ
Q: How many photos should I include in my Etsy listing?
A: Leverage all 10 image slots for comprehensive product views. (EditThisPic)
Q: Should I use filters on my product photos?
A: Reserve filters for enhancing overall mood without altering the true essence of your product. (Etsy)
Q: Can I edit photos directly on my smartphone?
A: Yes, with tools like Snapseed, you can achieve professional-grade edits right from your phone.
Conclusion
Investing time and effort into editing Etsy product photos can significantly elevate your shop's influence. Implement these strategies to create visuals that effectively attract buyers. Enhance efficiency by using tools like ProdShot to streamline your photo editing process.
Sources and Further Reading
- Etsy Product Photo Guide: Requirements, Tips & Styling
- Etsy Product Photography Tips (2025 Guide) – Outfy
- How to Edit Your Product Photos
- Etsy Product Photo Guide: Size, Format & Background Requirements (2026)
- Etsy Product Photography: 7 Tips That Actually Increase Sales
For further visual guidance, explore the Etsy listing photo checklist.