
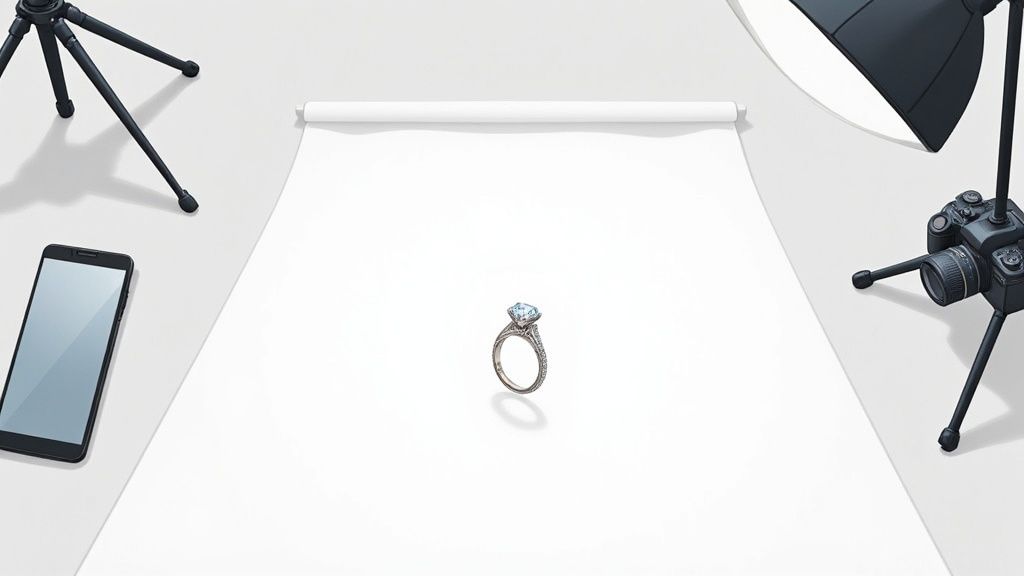
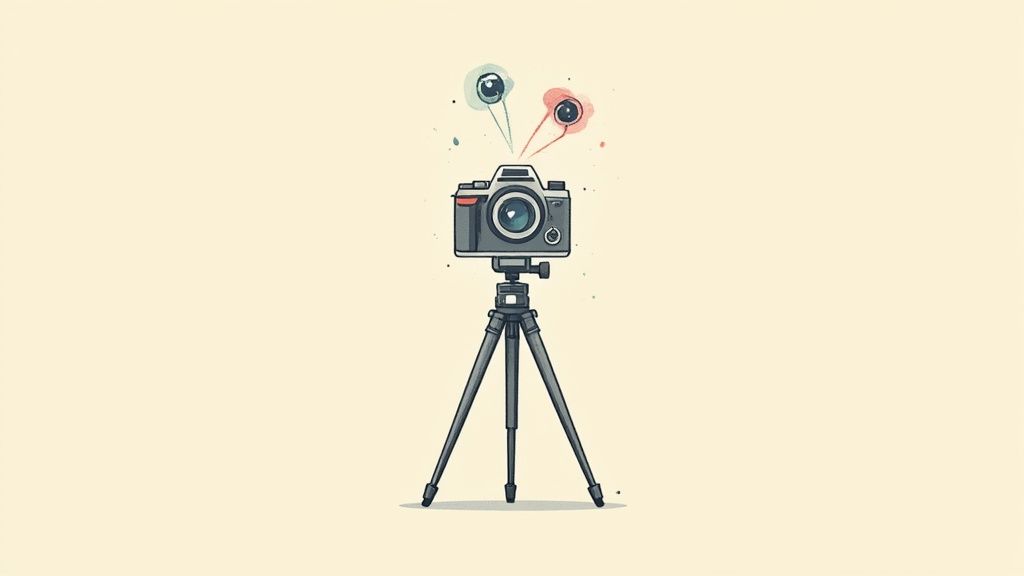
You don't need a fancy studio to get started with jewelry photography. Honestly, you can pull off some amazing shots with just four things: a camera (your phone totally counts), a tripod to kill the blur, a decent light source like a window, and a clean, simple background. The real trick is learning to control the light and keeping your camera perfectly still to capture those crisp details.
Building Your Jewelry Photography Toolkit
Before you even think about snapping that first picture, you need to get your gear in order. This isn't just about making a shopping list; it's about being strategic and building a kit that actually works for your budget and what you’re trying to achieve. The quality of your photos has a direct line to customer trust and, ultimately, your sales.
Think about it: the global jewelry market is expected to hit around $348 billion by 2025, with fine jewelry making up a massive 68% of that. In a market that huge, especially with the U.S. alone accounting for 25% of all sales, your photos have to do the heavy lifting. They need to show off the craftsmanship and make someone feel like they need that piece. As you can see from these global jewelry trends, compelling visuals are no longer optional.
Smartphone vs. DSLR: A Practical Comparison
The big question everyone asks is whether to use a smartphone or a "real" camera like a DSLR or mirrorless. The answer really boils down to your budget and how much control you want over the final image. Modern phones are amazing, no doubt, but a dedicated camera gives you a level of precision that’s hard to beat.
A smartphone setup is your most accessible, budget-friendly option. If you grab a small tripod and a clip-on macro lens, you can get some surprisingly professional-looking results. This is the perfect route for sellers on Etsy or those who need to crank out content for social media fast and without a huge investment.
On the flip side, a DSLR or mirrorless camera gives you full manual control over things like aperture, ISO, and shutter speed—which is a game-changer for tiny, reflective objects like jewelry. This is how you get those ultra-sharp images and that beautiful, creamy, blurred background (the "bokeh" effect) that makes the product pop.
Key Takeaway: Your camera choice is the foundation of your final image quality. A smartphone is a fantastic starting point, but a DSLR or mirrorless camera unlocks the pro-level control you'll eventually need to master tricky lighting and capture the finest details.
Let’s break down what you’d need for each approach.
Essential Gear Comparison: Smartphone vs. DSLR
This table gives you a side-by-side look at what a starter kit looks like for both a smartphone and a more professional camera setup.
| Gear Component | Smartphone Approach (Budget-Friendly) | DSLR/Mirrorless Approach (Professional Quality) |
|---|---|---|
| Camera | Modern smartphone with a good camera | Entry-level to mid-range DSLR or Mirrorless camera |
| Lens | Clip-on macro lens | Dedicated 100mm macro lens |
| Stability | Small, adjustable phone tripod | Sturdy, full-size tripod with an adjustable head |
| Lighting | Natural window light, DIY lightbox, small LED ring light | Two continuous LED panels with diffusers |
| Light Control | White foam core or paper for bouncing light | Professional bounce cards, reflectors, and diffusers |
| Background | Poster board, fabric, or a seamless paper roll | Professional seamless paper or custom surfaces |
As you can see, you can achieve a similar goal with both, but the investment and potential for quality scale up significantly with a dedicated camera.
This simple workflow shows the path from setup to the final shot, highlighting the core stages of any successful jewelry photoshoot.
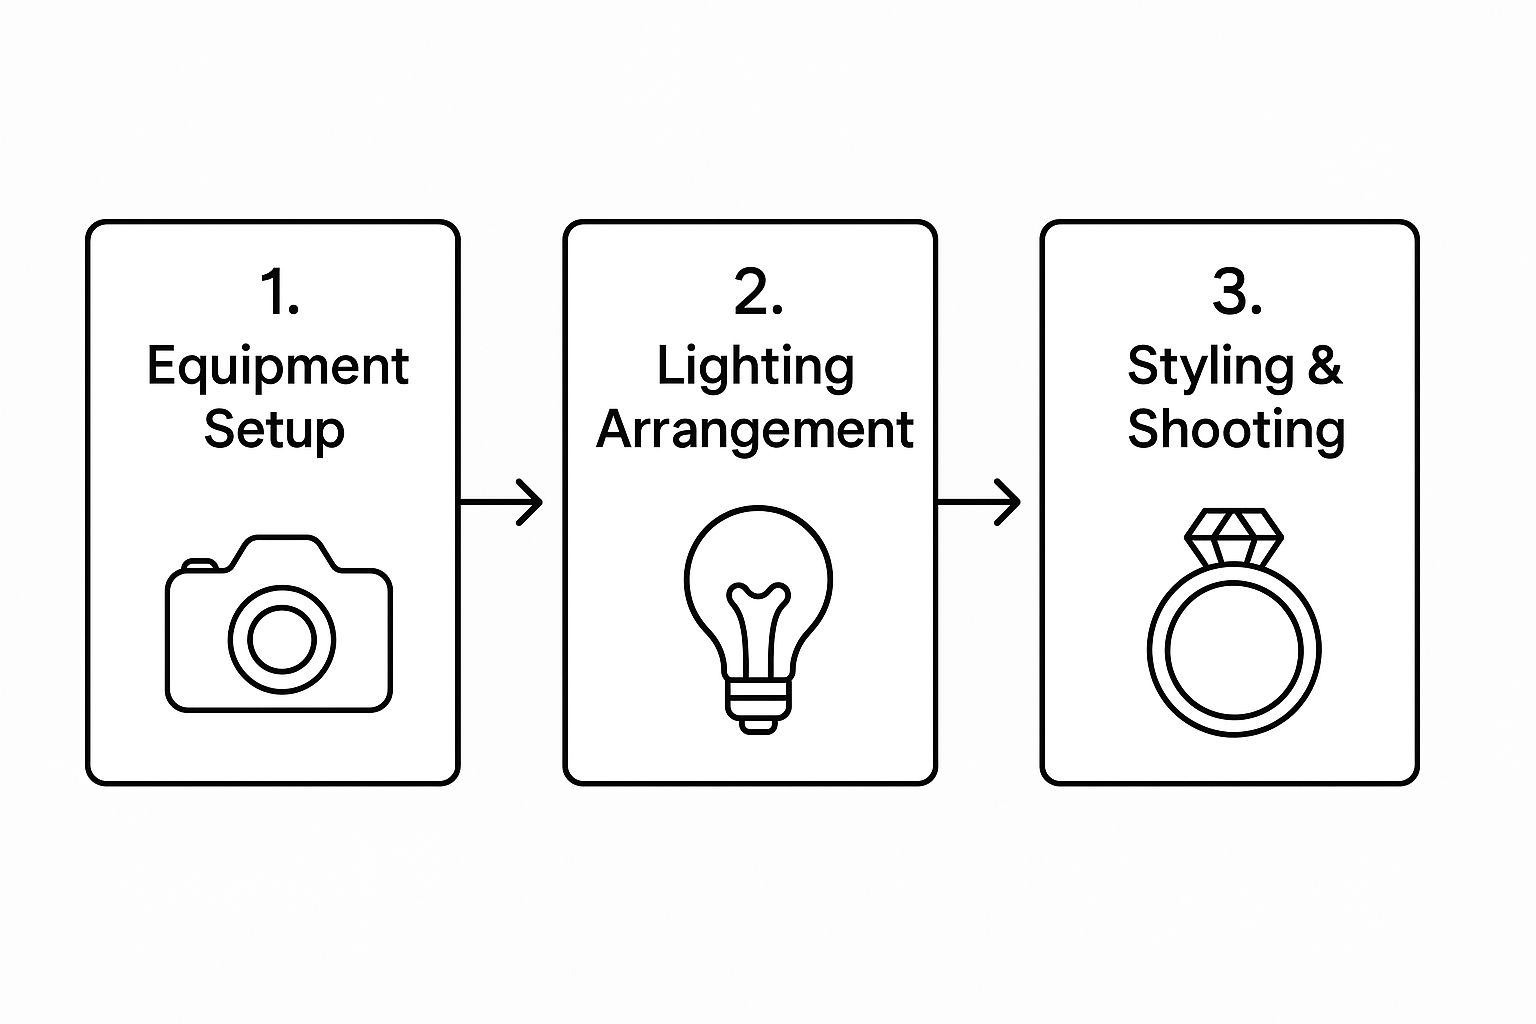
This just reinforces that having a clear process—gear, then lighting, then styling—is the key to getting great shots every single time.
Essential Gear for Every Budget
Camera aside, a few other pieces of equipment are non-negotiable if you're serious about your jewelry photography. These tools are all about controlling your environment to make sure your photos are sharp, well-lit, and professional.
-
A Sturdy Tripod: This is your number one weapon against blurry photos. Even the tiniest bit of camera shake, which you can't even see, will ruin a macro shot. A basic tripod is a cheap investment that pays for itself on day one.
-
Macro Lens: To get those up-close-and-personal shots of tiny details, hallmarks, and gemstone facets, you absolutely need a macro lens. For phones, you can find great clip-on macro lenses for cheap. For a DSLR, a dedicated macro lens (the 100mm is a classic for a reason) is the industry standard.
-
Lighting Equipment: Great lighting doesn’t have to break the bank. You can start with the soft, diffused light from a window (just hang a thin white sheet over it). A DIY lightbox made from a cardboard box and some tissue paper also works wonders. When you’re ready to upgrade, a pair of continuous LED panels will give you total control in any situation.
-
Bounce Cards: Don’t sleep on this simple tool. A piece of white foam core or even just a folded sheet of paper can be used as a bounce card. You use it to reflect light back into the shadows, which softens harsh lines and brings out details that would otherwise be lost.
Building out your toolkit is a marathon, not a sprint. Start with what you've got, really nail the fundamentals of lighting and stability, and then slowly upgrade your gear as your skills and business grow. Even the simplest tools give you the control you need to create clean, eye-catching jewelry photos that turn browsers into buyers.
Manipulating Light to Capture Every Sparkle
When it comes to jewelry photography, light is everything. It's not just about making a piece visible; it’s the tool you use to shape reflections, reveal the tiniest details, and make gemstones absolutely pop. Honestly, getting this right is the single most impactful skill you can develop. It’s what separates an amateur snapshot from a professional product photo, and the good news is you don’t need a fancy studio to do it.
The main goal here is creating soft, diffused light. Picture the gentle, even glow on a slightly overcast day—that's exactly what you're aiming for. Harsh, direct light, like a bare bulb or the midday sun, is your enemy. It creates ugly, dark shadows and bright, distracting hotspots, especially on shiny metals. That kind of glare will completely blow out the details on a silver chain or a polished gold band, making it look cheap and flat.
Pro Tip: Your biggest challenge in jewelry photography is harsh reflections. The goal isn't to kill all reflections—that would make metal look dull—but to control them. You want them to define the shape and polish of the piece without distracting the eye.
Creating Soft Light on a Budget
You can get that beautiful soft light with some pretty simple tools. Natural window light is your best friend, and it’s free. To soften it, just tape a piece of thin white paper or even a white bedsheet over the window. This instantly turns that harsh light source into a large, soft one, giving you the same effect as an expensive softbox.
If you need more consistency than the sun can offer, a DIY lightbox is a fantastic project. You can build one from a simple cardboard box. Just cut out the sides, cover the openings with white tissue paper or fabric, and place a lamp on either side. Boom—you've got a controlled environment that produces beautifully even lighting, which is perfect for getting consistent results across an entire product line.
Mastering the Art of Bouncing Light
Once you have your main light sorted, the next step is dealing with shadows. Jewelry has all sorts of complex shapes that create small, dark areas, hiding important details like clasps or engravings. This is where bounce cards become your secret weapon.
A bounce card is just a white surface used to reflect light. You don't need anything fancy.
- A piece of white foam core from a craft store works perfectly.
- A folded sheet of white printer paper can do the trick in a pinch.
- Even a small, white piece of cardboard will work.
Set up your main light (like your diffused window) on one side of the jewelry. Then, simply place the bounce card on the opposite side. It will catch the light and bounce it right back into the shadowy parts of your piece. This one simple action fills in those dark spots, creating a much more balanced and professional-looking photo. You'll be amazed at the difference this small adjustment makes.
Practical Lighting Scenarios
Different types of jewelry demand slightly different approaches. Learning how to photograph jewelry well means being able to adapt your setup to whatever piece is in front of you.
Scenario 1: The Highly Reflective Silver Chain
A polished silver or gold chain is basically a collection of tiny mirrors. Your mission is to create long, smooth highlights that define its links without showing a clear reflection of your camera or the room.
- Go Big with Your Light Source: Place your piece inside a lightbox or right next to a large, diffused window. The larger your light source is in relation to the jewelry, the softer and more seamless the reflections will be.
- Angle for a Gradient: Don't lay the chain perfectly flat. Position it at a slight angle to the light to create a gentle gradient from light to dark across the metal. This gives it a sense of dimension and a high-end feel.
- Fill the Shadows: Use a bounce card opposite your main light to gently brighten the other side of the links. This ensures no part of the chain gets lost in shadow.
Scenario 2: The Faceted Engagement Ring
With an engagement ring, you’re tackling two things at once: the shiny metal band and the multi-faceted stone. You have to light both of them perfectly.
- Light the Metal First: Start by getting the band right. Use a soft, diffused light source from the side to create that clean, elegant reflection we talked about.
- Add Sparkle with a Hard Light: Gemstones need a small, hard light source to really sparkle. Once the band looks good, introduce a small, undiffused light—like an LED penlight or even your phone's flashlight held far away—from a different angle.
- Find the Sweet Spot: This part is all about experimenting. Slowly move this little "sparkle light" around. You’ll see a point where the diamond's facets catch the light and just explode with fire. This two-light method is the real key to capturing both a beautifully lit band and a dazzling stone.
Choosing Backgrounds That Elevate Your Jewelry
Think of your photo's background as a silent partner in your storytelling. It can either make your jewelry the star of the show or create so much visual noise that the piece just gets lost. Your choice of background is a direct reflection of your brand’s personality and a make-or-break element when you're learning how to shoot jewelry.
For most e-commerce sites like Amazon, a clean, seamless white background isn't just a good idea—it's often a requirement. This clinical, distraction-free look puts 100% of the focus squarely on your product, letting customers zoom in on the details without any competing visuals. It also creates a professional, consistent look across your entire product catalog, which is a massive trust-builder for shoppers.
Getting this look is actually pretty simple. You can use a white poster board and gently curve it up from your table to the wall, which creates a seamless "sweep" with no hard corners. A dedicated roll of white seamless paper from a camera store is another great option. The real trick is to light the background separately from the jewelry, making sure it's pure white without completely blowing out the highlights on the product itself.
Weaving a Narrative with Textured Surfaces
While a crisp white background is essential for your main product listings, it doesn't do much to tell your brand's story. That’s where textured and lifestyle backgrounds shine, especially for social media, website banners, and email campaigns. The right surface can instantly convey a specific mood or aesthetic.
What feeling are you trying to evoke? Is your brand earthy and natural, or is it all about modern luxury? Your background should match that energy.
-
For a Rustic, Handmade Vibe: Try using a piece of weathered wood, some rough linen fabric, or a flat slab of slate. These organic textures are a perfect match for bohemian or handcrafted jewelry.
-
For a Touch of Luxury and Elegance: A slab of polished marble, a dark reflective surface, or even a piece of soft, draped satin can communicate high-end sophistication in an instant.
The key is to pick a background with a texture that adds visual interest but doesn't fight for attention with the intricate details of the jewelry.
Your background choice should be intentional. Ask yourself what story this surface tells about the piece sitting on it. A rustic wooden plank tells a very different story than a sleek sheet of acrylic.
Using Props with Purpose and Subtlety
Props can add wonderful context and personality, but be careful—they're a double-edged sword. The golden rule is that a prop should always support the jewelry, never compete with it. When it comes to props, less is almost always more.
For example, instead of a full bouquet of flowers crowding a pair of earrings, just scatter a few delicate petals. Rather than placing a necklace inside a cluttered jewelry box, try laying it next to a single, elegant ribbon.
Here are a few ideas to get you started:
- Geometric Blocks: Small concrete or wooden blocks can introduce height and create interesting angles.
- Natural Elements: A single dried leaf, a smooth river stone, or a sprig of lavender can add an organic, serene touch.
- Fabric Swatches: Even just the corner of a silk or velvet cloth can bring in a pop of color and rich texture.
The best props are just subtle nods to your brand's story. They add another layer of visual interest that makes the photo feel more dynamic and alive without stealing the spotlight. When you carefully curate your backgrounds and props, you build a powerful visual identity. For even more inspiration, check out this guide on creating stunning jewelry product photos that really connect with your brand.
Dialing in Your Camera Settings for Maximum Detail
Leaving your camera on "Auto" is a bit like letting a stranger drive your car. Sure, you’ll probably get to your destination, but you’re giving up all control over the journey. If you want to capture those crisp, professional images that actually drive sales, it's time to take the wheel and flip that dial to manual. This is where you’ll master the “exposure triangle”—the three core settings that work together to create a perfectly exposed, razor-sharp photo.
This level of control has never been more important. The online jewelry market blew past $46.1 billion by the end of 2024, and it's on a steep upward climb, fueled by a younger generation that absolutely shops with their eyes first. High-quality visuals are everything in this space; they have to compensate for the fact that a customer can't see and feel the piece in person. To learn more about how photography is shaping this industry, you can discover more insights about online jewelry statistics.
Aperture: Your Key to Sharpness
Aperture, measured in f-stops (like f/8 or f/16), is all about your depth of field. Think of it as how much of your photo is in focus from front to back. When you're shooting jewelry, you almost always want the entire piece to be tack-sharp, from the closest gemstone right to the clasp in the back. A common mistake I see is using a low f-stop number (like f/2.8), which creates that blurry background effect—great for portraits, but terrible for product shots where details are everything.
To get that edge-to-edge sharpness, you need to crank up your f-stop.
- The sweet spot for most jewelry photography is between f/11 and f/16.
- This creates a deep plane of focus, ensuring every tiny facet and intricate detail is crystal clear.
- It keeps the viewer's eye locked on the product, with no distracting, out-of-focus areas.
Just remember, a higher f-stop lets less light into the camera. You’ll have to compensate for that with a slower shutter speed, which is yet another reason why a solid tripod is non-negotiable.
ISO: The Enemy of Grain
Next up is ISO, which controls your camera's sensitivity to light. A high ISO might seem helpful in dark situations, but for product photography, it comes with a major downside: digital noise. That's the grainy, unprofessional-looking texture that can ruin an otherwise perfect shot. Since you’re using a tripod and have complete control over your lighting, there is absolutely no reason to use a high ISO.
For the cleanest, most detailed jewelry photos, always set your ISO to the lowest native value your camera offers. This is usually ISO 100 or ISO 200.
Keeping your ISO nailed down low guarantees the smoothest possible image. It allows the true texture of the metals and the sparkle of the gemstones to shine through without any distracting grain getting in the way.
Tying It All Together: A Real-World Example
Let's put this into practice. Picture this: you're shooting a detailed silver pendant on a clean white background. You’ve got your camera secured on a tripod and a soft light placed on either side of the product.
Here’s the exact process you’d follow:
- Go Manual: First thing’s first, switch your camera mode dial to Manual (M).
- Lock in ISO: Immediately set your ISO to 100. Now, don't touch it again.
- Set Aperture for Sharpness: Dial in an aperture of f/16. This is your priority for ensuring the whole pendant is sharp.
- Adjust Shutter Speed for Brightness: Finally, look at your camera's light meter. Start adjusting your shutter speed until that little indicator hits "0," which means you have a balanced exposure. This might be a slow speed, maybe 1/15s or even a full second. Don't worry—because you're on a tripod, that slow speed won't cause any motion blur.
Following this sequence—ISO, then Aperture, then Shutter Speed—takes all the guesswork out of shooting in manual. You prioritize image quality and sharpness first, then simply use shutter speed to dial in the perfect brightness. It’s a methodical approach that delivers consistently professional results, every single time.
Using AI Editing for a Flawless Final Image
Taking a great picture is only half the battle when you photograph jewelry. The real magic, the part that makes a piece truly pop off the screen, happens in post-production. For years, this meant spending hours hunched over a computer, meticulously clicking away at tiny flaws in complex software. But that’s changing fast.
Today, AI-powered editing tools have completely flipped the script. They’ve made professional-level editing fast, affordable, and honestly, pretty easy for anyone to master.
This isn't just about convenience; it’s a fundamental shift. We're moving away from editing being a technical chore and toward it being a creative final touch. Instead of tracing a product by hand to remove the background, an AI can nail it in seconds. That speed and efficiency allow small businesses to compete on a visual level that was once out of reach.
The impact is huge. By 2025, it's expected that 85% of jewelry brands will be using AI tools in their photography workflows. Why the rush? Because these tools have been shown to slash photo editing costs by as much as 93% for small businesses, freeing them up to create stunning visuals without the hefty invoice from a professional retoucher. You can check out more of these jewelry industry trends on Photoroom.com.
Automating the Tedious Tasks
Let's be real—the most time-consuming parts of traditional editing are now the easiest to hand off to AI. These tools use smart algorithms to understand your image and apply precise corrections, literally saving you hours of manual work.
Here’s where AI really shines:
- Background Removal: Instantly snip your jewelry from its original background. In one click, you can place it on a clean white canvas, which is a must-have for marketplaces like Amazon.
- Flaw Removal: Automatically spot and erase distracting dust specks, fingerprints, or tiny scratches on metal surfaces. These are the things you can’t see with the naked eye but that scream "amateur" in a high-res photo.
- Color Correction: Intelligently balance the colors so your gold looks rich and your silver looks crisp. AI can correct the color cast from your lighting, ensuring your metals and gemstones look true to life.
This automation isn't about replacing your creative eye. It's about freeing you from the repetitive, soul-crushing tasks so you can focus on what matters—styling your products and growing your business.
This chart from Photoroom offers a great visual breakdown of how brands are using different photo styles and how it affects their sales.
The numbers tell a clear story. While 38% of brands stick with a clean white background to keep the focus squarely on the product, a massive 82% use multiple photo styles to tell a richer story. That's a strategy that directly translates to better engagement.
Enhancing Sparkle and Shine Intelligently
Beyond just cleaning things up, AI tools can actually make your jewelry look better. One of the toughest things to capture in a photo is the brilliant sparkle of a gemstone or the deep luster of polished metal. AI editing can bring that life back into the image.
For instance, certain algorithms can analyze the facets of a diamond and selectively boost contrast and brightness in just those areas. This adds a realistic "fire" to the stone without making the whole image look fake or over-edited. It's a subtle but powerful touch that makes a piece feel far more luxurious.
If you want to see just how deep this rabbit hole goes, it's worth exploring professional product photo editing services that live and breathe this stuff.
Traditional vs AI Editing Workflow
To put the time and cost savings into perspective, let's compare the old way of doing things with a modern AI-powered workflow. The difference is night and day.
| Editing Task | Traditional Manual Method (Time/Cost) | AI-Powered Method (Time/Cost) |
|---|---|---|
| Background Removal | 15-30 minutes per image. High skill required (Pen Tool). | <10 seconds per image. Automated with one click. |
| Basic Retouching | 10-20 minutes per image (healing brush for dust/scratches). | <1 minute per image. AI-driven spot removal and enhancement. |
| Color & Shine Correction | 5-15 minutes per image (manual adjustments with curves/levels). | <30 seconds per image. Smart filters and one-click presets. |
| Batch Processing (50 images) | 15+ hours of manual work. Cost: $300-$750+ (at $20-50/hr). | ~1-2 hours of mostly automated work. Cost: $20-$50 (subscription). |
As you can see, the efficiency gains aren't small—they're massive. What used to take days of tedious work and a significant budget can now be accomplished in an afternoon for the price of a couple of coffees.
A Practical AI Editing Workflow
So, what does this actually look like day-to-day? Imagine you just finished a photoshoot for a new gold necklace. Here’s a super simple workflow using an AI tool like ProdShot.
First, you'll upload your best shot. Pick the sharpest, best-lit photo from your session and get it into the platform.
Next, one-click background removal. Use the automated tool to instantly isolate the necklace. The AI will create a perfect cutout and place it on a clean white background, just like that.
Then, you'll apply smart enhancements. Look for a feature like "Enhance" or "Retouch." With a single click, the tool can automatically adjust brightness, sharpen details, and correct the color to make that gold really pop. It'll also zap any tiny dust particles you missed during cleaning.
Finally, refine the details. If the tool has a "Sparkle" or "Clarity" slider, give it a gentle nudge to add a little extra life to any gemstones or metallic facets.
In just a few minutes, you’ve turned a good raw photo into a polished, e-commerce-ready image that looks like it came from a high-end studio. This kind of speed and quality was pure fantasy just a few years ago; now, it's a must-have for any modern jewelry seller.
Getting Ahead of Common Jewelry Photography Problems
Even when you follow all the steps, jewelry has a way of throwing curveballs. It’s one of the trickiest subjects to shoot well, and learning the craft often means solving problems as they pop up.
Think of this section as your troubleshooting cheat sheet. When you hit a wall—and you will—here are the quick fixes for the most common headaches.
How Can I Stop Reflections on Shiny Metal?
Reflections are the double-edged sword of jewelry photography. You need them to show that a piece is polished and metallic, but you don't want a perfect, tiny reflection of you, your camera, and your messy living room.
The trick isn't to kill reflections, but to control what the jewelry sees.
- Build a "White Box": If you don't have a lightbox, you can easily make one. Just grab two large white foam core boards and stand them up on either side of your jewelry. Place a third one on top. Suddenly, your piece is surrounded by clean, neutral surfaces, and those are the reflections you'll see in the metal.
- The Cone Trick: For super-reflective pieces like a simple wedding band, try this. Roll a piece of white poster board into a cone and cut a small hole in the top—just big enough for your camera lens to fit through. Place the cone over the ring, and you'll get these beautiful, soft, gradient highlights instead of distracting mirror images.
By managing the environment around the jewelry, you're managing the reflections. This is a thousand times easier than trying to clone them out in Photoshop later.
Pro Tip: Don't fight reflections—feed them. Give shiny surfaces clean, white things to reflect. This creates the elegant highlights that define the shape and quality of the metal.
How Do I Make Diamonds Sparkle on Camera?
It's a classic problem: you shoot a gorgeous diamond ring, but on camera, the stone looks like a dull piece of glass. What gives? This happens because the soft, diffused light that makes metal look amazing is the enemy of gemstone sparkle.
To get the best of both worlds, you need two different kinds of light.
- First, Light the Metal: Set up your main soft light (like a softbox or a diffused panel) to get the ring's band looking perfect. Focus on creating those smooth, clean highlights.
- Then, Add a "Sparkle Light": Once the metal looks good, bring in a second, much smaller, direct light source. This can be a simple LED penlight or even your phone's flashlight. Don't diffuse this one!
- Hunt for the Fire: With your eye to the camera, slowly move that small, hard light around. You'll see the diamond's facets catch the beam and erupt in a fiery sparkle. There's a "sweet spot" angle for every stone—when you find it, the difference is night and day.
This combination of soft light for metal and hard light for stones is how the pros capture both elements perfectly in one shot.
Why Do My White Backgrounds Look Gray?
You've got your piece on a crisp white background, but the photo comes out and the background is a murky, depressing gray. This is one of the most common frustrations, and it’s caused by your camera's light meter trying to be "helpful."
The camera sees all that white, panics, and thinks the scene is way too bright. To "fix" it, it automatically darkens the shot, turning your pure white into a muddy gray.
The solution is a simple camera setting: exposure compensation.
Find the button or dial on your camera marked with a [+/-] symbol. After composing your shot, just dial this up to +1 or +1.5. This tells your camera, "I know it looks bright, but trust me, it's supposed to be." This small tweak forces the camera to brighten the image, snapping that gray background back to the clean white you wanted.
Is It Better to Hire a Professional?
While you can get surprisingly far on your own, there's a point where DIY photography starts costing you more in time than it saves you in money. If you're spending hours fighting with lighting or if your sales are suffering because your images just don't compete, it's probably time to call in an expert.
It's always smart to understand the cost of professional product photography and see how it fits into your business plan. A great set of professional images isn't an expense; it's an investment that pays for itself through higher sales and a more polished brand.
Ready to skip the learning curve and get perfect jewelry photos every time? With ProdShot, you can turn simple smartphone pictures into stunning, studio-quality images in seconds. Our AI does the heavy lifting—removing backgrounds, correcting colors, and enhancing details—so you can focus on selling. Try ProdShot for free and see how easy it is to create visuals that convert.