
Using a white background for your product photos isn't just a trend; it's the gold standard in e-commerce. It creates a clean, crisp canvas that makes your products pop, highlighting every detail, color, and texture. Think of it as a non-negotiable for anyone serious about selling online.
Why White Backgrounds Rule E-commerce
A simple white background is one of the most powerful sales tools you can have. In the crowded world of online retail, that first impression is everything. A clean backdrop instantly signals professionalism and helps build trust with someone who has just landed on your page.
When a potential customer is looking at your product, you want their full attention on the item itself—not on a busy, distracting scene. Removing all that visual "noise" lets the product’s best features take center stage. This clarity is what helps shoppers feel confident enough to click "add to cart." They can actually see the quality and craftsmanship that might otherwise get lost.
Building Trust and Boosting Sales
Presenting all your products against the same clean background creates a cohesive, professional look across your entire store. This consistency is subtle, but it makes your brand feel more established and reliable.
A clean, professional aesthetic is a cornerstone of many effective Shopify conversion rate optimization strategies. When customers can clearly see exactly what they're buying, without any visual clutter, their confidence goes way up. That often translates directly to better sales and fewer returns.
This isn't just a good idea; it's often a hard requirement. Major marketplaces like Amazon, Shopify, and Walmart mandate white backgrounds for main product images to ensure a uniform, high-quality experience for their shoppers.
Meeting Marketplace Requirements
If you're selling on the big platforms, you have to play by their rules. For example, great visuals are a huge part of https://prodshot.net/professional-amazon-product-photography, and Amazon is famously strict about its pure white background rule for the main image. If you don't comply, your listing could get buried or even pulled down completely.
Here's a quick rundown of why this standard is so beneficial for sellers:
- It's Universal: A white background is neutral. It works for a global audience and ensures your product looks great no matter who is looking at it.
- It Highlights the Details: It forces the viewer's eye to focus on the product's design, materials, and quality. This is absolutely critical for things like jewelry, electronics, and clothing.
- It’s incredibly Versatile: An image with a clean background is a marketing workhorse. You can easily drop it into social media ads, email campaigns, print flyers, or website banners without a ton of extra editing.
Bottom line: learning how to properly shoot with a photography white background gives you a solid foundation for all your visual marketing. It guarantees your products look their best, keeps you in line with marketplace rules, and helps you build the kind of consistent, trustworthy brand that people want to buy from.
Choosing the Right Gear for a Clean Shot
Getting that perfectly clean, seamless white background all starts with your gear. But let me be clear—this doesn't mean you need to go out and buy the most expensive equipment you can find. Making smart choices with your tools will always have a bigger impact than just a high price tag.
What we're really aiming for is a reliable setup that puts you in complete control of the final image. Every single piece, from the camera in your hand to the surface your product sits on, plays a part in getting a professional-looking shot.
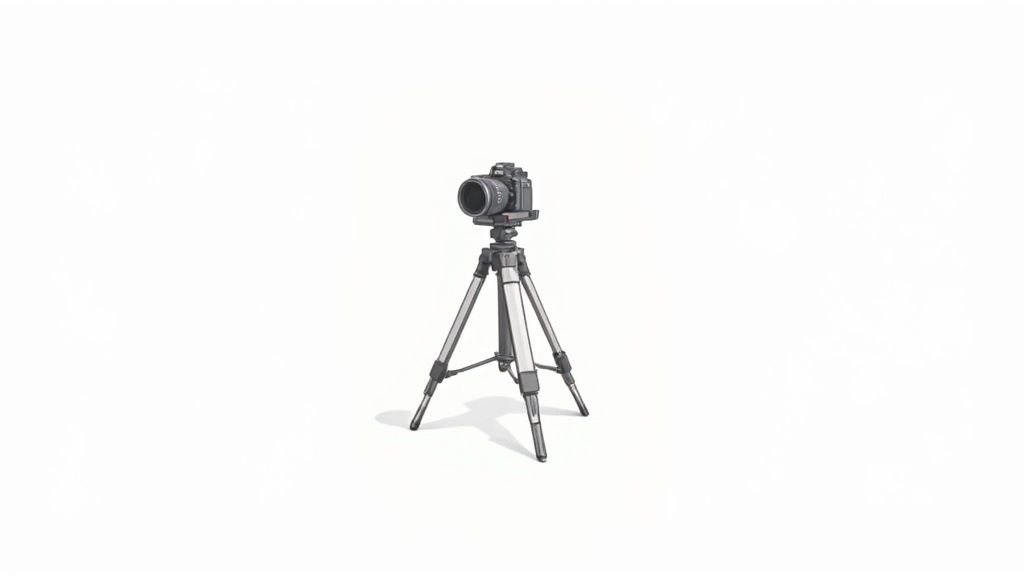
Your Camera and Lens Combination
Look, almost any modern camera can take a decent picture. For the controlled world of studio product photography, however, some are definitely better than others. The one non-negotiable feature? Manual control. You absolutely have to be able to adjust aperture, shutter speed, and ISO independently to get your lighting right.
This is why DSLR and mirrorless cameras are the top contenders. They give you that essential control and let you swap out lenses. I often give the edge to mirrorless cameras because their electronic viewfinders are a game-changer. You get a live preview of your exposure, which means you see exactly how your settings will affect the shot before you even take it. It’s a massive time-saver.
When it's time to pick a lens, you can't go wrong with a "nifty fifty"—a 50mm prime lens. It's a classic for a few very good reasons:
- Minimal Distortion: It captures things pretty much how our own eyes see them, so you won't get that weird, distracting warping you sometimes see with wider lenses.
- Sharpness: Prime lenses are built for one job, and they do it well. They're almost always sharper than a zoom lens in the same price range.
- Affordability: A 50mm f/1.8 is hands-down one of the best bang-for-your-buck lenses you can buy.
Pairing a capable camera body with a sharp prime lens like this gives you a rock-solid foundation for capturing crisp, clean product photos.
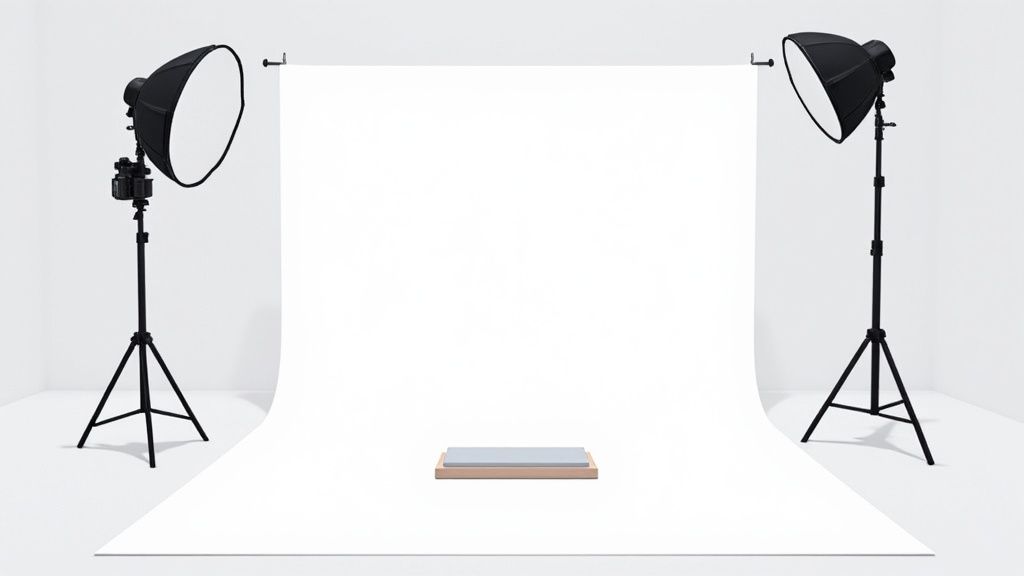
Selecting the Ideal White Backdrop
Your background is just as important as your camera. The right surface makes lighting a breeze and can slash your editing time later on. You’re looking for something that is pure white, doesn't reflect light, and is big enough to fill the entire frame behind your product.
Let's break down a few of the go-to options I've used over the years.
| Backdrop Type | Best For | Pros | Cons |
|---|---|---|---|
| Seamless Paper Roll | Dedicated studio spaces | Gives you a perfectly smooth, clean surface that you can just roll out. | Can be bulky and is easily damaged or dirtied. |
| Collapsible Backdrop | Mobile or temporary setups | Super portable and incredibly fast to set up and tear down. | Prone to wrinkles and might not be big enough. |
| V-Flat | Small products, budget setups | Cheap, versatile for bouncing light, and you can even make it yourself. | Less durable and requires careful handling. |
A roll of seamless paper, like Arctic White from Savage Universal, is pretty much the industry standard for a reason. It creates a perfect, creaseless "sweep" from the wall to the floor, which is key to eliminating ugly shadows around the base of your product. If you're tight on space or need to pack everything away after a shoot, a 5-in-1 collapsible reflector is a fantastic, versatile tool that usually includes a white side.
Here's a pro tip: The goal isn't to get a perfect #FFFFFF white straight out of the camera. The backdrop's real job is to be a clean, evenly lit canvas. This makes it easy for you (or an AI tool) to isolate the product later. If you try to blow out the background completely with your lights, you’ll often get light wrapping around your subject, which softens its edges and makes it look hazy.
Your choice really comes down to your budget, your space, and what you’re shooting. A small business selling jewelry might get by just fine with a V-flat made from foam core. A studio shooting furniture, on the other hand, will need a massive seamless paper roll. The main thing is to pick something that gives you an even, uncluttered field of white to work with. Get that right, and you're perfectly set up for the most important step: lighting.
Mastering Light for a Perfect White Background
Let’s be honest: lighting is everything when you're trying to nail that seamless, pure white background. It's the single factor that separates a professional-looking product shot from something that looks like it was hastily cut out in a cheap app. The core principle is deceptively simple, but it’s a game-changer: you have to light your background and your product independently.
If you just blast everything with a single light source, you’re asking for trouble. You end up with a messy battle of competing shadows and hotspots. Your product throws a distracting shadow onto the background, and the light meant for your subject spills everywhere, turning your "white" background into a dull, muddy gray.
By separating your lights, you give yourself complete control. This approach lets you intentionally overexpose the background just enough to blow it out to pure white—all without that harsh light spilling onto your product and destroying its details, colors, and textures. It takes a few extra minutes to set up, but the payoff in quality and reduced editing time is enormous.
The Foundational Two-Light Setup
The most reliable and effective way to get clean white backgrounds involves at least two lights. One for the product, and one for the background. This is the setup I come back to again and again for consistent, high-quality results.
First, you have your main light, which we call the key light. Its only job is to illuminate your product. I typically place this at a 45-degree angle to the side of the subject and slightly above it. This positioning is classic for a reason—it carves out the product's shape, brings out texture, and gives it a sense of three-dimensional form.
Your second light is aimed only at the white background. You’ll want to place it so it’s hidden from the camera's view, usually behind the product itself, to prevent any nasty lens flare. This light's sole purpose is to make that backdrop brilliantly and evenly white.
This simple diagram shows a common starting point for product photographers, often called three-point lighting.
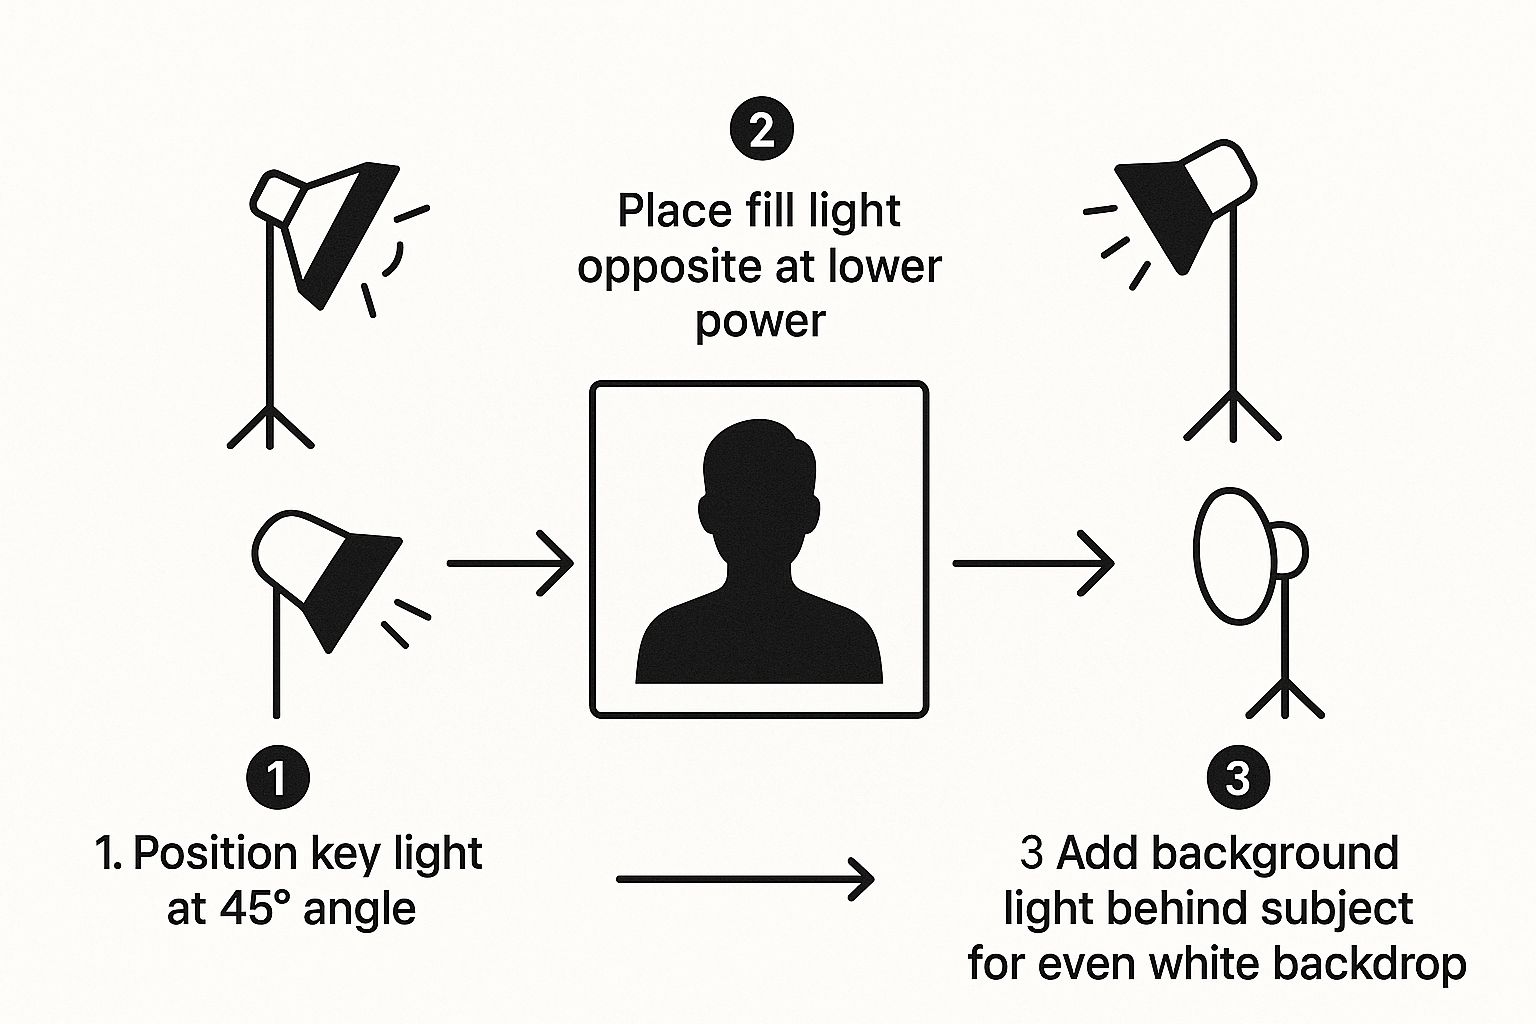
As you can see, the key is assigning a specific role to each light. When every light has one job, you get a balanced, professional image with that perfectly clean background.
Refining Your Light with Modifiers
Pointing a raw, unmodified flash at your product is a recipe for harsh, ugly light. You’ll get hard-edged shadows and those bright, distracting glare spots called specular highlights, especially on shiny surfaces. This is where light modifiers become your best friend.
A light modifier is simply anything you put between your light source and your subject to shape or soften the light. For this kind of product photography, they are absolutely non-negotiable.
Here are a few of the most common ones I use:
- Softboxes: These are my workhorses for most product shoots. A softbox diffuses the light through one or more layers of fabric, creating a soft, even glow that wraps beautifully around the subject. This is fantastic for minimizing harsh reflections and creating gentle shadows that define the product's shape.
- Umbrellas: Generally less expensive than softboxes, umbrellas are great for spreading light over a very wide area. A "shoot-through" umbrella, in particular, creates a broad and very soft light source, making it perfect for lighting larger products or even the background itself.
- Reflectors: Don’t underestimate the power of a simple piece of white foam core. A reflector isn't a light source on its own, but it’s a critical tool for bouncing light from your key light back into the shadows. This "fills in" dark areas, revealing more detail without needing another expensive flash.
Here's a key takeaway: The goal of most modifiers is to make your light source effectively larger in relation to your subject. A bigger light source creates softer light. Think about the difference between a clear, sunny day (a small, harsh light source) and an overcast day (a massive, soft light source).
The right modifier really depends on what you're shooting. For a product with a matte finish, a big softbox is perfect. For something highly reflective like a chrome teapot, you might need an even larger diffusion panel to create a single, clean reflection.
Lighting Modifier Comparison for White Backgrounds
Choosing the right tool can feel overwhelming, but understanding their basic properties makes it much easier. Each modifier shapes light differently, so the one you pick will have a big impact on the final look of your product's textures and reflections.
| Modifier | Light Quality | Best For | Ease of Use |
|---|---|---|---|
| Softbox | Soft, directional, controlled | Most products, creating defined shapes, controlling reflections | Intermediate |
| Umbrella | Very soft, wide, less controlled | Large products, evenly lighting backgrounds, groups | Beginner |
| Reflector | Bounced, fill light (softness depends on source) | Filling in shadows, adding subtle highlights | Beginner |
| Bare Bulb | Hard, high-contrast, specular | Creating dramatic, edgy looks or mimicking direct sunlight | Advanced |
Ultimately, experimenting is key. A softbox gives you the most control, but a simple umbrella and reflector combo can produce stunning, professional results when used correctly.
Budget-Friendly Lighting Solutions
You don't need a studio packed with thousands of dollars in gear to get started. I’ve seen incredible results achieved with a single off-camera flash and some creativity.
Here’s a practical single-light workflow if you're on a tight budget:
- Set your light. Place your one flash or strobe to the side, aimed at your product, just as you would with a key light.
- Bring in a reflector. On the opposite side of your product, prop up a white reflector (foam core is perfect) to bounce light back and soften the shadows.
- Create distance. Make sure you have a good amount of space between your product and the white background. The farther away the product is, the less likely your light will hit the background and cast a shadow.
- Shoot the background separately. This is the real trick. If you can’t get the background to pure white in one shot, take two. First, photograph the product as described above. Then, without moving your camera or product, turn off the light on the product and use that same flash to light up just the background. You can then easily stack and combine these two images in post-processing.
This two-shot method takes a bit more work in Photoshop, but it's a fantastic way to learn the principles of light control without breaking the bank. Mastering these fundamental lighting techniques is, without a doubt, the most valuable skill you can develop for creating incredible product images.
Nailing Your Camera Settings for Crisp Product Photos
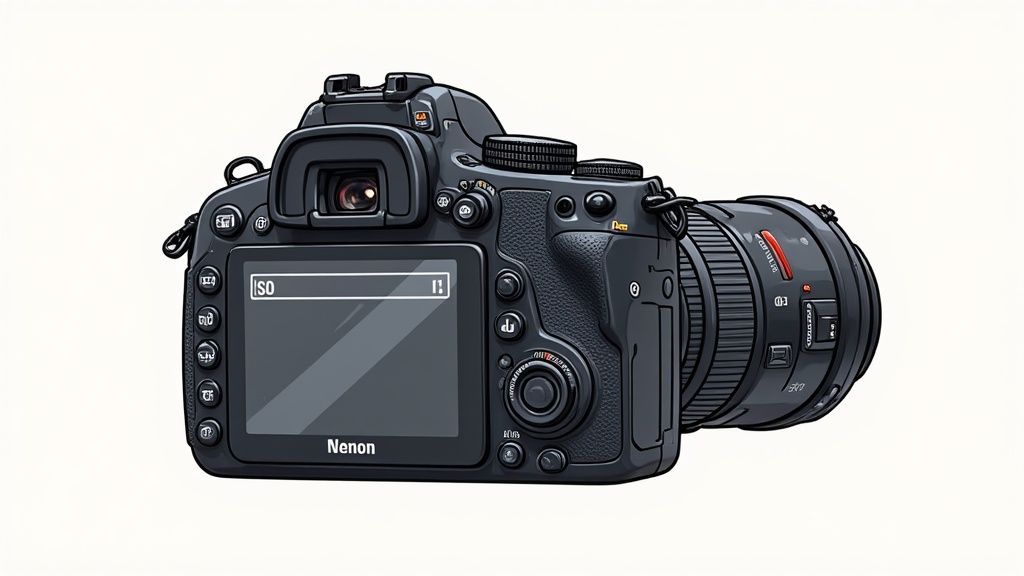
Alright, your gear is set up and the lights are in position. Now it's time to take the reins and tell your camera exactly what to do. Forget the automatic modes—for clean, professional product photography, you absolutely need to be in Manual Mode (M). This gives you direct control over the "big three" of exposure, making sure every shot is sharp, bright, and precisely what you envisioned.
Think of ISO, aperture, and shutter speed as your three main levers. In a controlled studio environment, the game is a little different than shooting out in the wild. Your main goal here is to capture the cleanest, most detailed image possible. This means we'll prioritize certain settings to get those pristine, ready-for-e-commerce shots.
Lock Down a Low ISO
First thing's first: your ISO. You're going to want to set this to your camera's base level, which is almost always ISO 100 or sometimes 200. In a studio where you control all the light, there’s simply no reason to crank it up higher.
A low ISO gives you the cleanest possible image file, free from that distracting digital noise or grain. This is how you maximize detail and get true-to-life colors, creating a high-quality foundation for any edits you do later. A grainy image can make a product look cheap and unprofessional, so starting clean is non-negotiable.
Choosing the Right Aperture for Product Focus
Next up is aperture, or f-stop. This is all about depth of field—basically, how much of your product is in sharp focus from the closest point to the farthest. For most product shots, the goal is simple: get the whole thing sharp.
A common mistake I see is shooting with a wide-open aperture (like f/1.8) just to let in more light. That creates a paper-thin sliver of focus, leaving most of your product looking soft and blurry.
For small to medium-sized products, an aperture around f/8 or f/11 is usually the sweet spot. It provides a deep enough depth of field to keep the entire subject tack-sharp. If you're shooting something larger, you might even need to push it to f/16 to get everything in focus.
Syncing Your Shutter Speed with Your Lights
With your ISO and aperture dialed in, the shutter speed is the last piece of the exposure puzzle. When you're working with strobes, the shutter speed's main job is simply to sync up with the flash. Most cameras have a maximum speed at which they can do this, typically around 1/200s or 1/250s.
Setting your shutter speed at or below this limit ensures the camera's shutter is fully open at the exact moment the flash fires. It’s a technical detail, but it’s critical for getting a perfectly and evenly lit shot.
Here’s a quick recap of the workflow:
- Set ISO: Start at your camera's base (e.g., ISO 100) for the best quality.
- Set Aperture: Choose a setting like f/8 or f/11 to keep the whole product sharp.
- Set Shutter Speed: Use your camera’s flash sync speed (e.g., 1/200s).
- Adjust Flash Power: Now, use the power controls on your lights to get the exposure perfect.
This methodical approach is your key to consistent, repeatable results. Beyond just the settings, remember that optimizing camera angles is another huge part of making your products look their best.
Fine-Tuning Color and File Type
Finally, let's talk about two crucial settings that will save you a world of headache in post-production. First, set a custom white balance. Don't ever trust "Auto White Balance" in the studio; it can drift from shot to shot. Grab a grey card, take a reference photo under your lights, and set the white balance from that. This guarantees your colors are accurate and consistent across the entire shoot.
And the most important tip of all? Always, always shoot in RAW. A RAW file is the digital equivalent of a film negative—it contains all the untouched data from your camera's sensor. JPEGs, on the other hand, compress the file and throw information away. Shooting RAW gives you maximum flexibility to adjust exposure, recover details, and perfect colors later without destroying the image quality.
Fine-Tuning Your Shots with AI Photo Tools
Getting a great shot straight out of the camera is a huge win, but the real magic happens in post-processing. This is where you polish your images to perfection. A smart editing workflow can save you from hours of tedious manual work, turning good photos into incredible e-commerce assets.
Your first pass will likely happen in software like Adobe Lightroom, where you'll make essential tweaks to color and exposure. After that, though, the real game-changer comes from specialized AI tools. These platforms are built to handle the most time-consuming parts of product photography with stunning speed and precision.
The Power of Automated Background Removal
For anyone shooting photography white background images, the biggest headache has always been getting a perfect, clean cutout of the product. For years, the only way was to painstakingly trace every edge with the Pen Tool in Photoshop. Depending on the product's complexity, this could take a few minutes or even a full hour for just one photo.
Today, AI-powered software can do the same job in seconds. You just upload your image, and a smart algorithm gets to work. It analyzes the scene, identifies your product, and cleanly snips it from the background, leaving you with a pixel-perfect cutout ready for a pure white canvas.
The old way was all about manual precision and a whole lot of patience. The new way is about speed and consistency. AI tools don't just remove the background; they remove a massive bottleneck from your entire workflow, freeing you up to focus on the more creative stuff.
This is a much better approach than just trying to "blow out" the background with powerful lights during the shoot. Overpowering your background lights often causes that light to wrap around your product, which softens its edges and creates a hazy, unprofessional look. An AI-driven process keeps those edges sharp and defined.
A Modern Workflow for Flawless Results
Switching to an AI-focused editing process is surprisingly simple and incredibly effective. It's the best way to guarantee every single product on your website has the exact same #FFFFFF white background, creating that clean, cohesive look that builds trust with customers.
Here’s how a practical workflow using a tool like ProdShot looks:
- Initial RAW Processing: Start in your favorite editor, like Lightroom or Capture One, for basic adjustments. Nail the white balance, tweak the exposure on the product itself, and make sure the colors are spot-on. Don't waste time trying to perfect the background here.
- Export Your Image: Save the corrected photo as a high-quality JPEG or TIFF file. This is the version you'll use for the next step.
- Upload to an AI Tool: This is where things get fast. Upload your image to an AI platform. The software automatically finds your product and generates a clean cutout.
- Final Touches and Download: The platform then places your isolated product onto a pure white background. You can usually make final tweaks to shadows or positioning before downloading the final, marketplace-ready image.
If you’re dealing with a large volume of images, the time savings really start to add up. You can learn more about how this efficiency scales in our guide on https://prodshot.net/photo-editing-services-for-ecommerce.
Why AI is the Future of Product Photography
This shift toward automation in photo editing isn't happening in a vacuum; it fits perfectly with where the industry is heading. Upcoming photography trends show a strong preference for minimalism and clarity—an aesthetic that a clean white background serves perfectly.
This isn’t just about saving time anymore; it’s about opening up new creative doors. For anyone looking to automate parts of their editing, exploring the top AI image models can be a huge help. These tools can do more than just remove backgrounds; some can generate realistic shadows or even place your products in entirely new virtual settings.
Ultimately, the goal is to produce high-quality, consistent images faster and more affordably than ever. By bringing AI into your workflow, you shift your role from a manual editor to a creative director, guiding the technology to produce the exact look your brand needs to succeed online.
Common Questions About White Backgrounds
Even when you have all the right gear and a solid lighting plan, getting that perfect white background can still be a bit of a headache. It's a common stumbling block for a lot of photographers, but don't worry—the fixes are usually simpler than they seem. Let's walk through some of the questions I hear all the time.
A classic problem is getting a final photo where the background looks dull and grey instead of pure, crisp white. This almost always boils down to one simple issue: your background isn't getting enough light. You have to remember to light your background and your product as two separate things.
So, if your backdrop is coming out grey, you just need to pump more power into the lights hitting it. The sweet spot is making the background about one to two stops brighter than your subject. Your camera's histogram is your best friend for this. You want to see the data spike for the background pushed all the way to the right edge, just before it starts "clipping" or blowing out.
Why Are There Shadows Around My Product?
It’s incredibly frustrating when you do everything right, only to find pesky shadows creeping onto your clean background. This is usually a spacing issue. When your product is sitting too close to the backdrop, the light you're using to illuminate it (your key light) is bound to spill over and cast a shadow.
Thankfully, the fix is easy: create more distance. Pull your product further away from the backdrop. Giving it some breathing room allows your background light to work its magic and completely wash out any shadows from your main light. As a bonus, this also stops the bright background from bouncing light back onto your product, which can create a hazy outline and soften its edges.
The demand for that professional, shadow-free look is a massive force in the photography world. In fact, the global photography services market was valued at a staggering $55.6 billion in 2023 and is only expected to climb, with commercial product photography leading the charge. This just goes to show how critical high-quality visuals really are.
Can I Use a Window Instead of Strobes?
You absolutely can. Natural light from a big window can create gorgeous, soft light that works wonderfully for product shots. The big catch, though, is the total lack of control. The sun is always on the move, clouds can roll in at any moment, and the color of the light changes drastically from morning to evening.
If you decide to go the natural light route, here’s how to make it work for a white background:
- Find the right spot: Set up next to a large, north-facing window if you can. This gives you soft, indirect light that's much easier to work with.
- Bring in a reflector: On the side opposite the window, place a large white reflector (even a piece of foam core works great) to bounce light back and soften any harsh shadows.
- Create separation: Just as you would with studio lights, make sure there's plenty of space between your product and your white backdrop to keep shadows at bay.
You can definitely get some beautiful results this way, but you'll always be at the mercy of the weather and time of day. That lack of consistency makes it tough to create a cohesive look for an entire product line. Understanding the pros and cons is key, and you can learn more about the cost of professional product photography to see how different setups impact the budget.
Ready to skip the tedious setup and editing altogether? ProdShot uses AI to instantly create perfect, studio-quality product photos with flawless white backgrounds from a simple smartphone picture. Stop wrestling with lights and software—get your free trial at https://prodshot.net and see the difference.