
Let’s be honest, changing the background of a photo used to be a real chore. But these days, it’s often as simple as a single click. This one small edit can completely transform a picture, taking it from a quick snapshot to something that looks polished and professional.
Why Bother Changing the Background?
The background of a photo isn't just empty space—it’s the stage for your subject. It sets the mood, provides context, and directs the viewer's eye. Get it wrong, and a cluttered or boring background can completely undermine what you’re trying to show. Get it right, and your subject truly pops.
Think about a product you’re selling online. If it’s sitting on a messy desk, it looks amateur. But swap that background for a clean, solid color, and suddenly the product itself looks more valuable and appealing.
This is why knowing how to properly change a photo's background is such a killer skill for anyone creating visual content. It goes beyond just making things look pretty; it's about telling a better story.
- Selling Online: Using a consistent background for all your products builds a clean, professional brand that customers trust.
- Social Media: A unique background can stop someone mid-scroll, making your posts stand out in a sea of content.
- Professional Headshots: A simple, neutral background for a profile picture on LinkedIn screams focus and competence.
The massive demand for high-quality images has pushed editing technology forward at an incredible pace. The market for background removal software alone was valued at roughly USD 1.5 billion in 2024 and is expected to explode to USD 5.2 billion by 2033, all thanks to the rise of AI.
Comparing Photo Background Editing Methods
Not all background editing techniques are created equal. Depending on your needs, timeline, and skill level, one method might be a much better fit than another. Here’s a quick breakdown to help you decide.
| Method | Best For | Skill Level | Typical Speed |
|---|---|---|---|
| AI-Powered Tools (like ProdShot) | E-commerce, social media, quick edits | Beginner | Seconds to a minute |
| Manual Selection (like Photoshop) | Complex images with fine details | Intermediate to Advanced | 15-45 minutes |
| Mobile Apps | On-the-go editing, casual posts | Beginner | A few minutes |
| Outsourcing to a Designer | High-volume or critical projects | N/A (Hiring skill) | Hours to days |
While manual methods have their place for highly detailed work, AI tools have become the go-to for most everyday tasks because of their incredible speed and accessibility.
The Speed of Modern Tools is a Game-Changer
What used to take an expert designer ages of careful, manual outlining in complicated software can now be done in seconds. This isn't just a minor improvement; it's a fundamental shift in how we create visuals. When you understand the elements that go into stunning product photography, you can see why an easily adaptable background is such a powerful part of the creative toolkit.
Just look at the time savings.
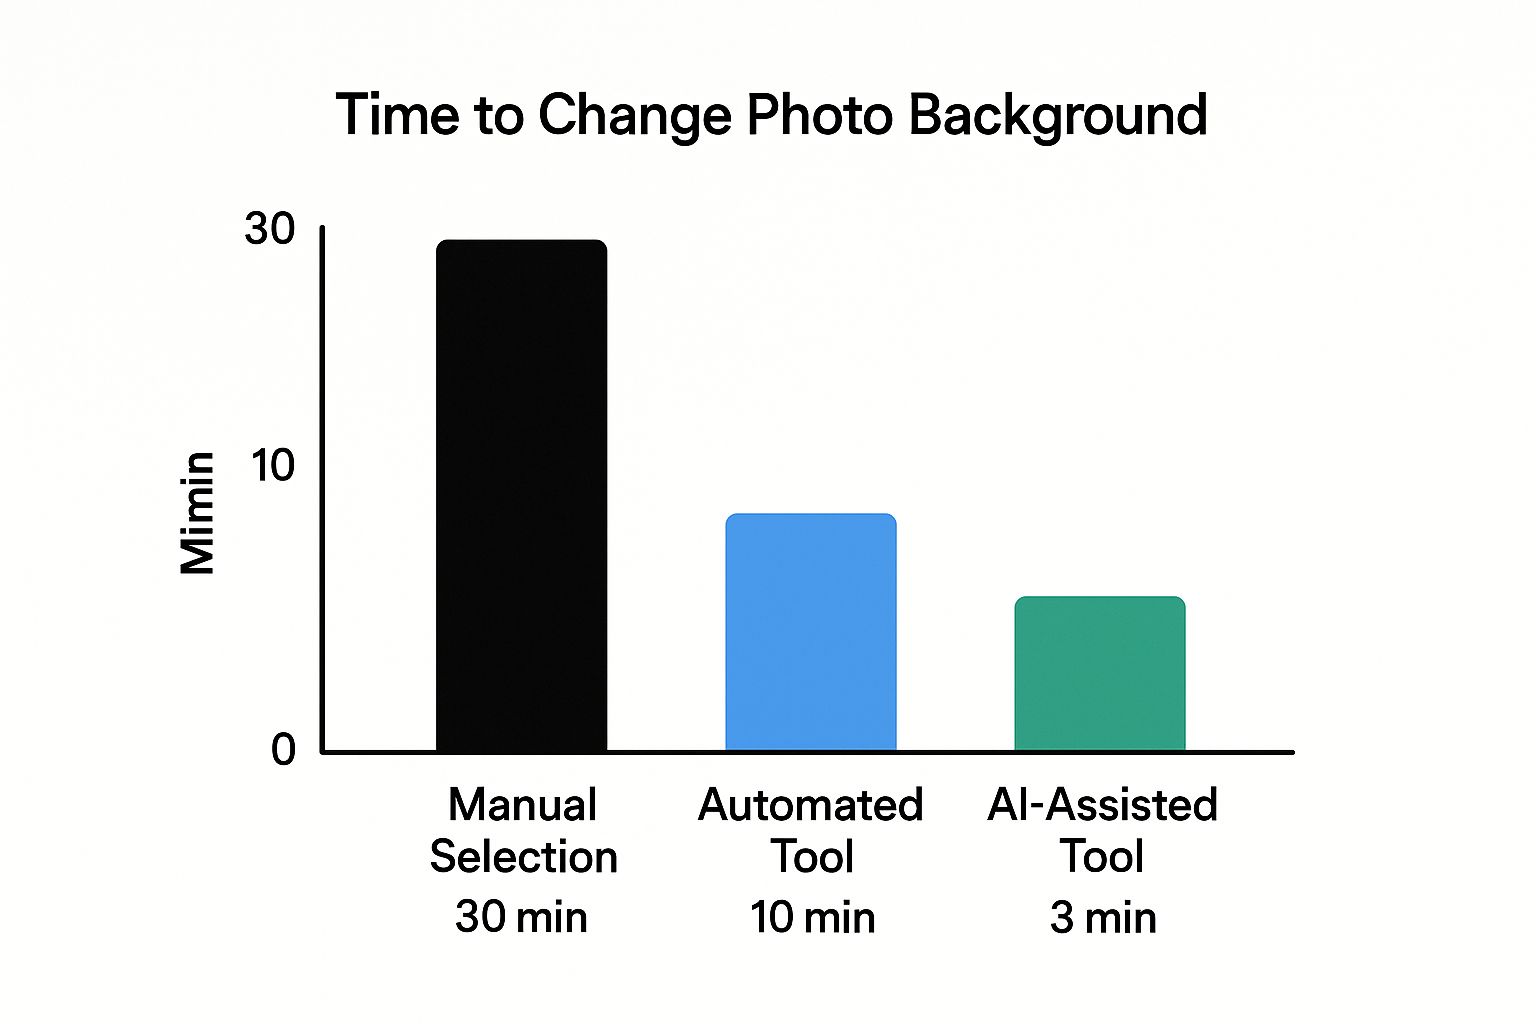
AI-driven tools can slash editing time from 30 minutes down to just three. That’s a massive 90% reduction in time and effort. For business owners, marketers, and creators, this efficiency means you can produce a huge volume of high-quality images without getting bogged down in tedious editing.
How to Prepare Your Photo for a Flawless Edit

Before you dive into changing a photo's background, remember this: a little prep work makes all the difference. The quality of your starting image has a massive impact on the final result. Think of it like building a house—a shaky foundation leads to a wobbly finish.
The whole point is to give your editing tool, especially an AI one, the cleanest possible data to work with. Get this right, and you’ll minimize weird artifacts and slash the time you spend on manual clean-up.
Select a High-Quality Source Image
This is non-negotiable. A blurry, low-resolution picture will never give you a crisp, professional cutout. Always, always start with the highest resolution file you have.
Here’s what I look for in a great source photo:
- Clear Subject Definition: The edges of your main subject need to be sharp and in focus. Soft, fuzzy edges are a nightmare for any software to trace accurately.
- Good Lighting: Your best friend here is even, bright light. Harsh shadows can eat into the edges of your subject, confusing the AI about where the person ends and the background begins.
- Strong Contrast: An image of a person in a dark shirt against a light, plain wall? Perfect. That clear color difference makes it incredibly easy for the software to see the boundary, leading to a much cleaner separation.
A subject shot against a busy, cluttered background (like a crowded street) is infinitely harder to isolate than one against a simple, solid-colored wall. Making that choice when you take the picture can literally save you hours in editing.
Make Simple Pre-Editing Adjustments
Once you've picked a solid photo, a few quick tweaks can make the AI's job even easier. We're not talking about complex retouching here, just simple moves to help isolate your subject and cut out the visual noise.
One of the most effective tricks is a simple crop. By cropping in tightly around your subject, you get rid of distracting background junk that might throw off the AI. This forces the tool to focus its attention exactly where you want it—a perfect first step before you change the background.
Using AI to Change Your Background in Seconds
This is where you can reclaim hours of your life. Forget about the tedious old days of complicated layers, manual selection tools, and tracing around objects pixel by pixel. Modern AI tools, like ProdShot, have completely flipped the script. What used to be a specialized skill is now something you can do in less time than it takes to make a cup of coffee.
The whole process is incredibly straightforward. You give the AI your image, and it does all the heavy lifting—analyzing the photo, identifying the subject with mind-blowing precision, and wiping away the background with a single click. This isn’t some clumsy gimmick anymore; it’s a powerful and genuinely accurate solution that works for everyone, from seasoned pros to complete beginners.
The One-Click Removal Process
Let’s look at a classic e-commerce problem. You’ve taken a great shot of a new handbag, but it’s sitting on your kitchen table, and the background is a mess of clutter. You need that product on a clean, white background for your online store, and you need it fast.
With an AI tool, your workflow is refreshingly simple:
- Upload the Image: Just drag and drop your photo of the handbag into the editor.
- Let the AI Work: The tool instantly gets to work, detecting and erasing the kitchen table and everything else you don't want.
- Add Your New Background: Pick a solid white color from the built-in palette.
- Download and Go: Your professional product shot is ready for your store.
The entire sequence takes seconds, not hours. The AI has been trained on millions of images, so it knows how to handle the tricky parts, like the gaps in a handbag strap or the fine texture of the leather. It preserves details that would be a nightmare to select by hand.
For anyone running a Shopify store, this is a massive time-saver. We’ve actually detailed how you can specifically https://prodshot.net/remove-background-shopify to get your product listings looking sharp and consistent.
Think about this: today's AI tools can isolate subjects with up to 95% accuracy. This has opened up professional-level editing to the 75% of users who don't have advanced photo editing skills. It's a fundamental shift in who can create high-quality images.
Beyond Solid Colors: Custom Backgrounds
But simply swapping in a plain white background is just the beginning. The real creative power comes from using custom backgrounds to build a mood, create a context, or tell a story.
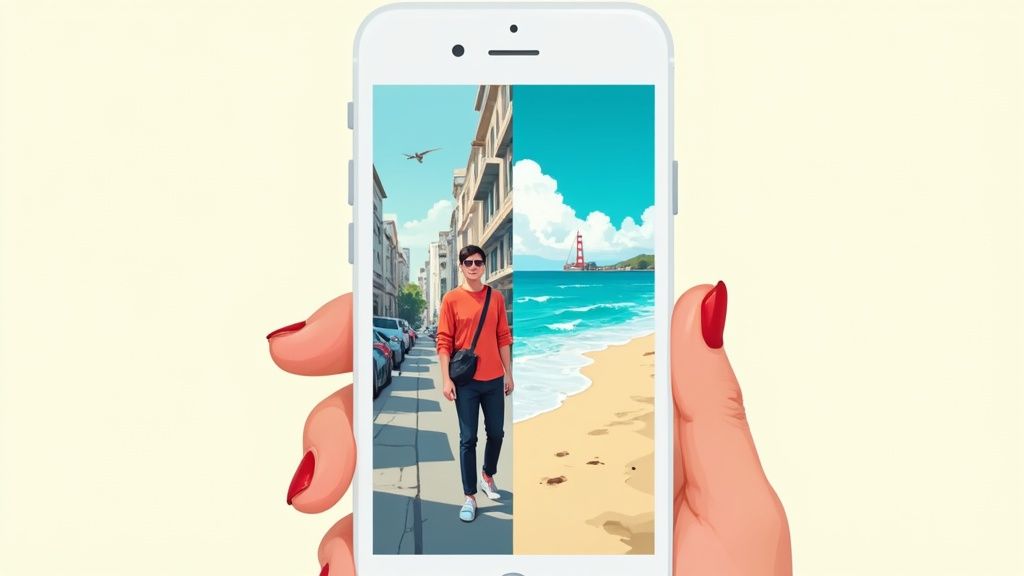
Imagine you're putting together a social media post for your travel blog. You've got a fantastic portrait of yourself, but the background is just your boring living room wall. Instead of a solid color, you could upload a photo of a breathtaking mountain vista or a vibrant city street and drop your portrait right into the scene.
Here are a few ways I've seen this used effectively:
- Product Marketing: Placing a waterproof watch against a dynamic image of splashing water.
- Personal Branding: Swapping the background of a professional headshot to a sleek, modern office setting.
- Creative Content: Transporting a person into a fantasy landscape for a piece of digital art.
The possibilities are pretty much endless. If you want to take it a step further and create truly unique backdrops from scratch, learning how to generate AI images from text can be a game-changer. You can literally describe the exact scene you're picturing and have the AI create it for you.
A Look at Other Tools for Background Editing
While one-click AI tools are incredible for speed, sometimes a project calls for a different set of hands—or a lot more manual control. The world of photo editing is packed with powerful software built for every imaginable skill level and task. Getting to know the alternatives helps you pick the right tool for the job, every single time.
This isn't just a niche skill anymore; it's a massive market. In 2023, the global background editing software market was valued at a cool USD 1.2 billion. It’s expected to explode to USD 4.4 billion by 2030, which tells you just how critical this capability is for everyone from e-commerce sellers to content creators.
Desktop Software for When Precision is Everything
For those jobs that require absolute, pixel-perfect detail, nothing really beats traditional desktop software. I'm talking about the industry titan, Adobe Photoshop. There's a reason it's been the go-to for decades. While AI is great for knocking out 90% of the work in seconds, Photoshop gives you the deep toolkit needed for that final, crucial 10%.
Its real power is in the advanced selection tools that go way beyond what most AI can do right now:
- The Pen Tool: This is your best friend for creating incredibly smooth, precise vector paths around complex objects. It gives you total control over every curve and corner, something automated tools can still struggle with.
- Select and Mask: A dedicated workspace designed for the really tough stuff—hair, fur, and semi-transparent objects. This is how you get cutouts that look truly natural and not like they've been hacked out with digital scissors.
- Layer Masks: Instead of permanently deleting a background, you use non-destructive masks to simply hide or reveal parts of an image. This means you can go back and make tiny adjustments later without having to start over.
The sheer number of options in an interface like Photoshop's highlights its biggest strength and weakness: unparalleled control, but a much steeper learning curve than a single-purpose AI tool.
Mobile Apps for Quick Edits on the Move
On the other end of the spectrum, you have mobile photo editing apps. Think Picsart or Snapseed. These are perfect when you just need to swap out a background for a quick social media post or a casual project. Their interfaces are built for touchscreens, making them incredibly fast and intuitive.
You can often remove a background with just a few taps and then drop your subject onto a new image right from your camera roll. They don't offer the microscopic precision of Photoshop, but for creators working primarily from their phones, the convenience is unbeatable.
Pro Tip: The best tool isn't always the most powerful one; it's the one that fits your workflow. For quick social media content, a mobile app is often way more efficient than firing up a beefy desktop program.
Ultimately, choosing the right tool comes down to balancing your need for speed, control, and convenience. If you're managing a high volume of images for an e-commerce store, our specialized product photo editing services can provide a professional, hassle-free solution. For those interested in exploring more advanced AI capabilities, checking out the top AI tools for photo editing can open up a whole new world of creative options.
Advanced Tips for a Truly Realistic Look

Getting the background swapped out is really just the first part of the job. The true artistry comes in making the final image look so natural that no one would ever suspect it was edited. This is where you move beyond a simple cut-and-paste and into creating a believable, professional composite.
What separates an okay edit from a great one are the subtle details our brains pick up on instantly. Think about lighting, shadows, and how the edges of your subject blend into the new scene. Nail these, and you'll sell the illusion every time.
Match Your Lighting and Colors
Nothing screams "fake" faster than mismatched lighting. If your subject was photographed under cool fluorescent lights and you drop them into a warm, sunset scene, it’s going to look jarring and wrong. Harmonizing the light is your top priority.
- Lighting Direction: Look at the new background. Where is the main light source? If the sun is on the left, the shadows on your subject need to fall to the right. It sounds simple, but getting this wrong is an immediate giveaway.
- Color Temperature: Does the new background feel warm and sunny, or is it cool and overcast? Use your photo editor's temperature and tint sliders to shift your subject’s color balance until it feels like it belongs in that same environment.
- Light Intensity: A subject blasted with bright, direct sun will look completely out of place in a dimly lit, moody interior. Play with the brightness and contrast of your subject until it blends in seamlessly.
The human eye is incredibly good at spotting inconsistencies in light and shadow. Spending a few extra minutes to match the light's direction and color will do more for realism than any other single tweak you can make.
Soften Edges and Add Shadows
Even the most advanced AI tools can leave you with edges that are just a little too perfect, a little too sharp. In the real world, light diffuses and wraps around objects, creating softer transitions. This is an easy fix that makes a huge difference.
Most editing software has a "feather" or "soften edge" tool. Don’t go crazy with it—blurring the selection by just 1 or 2 pixels is often all you need to create a much more organic blend between your subject and the new background.
Finally, a subject without a shadow looks like it’s floating in space. Adding a shadow is what "grounds" your subject in its new home. It doesn't need to be complex; sometimes, a simple, soft, dark oval placed beneath the subject is enough to anchor it to the scene and make the entire composite far more convincing.
Common Questions About Changing Photo Backgrounds
Even with the best tools, you'll eventually hit a snag when changing a photo's background. It happens to everyone. Let's walk through some of the most common hurdles I see and how to clear them like a seasoned pro.
Getting these little details right is what makes an edit look truly professional, not just a quick fix.
How Do I Get a Clean Cutout Around Hair or Fur?
Ah, the classic challenge. Hair, fur, and other fuzzy details are the ultimate test for any background removal tool. While today's AI is remarkably good, you sometimes need to step in to avoid that chunky, "helmet head" effect.
Your best defense is a good offense: start with a photo where your subject is well-lit and pops against the background. Good contrast makes the software's job much easier. If an automated tool is still struggling, you'll need to jump into an editor with a "refine edge" or "select and mask" tool. These let you manually paint over the problem spots, telling the software exactly what to keep and what to toss.
Pro Tip: Don't obsess over getting every single strand of hair perfect. I've found that feathering the edge by just 1-2 pixels often creates a more natural blend than a razor-sharp but jagged cutout.
What Is the Best Image Format to Save My Photo?
Once you've nailed the edit, how you save it makes a huge difference. The file format you choose can either preserve all your hard work or undo it.
Here’s the simple breakdown I use:
- JPEG (or JPG): Pick this if you're placing your subject onto a new, solid background. JPEGs are fantastic for keeping file sizes manageable for the web, but remember, they do not support transparency.
- PNG: This is your go-to format when you need a transparent background. Saving as a PNG preserves that clean cutout, letting you drop your subject onto any background you want later on.
For most e-commerce and social media work, a high-quality JPEG or a PNG-24 file offers the sweet spot between image quality and file size. If you're juggling a ton of product shots, our guide on photo editing services for ecommerce dives deeper into optimizing your entire visual workflow.
Can I Change the Background of a Low-Resolution Photo?
Technically, yes. But it's important to set realistic expectations. Swapping the background on a low-res or blurry photo almost always leads to a low-quality result. The software has very little pixel data to analyze, which means you'll get fuzzy edges and a noticeable lack of detail.
If you have no other choice but to use a low-resolution image, my advice is to keep the new background extremely simple. A solid color or a very subtle gradient will be far more forgiving than a busy, detailed scene, which will just make the poor quality of your subject stand out even more.
Ready to create stunning, professional images in seconds? With ProdShot, you can remove backgrounds, add perfect lighting, and generate conversion-optimized visuals with the power of AI. Try ProdShot for free and elevate your product photography today.