
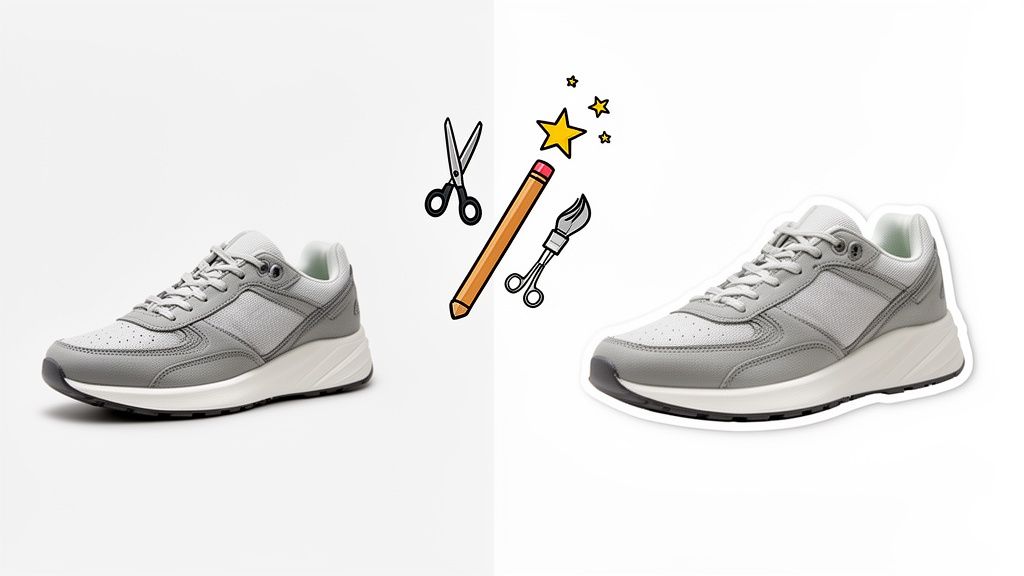
Here's the secret most people miss when trying to get a perfect cutout: the tool isn't the most important part. The photo you start with is.
Before you even think about searching for the best free background remover, spending a few minutes prepping your product shot can be the difference between a frustrating editing session and a flawless, professional result on the first go. These simple, no-cost techniques give the AI a massive head start.
How to Prep Photos for a Flawless Cutout
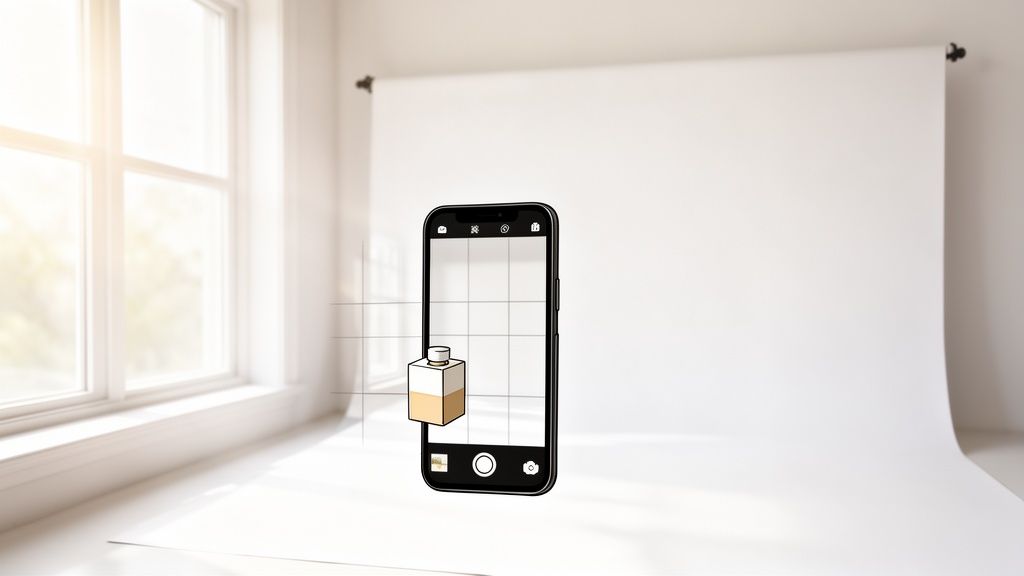
You really don't need a fancy studio to get this right. In fact, your smartphone and a couple of things you probably have lying around the house are more than enough to seriously improve your results.
The entire goal is to create a crystal-clear distinction between your product and whatever is behind it.
Think of it like this: an AI "sees" by analyzing pixels. When your product has sharp, well-defined edges against a simple background, the AI can confidently draw a clean line. A cluttered or messy background just creates confusion, and that’s when you get those jagged edges and weird artifacts we all hate.
Master Your Lighting and Background
Lighting and contrast are the two heavy hitters here. Get these right, and any background remover's job becomes ten times easier. First rule: forget your phone's built-in flash. It just creates harsh, ugly shadows that can completely throw off the AI.
Instead, go for natural light from a window. Set your product on a table near the window, but make sure it’s not in the path of direct, intense sunlight. This gives you soft, even light that wraps around your product and minimizes those troublesome shadows.
For the background, simpler is always better. A plain white or light gray poster board is a game-changer. This high-contrast backdrop gives the AI a clear silhouette to follow. You want to avoid busy patterns, textured surfaces, or anything with colors that are too similar to your product.
Pro Tip: If your product is white or very light, flip the script. Use a medium gray or even a black background to create that essential separation. It's all about contrast.
Framing and Focus for a Better Cutout
How you frame the shot matters, too. Don't shoot from across the room. Get closer and let the product fill most of the frame, but leave a little bit of breathing room around the edges. This gives the AI plenty of detail to work with.
And always, always tap your phone's screen right on the product to lock the focus. A blurry edge is an AI's worst nightmare and the fastest way to get a soft, amateurish-looking cutout.
Once you have a sharp, well-lit shot, you’re ready to roll. If your file size is a bit hefty for the web, you can easily tweak it. We cover exactly how to do that in our guide on using a free online image resizer.
Alright, you’ve got your perfectly shot photo. Now for the fun part: putting the free background removers to the test.
This is where the magic of AI really shines, but don’t expect a flawless one-click solution every time. Think of that first result as a solid starting point. The real pro touch comes from knowing how to polish that initial cutout into something truly ready for your storefront.
The Best Free Tools for the Job
Let's walk through a classic e-commerce challenge: a glossy product bottle. These are notoriously tricky. Reflections and see-through parts can easily confuse the software, which makes them perfect for seeing what these tools are made of.
The e-commerce boom has created a huge need for easy-to-use editing tools. The global background removal software market hit about $1.3 billion in 2024 and is on track to hit a massive $4.7 billion by 2033. This explosion has given small sellers a ton of powerful, free options to create images that can stand up against the big brands. You can actually explore more data on the background removal market to see just how big this trend is.
Let's compare two of the most popular free options out there.
Feature Comparison of Leading Free Background Removers
When you're choosing a free tool, not all are created equal. Some are faster, some give you more control, and others have limitations you need to be aware of. Here’s a quick head-to-head comparison of two popular choices, focusing on what matters most for e-commerce.
| Feature | remove.bg | PhotoRoom Free |
|---|---|---|
| Ease of Use | Extremely simple. Drag-and-drop interface with instant results. | Very user-friendly, with a slightly more feature-rich interface. |
| Cutout Quality | Excellent for simple objects, but can struggle with fine details like hair or fur. | Strong performance, often handles complex edges a bit better. |
| Manual Editing | Basic Erase/Restore tools are available and easy to use. | Good Erase/Restore tools, plus additional editing features. |
| Output Resolution | Free version is limited to a lower-resolution preview image (~0.25 megapixels). | Allows for higher-resolution downloads on the free plan. |
| Batch Processing | Not available on the free plan. | Limited batch processing available on the mobile app. |
| Watermarks | No watermark on the low-res output. | May add a small "PhotoRoom" watermark on free exports. |
For a quick, no-fuss removal on a simple product, remove.bg is fantastic. But if you need a higher-resolution image or are dealing with a more complex object, PhotoRoom's free version often gives you a bit more to work with.
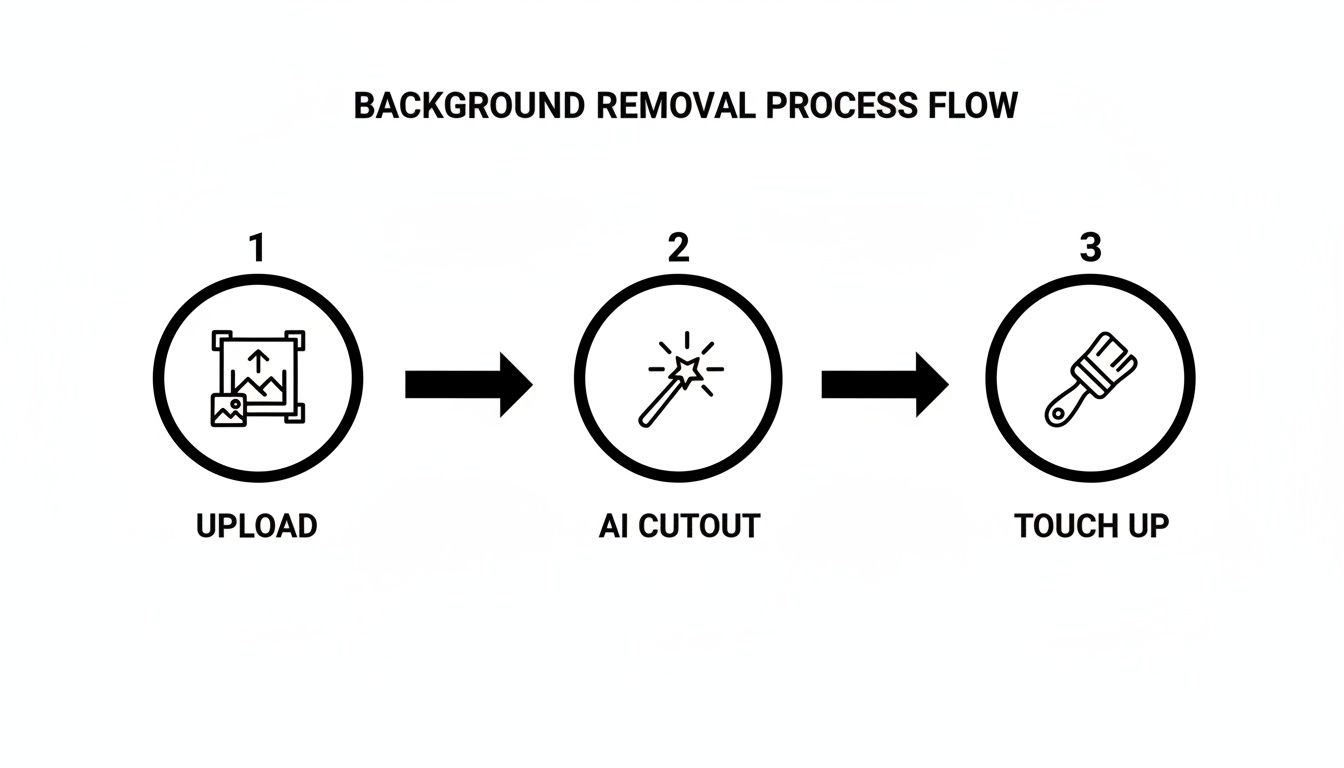
Your First Pass: The AI Cutout
The first step couldn’t be simpler. Just upload your photo to whichever tool you picked. In a few seconds, the AI will do its thing and give you the initial cutout. If it’s not perfect, don’t sweat it—this is just the raw clay you’re going to shape.
Take a good look at the result. Zoom right in on the edges. How did it handle the shiny highlights on the bottle? Are the curves smooth or a little choppy? If you were working on something like a necklace, you’d want to check if the AI correctly removed the background from between the tiny chain links.
Key Takeaway: The first AI cutout is almost never the final image. It’s a massive head start that saves you 90% of the work. Your job is to nail the final 10%.
Getting Hands-On: Refining the Edges
This is where the Erase and Restore brushes become your best friends. Pretty much every free tool has these, and getting good with them is what separates an okay image from a great one.
Let’s say the AI left a little bit of the background inside the handle of a coffee mug. You’d grab the Erase tool, make the brush a bit smaller than the area you need to clear, and just "paint" that leftover background away.
Or maybe the AI got a little too excited and erased part of your product, like the delicate stem of a wine glass. No problem. Just switch to the Restore brush. This tool brings back parts of the original image, letting you reclaim any details the AI accidentally snipped.
A few tips to make this process smoother:
- Soften Your Brush: If you have the option, use a brush with a softer edge. It helps blend your edits for a more natural look and avoids those sharp, obvious "edited" lines.
- Zoom In, Way In: You can’t fix what you can’t see. Get in as close as the tool will let you, especially around tricky textures or complex shapes.
- Change Up Your Brush Size: Use a bigger brush for large, simple areas and switch to a tiny, pixel-sized one for things like jewelry clasps or loose threads.
By combining the AI’s speed with your careful manual touch-ups, you can get a truly professional result without spending a dime. This hybrid approach is the smartest way to work when you're using free tools.
Alright, you've used a free tool to zap the background from your product photo. That's a great start, but we're not quite done yet.
A clean cutout is just the first step. To get that truly professional, "I-want-to-buy-this-now" look, you need to add back the little details that make an image feel real. A product just floating in a white void can look a bit… weird. Flat. Unconvincing.
The good news? You don't need to be a Photoshop wizard. A few simple tweaks, often in a free tool like Canva, can make all the difference.
The AI does the heavy lifting, but that "Touch Up" step is where your eye for detail will really make your product shine. Let's dig into what that actually means.
Add a Subtle Drop Shadow
Ever seen a product photo where the item looks pasted on? It's usually because it's missing a shadow. A simple drop shadow is the fastest way to make your product look like it's actually sitting there, grounded and three-dimensional.
The key here is subtlety. We're not going for a dramatic, heavy blob. We just want a soft hint that suggests weight and presence.
Most editors, including Canva, have a one-click shadow effect. To nail the look, you'll want to play with these settings:
- Offset: Keep this value low. You want the shadow super close to the product, not trailing ten feet behind it.
- Blur: Crank this up a bit. A soft, diffused edge is what makes a shadow look natural.
- Transparency: This is the most important one. Pull this way down. A realistic shadow is often barely there, somewhere around 15-25% opacity is a good starting point.
Expert Tip: Look at your original photo. Where was the light coming from? If it was hitting your product from the top left, your shadow should naturally fall to the bottom right. Matching the shadow's direction to your original light source is a pro move that makes the final image far more believable.
Correcting Colors and Creating Consistency
Here's a frustrating truth: the color you see on your screen probably isn't the exact same color your customer sees on theirs. On top of that, your camera might not have perfectly captured the true hue of your product.
A quick color correction helps ensure what customers see is what they get. This one little step can seriously cut down on returns from people saying, "the color wasn't what I expected."
Just use the basic sliders in your editor for tiny adjustments:
- Brightness: A little nudge up can make the whole image feel cleaner and more vibrant.
- Contrast: A slight boost here makes the details pop.
- Saturation: Easy does it. A tiny increase can make colors richer, but push it too far and your product will look cheap and unnatural.
If you're selling clothes, getting the look right is absolutely critical. This fantastic guide to apparel product photography has some excellent tips that go way deeper and can have a real impact on your sales.
Choosing the Right Export Settings
You've done all the work, and the image looks perfect. Now, don't mess it up at the finish line! How you save your file has a huge impact on both image quality and how fast your website loads.
Different e-commerce platforms have their own preferences, but here are some solid, battle-tested rules of thumb for exporting your finished photos.
| Marketplace | Recommended Format | Why It Works |
|---|---|---|
| Shopify | PNG | Essential if you need that transparent background to work on different colored pages. If you've placed your product on a solid white background, use a JPG to save on file size. |
| Amazon | JPG | Amazon puts everything on a white background anyway, so you don't need transparency. A high-quality JPG gives you the best balance of quality and small file size. |
| Etsy | JPG | The platform prefers JPGs for faster load times. Aim to keep your file size under 1MB for the best user experience. |
Don't underestimate these final touches. Solid research shows that 75% of online shoppers say product photos are 'very influential' when they're deciding whether to buy. Getting your visuals right can boost your conversions by as much as 30%. It's a big deal.
Clever Hacks for Batch Editing on a Budget

Editing your product photos one by one is a soul-crushing time-sink, especially when you’re staring down a new collection launch. And the most frustrating part? Most of the best free background remover tools know this. It's why they dangling batch processing just out of reach, locked behind a paywall.
But with a little clever thinking, you can rig up your own budget-friendly batch workflow without spending a dime. It's not about finding some secret feature; it's about building a repeatable system that lets free desktop software do the grunt work for you. No coding, just smart automation.
Your At-Home Automation Station
The big idea here is to use a free desktop image editor that supports macros or "actions." A macro is just a recorded sequence of steps that you can play back on any image. Think of it as creating a mini-robot to handle all your repetitive clicks.
First things first, get your files in order. Create two folders on your desktop: one called "Originals" and another called "Processed." All your raw product shots get dumped into the "Originals" folder. This simple bit of housekeeping keeps your workflow from getting messy and, more importantly, prevents you from accidentally overwriting your source images.
Recording Your First Action
Alright, now it’s time to open a free editor that has a macro recorder. Grab a single image from your "Originals" folder to use as a template.
Hit "record" on the macro tool and then just go through the exact steps you want to automate. Your sequence might look something like this:
- Apply auto-color correction to balance the tones.
- Nudge the brightness up a bit for a clean, crisp look.
- Resize the image to fit your marketplace's specs (say, 2000×2000 pixels).
- Save the final image as a PNG into your "Processed" folder.
Once you stop recording, you’ve got a saved action that does all of that in a single click. Now, you can just open each image, run the macro, and turn a multi-step chore into a one-click task. This little trick can literally save you hours when you've got a pile of images to get through. For marketers, building this kind of speed into visual production is huge; there's a great guide on this topic about creating an AI workflow for batch content creation.
A Quick Word on Efficiency
A recent industry survey found that over 70% of graphic designers and marketers are already using AI background removers. Around 60% of them reported a major productivity boost from batch processing. It just goes to show how critical these efficient, scalable workflows are for professionals.
Now, let's be clear: this macro method automates the post-removal edits. You still have to tackle the background removal for each image individually. But it streamlines everything that comes after, which is a massive win.
If you're wondering how to handle truly massive volumes, our guide on product photography with 1000 items in a batch is the logical next step when your business really starts to scale.
When Is It Time to Upgrade to a Paid Solution?
Free tools are absolutely clutch when you're just getting your e-commerce store off the ground. They get the job done for your first batches of product photos. But as your business grows, you'll inevitably hit a wall.
The very tools that felt like a lifesaver can start to feel like a bottleneck, actively costing you time and holding your brand back. Recognizing that tipping point is crucial for scaling up without pulling your hair out.
This isn't about spending money for the sake of it. It’s a simple cost-benefit analysis. When the hours you sink into manual editing and fighting with tool limitations start to add up to more than a paid subscription, it’s time to make the switch. A dedicated tool like ProdShot isn't just another expense; it's an investment in buying back your time and hitting a new level of professionalism.
The Volume Just Becomes Too Much
The most glaring sign it's time to upgrade? The sheer volume of photos.
If you’re spending hours every single day removing backgrounds, or the thought of shooting a new 50-product collection makes you want to hide, you’ve outgrown free tools. This is especially true when editing photos starts stealing time from the things that actually grow your business, like marketing and talking to customers.
Key Insight: Your time has a real dollar value. If a paid tool saves you ten hours a month, and you value your time at $30 an hour, any solution under $300 a month is already giving you a positive return on your investment.
The real roadblocks with free background removers boil down to quality and efficiency. Many free services cap your exports at a low resolution (think under 1000×1000 pixels), which just doesn't cut it for modern zoom features. They almost never have batch processing, API access, or smarter features like shadow generation, forcing you into a tedious, one-by-one editing grind. You can discover more insights about these tool limitations on Shotkit.
You Need Better Quality and More Advanced Features
Another clear signal is when your products themselves demand more precision than a free tool can deliver. If you sell anything with intricate details, you know the frustration all too well.
You should seriously consider upgrading if you’re regularly shooting:
- Apparel with fine details like lace, mesh, or fuzzy sweaters. Free tools just turn those edges into a blurry, messy disaster.
- Jewelry with delicate chains or clear gemstones that basic AI can't figure out how to isolate properly.
- Anything with hair or fur, which is notoriously difficult for simple algorithms to cut out cleanly.
Beyond just a clean cutout, paid solutions open up a whole new world of professional features. You can instantly add realistic, AI-generated shadows that give your products a sense of weight and presence. Many also offer tools to create entire scenes or lifestyle backgrounds, turning a simple cutout into a compelling visual story.
When you get to the point where these kinds of advanced edits are what you need to stand out, exploring professional product photo editing services is the logical next step for your brand's growth.
Your Top Questions About Free Background Removers, Answered
Jumping into the world of free editing tools always brings up a few questions. When you're trying to find the best free background remover for your e-commerce store, you need straight-up answers to figure out what’s right for your products.
Let's get right into the most common ones I hear.
Are These Free Tools Actually Worth My Time?
Yes, absolutely—especially when you’re just getting your store off the ground. The time an AI tool saves you compared to painstakingly tracing an object in Photoshop is massive.
Think of it this way: a good free tool gets you 90% of the way there in a few seconds. You're left with a few quick touch-ups, not a soul-crushing editing marathon.
But here’s the reality check: as your business grows, that "worth it" equation starts to flip. The minutes you spend fixing wonky edges on every single photo start to add up, and what was once a time-saver can quickly become a bottleneck.
Can Free Tools Handle My More Complicated Products?
This is where you really need to set your expectations. For products with clean, simple shapes—think books, jars, or plain t-shirts—most free tools are fantastic. They’ll pop out a crisp, ready-to-use image with one click.
But they often hit a wall with fine details. User reviews are pretty consistent on this: they praise the speed for simple stuff but point out major headaches with things like frizzy hair, delicate jewelry, or see-through products. You can see this pattern for yourself in user feedback on popular background removers at G2. It's just the trade-off you make for a free service.
The Honest Truth: Free tools aren't a magic wand for every product. If you're selling fuzzy sweaters or intricate necklaces, be prepared to roll up your sleeves and do some manual refinement.
What's the Single Biggest Catch I Should Know About?
If there's one "gotcha," it's almost always the output resolution.
Most of these tools offer a low-res cutout for free, often something tiny like 612×408 pixels. That might be fine for an Instagram story, but it's going to look pixelated and unprofessional on a Shopify or Amazon product page where customers expect to zoom in.
To get the full-resolution file, you’ll have to open your wallet for a subscription or a credit pack. This is how most "free" services actually make their money. Before you get too deep into editing, always, always check the export limits.
Another huge drawback is the lack of any real batch processing. You won't find a free plan that lets you drag and drop a whole folder of product shots at once. This means you're stuck in a one-by-one workflow, which becomes a real grind if you have more than a few photos to get through.
Ready to skip the headaches and get professional results in seconds? ProdShot uses smarter AI to deliver high-resolution, perfectly edited product photos every single time. Stop wrestling with editing tools and start focusing on your business. Try ProdShot for free and see the difference for yourself.