

Flat lay photos are images shot directly from above, creating a top-down view of items arranged on a flat surface. This style has become a huge deal in e-commerce because it showcases products with incredible clarity, gives them context, and really helps define a brand's personality.
Why Flat Lay Photos Are an E-Commerce Game Changer
In the ridiculously crowded online marketplace, just getting a customer to stop scrolling is half the battle. Flat lay photos aren’t just a passing trend; they are a seriously powerful sales tool designed to stop the scroll and turn casual browsers into actual buyers.
That top-down perspective offers a clean, organized, and totally distraction-free look at your product. It lets the customer focus on the little details that really matter.
There's a psychological trick at play here. When you arrange items neatly, you’re creating a sense of order and professionalism that builds trust almost instantly. It’s the difference between showing an item on a clean, well-lit counter versus a cluttered, messy shelf. This approach works for pretty much anything, from fashion and beauty products to tech gadgets and gourmet foods.
The Power of Visual Storytelling
A truly great flat lay does more than just show a product—it tells a story. By carefully choosing your props, you can create a whole vibe that evokes a certain lifestyle or feeling. Think about it: a watch surrounded by a leather journal, a nice pen, and a cup of coffee instantly suggests sophistication and productivity.
This narrative element is what helps customers imagine the product in their own lives, making it way more desirable. It answers questions they might not even know they have, like “What’s this brand all about?” or “How would this actually fit into my day?” Creating that emotional connection is what ultimately drives people to click "buy."
Boosting Conversions and Building Trust
The impact of high-quality visuals on sales is something you just can't ignore. The e-commerce product photography market, where flat lays are a key player, is valued at US$163.91 million and is expected to hit US$275.4 million by 2030.
It’s not just a big market; it has a direct impact on your store. High-quality images can boost conversions by up to 80%, and adding personalized visuals has been shown to cut cart abandonment by 17%.
This infographic breaks down just how much strong product imagery can move the needle on key e-commerce metrics.

The data makes it pretty clear: investing in better visual presentation directly leads to more sales, fewer abandoned carts, and real business growth. At the end of the day, putting effort into your photography is an investment in your bottom line.
A well-composed flat lay acts as your silent salesperson. It communicates quality, tells a story, and answers customer questions before they're even asked, making the path to purchase smoother and more appealing.
Here’s a quick look at how flat lay photos can directly impact the metrics that matter most to your online store.
Flat Lay Photography Impact on E-Commerce KPIs
| Metric | Potential Impact | Why It Works |
|---|---|---|
| Conversion Rate | Increase of up to 80% | High-quality visuals build trust and help customers visualize the product in their own lives, reducing purchase friction. |
| Add-to-Cart Rate | Significant increase | Compelling lifestyle shots create desire and an emotional connection, encouraging customers to take the next step. |
| Cart Abandonment | Decrease of up to 17% | Clear, detailed photos answer questions and reduce uncertainty, giving shoppers the confidence to complete their purchase. |
| Customer Engagement | Higher on social media | Visually appealing flat lays are highly shareable and stop the scroll, boosting brand visibility and engagement. |
| Return Rate | Lower | Accurate, detailed photos set clear expectations, meaning customers are less likely to be surprised or disappointed when the product arrives. |
| Perceived Value | Increased | Professional, well-styled photos make products look more premium, allowing for better pricing and brand positioning. |
Mastering flat lays is a must for any modern e-commerce brand, especially if you’re competing on platforms like Shopify, Amazon, or Etsy. For a detailed breakdown of what to budget for shoots, check out our guide on the https://prodshot.net/cost-of-professional-product-photography.
Ultimately, stunning flat lay photos are designed to improve Shopify conversion rate with AI-powered insights by presenting your products in the best possible light and turning window shoppers into loyal customers.
Planning Your Photoshoot for Stunning Results
The real secret to incredible flat lay photos has almost nothing to do with your phone's camera. It all happens before you even think about hitting the shutter button. I like to think of it as the 90/10 rule: 90% of the work is in the planning and setup, and only 10% is actually taking the picture. A little bit of strategic thinking up front makes the entire process faster, easier, and a whole lot more creative.
If you just jump in and start shooting, you'll likely end up with frustrating results that feel cluttered, random, or just… off. By figuring out your story and gathering the right pieces beforehand, you’re building a solid foundation. This is what guarantees your final images look polished and professional, not like a happy accident.
Develop a Clear Concept and Story
Before you move a single prop, stop and ask yourself: what story am I trying to tell? A great flat lay isn’t just a pile of nice-looking things. It needs to communicate a specific mood, a lifestyle, or a key benefit of your product.
Is your product all about morning productivity? Then your story might involve a laptop, a clean planner, and a fresh cup of coffee. Selling a skincare product that’s meant for relaxation? Your narrative could be built with a soft towel, a candle, and maybe a few calming botanicals.
Your goal is to create a visual scene that lets customers instantly imagine your product in their own lives. A strong concept is your creative compass, guiding every decision you make about props, colors, and backgrounds from here on out.
A fantastic way to nail down your concept is by making a quick mood board. Hop on Pinterest and gather images that have the color palette, textures, and general vibe you're going for. This visual guide will keep you on track and make sure everything feels cohesive.
Choosing the Right Background
The background is the stage for your product—it sets the entire tone. It needs to complement your hero item without stealing the show. And you absolutely don't need to spend a ton of money on fancy, professional surfaces to get started.
Here are a few of my go-to, easily accessible background ideas:
- White Foam Board: This is the undisputed MVP of flat lay backgrounds. It's cheap, you can get it anywhere, and it gives you a clean, bright, and distraction-free surface that makes products pop.
- Wooden Surfaces: A rustic wooden table or even a few old floorboards can add incredible warmth and texture. This works beautifully for handmade goods, natural products, or food photography.
- Textured Fabrics: Think about a rumpled linen sheet, a chunky knit blanket, or a simple piece of canvas. Fabrics bring in softness and a sense of depth, which is perfect for fashion, beauty, or cozy home goods.
- Marble or Stone: You can find really affordable marble-patterned contact paper or vinyl backdrops online. These give you an instant feeling of elegance and luxury without the weight or cost.
Always think about contrast. If you're shooting a dark product, a light background will help it stand out, and vice versa. The main thing is to keep the background simple enough that the focus stays right where it belongs: on your product.
Selecting Props That Add Context
Props are the supporting actors in your flat lay story. Their job is to add context and visual interest, but they should never, ever steal the spotlight from your main product. The best props are the ones that feel like they naturally belong in the scene.
A classic mistake is just throwing in anything that looks pretty. Instead, every single prop should have a purpose that reinforces your brand’s story.
Here are a few tips for picking props that actually work:
- Gather More Than You Need: My rule of thumb is to collect at least twice as many props as I think I'll actually use. Having a bunch of options on hand gives you the creative freedom to play around and experiment with different arrangements.
- Vary Textures and Sizes: Mix and match items with different scales and materials. For instance, pair something smooth and metallic with something soft and organic. This contrast is what creates visual interest and makes the whole composition feel dynamic.
- Stick to Your Color Palette: Go back to that mood board you made. Only choose props that fit into your brand’s color scheme. This is key for maintaining a consistent and professional look. A tight palette of just two or three complementary colors usually works best.
For example, if you’re shooting a new lipstick, your props might include a small makeup brush, a little sprinkle of pressed powder (for texture), a delicate piece of jewelry, and a single flower petal that perfectly matches the lipstick's shade. Each item adds to the story of beauty and elegance without distracting from the lipstick itself.
Mastering Lighting and Composition

This is where the magic really happens. Forget expensive strobes or complicated gear; creating beautiful flat lay photos comes down to understanding the fundamentals of light and arrangement. The best images look effortless, but trust me, they’re built on intentional choices that guide the eye and set a mood.
With just your smartphone and a bit of creative thinking, you can master the two elements that separate a casual snapshot from a professional product shot: lighting and composition. These are the secret ingredients that make an image feel balanced, compelling, and ready for your storefront.
Harnessing Natural Light
The single most important part of a stunning flat lay is good light. And the best light is almost always soft, diffused, and natural. A large window is your best friend here, giving you a beautiful, gentle light source that minimizes harsh shadows and makes products look their absolute best.
Find a spot next to a window but out of direct, intense sunlight. Direct sun creates ugly, dark shadows that can hide product details and create way too much contrast. What you're looking for is bright, indirect light—the kind you get on a slightly overcast day or in a room where the sun isn't beaming straight through the glass.
If the light is still too harsh, you can easily diffuse it without any fancy equipment. Just hang a thin white bedsheet or a sheer curtain over the window. This instantly softens the light, scattering it evenly across your scene and creating those gentle, flattering shadows that scream "professional."
Pro Tip: Turn off all the indoor lights. Seriously. Mixing daylight with the warm, yellowy glow from lamps will mess with your phone’s white balance, casting a weird color tint over your photo that’s a real pain to fix later.
Arranging Your Scene with Composition in Mind
Once your lighting is sorted, it’s time to style your products and props. Composition is simply how you place items in the frame. The goal is to create a visual path for the viewer's eye to follow, leading them straight to the star of the show—your product.
Good composition creates balance and makes the image pleasing to look at. Without it, even the most beautiful products can look cluttered and confusing.
Here are a few core principles to get you started:
- The Rule of Thirds: Imagine your screen is cut into a 3×3 grid, like a tic-tac-toe board. Instead of placing your main product dead center, position it along these lines or where they intersect. Most smartphones have a grid overlay you can turn on in the camera settings, which makes this super easy. It’s a simple trick that instantly makes your shot more dynamic.
- Create Visual Pathways: Use your props to create "leading lines" that draw the eye toward your hero product. A strategically placed pen, a piece of ribbon, or even the edge of a book can act as a subtle arrow pointing the viewer exactly where you want them to look.
- Embrace Negative Space: Don't feel like you have to fill every single inch of the frame. Negative space—the empty area around your objects—is crucial for a clean, high-end look. It gives your product breathing room, makes it feel more important, and keeps the scene from feeling overwhelming.
Think about creating a sense of balance. If you have a large, visually "heavy" item on one side, place a few smaller props on the other to create equilibrium. It’s like a visual seesaw; you want to distribute the weight so the whole image feels stable and intentional.
Telling a Story Through Placement
How you arrange your items has a huge impact on the story you’re telling. A perfectly organized, grid-like layout communicates precision, minimalism, and order. This is perfect for tech gadgets, office supplies, or modern beauty products.
On the other hand, a more casual, slightly "undone" arrangement can feel more organic and relatable. Think of a cozy scene with a crumpled blanket, a steaming mug of tea, and an open book. This style works wonders for lifestyle brands, handmade goods, and anything meant to feel authentic.
Let’s say you're shooting a leather wallet.
- For a "Productivity" Story: You could arrange it in a clean grid next to a sleek pen, a minimalist notebook, and a pair of glasses. The lines would be straight, and the spacing would be deliberate.
- For an "Adventure" Story: You could place the wallet more casually beside a folded map, a compass, and a set of worn-in keys on a rustic wooden background. The whole setup would feel less rigid, like someone just emptied their pockets after a long day.
Play around with both styles to see what fits your brand. There’s no single right answer—it’s all about making sure your composition reinforces the message you want to send. Once you master these simple lighting and composition techniques, your flat lay photos will instantly look more professional and do a much better job of selling your products.
Shooting and Editing Like a Pro

With your scene perfectly lit and styled, it's time to actually take the picture. This is where a little technique goes a long way. Don't worry—your smartphone is more than capable of taking incredible flat lay photos. The trick is to use its features with intention instead of just pointing and shooting.
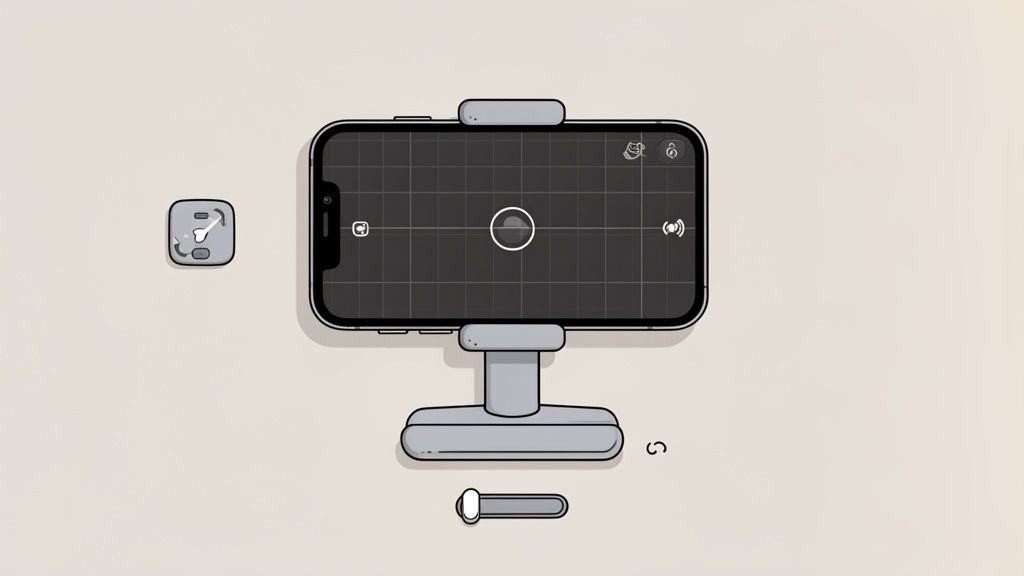
Getting that perfectly stable, top-down shot can feel awkward. But you don't need a fancy tripod with a horizontal arm. A simple hack is to stand on a sturdy chair or step stool directly over your scene. Grip your phone with both hands and tuck your elbows in for stability. The goal is to get the phone perfectly parallel to the surface below.
Mastering Your Smartphone Camera
Before you snap away, it’s time to take control of your camera's settings. Most modern phones have manual controls that can make a night-and-day difference in your photos. Ignoring them is like leaving free quality on the table.
The two most important settings to get right are focus and exposure. Just tap your main product on the screen. You'll see a little box appear, showing you where the camera is focusing. Once it looks sharp, press and hold that box until you see "AE/AF Lock" pop up. This move is crucial—it locks the focus and exposure, so the camera won't try to readjust if your hand wobbles a bit.
Locking your focus and exposure is a non-negotiable step for sharp, consistently lit photos. It stops the camera's autofocus from hunting and keeps the brightness from fluctuating, giving you total control over the final look.
Another critical setting is your grid. Dig into your camera settings and turn on the grid overlay. This simple 3×3 grid makes it ridiculously easy to straighten your lines and compose your shot using the rule of thirds. It's your secret weapon for perfect alignment, every single time.
One final word of caution: never, ever use the digital zoom. Pinching to zoom on a smartphone screen isn’t true zoom—it’s just cropping the image before you even take it. This instantly degrades the quality and leaves you with a pixelated, unprofessional mess. If you need a tighter shot, physically move your phone closer.
Polishing Your Images with Mobile Editing
Once you’ve got the shot, the final step is a bit of editing. The goal here isn't to make your photo look fake or over-processed. It's about making subtle tweaks to polish the image, make the best features pop, and keep everything in line with your brand's style.
I'm a big fan of mobile apps like Adobe Lightroom Mobile or Snapseed for this. They pack professional-level controls into a super intuitive interface.
Start with the basic adjustments. These small changes work together to create a big impact.
- Brightness (Exposure): Gently bump this up to give the photo a bright, airy feel. This is key for getting those clean white backgrounds that make products stand out.
- Contrast: A little bit of contrast will make your colors richer and details sharper. Just don't overdo it, or the shot will look harsh.
- White Balance: If you notice a slight yellow or blue cast, use the white balance tool to neutralize it. You want your whites to look like true whites.
- Sharpness: A slight boost in sharpness can make product details stand out, but too much will make the image look gritty and unnatural.
If this part of the process feels a bit overwhelming, exploring professional product photo editing services can be a great way to guarantee consistent, high-quality results without the learning curve. They can handle everything from color correction to background removal, freeing you up to focus on other parts of your business.
The real key to great editing is consistency. Once you find a mix of adjustments you love, save it as a preset. Using that same preset across all your flat lay photos builds a cohesive, professional look in your product gallery—a must for creating a strong and recognizable brand.
Once you've gotten your hands dirty and mastered the art of styling and shooting your own flat lay photos, it's time to talk about working smarter, not harder. While manual editing gives you that final layer of creative control, let's be honest—it can be a serious time sink, especially when you have an entire product line to photograph.
This is where AI-powered photo editors completely change the game.
Tools like ProdShot step in to handle the tedious, technical stuff for you. Imagine taking a decent photo with your phone, uploading it, and watching as the background is instantly removed, the lighting gets corrected, and realistic shadows are added—all in a matter of seconds. This isn't just about saving time; it's about giving everyone the ability to create high-quality product shots, no matter their design skills or budget.
From Raw Photo to Marketplace-Ready in Seconds
The real magic of these AI editors is how they understand the specific, and often strict, requirements of different e-commerce platforms. With a single click, you can generate that clean, pure white background that Amazon and Shopify demand. It takes all the guesswork out of the equation and ensures your product images are compliant and professional, every single time.
This kind of automation allows smaller sellers to produce high-converting, on-brand images that can go toe-to-toe with major retailers, all without the cost of a studio or a professional retoucher. It really levels the playing field, letting you focus on selling instead of getting bogged down in post-production.
Here’s a quick look at how an intuitive AI editor can turn a simple photo into a polished, e-commerce-ready asset.
The whole process is designed for speed. You just upload your image and let the AI do the heavy lifting of background removal and enhancement.
The Impact of AI on Brand Consistency
Consistency is everything when it comes to building a strong brand. When every single product photo has the same lighting, background, and overall vibe, it builds a cohesive and trustworthy shopping experience. Trying to achieve that manually across dozens, or even hundreds, of products is a massive headache.
AI-driven tools make this incredibly simple. You can create and save export presets for each marketplace you sell on, making sure every image meets the same standard. This means your Shopify store, Amazon listings, and social media feeds will all look polished and unified, reinforcing your brand's quality with every photo. For a deeper look at how this works, our guide on the AI product photo generator breaks it all down.
The flat lay trend isn't going anywhere. Just look at the #Flatlay hashtag on Instagram, which now has around 8.9 million posts. Brands consistently see higher engagement from these clean, organized shots. When you can generate professional-looking flat lays in seconds, you can tap into this trend far more effectively and meet the high visual standards that 67% of buyers now expect.
An AI photo editor isn't just a tool; it's a productivity multiplier. It automates the technical work, freeing up your creative energy to focus on what really matters—styling compelling scenes that tell your brand's story and sell your products.
Understanding how an AI functions as an image analyzer AI can also give you some valuable insight. These systems are trained to interpret visual data, which is how they can so accurately isolate a product from its background and enhance the image quality automatically. For anyone looking to create professional flat lay photos at scale, bringing an AI editor into your workflow is a smart move that saves both time and money.
Got Questions? Let's Troubleshoot Common Flat Lay Issues
Even the best-laid plans hit a snag. When you’re in the middle of a shoot, a million little questions can pop into your head. This is your go-to guide for tackling those common frustrations that crop up when shooting flat lay photos.
Think of this as the cheat sheet I wish I’d had when I started. Getting these details right is what separates a good photo from a great one.
What Are the Best Cheap Backgrounds?
You absolutely do not need to spend a ton of money on fancy surfaces to get that high-end, professional look. In fact, some of the best backgrounds are probably hiding in your house right now or cost next to nothing.
Here are a few of my tried-and-true favorites:
- White Foam Board: This is the undisputed champion of starter backgrounds. It’s cheap, you can find it anywhere, and it gives you a bright, clean canvas that makes any product the star of the show.
- Textured Fabrics: Don't underestimate the power of texture. A simple linen tablecloth, a chunky knit sweater, or a scrap of canvas can add a beautiful layer of depth and softness to your images.
- Contact Paper: This is my favorite budget hack. Want a marble or rustic wood vibe without lugging around heavy, expensive slabs? Adhesive vinyl or contact paper is your best friend. Stick it to a foam board, and you've got an elegant, textured surface ready to go.
- Poster Board: Poster board comes in every color imaginable, making it an amazing tool for weaving your brand’s color palette directly into your product shots for a super consistent look.
The trick is to pick a background that complements your product, not one that steals the spotlight.
How Do I Fix Unwanted Shadows?
Ah, shadows. Harsh, distracting shadows are one of the most common complaints I hear, but the fix is usually pretty simple. The culprit is almost always direct, intense light.
The secret to professional-looking photos isn't eliminating shadows completely—it's softening them. Gentle shadows create depth and make your products look three-dimensional, not like flat cutouts.
To get that soft, diffused light, move your setup near a window but out of the direct sun. If the light coming through is still too harsh, you can easily soften it by hanging a plain white bedsheet or a sheer curtain over the window. This acts as a giant diffuser, scattering the light for a much more flattering effect. And a pro tip: turn off all your indoor lights. Mixing different light sources is a recipe for weird color casts and multiple competing shadows.
What Props Should I Use?
Choosing props is all about telling a story. Every single item in your frame should feel like it belongs there, reinforcing the lifestyle or mood you want your product to evoke. A classic beginner mistake is just throwing in props because they look pretty.
Here are some quick guidelines I follow when picking props:
- Keep it Relevant: Only bring in items that make sense with your product. If you're shooting a bag of artisan coffee, props like a coffee grinder, a favorite mug, and a few scattered beans just work. A random seashell? Not so much.
- Stick to a Color Palette: I find that limiting props to two or three complementary colors that match the brand creates a much more cohesive and professional feel.
- Vary Size and Texture: Create more visual interest by mixing larger items with smaller ones. Combine different textures, too—think about placing something smooth next to something with a rougher texture.
I always recommend gathering way more props than you think you'll need. Having plenty of options on hand gives you the creative freedom to play around until the composition feels absolutely perfect for your flat lay photos.
Ready to skip the manual editing and get straight to stunning, marketplace-ready images? ProdShot uses AI to instantly remove backgrounds, perfect lighting, and generate professional product photos in seconds. Try ProdShot for free and see how easy it is to elevate your e-commerce visuals.