
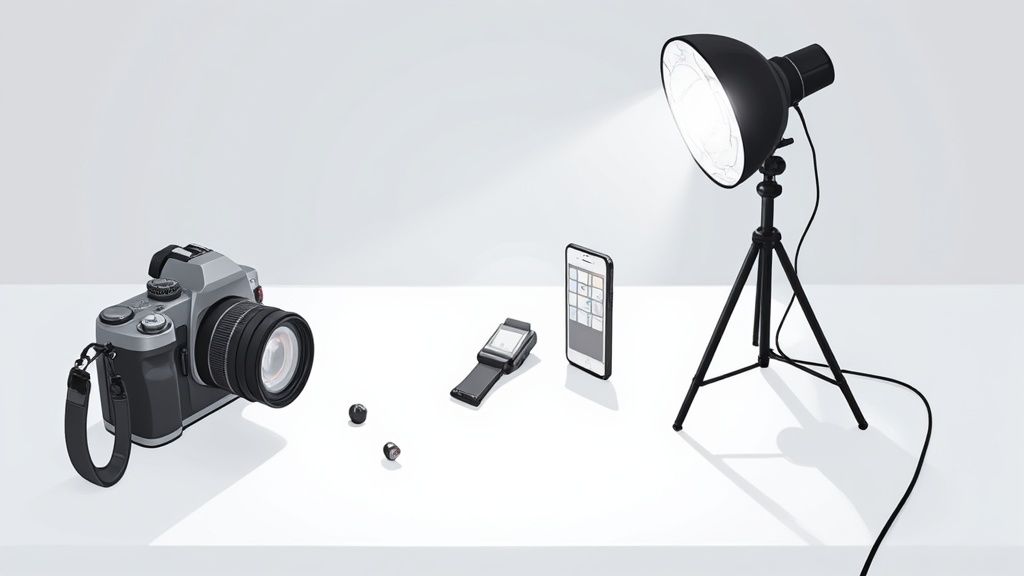
A good camera for product photography is crucial, but it might not be what you think. While a big sensor, high resolution, and fancy interchangeable lenses are great, the best camera is often the one you already have—especially when you know how to pair it with great lighting.
Let's break down what really matters for creating professional, marketplace-ready images that sell.
What Makes a Good Camera for Product Photography
Picking a camera can feel overwhelming, but it really just boils down to a few core elements that directly impact your final shot. Once you understand these, you can cut through the marketing hype and focus on what you actually need for crisp, appealing photos that look great on Shopify, Amazon, or Etsy.
With the global photography market valued at a whopping $105.2 billion in 2023—largely driven by e-commerce—it’s clear that high-quality visuals are no longer optional. They're essential for any online seller who wants to compete.
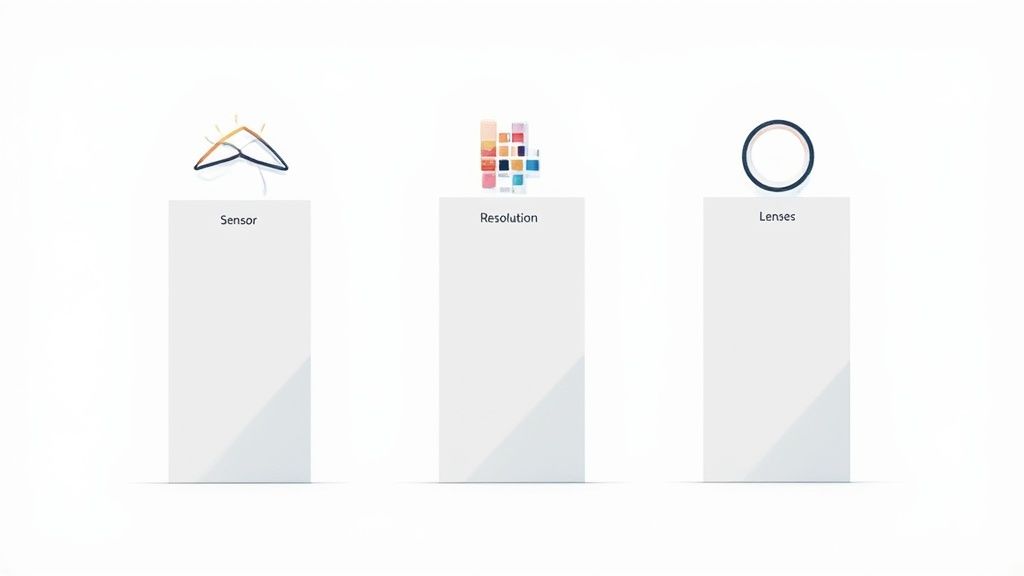
The Three Pillars of a Great Product Camera
Think of these three features as the foundation of every great product shot. Getting them right from the start will save you countless hours in editing and make your products look their absolute best.
-
Sensor Size: This is basically the camera's "canvas." A larger sensor (like those in full-frame or APS-C cameras) can capture way more light and detail. This means you get cleaner images with richer colors and less distracting grain, which is a huge advantage in a studio setting.
-
Resolution (Megapixels): Think of megapixels as the tiny tiles in a mosaic. The more you have, the more detail you can capture. This lets customers zoom way in on your product's texture and features without the image turning into a blurry, pixelated mess. A camera with 24MP or more is a fantastic starting point for professional e-commerce.
-
Lens Options: The camera body is only half the story—the lens is where the magic happens. Being able to swap lenses gives you incredible creative freedom. A dedicated macro lens, for instance, is a must-have for capturing the tiny, intricate details on products like jewelry or electronics.
To help you remember what to look for, here's a quick cheat sheet summarizing how these key camera features translate into better product photos.
Key Camera Feature Impact on Product Photos
| Feature | Why It Matters for Product Photography | Good Starting Point |
|---|---|---|
| Sensor Size | Captures more light, leading to cleaner images with better color, less grain, and more detail. | Full-frame or APS-C |
| Resolution | Allows for sharp, detailed images that customers can zoom into. Crucial for showing product quality. | 24 megapixels or higher |
| Lens Options | Provides flexibility to shoot different product types, from tiny jewelry (macro) to large furniture. | A standard prime lens (like a 50mm) and a macro lens. |
| Manual Mode | Gives you full control over settings like aperture, shutter speed, and ISO for consistent results. | Any camera with a full manual ("M") mode. |
| Lighting Gear | Good lighting is more important than the camera itself. It creates professional, appealing photos. | At least two external lights (strobes or continuous). |
Remember, these features are your toolbox. Knowing how to use them is what truly separates an amateur shot from a professional one that drives sales.
The secret to stunning product images isn't always buying the most expensive camera. It's about understanding how to master light and leverage the key features—sensor, resolution, and lenses—that your current camera offers.
Honestly, even a modern smartphone can produce incredible results when you apply these principles. The cameras are getting ridiculously powerful, and when you pair them with smart AI-editing tools, your phone can become a surprisingly effective and affordable way to create clean, consistent product photos.
If you want to dive even deeper into the different options and features, this detailed guide to choosing the best camera for product photography is an excellent resource.
Decoding Camera Features for Flawless Product Shots
Diving into cameras for product photography can feel a bit like learning a new language. You’ll hear terms like "aperture" and "sensor size" tossed around, but don't get intimidated. Once you understand what these specs actually do for your photos, you unlock total creative control. This isn't about buying the most expensive gear; it's about knowing how to use your tools.
Think of your camera’s sensor as its eyeball. A larger sensor, like a full-frame or an APS-C, can physically gather more light and detail. For your product shots, this means cleaner images, richer colors, and less of that grainy, unprofessional noise, even in a perfectly lit studio. A bigger sensor gives you a more polished, professional final image.
Megapixels: The Zoom-In Test
Next up are megapixels. The easiest way to think about them is to imagine your photo is a giant mosaic. The more tiny tiles (megapixels) you have, the sharper and more detailed the picture is up close. A camera with 24MP or more creates an image so packed with information that your customers can zoom right in on the texture of a fabric, a logo, or the fine details of your craftsmanship without it turning into a blurry mess.
That level of detail is huge for building trust. It visually answers questions your customers might have, erasing their doubts and making them feel confident enough to hit "buy." It's the best way to show off the quality you've worked so hard to achieve.
Mastering Your Creative Controls
Beyond the basic specs, the real magic of a dedicated camera is in its manual controls. These are your dials for getting consistent, professional shots every single time, whether you're aiming for technical perfection or a specific artistic vibe.
- Aperture (f-stop): This is all about focus. A low f-stop number (like f/2.8) creates that beautiful, blurry background you see in lifestyle shots. For standard product photos on a white background, you’ll want everything sharp, so you'll use a higher f-stop (like f/8 or f/11).
- Shutter Speed: This just controls how long the sensor is exposed to light. Since your products will be sitting perfectly still on a tripod, you don't have to worry much about this.
- ISO: Think of this as the camera's sensitivity to light. For product photography, your goal is simple: keep it as low as possible. An ISO of 100 or 200 will give you the cleanest, most grain-free images.
Having direct control over these three settings is what separates a deliberate, professional shot from a simple snapshot. It’s how you perfectly expose your product against a clean white background or create a moody, atmospheric lifestyle image with total precision.
Why Small Details Make a Big Difference
Finally, don’t ignore the little things that make your life easier. A flip-out screen is an absolute lifesaver for shooting flat lays from above or getting low-angle shots without breaking your back. Good lens compatibility is also key, giving you the freedom to pop on a macro lens for tiny jewelry or a versatile zoom for bigger items.
And then there's color accuracy, which is non-negotiable. E-commerce brands demand cameras that capture true-to-life colors right out of the gate. It's no wonder a brand like Canon, famous for its color science, crushed it in 2023, selling 3.35 million units for a whopping 46.5% market share. You can read more about these digital photography market trends to see what’s driving demand.
Choosing a camera that gets color right from the start will save you from hours of frustrating editing later on.
Camera Recommendations for Every Budget
Choosing a camera for your product photos doesn't have to mean emptying your bank account. Honestly, the best camera is the one that fits your current needs and the stage your business is in. It’s all about getting professional results without spending money you don't have to.
We’ve broken down our top picks into three simple tiers to help you find that perfect fit, whether you're just starting out or ready to scale up.
This decision tree helps visualize the trade-offs you'll make. Should you prioritize super-high megapixels for capturing tiny details, or do you need manual controls for creative effects like that beautiful background blur?
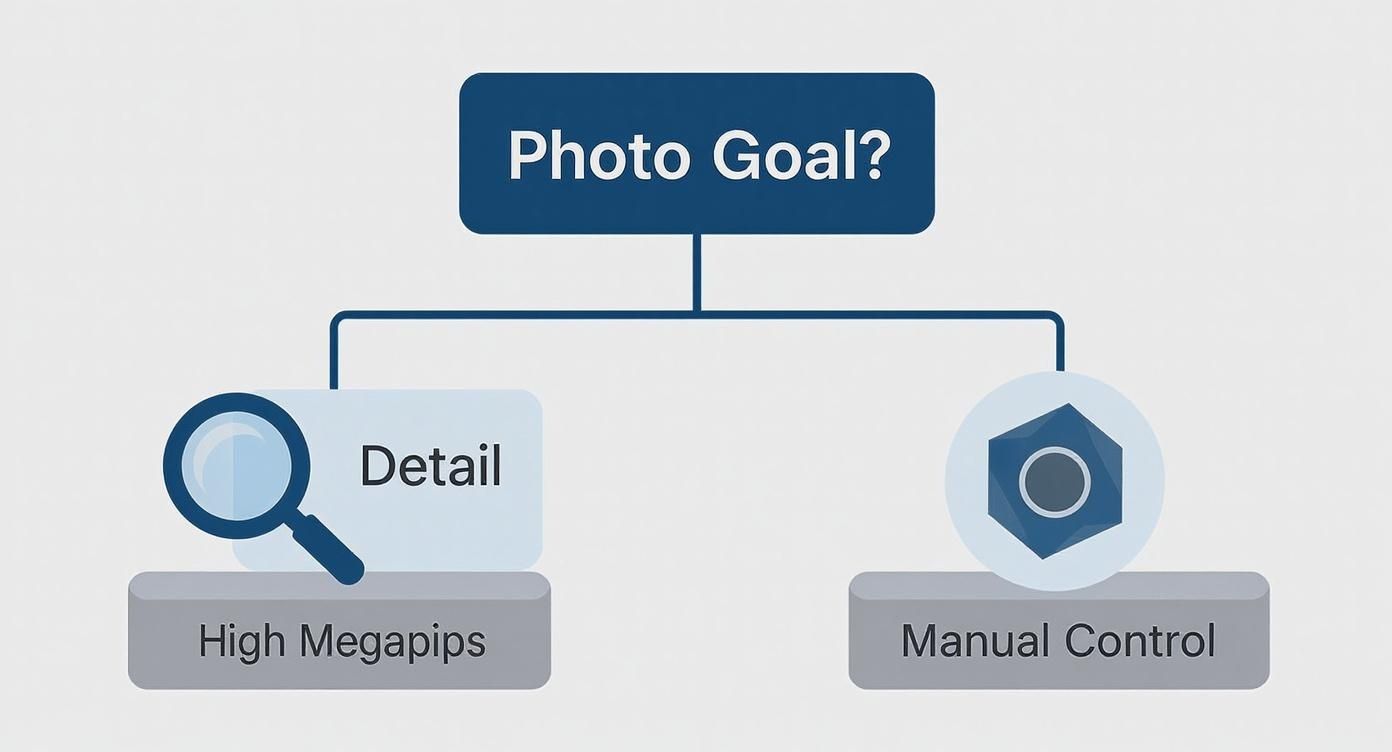
As you can see, the path is pretty clear: if capturing fine textures in a piece of jewelry is your top priority, resolution is king. But if you’re after that artistic, soft-focus background, manual controls are what you need to focus on.
Camera Recommendations by Budget Tier
To make it even clearer, here’s a quick breakdown of what to expect from each budget level and who each tier is really built for.
| Budget Tier | Example Models | Key Strengths for Product Shots | Ideal For |
|---|---|---|---|
| Budget-Friendly | Smartphone + ProdShot, Canon EOS R50 | Excellent value, easy to use, and capable of professional results with good lighting. | New sellers on Etsy/Shopify, small-batch creators, and anyone starting on a tight budget. |
| Mid-Range | Fujifilm X-T5 | Superior image quality, high resolution for cropping, and fantastic color science. | Growing e-commerce businesses, brands wanting to elevate their visual identity. |
| Professional | Sony Alpha 7 IV | Unmatched detail, dynamic range, and reliable performance for high-volume work. | Agencies, large studios, and brands where image quality is a primary competitive advantage. |
Let's dive a little deeper into what makes each of these tiers tick.
The Budget-Friendly Tier
For sellers just getting started, the best camera might already be in your pocket. Modern smartphones have incredibly powerful cameras. When you pair your phone with great lighting and a tool like ProdShot to handle the background removal and editing, you can produce stunning, marketplace-ready images. Seriously.
If you’re ready for a dedicated camera, entry-level mirrorless models like the Canon EOS R50 are a fantastic starting point. They give you:
- APS-C Sensors: This is a huge step up from a smartphone. The larger sensor captures way more light and detail, which means cleaner, sharper photos.
- Interchangeable Lenses: This is the real game-changer. You can start with a basic lens and add a dedicated macro or prime lens later on, opening up a whole new world of creative possibilities.
- Manual Controls: You get full command over your settings. This is crucial for creating consistent, professional-looking shots every single time.
These options are perfect for new Etsy or Shopify store owners who need high-quality images without a big upfront investment.
The Mid-Range Tier
Once your business starts to grow, investing in a mid-range camera can dramatically lift your brand's visual quality. This is the tier for people who need more resolution for detailed zoom-ins on their website or who want better performance in tricky lighting.
A camera like the Fujifilm X-T5 is an incredible choice here. It hits that sweet spot with a powerful combination of features without the hefty professional price tag. Its key strengths are the exceptional in-camera color science—which saves a ton of time in editing—and a high-resolution sensor that’s perfect for capturing intricate product details. This is the ideal upgrade for established e-commerce businesses ready to level up their product photography.
A mid-range camera is often the most cost-effective upgrade a growing brand can make. The jump in image quality from an entry-level model is immediately noticeable to customers and can directly impact conversion rates.
The Professional Tier
For high-volume studios, creative agencies, or brands where image quality is a core competitive advantage, professional-tier cameras are the gold standard. We’re talking about models like the Sony Alpha 7 IV, which deliver unparalleled sharpness, dynamic range, and rock-solid autofocus.
But let's be real: this level of gear is complete overkill for most sellers. The investment is massive, and you only unlock its full potential with equally professional lenses and lighting setups. Unless you're shooting for giant print ads or have very specific technical needs, the mid-range tier almost always offers a better return on your investment.
If you're curious about what goes into a full-scale professional shoot, you can learn more about the cost of professional product photography and see if it’s the right direction for your business.
Looking Beyond the Camera Body to Lenses and Lighting
A great camera body is a fantastic starting point, but it's only one piece of the puzzle. The real magic in product photography happens when you invest in quality lenses and truly master your lighting. In fact, most pros will tell you the same thing: a decent camera with a premium lens will beat a top-of-the-line camera with a cheap kit lens, no contest.
Think of it like this: the camera’s sensor is what records the image, but the lens is the eye. It’s what gathers and focuses the light, and it’s directly responsible for the sharpness, clarity, and overall feel of your photo. If you want to make one upgrade that delivers an immediate and dramatic impact on your images, start with your glass.
This is where you need to know the difference between lens types. A zoom lens is convenient, letting you frame up products of different sizes without having to physically move your setup. But for pure image quality, nothing beats a prime lens—a lens with a single, fixed focal length. They are almost always sharper and let in more light.
Choosing the Right Lens for Your Products
For most general product photography, a standard 50mm prime lens is an absolute workhorse. It gives you a natural perspective that’s very close to what the human eye sees, with minimal distortion. It’s a reliable go-to for a huge range of products.
But what if you sell tiny, intricate items like jewelry, watches, or delicate electronics? In that case, a macro lens isn't just a nice-to-have; it's essential. These lenses are specifically built for extreme close-ups, letting you capture those razor-sharp details that a standard lens just can't see. This is how you show a customer the fine craftsmanship that makes your product worth its price.
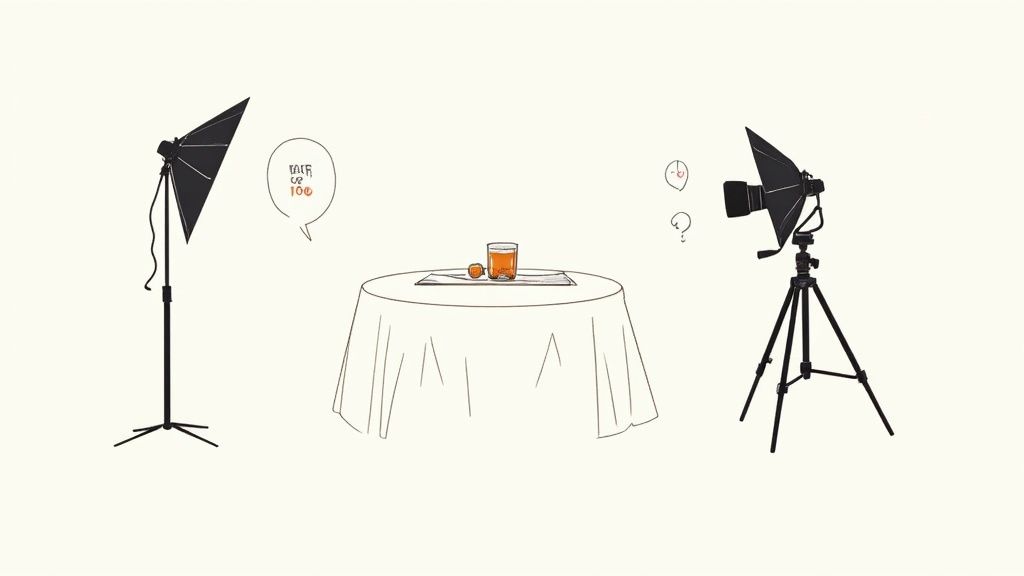
Mastering Light: Your Most Powerful Tool
Here’s the honest truth: you could have the best camera and lens money can buy, but with bad lighting, you'll still get mediocre photos. Light is the secret weapon of every great product photographer. It shapes your product, defines its texture, creates mood, and draws the customer's eye. Learning to control it is like a painter learning to mix colors.
You don't need a huge, expensive studio to get started. A simple two-light setup can work wonders.
- Key Light: This is your main light. You'll typically place it at a 45-degree angle to your product to create soft, flattering highlights and give the object shape.
- Fill Light: Placed on the opposite side, this light is a bit less powerful. Its job is to "fill in" the dark shadows created by the key light, giving you clean, even illumination across the product.
Mastering a simple two-light setup gives you complete control over shadows and highlights. This skill is far more valuable than any camera upgrade, allowing you to create consistently professional images that make your products shine.
By focusing your budget on quality lenses and spending your time learning to shape light, you can produce incredible results. And if you nail the shot but the final edits feel like a chore, remember that professional product photo editing services can give your images that final polish, handling everything from color correction to background removal.
At the end of the day, a good camera is just part of a system where the lenses and lighting are the real stars of the show.
Your First Product Photoshoot: A Practical Guide
Alright, you've got the theory down. Now it’s time to roll up your sleeves and put that knowledge into practice. This guide will walk you through setting up and capturing your first product photos, helping you get sharp, consistent, and professional-looking results from day one.
First things first: prepare your product. This sounds obvious, but it's the one step everyone seems to rush. Your camera will pick up every single fingerprint, speck of dust, and smudge. Make your item spotless. If you're shooting apparel, steam or iron it until every last wrinkle is gone. A little cleaning now saves you a ton of editing headaches later.
Next, let's build your "studio." You don't need a dedicated room—just a clean, simple backdrop will do. A large sheet of white paper curved up against a wall creates a seamless "infinity sweep," making your product look like it's floating in a professional space. Try to set up near a window for beautiful, soft natural light. If you're using artificial lights, place two at 45-degree angles to the product to kill any harsh shadows.
Dialing in Your Camera Settings
With your product prepped and your background ready, it's camera time. Mount it on a sturdy tripod. This isn't optional; it's the only way to guarantee you'll eliminate blur from shaky hands and get maximum sharpness.
Using a tripod is the single most effective way to ensure your product photos are tack-sharp. It lets you use a low ISO for clean images and a smaller aperture for a deep depth of field, creating a perfectly focused shot every time.
Now, flip your camera dial to Manual Mode (M). Don't be intimidated! Use these settings as your starting point:
- Aperture: Start somewhere between f/8 and f/11. This range gives you a nice, deep depth of field, making sure your entire product is in sharp focus from front to back.
- ISO: Lock this in at the lowest native setting your camera has, usually ISO 100. This gets rid of digital noise or "grain" and gives you the cleanest image possible.
- Shutter Speed: Adjust this last. Since your product isn't going anywhere and your camera is on a tripod, you can use a slower shutter speed to get the perfect exposure without worrying about motion blur.
The Professional Workflow Tip
Want a real game-changer? Try tethered shooting. Connect your camera to a laptop with a USB cable. This lets you see your photos pop up on a large screen the moment you take them. You'll instantly spot focus issues, lighting problems, or distracting dust specs that you'd absolutely miss on the camera's tiny screen.
Investing in a good camera for product photography is key because, at the end of the day, high-quality visuals are what drive sales. It's no surprise that the global eCommerce product photography market is expected to hit $2.38 billion by 2034. You can learn more about this growing market’s trajectory. Once you've captured your shots, you can use a Shopify photo editor to put the final touches on them for your storefront.
Common Questions About Product Photography Cameras
Diving into the world of cameras can feel overwhelming, especially when your goal is just to take pictures that actually sell your products. Let's cut through the noise and tackle the questions I hear most often. This will help you pick a good camera for product photography with confidence.
Can I Really Start with My Smartphone?
Absolutely. In fact, for most people just starting out, it's the smartest move you can make. The cameras in modern smartphones have become ridiculously powerful, and they're more than capable of capturing the kind of sharp, vibrant images you need for online stores.
The real secret isn't the camera itself, but how you use it. When you pair your phone with great lighting, a steady tripod, and a solid editing app, you can get results that look just as professional as those from a pricey DSLR. It’s the perfect way to get your products listed and see what sells without a huge upfront investment.
What Is the Most Important Feature for Small Products?
When you're shooting tiny, detailed items like jewelry, watches, or delicate crafts, one feature trumps all others: macro capability. This has less to do with megapixels and everything to do with how close your lens can focus on the subject.
A true macro lens lets you get in close and capture the fine textures, intricate details, and expert craftsmanship that make your product special. It’s what allows a customer to see the quality, building the trust they need to click "add to cart." Without it, all those beautiful little details just turn into a disappointing, blurry mess.
For small products, your top priority should be a camera and lens combination that offers a 1:1 macro magnification. This ensures you can capture every tiny detail with razor-sharp clarity, turning a simple photo into a powerful sales tool.
How Many Megapixels Do I Need for E-commerce?
This is a classic point of confusion, but the answer is way simpler than you'd think. For marketplaces like Shopify, Amazon, and Etsy, you really don't need a 60-megapixel beast of a camera. For most online sellers, 20 to 24 megapixels is the absolute sweet spot.
That resolution gives you more than enough detail for customers to zoom in and inspect your products without things getting pixelated. It also gives you the breathing room to crop your photos for different formats—like Instagram posts or website banners—without losing quality. Anything more is usually overkill and just creates gigantic files that will clog up your computer and slow you down.
Once you have those high-quality photos, the next step is putting them to work. It's well worth your time to learn how to enhance social media engagement with your product visuals to really maximize their impact.
Should I Choose a Full-Frame or APS-C Camera?
For product photography, an APS-C camera is almost always the more practical and budget-friendly choice. Full-frame sensors are fantastic at gathering light, but here’s the thing: you’ll be shooting in a controlled space with plenty of your own light. This pretty much cancels out the main advantage of a full-frame camera.
APS-C cameras and their lenses are usually smaller, lighter, and much easier on the wallet. They still deliver incredible image quality with beautiful color and detail—everything you need for killer e-commerce shots. A full-frame camera is a phenomenal piece of gear, but for this job, it's a luxury, not a necessity.
Ready to create stunning, marketplace-ready product images in seconds? With ProdShot, you can turn simple smartphone photos into professional shots with perfect backgrounds, lighting, and shadows. No studio or design skills required. Try it free and see how easy it is to make your products look incredible. Learn more at https://prodshot.net.