
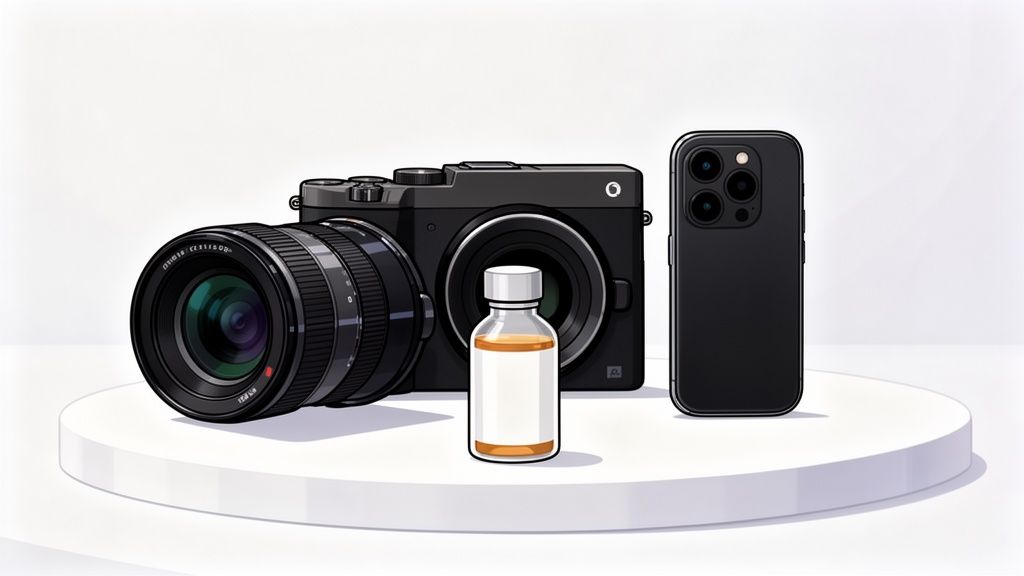
When it comes to product photography, the "best" camera is the one that gets the job done for you. It’s a balancing act between capturing stunning detail, getting colors just right, and having a workflow that doesn’t drive you crazy. While a fancy DSLR or mirrorless camera can give you breathtaking quality, don't count out your smartphone. With the right light and a little software magic, it can produce fantastic shots for social media or your online store.
Why Your Product Photos Are Your Most Important Sales Tool
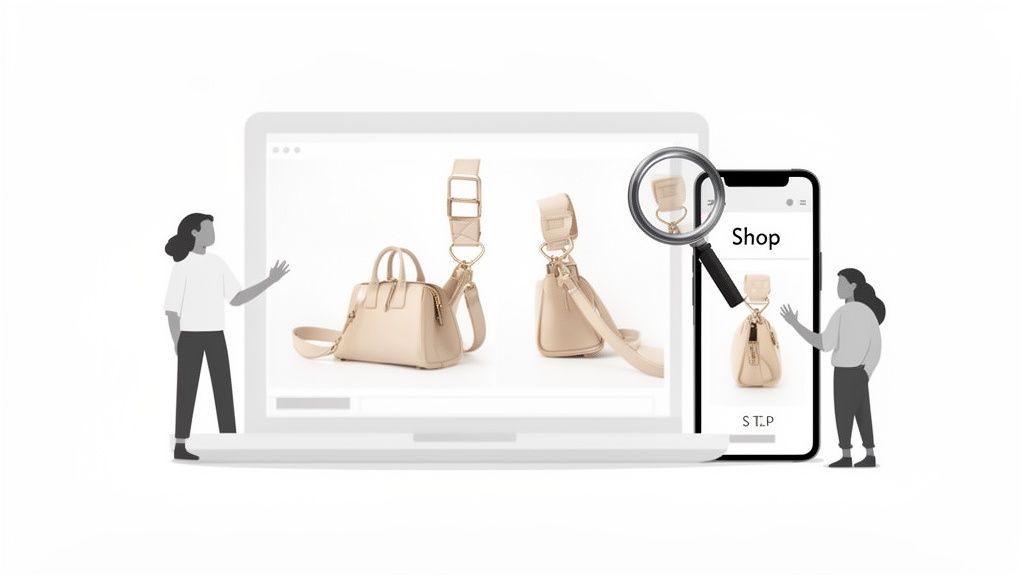
Think of your product photos as your silent, 24/7 salesperson. In the crowded aisles of Amazon, Shopify, or Etsy, it’s your images that do the talking first. They have a split second to grab a shopper's attention and communicate the value of what you’re selling.
Great photos do more than just display a product; they build instant trust and define a customer's perception of your brand. A blurry, poorly lit shot screams amateur and makes people question the quality. On the other hand, a sharp, well-composed image invites them to zoom in, see the fine details, and picture themselves using your product.
The Decisive Role of Visuals
The numbers don't lie. A staggering 9 out of 10 online shoppers say high-quality photos are one of the most important factors influencing their purchase, beating out even price (83%) and shipping costs (76%). It's no wonder that product pages with high-resolution images can attract 95% more organic traffic.
In e-commerce, your customer can't pick up the product, feel its weight, or examine the texture. Your photos have to do all that heavy lifting, bridging the gap between the screen and their hands.
This is where many business owners hit a wall. They assume getting professional-looking shots means dropping thousands on a good camera for product photos, complicated lighting rigs, and endless hours spent editing. While that traditional route offers unparalleled control, the price tag and learning curve are steep.
At the end of the day, the goal is to sell more products. To see how great visuals fit into the bigger picture, it's worth learning how you can improve your e-commerce conversion rates with better imagery. The good news is that you no longer need a massive budget or a dedicated studio to get it right. Modern tools have made professional results more accessible than ever.
What Actually Makes a Camera Good for Product Photos?
Diving into camera specs can feel like learning a new language. All those technical terms and numbers don't always make it clear what you actually need for great product shots. So, let's cut through the noise and focus on the features that truly make a difference in how a customer sees your products online.
Think of a camera's sensor as its eyeball—the bigger it is, the more light and detail it can capture. A large full-frame sensor is like having perfect 20/20 vision. It pulls in tons of light, resulting in clean, rich images with minimal grain, which is exactly what you want when showing off your products under studio lights. It just makes everything look more premium.
Resolution: The Difference Is in the Details
Then you have resolution, which is measured in megapixels (MP). Higher megapixels mean more detail. It’s the difference between a standard t-shirt and a high-thread-count Egyptian cotton sheet. That higher "thread count" lets customers zoom way in on the tiny details—the clasp on a necklace, the stitching on a leather bag, or the texture of a fabric—without the image turning into a blurry, pixelated mess.
While a 24MP camera is a fantastic workhorse for most e-commerce shops, jumping up to 40MP or more gives you incredible freedom. You can crop in tight for different ad formats or print a massive banner without losing a bit of sharpness.
This level of detail is a huge trust-builder. When a shopper can virtually touch and inspect every part of your product, they feel more confident hitting that "buy" button.
Getting Light and Color Just Right
Beyond pure detail, two other features are absolutely critical for product photos: dynamic range and color accuracy.
- Dynamic Range: This is all about the camera's ability to see details in the very brightest and darkest parts of a photo at the same time. A camera with great dynamic range can capture the subtle texture on a white ceramic vase without turning its dark, shadowed base into a black blob.
- Color Accuracy: For e-commerce, this is non-negotiable. You need a camera that gets colors right straight out of the box. If that red dress looks orange on screen, you're setting yourself up for a wave of returns and unhappy customers.
We've covered the most important technical aspects, but here’s a quick-glance table to help you remember what to look for when you’re comparing models.
Key Camera Features for Product Photography Explained
This table breaks down the essential camera specs and explains exactly why they matter for making your products look irresistible.
| Camera Feature | What It Does | Why It Matters for Your Products |
|---|---|---|
| Sensor Size | Captures light and image data. Larger sensors (like Full-Frame or APS-C) gather more light. | Larger sensors produce cleaner, higher-quality images with less digital "grain," especially in controlled lighting. |
| Resolution (MP) | Determines the level of detail in an image, measured in megapixels. | High resolution allows for sharp, detailed shots where customers can zoom in to inspect textures, materials, and craftsmanship. |
| Dynamic Range | Measures the camera's ability to capture detail in both bright highlights and dark shadows in a single shot. | Prevents loss of detail on reflective or multi-toned products, ensuring everything from a shiny metal clasp to dark fabric is visible. |
| Color Accuracy | Refers to how faithfully the camera reproduces colors compared to the real-life object. | Crucial for managing customer expectations and reducing returns. What they see on screen should match what arrives in the box. |
Ultimately, finding the right camera is about balancing these core features. The goal isn't just to snap a picture, but to create an accurate, appealing digital storefront that convinces a customer your product is the one they need.
Choosing Your Tool: DSLR vs. Mirrorless vs. Smartphone
Picking a camera for product shots is a lot like choosing a vehicle for a road trip. The best choice really depends on the journey you have in mind. There's no single "best" camera out there; it's all about finding the right tool for your specific e-commerce goals.
Think of a DSLR (Digital Single-Lens Reflex) camera as the trusty, powerful pickup truck of the photography world. It's built to last, can handle almost any job you throw at it, and has a massive ecosystem of lenses built up over decades. For years, they've been the workhorses of the industry, loved for their fantastic image quality and beefy battery life. The trade-off? They're heavy and bulky, which can make them a bit of a hassle to set up and move around.
A Mirrorless camera, on the other hand, is like a sleek, modern electric car. It's lighter, faster, and jam-packed with the latest tech, like incredible autofocus systems and crystal-clear electronic viewfinders. By getting rid of the old-school mirror mechanism found in DSLRs, manufacturers made them more compact and nimble. They are undoubtedly the future, but that future often comes with a higher price tag.
The Rise of the Smartphone
And then you have the high-end Smartphone. It’s the zippy electric scooter of the group—unbelievably convenient and perfect for whipping up content on the fly, especially for social media feeds. The cameras on today's phones are genuinely impressive, but they still hit a wall when you need consistent, high-detail hero images for your main product listings.
Their tiny sensors just can't compete with dedicated cameras when it comes to capturing fine textures and a wide range of light. Plus, you're usually stuck with a fixed lens. That means you have to rely on digital zoom to get closer, which is just a fancy way of saying you're cropping the image and losing quality.
This guide below helps break down what really matters—sensor size, resolution, and dynamic range—to steer you in the right direction.
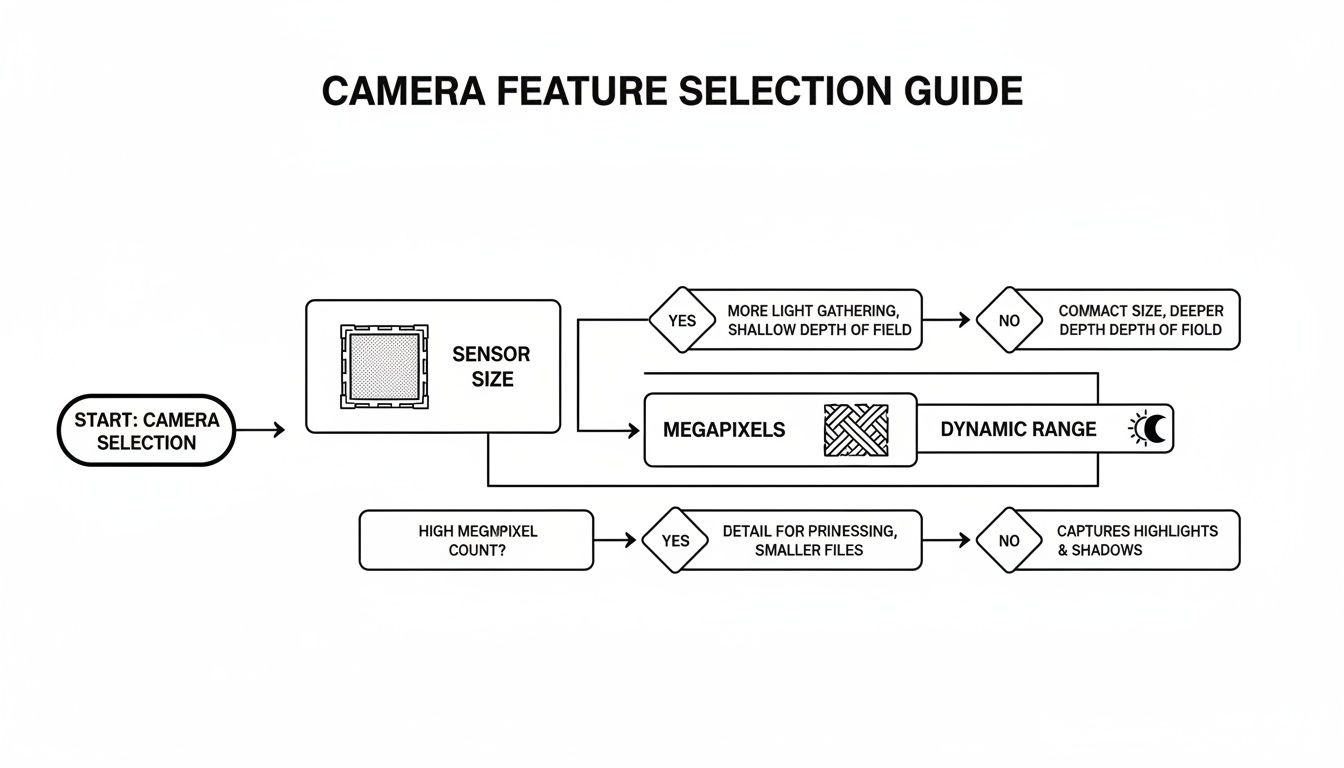
As the flowchart shows, a good sensor is your foundation for quality, but high resolution is what lets you capture the tiny details that convince a customer to click "buy."
Weighing the Investment Against the Need
The price gap between these options is huge. A truly professional setup usually means a DSLR or mirrorless camera paired with a specialized macro lens. A Canon EOS R5 with its 45MP sensor is a dream for shooting intricate jewelry, while a Sony A7R IV and its massive 61MP sensor can capture every last detail on a piece of consumer electronics. But these setups can easily run you $3,000-$6,000 before you even buy a single light or tripod.
At the same time, the world is shifting. Mobile-first content is king, with 47% of brands now focusing on vertical video for platforms like Instagram and TikTok, where a smartphone is right at home. You can check out more about the latest product photography trends to see how priorities are changing.
The core question every e-commerce seller needs to ask is: Do I need the absolute peak performance of a dedicated camera, or is the speed and convenience of a smartphone good enough? The right answer depends entirely on your product, where you sell it, and what your budget looks like.
Your Essential Gear and Camera Settings for Perfect Shots
Having a good camera is a great starting point, but it's only one piece of the puzzle. To really nail those sharp, professional-looking images that make customers click "buy," you need the right supporting cast of gear. It’s like being a master chef—a fantastic oven is key, but you can't create a masterpiece without the right pans, ingredients, and techniques.
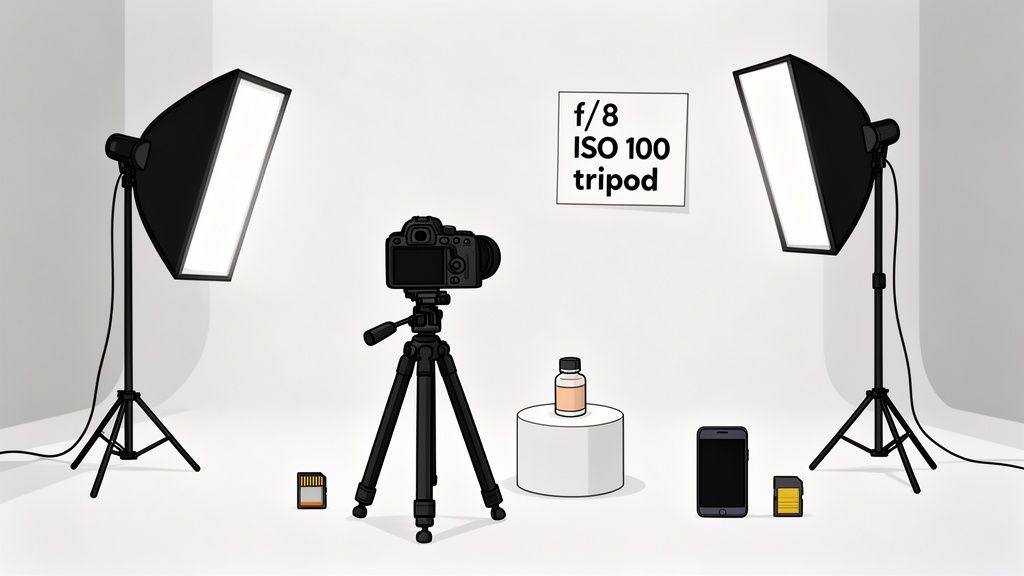
In photography, that support system is your gear. First and foremost, a sturdy tripod is non-negotiable. It eliminates the tiny, unavoidable hand movements that create blur, guaranteeing every shot is perfectly crisp. Good lighting is just as critical. Even a simple softbox or a well-placed window can make your product pop. Honestly, these two things will improve your photos more than almost any fancy camera feature.
Your Go-To Camera Settings Cheat Sheet
Once your setup is solid, it's time to dial in your camera settings. Getting this right means balancing three key elements, often called the "exposure triangle." It sounds technical, but it’s pretty straightforward. For consistently great product shots, switch your camera to Manual Mode (M) and start here:
Aperture (f-stop): Start at f/8. Think of the aperture as the pupil of your camera’s eye. A higher number like f/8 or f/11 keeps your entire product in sharp focus from front to back—a must-have for e-commerce.
ISO: Keep it at 100 or 200. ISO is your camera's sensitivity to light. Sticking to the lowest native setting (usually 100) prevents that grainy, unprofessional look known as digital noise, giving you the cleanest image possible.
Shutter Speed: Adjust as needed. Since your camera is locked down on a tripod and your ISO is low, you can let the shutter stay open longer to capture the perfect amount of light. This is the one setting you'll tweak most often to get the brightness just right, without any fear of blur.
This simple formula—a higher f-stop and a low ISO—is the secret to maximum sharpness and clarity. And because you’re using a tripod, you have the freedom to use whatever shutter speed you need for a perfectly exposed shot.
By mastering these three settings, you take full control away from the camera's auto mode. This consistency is key to building a professional and trustworthy product gallery for your online store.
Of course, taking the photo is only half the battle. If you want to see how to transform great shots into flawless final images, check out what professional product photo editing services can do. Combining a solid setup, the right settings, and smart editing is how you create images that truly sell.
The Hidden Costs of Traditional Product Photography
That shiny new camera is just the ticket to entry. The real price of traditional product photography isn’t on the price tag; it's paid in hours, effort, and the sheer frustration of trying to get it right.
Think about it. A small business owner drops a few thousand dollars on a camera and some lights. They block off an entire weekend to shoot just ten products. What do they end up with? A collection of inconsistent images with harsh shadows, off-kilter colors, and a look that’s miles away from the professional shots they were aiming for.
And that’s when the real work begins: the post-production slog.
The Endless Editing Cycle
Every photo you take is going to need some love in post. This means spending hours glued to your screen, wrangling complex software like Photoshop or Lightroom to fix problems that cropped up during the shoot.
For every single image, the to-do list is long:
- Background Removal: You have to painstakingly trace and cut out your product to get that clean, pure white background that marketplaces demand.
- Color Correction: Is that blue shirt really that blue? You'll need to tweak hues and saturation to make sure the color is spot-on, which is critical for keeping customers happy.
- Retouching: The camera sees everything—every speck of dust, every fingerprint, every tiny imperfection. Now you have to remove them all, one by one.
- Consistency: Every photo needs to match. You have to ensure the lighting, style, and a dozen other variables are identical across the entire product line.
Every hour you spend on these repetitive tasks is an hour you’re not spending on marketing, talking with customers, or actually growing your business. This opportunity cost is a huge hidden expense that most sellers completely overlook. You can get a more detailed look at these expenses by reading about the true cost of professional product photography.
For small online retailers, the stakes are incredibly high. Research shows that 5 out of 10 customers value high-quality photos more than product descriptions. Even worse, poor visuals are directly responsible for 22% of returns because the product didn't match what the customer saw online. You can find more insights into the e-commerce photography market on proficientmarketinsights.com.
From setting up the lights to culling thousands of shots and then editing the keepers, the whole process is a massive drain. It’s a steep learning curve that requires a level of patience most entrepreneurs just can't afford. The camera purchase is just the down payment; the real cost is paid with your most valuable asset: your time.
The AI Alternative: How to Get Pro Photos Instantly
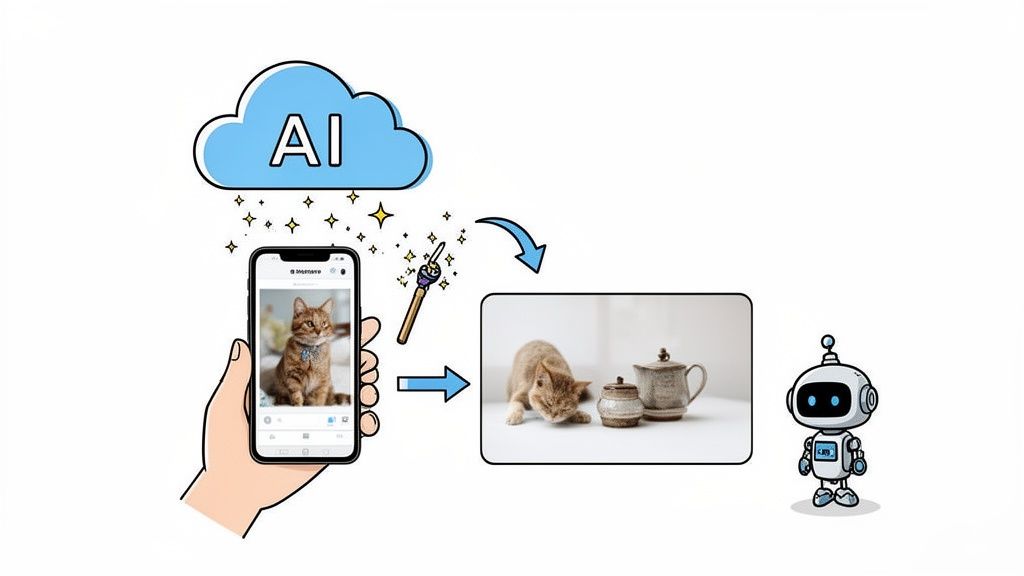
What if you could bypass the expensive gear, the tricky lighting setups, and the hours spent editing? The modern answer isn’t about buying a better camera—it's about using smarter software. AI-powered tools are completely changing how we approach product shots, essentially giving every seller their own on-demand virtual photography studio.
Instead of sinking thousands into a good camera for product photos and all the accessories, you can get professional-looking images with the smartphone you already have in your pocket. The process is almost laughably simple: you snap a basic picture, upload it, and let the AI handle the rest.
Your Three-Step Path to Perfect Images
This new approach makes high-quality photography accessible to everyone. It turns a multi-hour headache into a task that's over in seconds.
- Snap a Simple Photo: Grab your smartphone and take a clear picture of your product. Don't stress about the background or getting the light just right.
- Upload to an AI Platform: Drag and drop your image into an AI tool like ProdShot.
- Receive a Perfected Image: In an instant, the AI removes the background, balances the lighting, cleans up any small imperfections, and gives you back a flawless, marketplace-ready photo.
It's not just about convenience; it's about consistency. Every single image in your catalog gets the same professional treatment, which builds a cohesive, trustworthy brand identity that helps drive sales.
The advantages are clear. You save an incredible amount of time and money compared to going the traditional route. You can stop wrestling with camera settings and editing software and get back to actually growing your business. For anyone curious about the tech behind this, exploring different AI image manipulation techniques can open your eyes to what's possible.
Ultimately, tools like an AI product photo generator let you create scroll-stopping images without the steep learning curve or high price tag. Professional results are finally within reach for everyone.
A Few Common Questions About Product Photography
Diving into product photography can feel a little overwhelming, and it's natural to have questions. Let's clear up a few of the most common ones that sellers ask when they're just starting out.
Do I really need an expensive camera for good product photos?
Honestly, no. While a fancy DSLR or mirrorless camera is the gold standard, you absolutely do not need one to get great shots, especially when you're starting.
Modern smartphones pack some serious power in their cameras. They can capture sharp, well-lit images that look fantastic on most online stores and social media feeds. The real secret isn't the camera body; it's the lighting and how you edit the photos afterward. Don't let gear hold you back.
How many megapixels should I be looking for?
It's easy to get caught up in the numbers, but for most e-commerce sites like Shopify or Amazon, anything in the 12 to 24 megapixel range is plenty. Megapixels are all about how big you can blow up the image or how much you can crop it before it starts looking blurry.
But here’s the thing: fantastic lighting, a sharp lens, and true-to-life colors will make a far bigger difference to your final shot than a massive megapixel count. Get the basics right first.
So, can I just use my phone?
You bet. For many people, starting with a phone is the smartest and most budget-friendly way to go. It gets you in the game instantly.
For your main "hero" shots on product pages, a dedicated camera will often give you an edge in sharpness and that professional-looking background blur. But for social media posts, stories, and behind-the-scenes content? Your phone is probably the best tool for the job.
The best camera is the one you have. Start with your phone, learn the ropes, and once you're ready to grow, you can decide if investing in a good camera for product photos or using a smart AI tool makes more sense for your business.
Stop wrestling with complicated setups and expensive gear. ProdShot takes your simple phone pictures and transforms them into professional, marketplace-ready images in seconds. Try it for free and see the difference.