
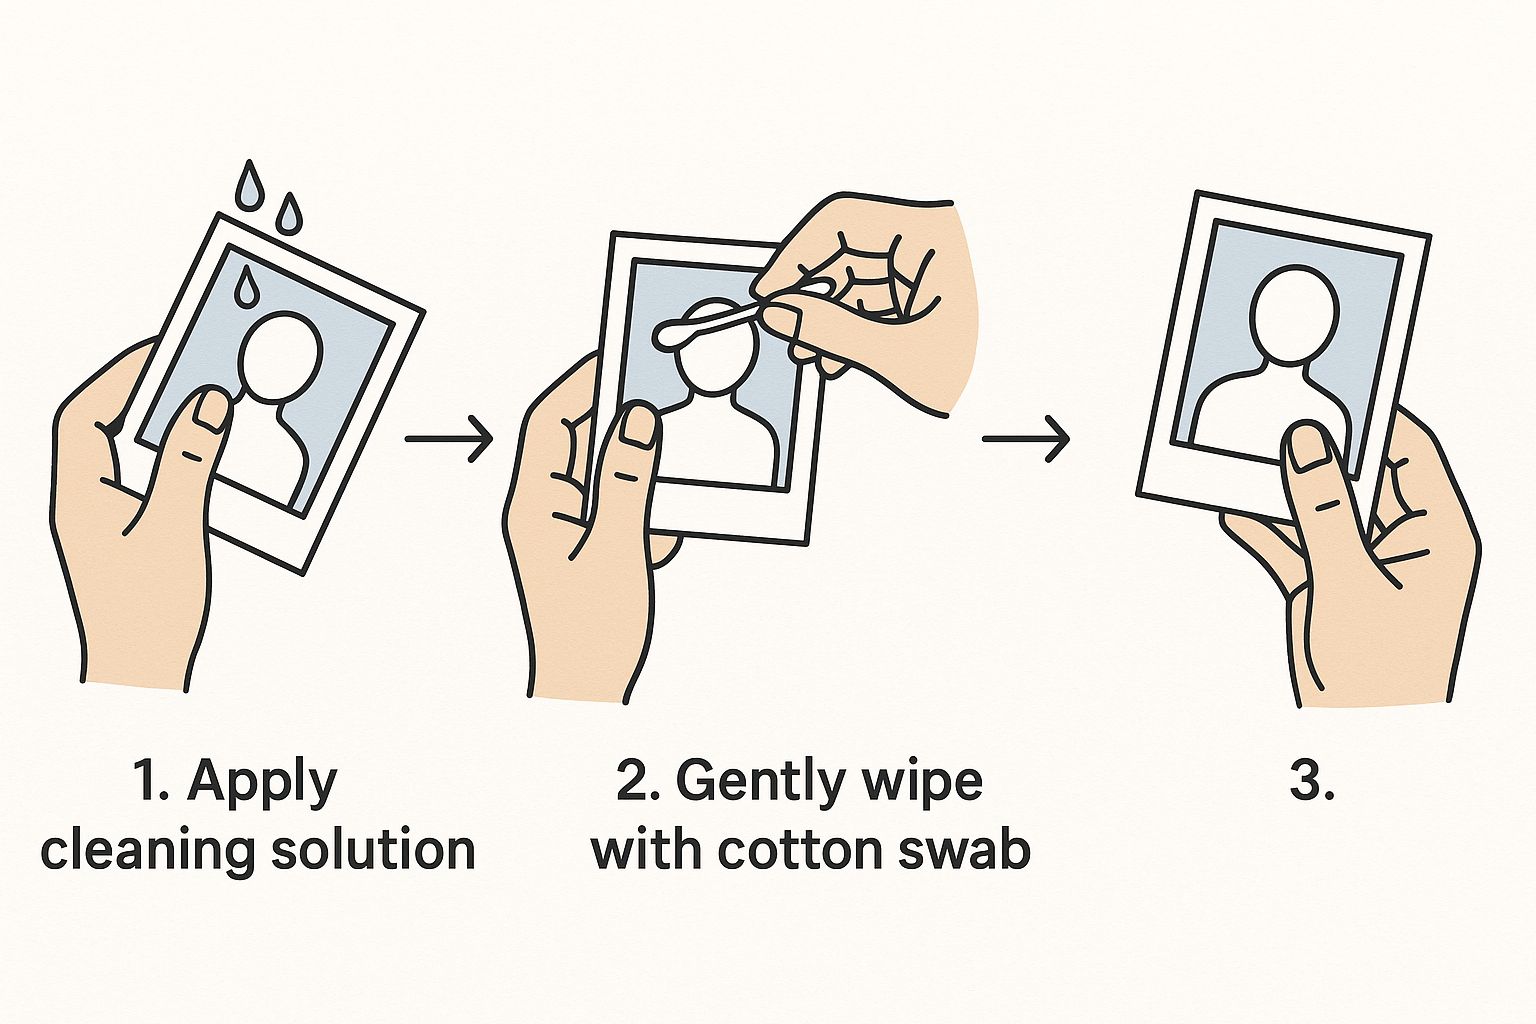
If you've ever found an old photo covered in dust or noticed annoying digital "noise" in a product shot, you know how frustrating it is. The good news is, cleaning up a picture today is easier and safer than ever before. We're not talking about risky physical cleaning anymore—this is all about digital magic.
This non-destructive approach means your original photo is always preserved. It's a massive leap from the old days of carefully wiping a physical print and just hoping you wouldn't scratch it.
Why Digital Photo Cleaning is the New Standard
The whole idea of "cleaning a picture" has changed. What used to involve special cloths and chemical solutions is now done entirely with software. It's a safe, powerful, and surprisingly accessible way to get professional results.
Instead of physically touching a delicate print, we're now working at the pixel level. Smart software can hunt down and fix imperfections with incredible precision, leaving you with a crystal-clear image. The biggest win? There's zero risk of the permanent scratches, fading, or water damage that came with handling physical photos.
The Shift from Print to Pixels
Let's face it, the photography world lives online now. That simple fact has completely changed how we handle and preserve our images. As of 2023, a staggering 90% of all photographs are stored digitally. This isn't just a trend; it's a fundamental shift that makes software-based cleaning an absolute necessity for keeping our images looking sharp.
Before we dive into the "how-to," let's quickly compare the old way versus the new way.
Digital vs Physical Picture Cleaning
| Aspect | Digital Cleaning (Software) | Physical Cleaning (Prints) |
|---|---|---|
| Risk of Damage | Virtually zero. The original file is never altered. | High. Risk of scratches, chemical stains, and fading. |
| Reversibility | 100% reversible. You can always "undo" or revert. | Permanent. Any damage done is irreversible. |
| Precision | Pixel-level accuracy for removing tiny dust spots. | Limited. Can easily miss small details or cause new smudges. |
| Tools Needed | Computer or smartphone with editing software/app. | Specialized cloths, chemical solutions, and brushes. |
The takeaway is clear: digital cleaning offers all the reward with none of the risk.
The real beauty of digital cleaning is that it's non-destructive. You can go wild experimenting with blemish removal, color fixes, and noise reduction, all while your original file sits safe and sound. It’s like having an infinite undo button for your photos.
Two Paths to a Perfect Picture
When it comes to cleaning up your product photos, you generally have two solid options.
- Automated AI Tools: Platforms like ProdShot are built for speed. You just upload an image, and the AI gets to work, automatically zapping dust spots, fixing weird lighting, and smoothing out background noise in seconds.
- Manual Editing Software: For that one-of-a-kind family photo or a high-stakes commercial shot, nothing beats the control of programs like Adobe Photoshop. This route takes more know-how, but the level of precision is unmatched.
Knowing which tool to grab for the job is half the battle. If you're running an e-commerce store and need consistency and polish across hundreds of images, it's worth looking into professional product photo editing services that can give your shop a serious competitive edge.
Assembling Your Digital Cleaning Toolkit
Before you can start cleaning up your images, you’ve got to have the right tools for the job. Your choice generally boils down to two paths: fast, automated platforms or manual, high-control software. Each has its time and place, depending on what you're trying to accomplish.
AI-powered tools are built for one thing: speed. Imagine you just shot a hundred new product photos, but they all have a few tiny dust specks and the white background isn't quite white. An AI tool can chew through that entire batch in minutes, spitting out clean, consistent images with zero manual effort. It’s a lifesaver for high-volume work.
On the flip side, you have traditional photo editors like Adobe Photoshop. These give you deep, granular control over every single pixel. This is what you’ll reach for when you're working on a single, high-stakes hero image for your homepage or carefully restoring a precious family photo where every detail matters. The trade-off, of course, is time and a much steeper learning curve.
Choosing Your Primary Tool
So, which one is right for you? It really depends on your end goal. If you're an e-commerce seller, consistency and speed are king. If you're a photographer or digital artist, complete creative control is everything.
- AI Photo Editors: These are your best bet for high-volume tasks like cleaning up product catalogs, zapping backgrounds, and making quick color corrections. Tools like the Shopify photo editor from ProdShot are designed specifically for this kind of efficient workflow.
- Manual Software (Photoshop, GIMP): Ideal for detailed restoration, complex composites, and any time you need pixel-perfect precision that an algorithm might overlook.
Here’s a quick look at a typical AI tool's interface. Notice how it’s designed for simplicity and getting the job done fast.
The clean layout is all about a simple upload-and-edit process, which makes it approachable even if you're a complete beginner.
Essential Workspace Prep
No matter which software you choose, a little prep work goes a long way. Always start with the highest-resolution version of your image you can get your hands on. You can always make an image smaller, but you can’t magically add detail that isn't there to begin with.
Your monitor is your window into the image. If its colors are off, your edits will be, too. A calibrated monitor is a non-negotiable step to ensure the colors you see are the same colors everyone else will see.
Finally, once you've got the basics down, you might want to see what else is possible. It’s worth exploring some of the incredible AI-powered image-to-image processing tools out there. They can transform and refine images far beyond simple cleaning, opening up a whole new world of creative possibilities.
Removing Dust And Scratches With AI
This is where the real magic happens. If you’ve ever finished a product photoshoot only to find tiny sensor dust spots on every single image, you know the pain. It used to mean hours of painstakingly using a clone stamp tool on each photo.
Today, AI makes that whole process nearly instant.
Modern AI tools have been trained on millions of images, teaching them how to intelligently spot and remove common blemishes. They don’t just blur over an imperfection; they actually analyze the surrounding pixels and reconstruct the area so it looks completely natural. This means you can clean up dust, small scratches, and other specks without leaving behind any of those tell-tale editing marks.
The workflow is ridiculously simple. You upload your image, the AI scans for flaws, and you just have to approve the fixes.
The Automated Cleaning Process
The whole point of using AI for this is efficiency. The process boils down to a few quick actions.
- Upload Your Image: Just drag and drop your product photo directly into the AI tool. No complicated menus to navigate.
- AI Detection: The software immediately gets to work, analyzing the image and identifying anything that detracts from a professional look—dust, scratches, you name it.
- One-Click Removal: With a single click, you can approve the AI’s suggestions and watch the flaws disappear. The tool is smart enough to fill in the gaps for a seamless result.
For any business trying to maintain high standards across a large product catalog, automated product photo retouching is an absolute game-changer. It guarantees every image is spotless without all the manual labor.
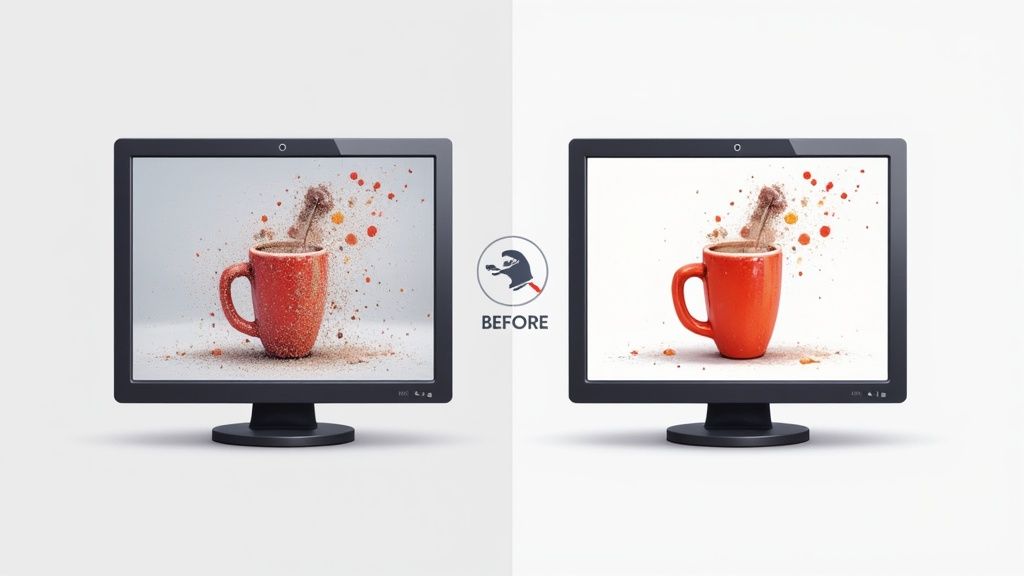
The image below shows just how simple and hands-off modern digital cleaning can be.
This really highlights how digital tools can offer a gentle, precise touch, mimicking the care of physical restoration but with far more power and safety.
To give you a better idea of what different tools offer, here's a quick breakdown of their core cleaning features.
AI Tool Feature Breakdown for Photo Cleaning
| Feature | What It Does | Best For |
|---|---|---|
| Blemish Removal | Automatically detects and removes spots, dust, and minor scratches. | Quickly cleaning up product photos taken in non-studio environments. |
| Object Removal | Erases larger unwanted objects and intelligently fills the background. | Removing props, stray items, or distracting elements from a shot. |
| Noise Reduction | Smooths out grainy textures caused by low light or high ISO settings. | Enhancing photos taken with a smartphone or in poor lighting. |
| Scratch Repair | Specifically targets and reconstructs linear scratches or tears. | Digitizing and restoring old or damaged photographs of products. |
Each tool has its strengths, but they all share the common goal of making your images look clean and professional with minimal effort.
Beyond Basic Blemish Removal
While getting rid of dust is a huge win, these tools often do more. Many AI editors can also correct minor lens distortions or chromatic aberration—that subtle purple or green fringing you sometimes see on high-contrast edges.
The result is a cleaner, crisper image that looks like it was shot in a high-end professional studio.
The biggest advantage of using AI here is consistency. When you have to clean dozens or even hundreds of pictures, AI ensures each one is treated with the same level of precision. This creates a uniform, polished look across your entire product line that’s incredibly difficult and time-consuming to get right manually.
Fixing Noise Without Losing Detail
You know that grainy, sandy texture that shows up in photos taken in low light? That’s digital noise. It’s what happens when your camera's sensor has to work overtime to capture enough light, and the result is a sea of distracting speckles that can completely undermine a great shot. Getting rid of that noise is a non-negotiable step for a clean, professional look.
For years, the only real option was to jump into a program like Lightroom or Photoshop and start fiddling with sliders. You’d nudge the "luminance" and "color" noise reduction, trying to find that perfect balance. But it was always a trade-off. Push it just a little too far, and your sharp, detailed product would turn into a blurry, plastic-looking mess. All that lovely texture? Gone.

This is precisely where AI tools have stepped in and completely changed the game. Instead of just smearing the noise away across the whole image, modern AI algorithms are smart. They can actually tell the difference between unwanted grain and the important details you want to keep.
The AI Advantage in Noise Reduction
Think about how an AI-powered editor sees your photo. It doesn't just see a bunch of pixels; it analyzes the content. It can identify a smooth, painted wall and apply aggressive noise reduction there, while at the same time, it protects the crisp weave of a fabric or the sharp edges of your product. This selective, intelligent approach is the secret to getting spotless images that don't sacrifice an ounce of clarity.
Here’s why it works so well:
- Detail Preservation: It’s smart enough to smooth out the flat, noisy areas while leaving textured surfaces completely alone.
- Time Savings: An edit that used to involve careful, manual adjustments now literally takes a single click.
- Natural Results: AI helps you dodge that overly smooth, "waxy" look that screams "I went too hard on the noise reduction!"
The real magic of AI is its contextual awareness. It doesn't just see pixels; it sees a sky, a product, or a person's face. This allows it to make much smarter calls about what's noise and what's essential detail, giving you a clean photo that still feels real.
Sharpening The Right Way
Once the noise is gone, the final step is often a touch of sharpening to bring back that crisp, defined look. But just like with noise reduction, it’s easy to overdo it. Too much sharpening can create harsh, unnatural-looking edges and even introduce a different kind of visual distraction.
The best practice here is to be gentle. Your goal is to enhance the detail that’s already there, not to create new, artificial lines. Many AI tools, like ProdShot, bundle intelligent sharpening right alongside their noise reduction features. This ensures you get a balanced, clean finish that makes your product photos look like they came straight from a professional studio.
Once you’ve tackled the noise and scrubbed away any blemishes, the next big hurdle is color. Nothing screams “amateur” louder than a photo with a funky color cast. You know the look—that dull yellow hue from indoor lights or a white background that looks more like a gloomy gray morning. It can kill an otherwise great shot.
But don’t worry, you don’t need a degree in color theory to nail this. Most of the time, a one-click AI fix is all you need to neutralize those weird tints. Let’s say your product is sitting on a white backdrop that picked up a bluish tint from the window light. A good AI editor can see that, adjust the temperature, and snap it back to a crisp, clean white in a single click.
Going Beyond the One-Click Fix
For those times when the auto-fix doesn't quite cut it, you'll need to roll up your sleeves and jump into the manual tools. The two workhorses here are Levels and Curves. They might look a little intimidating at first glance, but they give you incredible power over the brightness and contrast of your image.
- Levels: This is your go-to for setting the absolute darkest black and the brightest white in your photo. It’s a super-fast way to add some serious punch.
- Curves: This tool gives you surgical precision over the entire tonal range, from the deepest shadows all the way up to the brightest highlights.
A quick glance at your photo’s histogram—that little graph showing the tonal distribution—is your best diagnostic tool. Is the graph all scrunched up on one side? That’s a clear sign your image is either way too dark or completely washed out. A few simple tweaks in Levels or Curves will stretch that graph out to cover the full spectrum.
Honestly, just learning to "set the black and white points" is one of the quickest ways to make a flat, lifeless photo pop with professionalism. It guarantees you get those rich, deep blacks and clean, bright whites without crushing the details.
Of course, a perfectly edited photo can still fall flat if it’s not sized correctly for the platform you’re posting on. To make sure all your hard work pays off, check out these excellent guidelines on the best image sizes for social media. It’s the final step to ensuring your pictures look sharp everywhere they’re seen.
Your Top Photo Cleaning Questions, Answered
Jumping into photo editing can feel a little daunting. You know you want that clean, professional look, but a lot of questions pop up along the way. I get it. Here are some quick, practical answers to the most common things people ask when they start cleaning up their product shots.
What’s the Best Tool to Start With?
If you're just starting out, my advice is always to go with an AI-powered tool. Seriously, don't overwhelm yourself. A tool like ProdShot is built for one thing: to get you a great result, fast. You upload your picture, and it does the heavy lifting for you, no deep technical knowledge required.
Of course, something like Photoshop gives you granular control over every pixel, but the learning curve is steep. You can get bogged down in tutorials for hours. Start with AI, get great results, and then you can always explore the more complex software later if you find you need it.
Can Every Damaged Photo Actually Be Fixed?
Honestly? No. And anyone who tells you otherwise is selling something. AI tools and manual editing can do incredible things—they're fantastic for getting rid of dust, fixing minor scratches, and correcting weird color casts. But they can't perform miracles.
If a photo is just a blurry mess because the camera was completely out of focus, or if it's so low-resolution that it looks like a blocky mosaic, there's just not enough data there to fix it. The key is to manage your expectations. You can improve almost any image, but you can't create sharp detail that was never there in the first place.
Here’s a good rule of thumb I always follow: Focus on removing what you don’t want (like dust and noise). Don’t try to add what isn’t there (like sharp focus). Sticking to this will give you the most natural, believable results every single time.
How Do I Know When to Stop Editing?
This is the big one. The goal is to make your product look its best, not to make it look fake. An image is "clean enough" when all the distracting little flaws are gone, and your eye goes straight to the product.
Here’s a quick mental checklist I run through:
- The Distraction Check: Scan the image. Are there any little dust spots or smudges pulling your attention away from the main event?
- The Color Check: Does the color look real? Is there a funky yellow or blue tint making it look unnatural?
- The Zoom Test: Zoom in a bit. Is there so much digital noise or grain that it's making the details look fuzzy?
Once you've handled those points without making the textures look waxy or "plastic," you're done. It's so easy to push it one step too far. Learning to stop is just as important as learning how to edit.
Ready to see how simple it is to get that studio-quality finish without the headache? Give ProdShot a try and see what it can do for your photos. Get your free trial today.