
Swapping out a messy background for a clean white one is one of the most important things you can do for your product photos, especially if you're selling on a platform like Amazon or Shopify. It’s a simple change, but it makes a world of difference. Your product becomes the star of the show, all the distractions melt away, and it just gives your store a professional polish that helps build trust with shoppers.
The Power of a Clean White Background
Ever noticed how all the big online marketplaces seem to have a thing for white backgrounds? It’s not just a random design choice. It’s actually a smart sales strategy based on a little bit of psychology.
A clean, consistent backdrop makes your entire product gallery look tidy and professional, which is huge for making a good first impression. When a potential customer is scrolling through a sea of items, the ones on that crisp white background just pop. They look cleaner, more high-quality, and more trustworthy.
Here’s why it works so well:
- It Kills the Visual Clutter: A busy background is distracting. When you get rid of it, the customer’s attention goes right where it should: on your product's details, texture, and unique features.
- It Creates Consistency: Using the same white background for every photo ties your whole website or catalog together. It creates a cohesive, polished look that strengthens your brand.
- It Boosts Perceived Value: It's a subtle thing, but products presented cleanly often feel more valuable. It sends a signal that you’re a professional who cares about quality.
The need for this skill is absolutely blowing up. As e-commerce and social media keep growing, the market for image background removal tools is set to expand in a big way. This really shows how much everyone is leaning on AI tools to handle this task with incredible precision. You can learn more about the future of AI in visual content and see how these tools are changing the game.
A white background isn't just about making things look nice; it's about making them sell. It removes the friction between the customer and the product, letting the item's quality speak for itself.
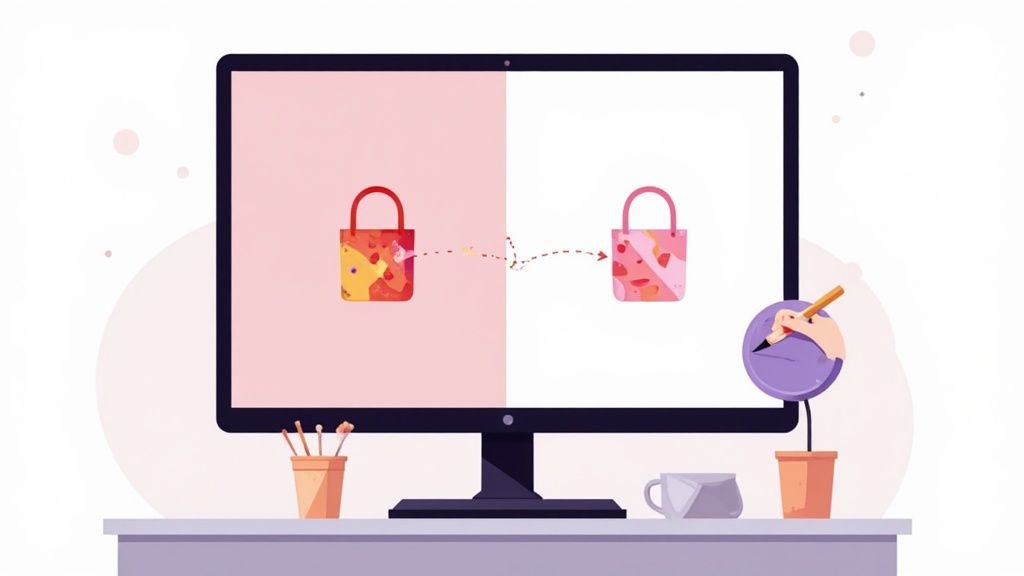
Tools like ProdShot have made getting that professional look almost ridiculously easy. Just look at this before-and-after.
The photo on the left is a real-world snapshot with a cluttered desk. The one on the right? It’s a clean, marketplace-ready shot with a perfect white background. That single change—from a distracting environment to a focused product image—is exactly what makes an online store look legit and helps drive sales.
Get a White Background in Seconds with AI
If you need to change a picture's background to white without getting lost in complex software, AI-powered tools are the way to go. The whole process is incredibly simple, turning what used to be a long, tedious editing session into a task you can knock out in less than a minute. Forget about painstakingly tracing edges with a pen tool; you just let smart algorithms do all the heavy lifting for you.
This kind of workflow is a lifesaver for e-commerce sellers, especially when you're managing dozens or even hundreds of product listings. With a tool like ProdShot, the steps couldn't be more straightforward. You start by uploading your original image—it can be a quick photo you snapped with your phone, complete with whatever cluttered background was behind it.
The AI gets to work instantly, analyzing the photo to figure out what the main subject is and separating it from everything else. You don't have to select or outline anything. Within seconds, the background is gone, leaving you with a perfectly clean cutout of your product.
The One-Click Transformation
Once the background is removed, the final step is just as easy. You simply pick the white color option, and the tool instantly applies a pure white background (#FFFFFF) to your image. The result is a professional, marketplace-ready photo that looks crisp and consistent.
This approach completely removes the steep learning curve that comes with traditional editing software. It's built for speed and efficiency, making it possible for anyone to create high-quality product shots. For online sellers, this speed is a massive advantage. If you're a Shopify store owner, for example, you can learn more about how to remove the background from product photos for Shopify and get your listings live that much faster.
Whether you do it by hand or with AI, the basic path to changing a background follows a few key stages.
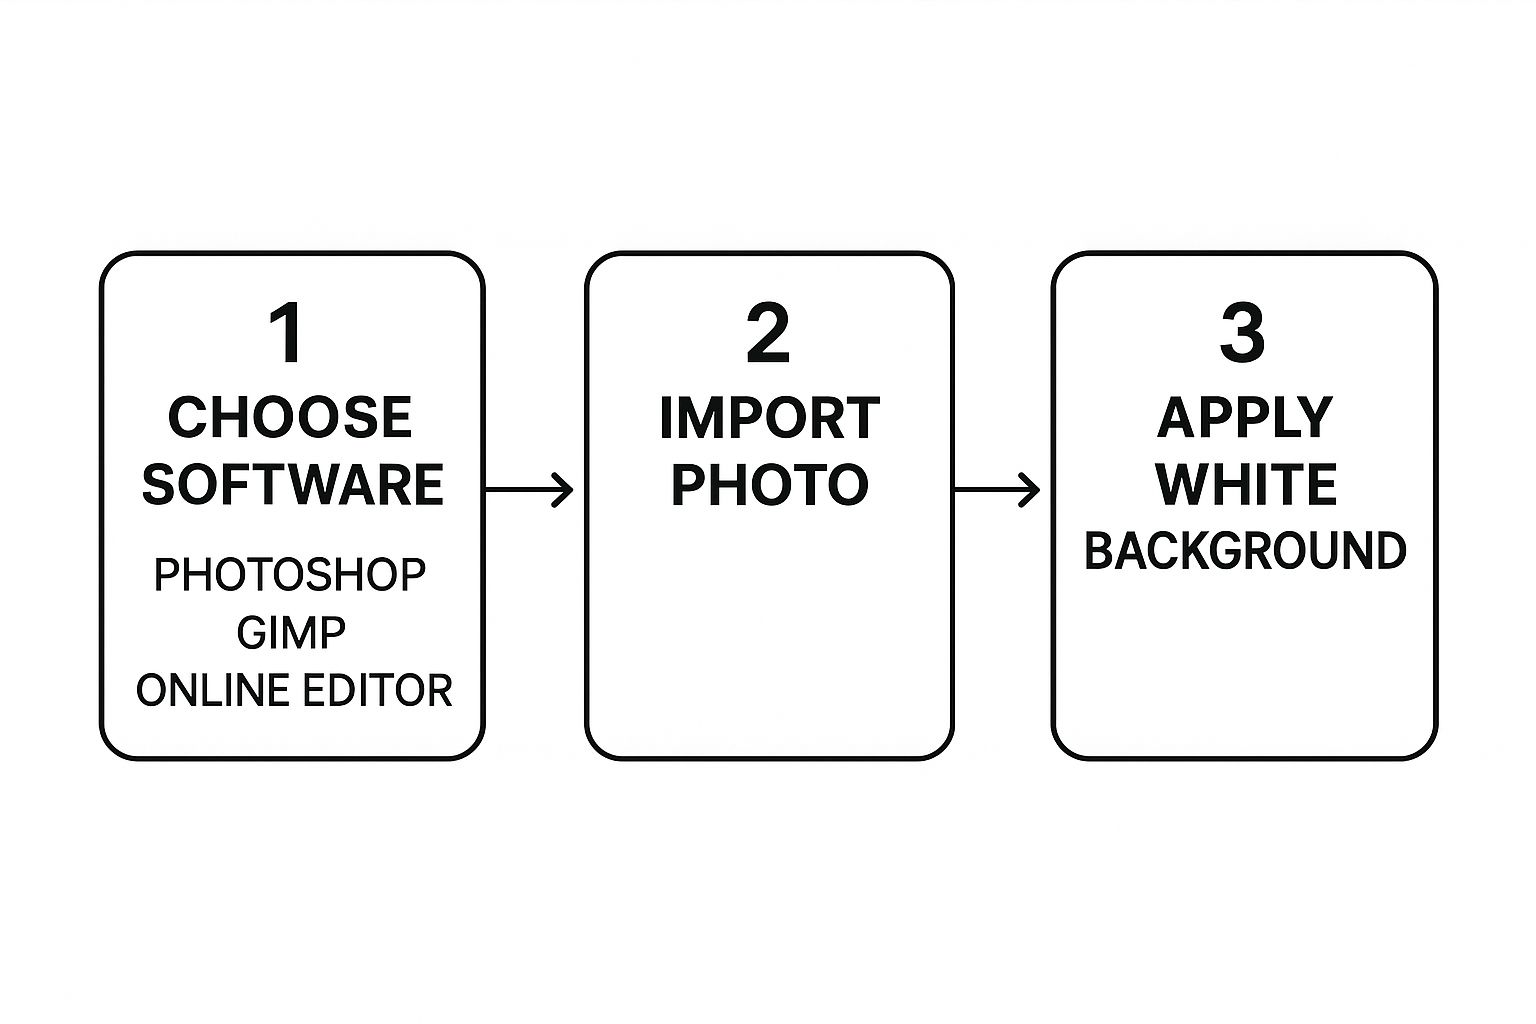
This visual shows you the core steps, but the beauty of AI tools like ProdShot is that they automate pretty much the entire thing into one seamless action.
Editing Time Comparison: Manual vs. AI Tools
Let's look at the actual time you save. Manually editing photos, even for a pro, takes time. When you multiply that by a full product catalog, the hours add up fast. Here’s a quick breakdown of how AI changes the game.
| Task | Manual Method (e.g., Photoshop Pen Tool) | AI Tool (e.g., ProdShot) |
|---|---|---|
| Single Simple Product | 5-10 minutes | < 30 seconds |
| Complex Product (e.g., jewelry, hair) | 15-30+ minutes | ~1 minute |
| Batch of 50 Products | 4-8 hours | < 25 minutes |
As you can see, the time savings are enormous. What used to be a full day's work can now be handled during a coffee break, freeing you up to focus on growing your business instead of getting bogged down in repetitive editing tasks.
Streamlining Your Visual Content
Saving all that time on background removal means you can focus on other crucial parts of your business, like marketing and talking to customers. It’s all about working smarter, not harder. By adopting an AI-first approach to your photo editing, you can keep your storefront looking polished and professional with minimal effort.
The real benefit of using AI for background removal isn't just the speed—it's the consistency. Every image gets the same high-quality treatment, ensuring your brand's visual identity remains strong and cohesive across all your products.
Beyond just background removal, there are tons of other resources that can help you create better visual content. It's worth exploring some of the other essential content creation tools out there that cover everything from video editing to graphic design, helping you build a complete toolkit for all your creative needs.
Polishing Your Image for That Flawless Finish
AI is absolutely brilliant for getting you 99% of the way to a perfect image in seconds. I see it every day. But sometimes, that final 1% is what really separates a good photo from a truly professional one. This is especially true when you're dealing with tricky subjects that have fine, complex details.
Think about shooting a fluffy sweater or a model with wispy, flyaway hair. These elements have soft, intricate edges that can occasionally give an automated system a bit of a challenge. Instead of a perfectly clean cutout, you might spot a tiny, faint halo from the old background or some slightly jagged edges where the AI struggled to perfectly define the border.
Prepping Your Photo for a Cleaner Cutout
Here’s a tip I’ve learned from experience: the quality of your final image almost always comes down to the quality of your source photo. A well-lit, high-contrast image gives the AI more distinct information to work with, which means you’ll get a much cleaner, more accurate background removal.
Before you even upload your photo to ProdShot, try making a few simple tweaks. It only takes a moment.
- Bump Up the Contrast: A slight contrast boost helps create a harder, more defined line between your subject and its background, making the AI's job easier.
- Check Your Lighting: Make sure your product is evenly lit. Harsh shadows can sometimes be misinterpreted by the AI as being part of the subject itself.
- Use a Simple Backdrop: If you can, shoot against a plain, solid-colored wall. The less visual clutter the AI has to analyze, the better the result.
A great input leads to a great output. I’ve found that spending just 30 seconds adjusting a photo's lighting and contrast beforehand can save you minutes of touch-up work later and dramatically improve the AI's accuracy.
Mastering the Final Touch-Ups
Even with a perfect source photo, you might spot a tiny imperfection here or there. This is where simple touch-up tools become your best friend. Most modern editors, including ProdShot, offer intuitive tools to clean up these small issues. Just look for a "refine edge" tool or a simple erase brush to smooth out any rough spots along your subject’s border.
This is a huge leap from how we used to do things. The jump from manual editing to AI automation has created massive efficiencies for everyone. Not long ago, if you wanted to change a picture background to white, you were looking at 10 to 30 minutes of tedious work for every single image. Today's AI slashes that time down to mere seconds, completely changing professional workflows.
If you're dealing with a really complex project or would just rather have an expert handle it, our product photo editing services can take care of all these little refinements for you, making sure every last detail is absolutely perfect.
Creating Realistic Shadows and Depth
So you've switched out your background for a crisp, clean white one. But now your product looks… a little weird. Maybe it looks like it’s floating in space. It’s a super common problem, but thankfully, the fix is both simple and incredibly effective: add a realistic shadow.
A well-placed shadow is what grounds your subject. It gives it weight and convinces the eye that it’s actually sitting on a surface, right there in the frame.
Without that small detail, the whole image can feel flat and artificial. With it, you instantly create a sense of depth and dimension. It's a subtle touch, for sure, but it’s often the one thing separating an amateur product shot from a professional one.
Matching Shadows to Your Subject
Of course, not all shadows are created equal. The kind of shadow you add needs to feel authentic to the product itself and, just as importantly, the lighting in the original photo. AI tools like ProdShot make this process much easier by giving you simple, intuitive controls to get the effect just right.
You'll generally work with two main types of shadows:
- Drop Shadow: Think of this as a soft, diffused shadow that appears slightly behind and below your product. It’s perfect for creating a gentle lift and a hint of depth without being too obvious.
- Contact Shadow: This one is sharper and more defined. It shows up right where the product makes contact with the ground, mimicking how light behaves in the real world. This is key for adding that extra dose of realism.
To get the look right, think back to the original lighting. Was it a harsh, direct light that created sharp, defined shadows? Or was it softer and more diffused? Trying to replicate that original feel will make your final image far more believable. You can adjust the shadow's opacity, blur, and direction to fine-tune the effect until it blends in perfectly.
My rule of thumb? Always start with a low opacity and a slight blur. From there, I gradually increase both until the shadow looks natural. The most common mistake I see is overdoing it—subtlety is your best friend here.
Ultimately, the goal is to add realism without making people notice the shadow itself. A great shadow supports the product, enhances its shape, and makes that clean white background feel less like a void and more like a professional studio. It's the final touch that truly completes the transformation.
Common Mistakes to Avoid with White Backgrounds
Getting a professional-looking white background is about more than just hitting an "erase" button. I've seen countless product shots that almost get it right, but a few small, common mistakes can make an otherwise great photo look amateurish.
Paying attention to these little details is what really separates clean, high-converting images from the ones that just feel… off.
One of the biggest culprits? Starting with a low-resolution photo. If your source image is blurry or pixelated, the edges of your product will never look sharp, no matter how sophisticated your editing tool is. You'll end up with a fuzzy, unprofessional outline that just screams low quality.
Another classic giveaway is leaving behind a faint "halo" from the old background. This happens a lot with automated tools that don't quite nail the cutout, leaving a thin, discolored border around your product. It’s a dead giveaway that the background was artificially removed and can be super distracting.
Ensuring True White and Proper Alignment
It’s also surprisingly common to see backgrounds that aren't truly white. Many people accidentally settle for a light gray or an off-white tint. For marketplaces like Amazon, that just won't fly—they require a pure, digital white (RGB 255, 255, 255). An inconsistent, off-white background across your product gallery can make the whole collection look sloppy.
I think the most subtle—and damaging—mistake is overexposing the product just to force the background to look whiter. This completely blows out the details and textures on the item itself, which defeats the entire purpose of the photo. Always, always expose for the product first.
Finally, don’t forget the basic housekeeping of alignment and cleaning. It sounds simple, but it makes a huge difference. Here are a few final checks I always recommend:
- Crooked Products: Is your product perfectly straight and centered? A slightly tilted item can look careless.
- Smudges and Dust: Give your product a good wipe-down before shooting. Trust me, editing out tiny specks of dust or fingerprints later is a massive headache.
- Uneven Lighting: Look for dark spots or harsh glares. You want the lighting to be even so it highlights your product's best features, not distracts from them.
Fixing these issues in post-production is possible, but it eats up a ton of time. For anyone who needs consistently flawless results without the hassle, exploring professional photo editing services for ecommerce can be a great way to ensure every single image is perfect and ready to drive sales.
Frequently Asked Questions

As you get the hang of creating clean product shots, a few questions tend to pop up. Let's tackle some of the most common ones I hear.
Can I Get a Good Result from a Low-Resolution Photo?
Technically, you can run a low-res photo through the tool, but I’d strongly advise against it. For a truly professional finish, you absolutely need to start with a high-resolution image. AI tools do their best work when they have plenty of clear pixel data to analyze.
When you use a fuzzy or low-resolution photo, you're almost guaranteed to get jagged, pixelated edges and a noticeable loss of detail. To get that crisp, clean cutout you're after, always start with the best quality source photo you have available.
My personal rule is simple: if the source image looks blurry when I zoom in, the final result will never look sharp. A great final image starts with great input.
What Is the Best File Format for Web Use?
When you’re prepping images for your e-commerce site, blog, or any other web platform, JPEG is the ideal format. It hits the sweet spot, giving you excellent image quality while keeping file sizes small and manageable—which is critical for fast page load times.
The only time you'd really need a different format is if you wanted a transparent background, in which case PNG would be your go-to. But for a solid white backdrop, a high-quality JPEG is the undisputed industry standard.
How Do AI Tools Handle Tricky Details Like Hair or Fur?
This is where modern AI background removers really shine. They've been trained on millions of diverse images, which allows them to recognize and handle incredibly complex edges like wisps of hair, fuzzy fur, and delicate fabrics. The algorithm is surprisingly good at intelligently isolating those tiny details all on its own.
And for the rare cases where it’s not quite perfect, most good tools include refinement brushes. These let you go in and manually touch up any specific areas for a flawless result, giving you the perfect blend of automated speed and manual control.