
Knowing how to change a photo's background is more than just a neat trick—it’s about giving your subject the perfect stage. You're essentially lifting the star of your photo out of its original environment and dropping it into a new one, whether that’s a solid color or an entirely different scene. This one skill can take a photo from just "good" to truly fantastic.
Why a Great Photo Background Matters
Let's face it, a busy or distracting background can absolutely kill an otherwise great shot. Think about it: visual clutter behind a professional headshot, or a dull, uninspired setting for a product you’re trying to sell. The background isn’t just filler; it sets the mood, guides the viewer’s eye, and ultimately defines the entire feel of the image.
Being able to swap it out is a powerful tool. Take a LinkedIn profile picture, for instance. Trading a messy home office for a simple, professional backdrop instantly boosts your personal brand. You’re still the same person in the photo, but the new context shifts the message from "working from my couch" to "career-focused professional."
The Commercial Impact of Clean Backgrounds
This idea is even more critical in e-commerce. There's a reason a clean, white background is the gold standard for product shots—it puts the product on a pedestal and eliminates anything that could pull the customer's focus away.
When someone is scrolling through countless options online, a product that stands out against a simple backdrop feels more professional and trustworthy. For any online business, nailing the visuals is non-negotiable. Diving into some tips for effective e-commerce photography really drives home how much a clean background can make or break a sale.
The demand for high-quality, polished images has created a huge market for editing tools. In fact, the image background remover market is expected to reach about $500 million globally by 2025, and some forecasts even predict it could hit $1.8 billion by 2033. This explosion shows just how much online sellers and marketers rely on clean images to attract customers. You can learn more about the future of AI in photo editing on superagi.com.
Key Takeaway: A strong background does more than just make a photo look better; it makes it more effective. It tells the viewer where to look, makes the subject pop, and builds a sense of trust and professionalism that’s crucial for personal branding and online sales.
Choosing the Right Background Removal Tool
Knowing how to change a photo's background is one skill, but picking the right tool for the job is a whole different ballgame. This is where you save yourself from hours of frustration. The truth is, not all tools are created equal, and your choice can be the difference between a five-minute tweak and a five-hour ordeal.
So, what are you working on? Are you an Etsy seller trying to get through a hundred new product photos? Or a photographer meticulously editing a single, high-stakes portrait for a client? Your needs are worlds apart, and so are the best tools for each scenario.
First, Figure Out What You Actually Need
Before you even think about downloading software or signing up for a new service, take a minute to define your project. The goal is to match the tool's strengths to what you care about most—whether that’s raw speed, pixel-perfect precision, or just keeping costs down.
For example, an e-commerce entrepreneur often deals with images in bulk. Speed and consistency are everything. On the other hand, a graphic designer creating a complex composite for a major ad campaign needs total control over every last pixel.
Key Takeaway: There's no single "best" tool. The right choice is the one that perfectly fits your specific situation, whether that’s batch-processing for an online store, artistic control for a creative project, or a quick, free fix for a social media post.
Comparing Your Top Options
To make things easier, let's look at the main categories of tools you'll come across.
-
One-Click AI Tools (like ProdShot): These are built for pure speed and efficiency. You upload your image, and the AI does all the hard work, giving you a clean cutout in just a few seconds. They’re ideal for high-volume tasks where time is money. For a Shopify store owner, this is an absolute game-changer. You can find a deeper dive on how to remove the background for Shopify listings in our dedicated guide.
-
Professional Editing Software (like Adobe Photoshop): This is the industry standard for professionals who demand absolute control. With tools like the Pen Tool and Layer Masks, you can tackle incredibly complex images with tricky edges, like flyaway hair or fine lace. The learning curve is steep and it comes with a subscription fee, but for complex jobs, the results are simply unmatched.
-
Free Online Editors (like GIMP or Photopea): Think of these as the budget-friendly middle ground. They give you more manual control than a simple AI tool but without the hefty price tag of professional software. They're a fantastic option for one-off projects or for anyone willing to invest a little time to learn the ropes without a financial commitment.
To help you decide, I've put together a quick comparison table that breaks down the pros and cons of each approach based on what most users are looking for.
Comparing Background Removal Methods
| Method | Best For | Speed | Learning Curve | Cost |
|---|---|---|---|---|
| AI Tools (ProdShot) | E-commerce, bulk edits, speed | Seconds | Minimal | Free & Paid Tiers |
| Pro Software (Photoshop) | Creatives, complex images, max precision | Slow to Moderate | High | Subscription |
| Free Editors (GIMP) | Hobbyists, one-off projects, budget-conscious users | Moderate | Moderate | Free |
Ultimately, the table highlights a clear trade-off: as you gain more features and precision, the cost and time investment tend to go up.
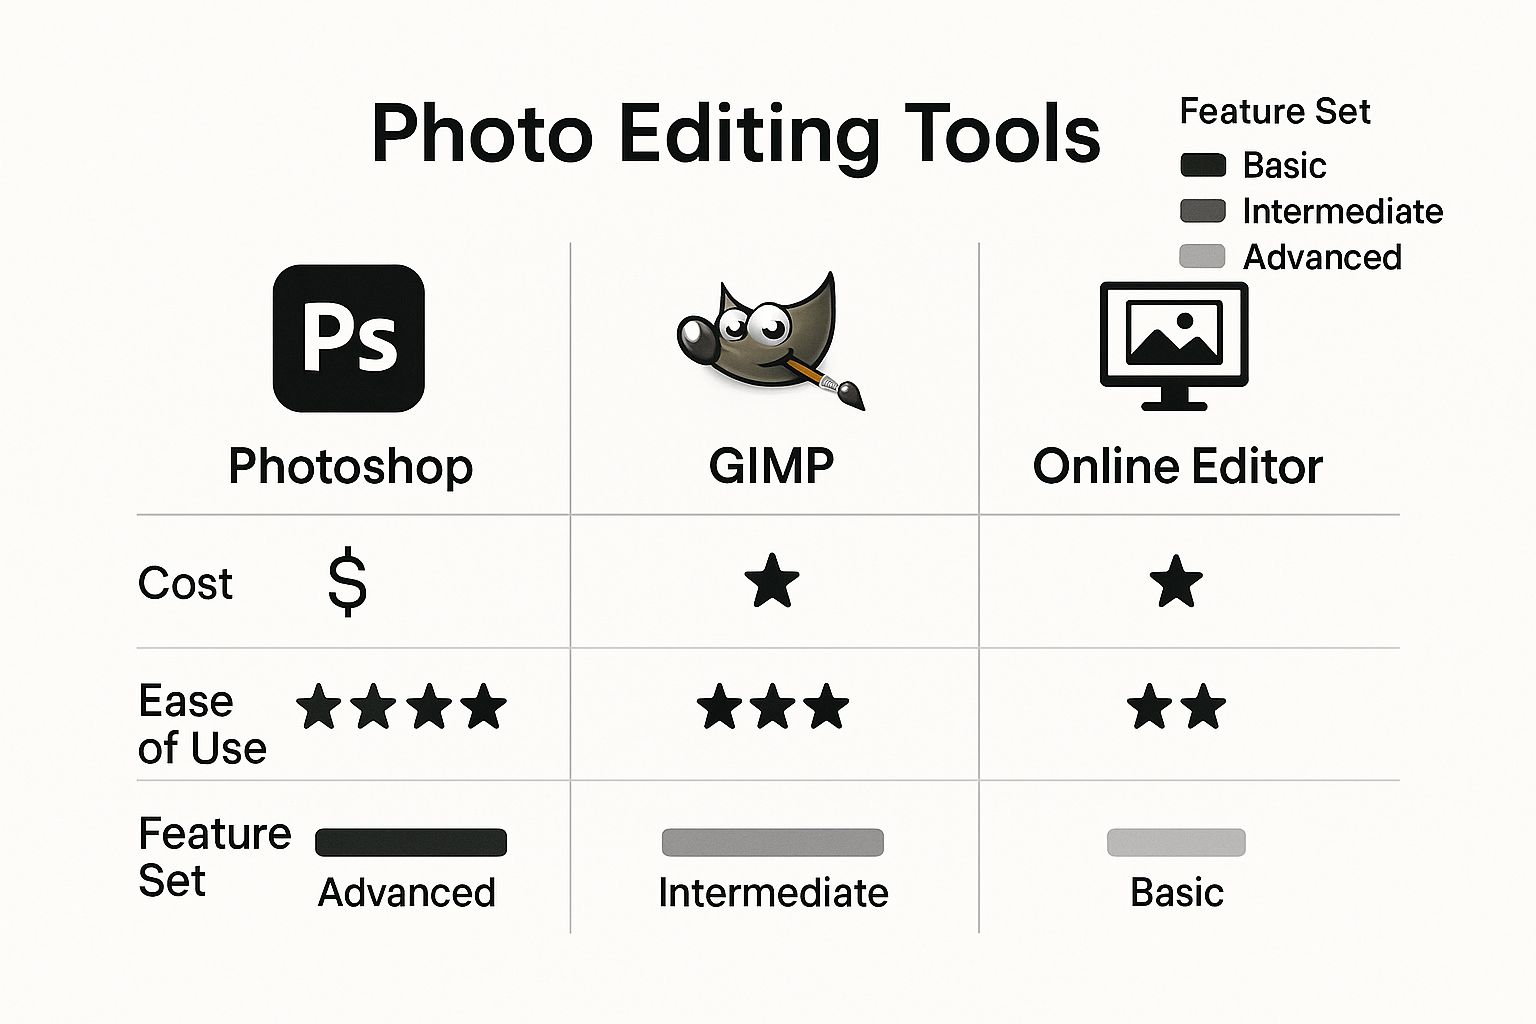
This image sums it up perfectly. Making the right choice simply means deciding which of these factors—speed, control, or cost—is the most important for the task at hand.
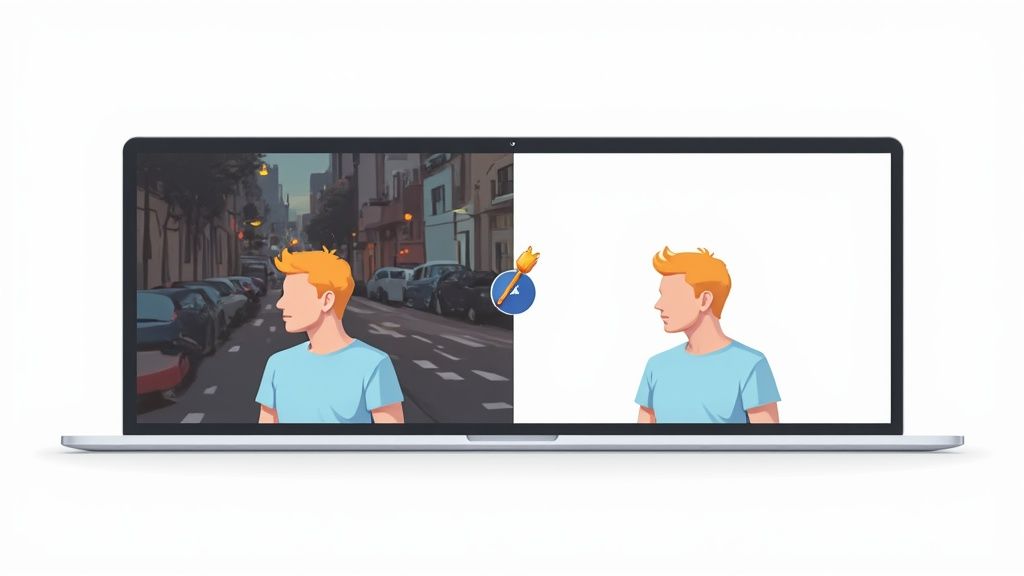
Using AI for Instant Background Changes
When you need to change photo backgrounds quickly and consistently, AI-powered tools are a game-changer. Let's be honest, the days of painstakingly tracing around an object with a mouse are over. Modern AI gets you a professional result in seconds, which is a massive win for anyone managing an online store or creating content on a tight schedule.
This approach is all about efficiency. Instead of wrestling with complex software like Photoshop, you just upload your image, and the AI handles the heavy lifting. It separates your subject from its surroundings with surprising accuracy, making it possible to process dozens of product photos in the time it used to take to edit just one.
A Real-World Walkthrough with an AI Tool
Let’s run through a common scenario. Imagine you're an Etsy seller who just snapped a photo of a new handmade ceramic mug on your kitchen counter. The lighting is decent, but the background—complete with a toaster and a fruit bowl—is distracting and unprofessional. This is the perfect job for an AI tool like ProdShot.
The whole process is refreshingly simple. First, you upload your original photo directly to the platform. There’s no software to install; it all happens right in your browser.
Here’s what you’ll see. The interface is designed for a straightforward, drag-and-drop experience.
The layout is clean and focused. It guides you to upload your image and immediately see the background vanish. Within moments, the AI algorithm analyzes the photo, identifies the mug, and cleanly isolates it from your cluttered kitchen scene.
Fine-Tuning Your New Background
Once the original background is gone, you have a blank canvas. This is where you can start to really dial in your brand's aesthetic. Most good AI tools give you a few solid options:
- Solid Colors: A clean white background is the classic choice for e-commerce because it makes the product the hero. You could also easily select a color that matches your brand palette.
- AI-Generated Scenes: Want to show your mug in a cozy living room or on a sleek office desk? You can often generate a custom lifestyle background by simply describing what you want in a text prompt.
- Custom Images: If you already have a branded background or a specific scene you want to use, you can upload it and place your product right into it.
This kind of accessibility has completely changed the photo editing game. User-friendly background removal tools allow everyone from students to small business owners to get pro-level results in seconds. In fact, some tools can strip a background in under 20 seconds while maintaining high image quality for products, people, and even animals. You can dig into some great options in Zoviz's breakdown of free background removers.
Pro Tip: When placing your subject into a new lifestyle scene, pay close attention to the lighting. If your product was lit from the left in the original photo, try to choose a new background where the light source also appears to be coming from the left. This small detail is what makes the final composite image look natural and believable.
Even the best AI can sometimes miss the mark with tricky edges, like the wispy fibers on a knitted scarf or the fluff of a fur-lined hood. For these situations, look for a "Refine Edge" or "Erase/Restore" brush. This feature lets you manually touch up the selection, adding back any bits of the subject that were accidentally erased or cleaning up fuzzy outlines for a crisp, perfect finish.
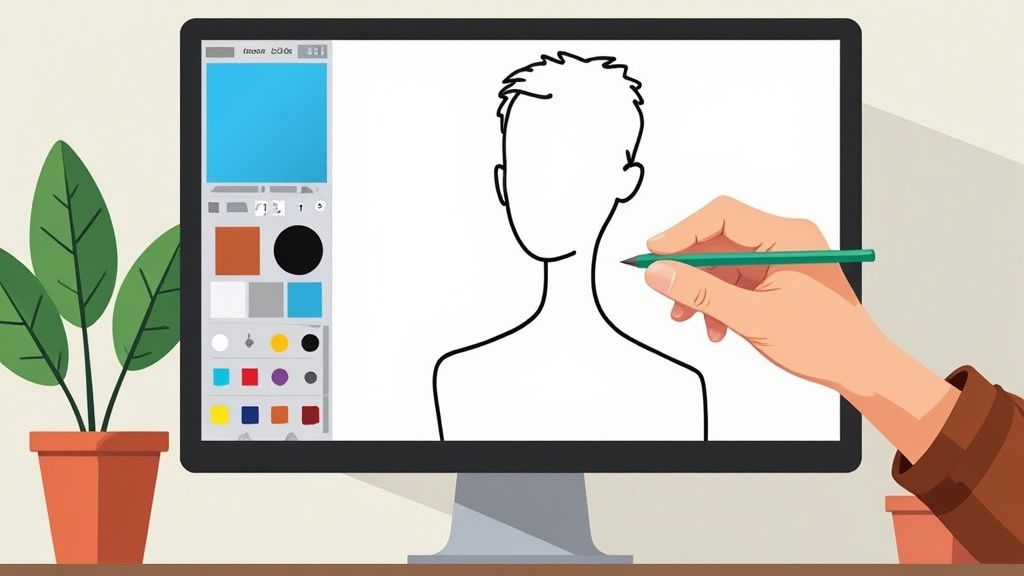
When You Need to Go Manual
AI tools are fantastic for speed, but sometimes you need absolute, pixel-perfect control. This is where manual techniques come into play. For those really complex images with fine details, knowing how to manually change a photo background in a program like Adobe Photoshop is what separates a good edit from a truly professional one.
Going manual isn't about getting it done fast; it's about getting it done right. You're in the driver's seat, making a thousand tiny decisions that an algorithm just can't. This is how you ensure every edge is clean and the final image looks completely believable.
A Classic Challenge: Hair vs. a Busy Background
Let's walk through a classic, tricky scenario. You've got a great shot of a model with long, flowing hair, but the background is a chaotic city street. There are cars, buildings, and other people cluttering up the frame. An AI tool will likely struggle here, getting tripped up by the fine strands of hair and the overlapping colors between your subject and everything behind them.
This is the exact moment when tools like the Pen Tool and Layer Masks in Photoshop prove their worth. These are the workhorses of professional retouchers, letting you carefully trace your subject and hide the background without destroying any pixels, which means you can always go back and make changes.
Getting Precise with the Pen Tool
The Pen Tool is your secret weapon for creating an incredibly clean and precise path around your subject. It’s not like a freehand brush; it uses anchor points and curves to build a vector path. The result? Selections that are impossibly smooth and professional.
- Start with the easy parts. Begin by clicking to place anchor points around the solid areas of your subject, like their shoulders and torso.
- Master the curves. For rounded edges, you’ll want to click and drag. This pulls out handles that let you control the shape of the line. It definitely takes some practice, but it's the only way to trace organic shapes realistically.
- Close the loop. Keep working your way around the subject until you connect back to where you started.
Once your path is complete, you can turn it into a selection. Now you’ve got a perfect outline of your subject's main form, but we still have to deal with those tricky details, like the hair.
Refining the Edges with Layer Masks
Here's a critical tip: never just delete the background. That's a destructive edit, and you can't undo it later. The professional approach is to use a Layer Mask. A mask lets you hide parts of a layer without permanently erasing anything. It’s like putting a stencil over your photo; you can paint on it to show or hide what's underneath.
After creating that initial selection with the Pen Tool, you can apply it as a layer mask. The background will vanish instantly, but it’s not actually gone—it's just hidden from view.
Pro Tip: When you're working on a layer mask, remember this: painting with black hides that part of the layer, while painting with white reveals it. This non-destructive workflow is the foundation of professional photo editing because it gives you unlimited flexibility to make tweaks.
For something as complicated as hair, you'll need to jump into Photoshop's Select and Mask workspace. This is a specialized environment designed specifically for refining the edges of a mask. You can grab its Refine Edge Brush and simply paint over the wispy strands of hair. Photoshop will then intelligently separate them from the old background. This is how you get rid of that harsh, "cut-out" look and make your subject look like they truly belong in their new setting. It’s this deep level of control that makes manual editing an essential skill for anyone serious about their images.
Pro Tips for a Natural and Seamless Look

Getting rid of the old background is really just the beginning. The true magic happens when you make your subject look like it actually belongs in the new scene. It's the small, thoughtful details that separate an obvious cut-and-paste job from a believable, professional-looking photo.
So many edits fall flat because of simple mistakes like mismatched lighting or a complete lack of shadows. These tell-tale signs scream "fake" and can make the whole image feel disjointed. Our goal is to blend everything together so perfectly that no one would ever suspect it wasn't the original shot.
Match Your Lighting and Shadows
If you only focus on one thing, make it this: consistent lighting. Nothing gives away a background swap faster than a light source that doesn’t make sense. If your subject is lit from the right, but the new background is lit from the left, your brain will instantly spot the inconsistency.
Before you do anything else, look at the new background and figure out where the light is coming from. Once you know that, you can tweak your subject's brightness and contrast to match. A great trick I use all the time is adding a subtle drop shadow.
- Direction: Make sure the shadow falls away from the main light source.
- Softness: Stay away from hard, black shadows. A softer, slightly transparent shadow always looks more natural.
- Placement: Position the shadow right under the subject to anchor it to the ground.
This one simple adjustment adds weight and presence, preventing that awkward "floating" look that ruins so many composites.
A common pitfall is forgetting to ground the subject in its new environment. A soft, realistic drop shadow is often all it takes to create a sense of place and make the entire composition feel more cohesive and professional.
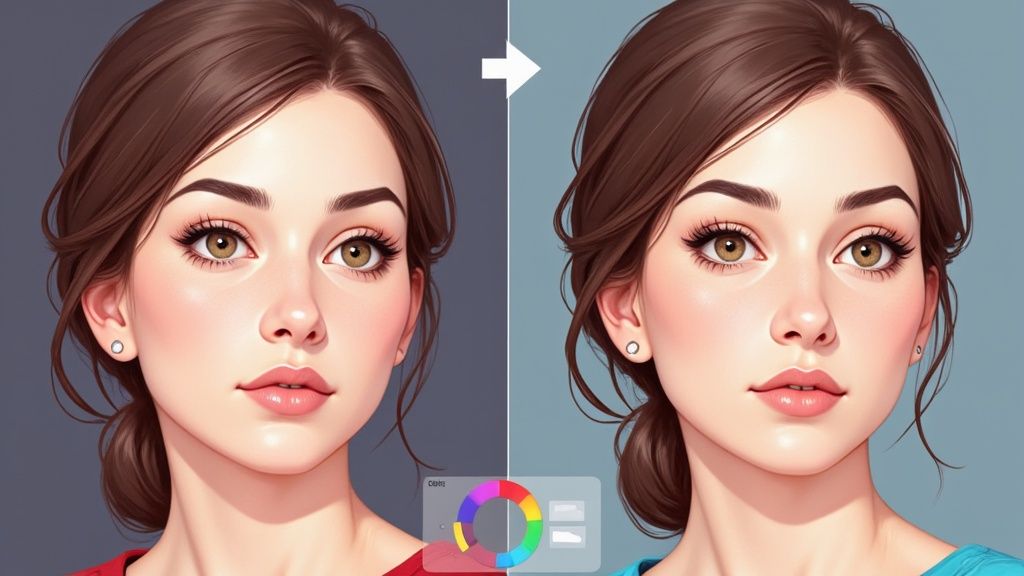
Harmonize Colors and Create Depth
Color is the next big piece of the puzzle. The photo of your subject has its own color temperature from the original lighting. When you drop it into a new background, those colors can clash badly.
This is where your color balance tools come in. You'll want to gently nudge the tones of your subject to fit the new environment. For instance, if you're placing your subject on a sunny beach, you'll probably need to add a little yellow or red to give it that warm glow. If you're struggling to get this just right, you might consider getting help from professional graphic design services to ensure a polished final image.
Finally, think about depth. A fantastic way to sell the effect is to add a very subtle blur to the new background. This tricks the eye by mimicking the shallow depth of field you'd get from a real camera lens, which naturally draws attention to your sharp, in-focus subject.
For businesses needing flawless images consistently, exploring our product photo editing services can be a game-changer, ensuring every photo is perfectly blended and ready to convert.
Common Problems and How to Fix Them
https://www.youtube.com/embed/8zx9i_Ut1Gk
Even with the best tools, you’ll occasionally hit a snag when you change a photo background. It’s just part of the process. Knowing how to troubleshoot these common issues is what turns a frustrating experience into a quick fix, ensuring you always get a clean, professional result.
One of the most frequent headaches I see is dealing with fine, wispy hair. AI tools can sometimes get a little too aggressive with these delicate details, erasing them along with the background or leaving a fuzzy, unnatural halo. When this happens, your best bet is to find a tool with a refine-edge brush or a manual touch-up feature to gently paint those strands back in.
Another classic problem is when your subject and background are too similar in color. If you're photographing a white product on a white wall, that low contrast can confuse even the smartest algorithms. The key here is prevention, really. Try to shoot against a background that contrasts with your subject whenever you can. If you're stuck with the image, you'll likely need to manually trace the object’s edges for a clean separation.
Dealing with Color Cast and Edge Halos
Have you ever removed a background only to find a faint colored line around your subject? That’s what we call a color cast or an edge halo. It happens when light from the original background reflects onto the edges of your subject. Think of a person photographed on bright green grass—they might end up with a subtle green glow on their shoes.
To fix this, look for a "de-fringe" or "color decontamination" tool in your software. This feature is designed to neutralize those leftover colors, making the edges look sharp and natural against any new background you drop in.
Here's a quick cheat sheet for these common issues:
- Wispy Hair: Grab a refine-edge brush to restore the fine details that AI might have missed.
- Low Contrast: Manually trace the edges or use a magic wand tool with a low tolerance setting for more precise control.
- Color Cast: Apply a de-fringe tool to get rid of that unwanted color bleed from the original background.
Even as the background remover market grows, challenges in handling complex images remain a key focus for developers. While AI gets better every day, these tricky situations are why learning a few manual fixes is so valuable. Discover more about innovations in background removal technology.
For e-commerce sellers facing these issues regularly, perfecting your images is non-negotiable. If you're running into persistent problems, our guide on photo editing services for ecommerce offers deeper insights into achieving consistently flawless results. Mastering these simple fixes will give you the confidence to handle any image that comes your way.
Frequently Asked Questions
You’ve got questions, and I’ve heard most of them before. Let’s tackle some of the common hurdles people run into when they first start swapping out photo backgrounds.
What's the Best Free Tool to Change a Photo Background?
Honestly, for most people, the best free tools are the AI-powered ones you can find online. I'm talking about options like Canva or Adobe Express. Why? Because they're built for speed and simplicity.
You can often remove a background with a single click, which is a lifesaver for whipping up social media posts or quick product mockups. They do the heavy lifting for you, so you can get a great-looking result without needing to dive into a complex program.
How Can I Make My New Background Look Realistic?
This is the big one. The secret to making your subject look like it actually belongs in the new scene is all about matching the little details. I always focus on three things:
- Lighting: Where is the light coming from in your new background? Make sure the light on your subject is coming from the same direction. It's the most important piece of the puzzle.
- Shadows: Your subject needs to be anchored to the new scene. Adding a soft, subtle drop shadow makes an enormous difference and stops it from looking like a floating sticker.
- Color Tone: Match the color temperature. If your new background is a warm, sunny beach, your subject shouldn't have a cool, blue-ish tint from its original photo. A quick color balance adjustment can blend everything together seamlessly.
It really is the tiny details that sell the final image. A well-placed shadow and consistent lighting are what separate an obvious edit from a professional-looking composite.
Can I Change the Background on a Low-Resolution Photo?
You can, but I wouldn't recommend it if you can avoid it. The problem with low-resolution photos is that the edges of your subject are often blurry and pixelated.
This makes it incredibly tough for any tool—AI or manual—to get a clean, crisp cutout. You’ll almost always end up with a messy, artifact-ridden edge. For the best possible results, always, always start with the highest-resolution photo you have.
Ready to create some incredible, professional-looking images in just a few seconds? Give ProdShot a try and see how easily you can change your photo backgrounds with AI.
You can get started for free right now at https://prodshot.net.
Article created using Outrank