
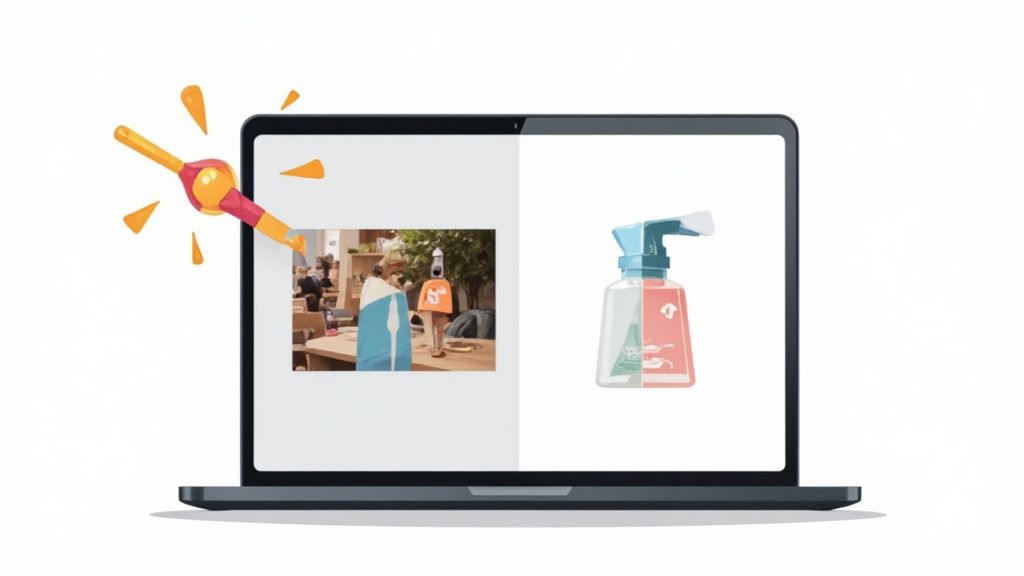
The fastest way to change a photo background is with a modern AI tool. You just upload your picture, and the software automatically finds your subject, cuts it out, and lets you swap in a new background. The whole process takes seconds, completely sidestepping the tedious manual editing work that used to take hours.
Why a Great Background Can Make or Break Your Image
Ever scroll through an online store and notice how some product photos just feel more professional and appealing? More often than not, the secret is the background. In a world where we’re all drowning in visual content, a clean, intentional background is one of the most powerful tools you have to grab someone's attention.
A simple background swap can completely change the vibe and narrative of an image.
For an e-commerce shop, taking a product out of a cluttered, distracting scene and placing it on a crisp white background makes the item the undeniable hero. For a professional headshot, dropping in a subtle, branded background for LinkedIn can make you seem far more polished. This guide isn't just theory; it’s about showing you why learning to change a photo background is a must-have skill for anyone in marketing or e-commerce today.
The Surge in Demand for Clean Visuals
The need for high-quality, polished images has absolutely exploded. This isn't just a fleeting trend—it's a real shift in how we present ourselves and our products online. The market for background removal software has seen massive growth, fueled by this demand from online stores, marketers, and even just regular people.
In 2024, this market was valued at an impressive USD 1.5 billion. It’s projected to skyrocket to USD 5.2 billion by 2033. That kind of growth is a direct reflection of how much digital media relies on clean images for everything from product listings to ad campaigns. If you're curious, you can explore more data on this software market to see the full picture.
Here's the bottom line: A good background isn’t just for looks. It’s about clarity. It cuts out the noise, pulls the viewer’s eye right where you want it, and helps create a consistent brand look that builds trust with your audience.
Modern Tools Have Made It Incredibly Simple
It wasn't that long ago that this kind of editing required pricey software like Photoshop and a whole lot of patience. You had to meticulously trace around your subject, pixel by pixel. Today, AI-powered tools have made this once-technical skill accessible to literally anyone. You no longer need a design degree to get professional-looking results.
These tools are built for speed and simplicity, helping you:
- Build consistent product galleries that look clean and uniform.
- Design social media posts that actually stand out in a crowded feed.
- Produce polished marketing materials without needing to hire a designer.
Mastering this one simple skill gives you a ton of creative control, letting you adapt any image for any purpose in just a few clicks.
Picking the Right Tool for Background Removal
Not too long ago, if you wanted to change a photo's background, your only real option was to roll up your sleeves and dive into complex editing software. Today, things are a lot different. We're now looking at a choice between those powerful, traditional editors and a new wave of smart, specialized AI tools.
So, where do you start? Your decision really boils down to what you need, what your budget looks like, and how much time you've got to spare. Do you really need to spend weeks learning the ins and outs of a beast like Photoshop, or can a one-click AI solution get you the results you need in a fraction of the time? The right tool depends entirely on the job at hand. Are you cranking out hundreds of e-commerce product shots on a tight deadline, or are you meticulously crafting a single, artistic masterpiece?
This visual guide can help you map out which path makes the most sense based on your goals and current skill level.
For anyone who needs speed, consistency, and simplicity, AI-powered tools are the most direct route to a clean, professional-looking image.
AI Tools vs. Manual Software
When you're figuring out how to change a photo background, the main trade-off is between automation and control. AI tools like ProdShot are built to do one thing and do it exceptionally well: remove backgrounds quickly and accurately without much fuss. You just upload your image, and the algorithm gets to work, isolating your product in seconds. This is an absolute game-changer for high-volume jobs, like getting an entire online store's catalog looking sharp and consistent.
On the flip side, manual software gives you total control down to the last pixel. Programs like Photoshop are packed with an arsenal of tools—the pen tool, layer masks, channel selections—that let a skilled user create flawless cutouts. This level of precision is incredible for complex creative projects where every little detail counts, but it comes at a cost: a steep learning curve and a serious time investment for every single image.
Honestly, for about 80% of business needs—especially in e-commerce—an AI tool strikes the perfect balance of quality, speed, and cost. The time you get back can be poured straight into other parts of your business that need your attention.
AI Background Removers vs Manual Editing Software
Choosing between an AI tool and traditional software can feel overwhelming, but it gets easier when you compare them side-by-side. One is built for speed and efficiency, while the other is designed for ultimate creative freedom.
This table breaks down the key differences to help you see which approach fits your workflow best.
| Feature | AI Tools (e.g., ProdShot) | Manual Software (e.g., Photoshop) |
|---|---|---|
| Speed | Seconds per image | Minutes to hours per image |
| Skill Level | Beginner-friendly | Requires expertise and training |
| Best For | E-commerce, bulk processing | Creative composites, fine art |
| Consistency | High (automated process) | Varies by user skill |
| Cost | Low monthly subscription | Higher subscription or one-time cost |
Ultimately, there's no single "best" tool—just the best tool for you. If you're running an online store or creating marketing content, the raw efficiency of AI is tough to beat. It transforms what used to be a tedious editing chore into a quick and simple step in your content creation process.
Changing Your Background with AI Tools
This is where the magic really happens. Using an AI tool to swap out a photo background takes what used to be a tedious, manual chore and makes it practically instant. Forget fussing with complex selection tools and technical jargon; this is all about getting professional results in minutes.
I’ll walk you through the entire workflow, from prepping your image for the best possible outcome to uploading it and letting the AI do the heavy lifting. The whole process is designed to be second nature, even if you’ve never touched a design tool in your life.
Prepping Your Image for the AI
Before you even think about uploading your photo, a little prep work can make a world of difference in the final quality. AI algorithms are incredibly smart, but they work best with clear information. The goal here is to give the software a clean, easy-to-read starting point.
For the best results, start with an image where your product is in sharp focus and stands out from its original background. Think of a dark blue bottle against a light gray wall—that high contrast gives the AI a clear edge to detect. Blurry images or photos where the product color blends into the background can sometimes confuse the algorithm, meaning you’ll have to do more manual clean-up later.
Here are a few quick tips I always follow:
- Good Lighting is Everything: Make sure your product is well-lit, without any harsh shadows or blown-out highlights. Even, consistent lighting helps the AI accurately trace the object's true edges.
- Keep the Background Simple: While AI can handle busy scenes, a simpler background means a faster and cleaner initial cutout. A solid-colored wall or even a simple outdoor setting is perfect.
- Start with High-Resolution: The more pixel data the AI has, the more precise the final edge will be. A crisp, high-resolution photo will always beat a small, pixelated one.
Uploading and Processing Your Photo
Once your image is ready, the next part is incredibly simple. Most modern AI background removers, like the one built into ProdShot, have a simple drag-and-drop interface. You just select your photo, upload it, and the AI gets to work.
Within seconds, the software scans the image, identifies the main subject, and meticulously separates it from the background. You’re left with a clean cutout of your product on a transparent canvas, all set for its new home. For anyone looking to take this a step further, exploring how automated image generation can amplify your marketing is a great next move.
This level of automation is exactly why these tools are taking off. The global background removal software market was valued at around USD 1.2 billion in 2023 and is projected to hit USD 4.4 billion by 2030. That growth is almost entirely driven by the demands of e-commerce, where clean product images are no longer a nice-to-have but a flat-out necessity.
Selecting the Perfect New Background
With your product isolated, now comes the fun part. This is where you set the context and mood for your final image. Your choice of background should be intentional—it needs to support the story you want to tell about your product.
Here are the most common options I see brands using:
- Solid Colors: A clean white or neutral gray background is the gold standard for e-commerce. It kills all distractions, makes the product the hero, and creates a consistent look across your entire catalog.
- Stock Photography: Placing your subject into a realistic scene helps customers visualize it in their own lives. A photo of a handbag, for example, can be dropped onto a stylish café table to create an aspirational, lifestyle feel.
- AI-Generated Scenes: For total creative freedom, you can use an AI product photo generator to dream up a unique background from a simple text prompt. This lets you produce stunning, on-brand visuals perfectly suited to your product without ever needing a physical photoshoot.
Refining Edges and Shadows for a Realistic Look
Getting an automated background removal gets you 90% of the way there. That's a huge time-saver. But it’s the final 10% that truly sells the realism and separates a good edit from a great one.
This is where you transform a simple cutout into a product photo that feels real and believable. It’s all about adding those professional finishing touches that trick the eye into seeing a seamless image. Let's get into the practical side of cleaning up those tricky edges and grounding your product in its new home.
Mastering Difficult Edges
The first place that usually needs a little love is the edges, especially with more complex products. The AI does an incredible job, but things like hair, fur, or even semi-transparent objects like glassware can sometimes leave a slight halo or a fuzzy outline.
Fixing this is easier than you might think. Most modern AI editors have manual touch-up tools, often called an "Erase" or "Restore" brush. These let you paint back in parts the AI might have clipped or clean up stray pixels that don't belong.
- For Hair and Fur: Grab a soft-edged erase brush and gently tap away any unnatural-looking background pixels stuck between the strands. The key here is subtlety. You’re just softening the transition, not making a hard cut.
- For Sheer Fabrics or Glass: If your object is a bit see-through, you might notice some of the old background color bleeding into it. A quick pass with a low-opacity restore brush can bring back the object's true color and texture without making it look fake.
This kind of fine-tuning is what the pros do. For a much deeper look into these techniques, our guide on product photo retouching has more advanced tips to get your images looking perfect.
The Critical Role of Shadows
If you learn only one thing from this guide, let it be this: shadows are absolutely non-negotiable. Without a shadow, your product will look like it’s floating awkwardly in space. It's the single most important element for making an object feel grounded and part of its new scene.
A good shadow anchors the product to whatever surface it's on. It provides depth, context, and a sense of realism that a simple cutout just can't match.
Pro Tip: Never, ever use a solid black, hard-edged shadow. Real-world shadows are almost always soft, a bit diffused, and have some transparency. You want a gentle gradient that’s darkest near the point of contact and fades out from there.
Most AI editing tools, including ProdShot, can generate shadows for you automatically. You can usually tweak the shadow's direction, softness, and opacity to match the lighting in your new background. For instance, if your new background has a light source coming from the top-right, your shadow should be cast toward the bottom-left. It’s a tiny detail that makes the entire image feel cohesive and natural.
Matching Lighting and Color Tones
The last piece of the puzzle is making sure your product and background look like they belong in the same room, under the same light. Mismatched lighting and color temperatures are a dead giveaway that a photo has been edited. If your product was shot under cool, blue-ish studio lights and you drop it into a warm, sunny outdoor scene, it's going to stick out like a sore thumb.
To fix this, just look for the basic adjustment sliders in your editor.
- Brightness and Contrast: Nudge these a little to make sure your product isn't way brighter or darker than its new surroundings.
- Color Temperature: Use a "temperature" or "warmth" slider to align the color tones. If the background is warm, push the product's temperature slightly toward yellow. If it's cool, shift it toward blue.
These adjustments are subtle, but they make all the difference. By refining the edges, adding a realistic shadow, and matching the lighting, you elevate your image from a simple cutout to a polished, professional visual that actually stops the scroll.
You’ve nailed the new background and perfected every last detail. Now for the final, crucial step: getting that image ready for the world.
How you save and optimize your photo is just as important as the edit itself. It’s the difference between a lightning-fast website and one that lags, or a product that looks crisp on Instagram versus one that’s a pixelated mess. This is the last mile that makes all your hard work count.
Honestly, this is where a lot of people drop the ball. But getting it right is what separates the pros from the amateurs. The demand for these skills is exploding, with the photo editing software market valued at a staggering USD 1,149.06 million in 2024 and projected to hit USD 1,818.90 million by 2034. With everyone from small business owners to influencers creating content, knowing how to properly finish an image is a game-changer.
Choose the Right File Format
The file type you pick might seem like a small detail, but it has a huge impact on how your image behaves online. Get this wrong, and you could end up with blurry pictures or, even worse, a slow-loading page that sends customers running.
Here’s the breakdown:
- JPEG (or JPG): This is the workhorse for most web photos. JPEGs are brilliant at compressing images to keep file sizes small, which is essential for good website performance. The only catch? They don't support transparent backgrounds.
- PNG: This is your go-to when you need that background to be transparent. It's perfect for logos or product shots that you want to layer on top of a colored background or another design. Just be aware that the file sizes are typically larger than JPEGs.
- WebP: This is the new kid on the block, and it's fantastic. WebP gives you the best of both worlds—tiny file sizes and support for transparency. It's quickly becoming the gold standard for high-performance websites.
My rule of thumb: If it's a standard product shot on a solid background, use JPEG. If you need transparency for a logo or a special design, use PNG. If your website platform supports it, WebP is almost always the best choice for speed.
Compress and Resize for Your Platform
I can't say this enough: large, unoptimized images are the number one killer of website speed. Before you even think about uploading, you need to compress and resize your photos for their final destination.
After you've swapped the background, don't forget the final step of optimizing image sizes for social media and your own site. A good target to aim for is a file size under 200 KB.
You can use a tool like ProdShot's simple image resizer to quickly get your dimensions right for any platform without sacrificing quality. Give it one last look-over for any stray pixels or odd lighting, and you’re ready to go. Your perfectly polished image is now ready to impress—and convert.
Common Questions About Changing Photo Backgrounds
When you first start diving into changing photo backgrounds, you’ll quickly run into a few common questions. Seriously, everyone asks these. Getting them sorted out can be the difference between a frustrating afternoon and a final image you're proud of.
Let's walk through the most frequent hurdles so you can get back to editing with confidence.
What Is the Best Way to Handle Complex Edges Like Hair?
Ah, the classic problem: hair, fur, or anything fuzzy. For these super-intricate edges, AI-powered tools are, without a doubt, your best bet. These systems have been trained on millions of images to recognize and isolate all those tiny, complex details automatically, which will save you a massive amount of time.
You can do it manually in software like Photoshop with tools like the Refine Edge brush, but it takes a ton of skill and patience to master. An AI editor gets you 90% of the way there in just a few seconds.
For the best possible result, look for a tool that also gives you manual touch-up brushes. That way, you can quickly clean up any tiny imperfections the AI might have missed.
Can I Make My Photo Background Transparent?
Absolutely. In fact, creating a transparent background is one of the main reasons people use these tools in the first place. The whole secret here is saving the final image in a file format that actually supports transparency.
Your go-to formats are:
- PNG: This is the most popular choice for web graphics that need a transparent background. It keeps the quality high, but the file sizes can be a bit larger.
- WebP: A newer format that's fantastic for websites. It offers great compression and supports transparency, which means faster-loading pages.
Crucial Tip: Whatever you do, don't save as a JPEG if you need transparency. JPEGs don't support it and will automatically fill your background with solid white, completely undoing all your hard work. Just select the transparent option and export as a PNG or WebP.
How Do I Make My Subject Look Natural in a New Background?
This is where art meets science. Making a composite image look believable really boils down to three things: lighting, shadows, and perspective. Nail these, and your image will look seamless and professional.
First, check the lighting. The light source in your new background needs to match the lighting on your subject. If the background is lit from the right, your subject should be, too. Simple, but it makes a huge difference.
Next, add a soft drop shadow. This grounds your subject to its new surface, making it feel like it's really there and not just floating.
Finally, get the scale and perspective right. Your subject shouldn't look awkwardly huge or tiny for the scene, and the camera angles should feel like they align.
Ready to create stunning, professional product images in seconds? With ProdShot, you can automatically remove and change backgrounds, add realistic shadows, and generate entire scenes with AI. Start your free trial today and see the difference it makes!