
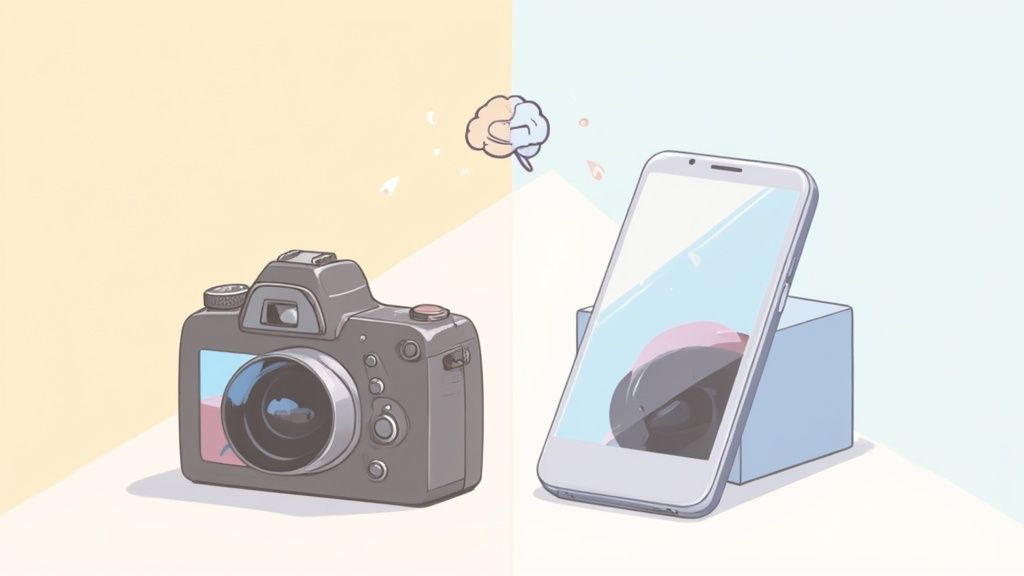
When a photo turns out blurry, you have two paths forward. You can try to fix it with post-processing software, or you can prevent it from happening in the first place. These days, fixes range from manual sharpening in a program like Photoshop to automatic AI-powered tools that can intelligently reconstruct lost detail.
Understanding Why Your Photos Are Blurry
Before you can salvage a blurry shot, you need to play detective. Figuring out what went wrong is the key to choosing the right fix. Most fuzzy images aren't a lost cause; they're usually the result of a few common, and often preventable, slip-ups that happen when you press the shutter.
Getting to the root of the problem won't just help you rescue your existing photos—it's the first step to capturing consistently sharper images from now on.
The Three Main Culprits of Blur
Generally, there are three big reasons your photos aren't as crisp as you'd like. Each one leaves a distinct fingerprint on your image.
- Camera Shake: This is what happens when the camera itself moves while the shutter is open, a common issue in low light. It creates a general, all-over softness, smearing the entire scene just enough to ruin the shot.
- Subject Motion: If your subject moves while you’re snapping the picture, you get motion blur. The background might be perfectly sharp, but the moving person or object will have a streaky, almost ghostly trail behind it.
- Missed Focus: This one’s a classic. It’s when your camera’s autofocus locks onto the wrong part of the scene—like the wall behind your friend instead of their face. The result is a photo where something is sharp, but it's not what you intended.
This image breaks down how often each of these culprits is to blame.
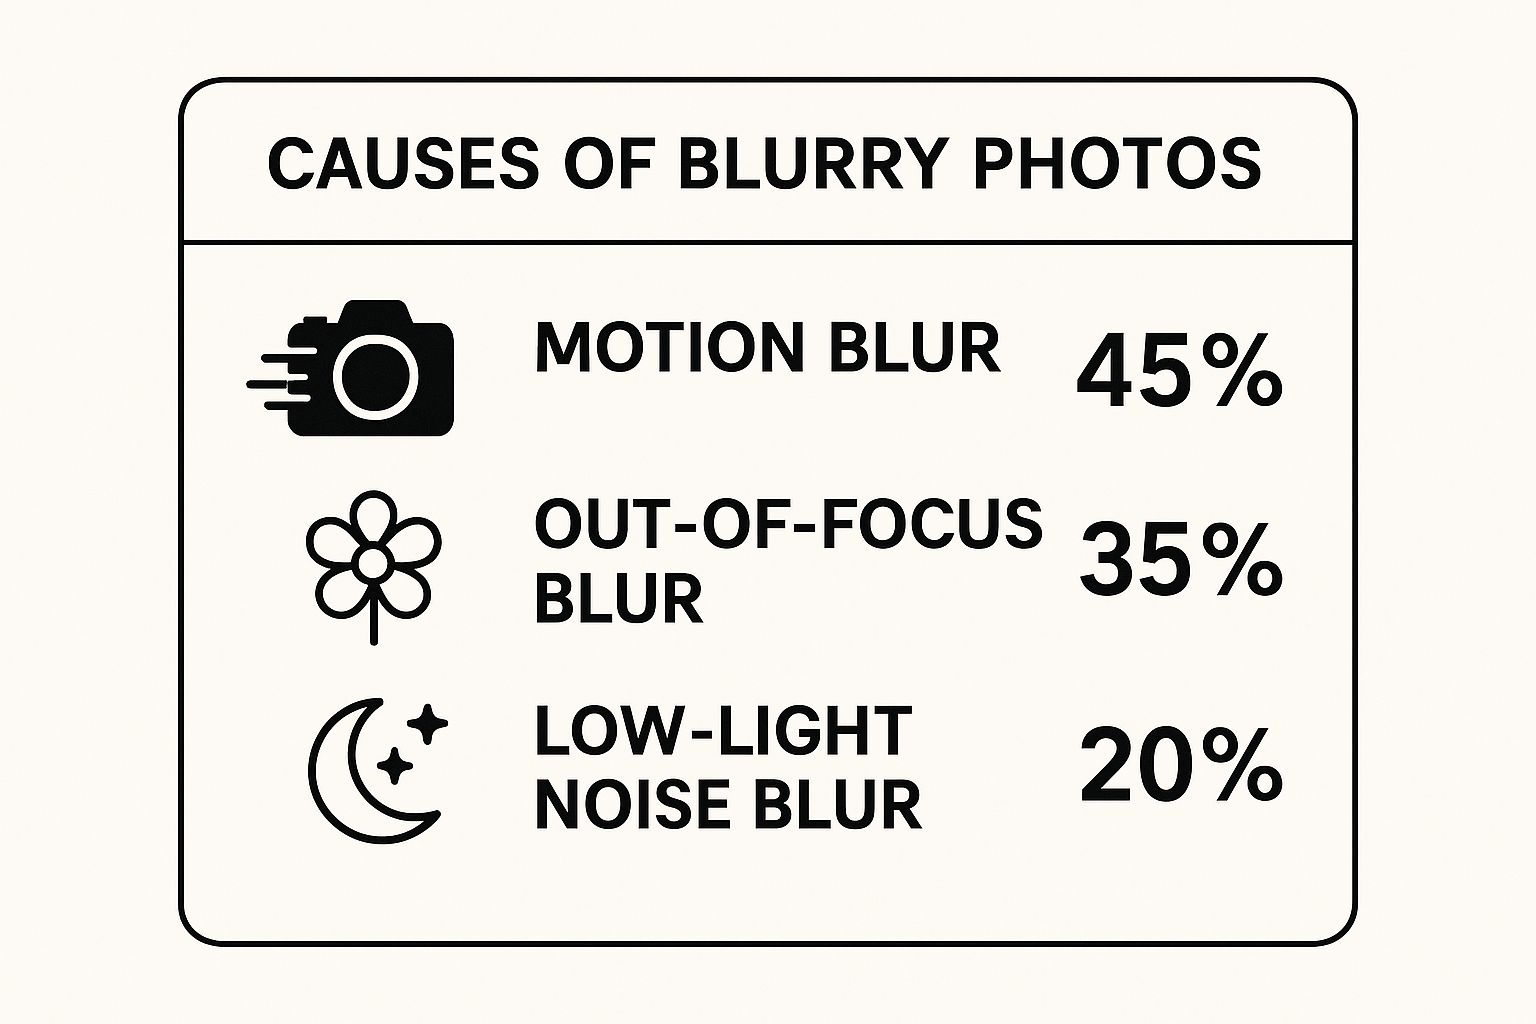
As you can see, motion blur—either from the camera or the subject—is the most common problem, accounting for almost half of all blurry photos.
The table below provides a quick summary of these common issues and how to tackle them both in-camera and after the fact.
Common Causes of Blur and Practical Fixes
| Type of Blur | Primary Cause | In-Camera Prevention Tip | Best Post-Processing Fix |
|---|---|---|---|
| Camera Shake | Unsteady hands or slow shutter speed. | Use a tripod or increase your shutter speed (e.g., 1/125s or faster). | AI sharpening tools that analyze and correct the entire image. |
| Subject Motion | The subject moved during the exposure. | Use a faster shutter speed or "burst mode" to capture multiple frames. | AI-based motion deblurring, which can be tricky but effective. |
| Missed Focus | Autofocus locked on the wrong point. | Use single-point AF to select your focus point manually. | Very difficult to fix. Some AI tools can add "selective sharpness." |
Ultimately, a little prevention goes a long way. Paying attention to your settings and how you hold the camera can save you a ton of editing time later.
Key Takeaway: Preventing blur is always more effective than fixing it later. A steady hand, a fast shutter speed, and careful focusing can solve over 80% of blur-related problems before they even happen. Once a photo is blurry, you might also consider using a high-quality image resizer to ensure the file is optimized after editing, which helps maintain clarity when sharing online.
Going Hands-On: Manually Sharpening Photos in Editing Software
Sometimes, AI tools can feel a bit like using a sledgehammer when you really need a scalpel. For those moments, professional editing software is your best friend. Programs like Adobe Photoshop and Lightroom are the industry standard for a reason—they give you surgical precision to fix blurry photos without turning them into a crunchy, over-sharpened mess.
This approach is perfect for images that are just a little soft, where a careful, human touch can coax out stunning detail. The demand for this level of control is huge; the photo editing software market was valued at around USD 1.15 billion and is on track to hit USD 1.82 billion by 2034. It's that need for advanced sharpening filters and blur reduction tools that drives this growth, giving creators the final say over their images.
The Unsharp Mask: Your Secret Weapon
Don't let the name throw you off; the Unsharp Mask is one of the most powerful sharpening tools in your arsenal. It doesn't actually "unsharp" anything. Instead, it works by finding the edges in your photo—the areas where light and dark meet—and boosting the contrast along those lines. This creates the illusion of incredible sharpness.
Unlike a simple, one-size-fits-all "Sharpen" slider, this tool gives you three critical controls to dial in the perfect look.
- Amount: Think of this as the intensity. How much sharpening do you want to apply? A good starting range is usually between 50% and 150%.
- Radius: This setting tells the software how wide of an area around the edges to affect. For most high-resolution photos, a tiny radius of 1-2 pixels is all you need.
- Threshold: This is a lifesaver. It prevents the software from sharpening things you don't want to sharpen, like subtle noise or film grain. A threshold of 2-10 tells it to ignore minor pixel differences and focus only on true edges.
Layer Masks: The Pro Move for Selective Sharpening
One of the most common rookie mistakes is sharpening an entire image at once. This can make smooth areas, like skin or a clear blue sky, look gritty and just plain wrong. The professional workflow involves using a layer mask.
By applying your sharpening effect on a separate layer, you can use a mask to paint that sharpness exactly where it’s needed. Think of highlighting the sparkle in someone's eyes, the intricate texture of a product, or the architectural details on a building—all while leaving the rest of the photo untouched.
This technique is a cornerstone of high-end photo retouching and gives you a much more natural-looking result. If you're prepping images for an e-commerce site, a dedicated Shopify photo editor can help with these final touches after you've done the heavy lifting.
And remember, once the editing is done, you still need to make sure the image looks great online. Learning a few image compression tips for mobile design is a crucial final step to ensure your beautifully sharpened photo loads quickly and maintains its quality on any device.
If manually sharpening a photo feels like performing delicate surgery, then using AI is like waving a magic wand. These tools have completely changed the game for photo restoration, giving anyone the power to rescue a fuzzy image with just a few clicks.
Forget about painstakingly tweaking sliders. Modern AI algorithms look at your photo, figure out why it's blurry, and then intelligently reconstruct the missing details. It’s a huge time-saver, especially for those frustrating photos with motion blur or a missed focus that would otherwise be a lost cause. The tech behind it is pretty incredible—the AI learns from millions of sharp and blurry photo pairs, essentially teaching itself how to reverse-engineer the blur.
The Simple AI Workflow
The whole process is refreshingly simple. Most AI photo enhancers, like the one we've built at ProdShot, are designed around a straightforward upload-and-enhance model.
- Upload Your Image: Just drag and drop your blurry photo right into the tool.
- Let the AI Do Its Thing: The system immediately gets to work, analyzing the pixels to understand the blur pattern.
- Download the Result: In a matter of seconds, you get a much sharper version, ready to go.
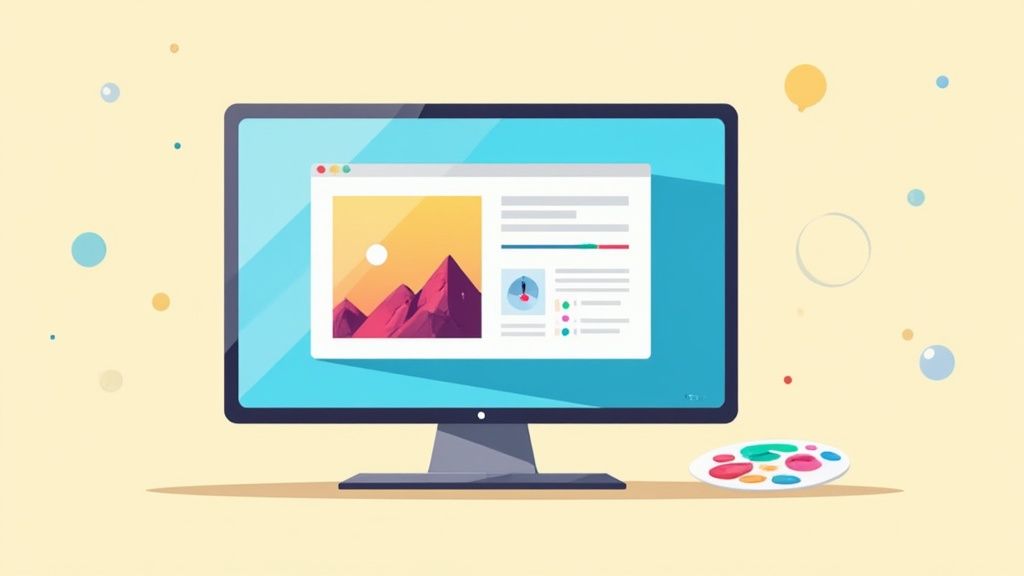
Here's a look at what you can expect. The interface is clean and to the point, designed to get you from blurry to sharp with zero fuss.
The before-and-after shot says it all. You can see how the AI has skillfully reconstructed facial features and sharpened up soft edges, turning a throwaway picture into a perfectly usable one.
Why AI is a Game-Changer
You really can't overstate the impact AI has had on image editing. The global AI market is already valued at around USD 279 billion and is expected to keep climbing, mostly because of the efficiency it brings. In fact, one recent survey found that 58% of people are now using AI editing tools on a regular basis. Why? Because they automate tedious jobs like deblurring and noise reduction.
The real power of AI is that it makes professional results accessible to everyone. Small business owners and creators can now get high-quality images without needing to master complex, traditional software.
This technology is also the backbone of tools like an https://prodshot.net/ai-product-photo-generator, which can create incredible visuals from just a few words. If you want to dive deeper into how this tech is evolving across different industries, you can explore more about the future of AI innovation.
When it comes down to it, AI offers a powerful, fast, and incredibly effective solution for fixing those frustrating blurry photos.
Going Deeper: Meet Computational Photography
While fixing a blurry photo after the fact is great, some of the most impressive deblurring work happens inside your camera before you even see the final image. This is the world of computational photography, and it’s like having a tiny, brilliant photo editor living in your device, making real-time decisions to give you the sharpest shot possible.
This isn't just a niche gimmick; it's a massive field. The market is expected to rocket from USD 18.43 billion to a staggering USD 41.77 billion by 2032. That growth is fueled by the very algorithms that help us all capture cleaner, crisper photos every day. If you want to dive into the numbers, you can explore the full computational photography market growth on Coherent Market Insights.
The Secret is Merging Multiple Frames
At its heart, computational photography outsmarts blur by capturing and analyzing a bunch of images in the blink of an eye. When you press the shutter button, your smartphone isn’t just taking one picture; it’s often firing off a rapid burst of shots.
From there, it uses a couple of clever techniques to build a better final image:
- Multi-frame HDR (High Dynamic Range): You’ve probably seen the "HDR" setting on your phone. It works by taking several photos at different exposures—one dark, one bright, and one in the middle. The software then stitches the best-lit parts of each frame together. A fantastic side effect is that it also grabs the sharpest details from each of those shots, often correcting for minor hand-shakes.
- Exposure Fusion: This is a similar idea but with a laser focus on detail and texture. The software sifts through a whole sequence of burst images and cherry-picks the sharpest pixels from the entire set, intelligently weaving them together into one super-sharp composite photo.
This is exactly why modern smartphones can pull off such clear photos in dim, tricky lighting. By combining the data from multiple quick shots, they can use faster shutter speeds for each individual frame, which dramatically minimizes the chance for camera shake to ruin the final image.
How This All Helps You
So, what does this mean for you? Knowing how this tech works gives you a real edge. It explains why using "burst mode" for action shots is such a lifesaver—you’re basically feeding the camera more raw data to work its magic.
Many editing apps have also started building these computational tricks right in, letting you apply similar deblurring and enhancement effects after you've taken the photo. By understanding the power of these built-in algorithms, you can learn to fix blurry photos by simply letting your camera do the heavy lifting for you.
Knowing When a Blurry Photo Cannot Be Saved
While today's software can feel like magic, it’s crucial to know that not every blurry photo is salvageable. I've spent countless hours trying to fix photos that were just too far gone, and learning the limits is key to managing your expectations and focusing your energy where it actually counts.
Ultimately, whether you can rescue an image comes down to a few hard truths.
Assessing the Damage
The first and most important thing to look at is the severity of the blur. Think of it on a spectrum. A photo that’s just a little soft or slightly out-of-focus probably has enough good data left for an AI to work with. It can find the edges and sharpen up the details pretty effectively.
But what if you have a photo with extreme motion blur, where a person’s face is just an unrecognizable streak of color? That’s almost always a lost cause.
Another huge factor is the original image resolution. A low-res photo that’s also blurry is a double whammy. You simply don't have enough pixel information for the software to intelligently piece together what’s missing. It’s like trying to solve a 1000-piece puzzle when you only have 50 pieces to start with.
The core limitation is simple: software can't invent details that were never captured. It can analyze blur patterns to sharpen what's there, but it can't create a person's features or read text that has been completely smeared into oblivion.
Your goal is to learn the difference between a photo that's just "soft" and one that is fundamentally "compromised." Spotting this distinction will save you a ton of time and frustration, letting you know when to dive into an edit and when it’s best to just move on.
Got Questions About Fixing Blurry Photos?
If you're diving into the world of photo editing, you're bound to have a few questions. We see the same ones pop up all the time, so let's get you some quick, practical answers.
Can a Really Blurry Photo Actually Be Fixed?
This is the big one, and the honest answer is: it depends. Modern AI tools are getting scarily good. They can often work some serious magic on photos that are just a bit soft, suffering from motion blur, or where the focus was just slightly off.
But there's a limit. If a picture is so blurry that you can't make out the basic shapes and features, there’s no software on earth that can invent details that simply weren't captured. Think of it this way: AI is incredible at salvaging a photo, but it can't create one from scratch out of a total blur.
What's the Best Software to Unblur a Photo?
The "best" tool really comes down to what you need and how much time you want to spend. There’s no single right answer, but here’s how I see it:
- For Ultimate Control: The pros still reach for tools like Adobe Photoshop. With features like the Unsharp Mask and selective sharpening on different layers, you have a level of precision that's unmatched—if you're willing to climb the learning curve.
- For Speed and Simplicity: This is where dedicated AI enhancers shine. They're built to give you fast, automatic results with just a click or two, making them perfect when you need to fix something quickly without a fuss.
Does Sharpening an Image Make It Worse?
It absolutely can. Over-sharpening is a classic editing mistake that can ruin an image. When you push those sharpening sliders too far, you start to see nasty digital side effects, like weird bright "halos" around edges and a gritty, grainy look called noise.
The secret is to be subtle. Here’s a pro tip: always work non-destructively. Instead of applying sharpening directly to your image, do it on a separate layer. That way, you can easily dial the effect back, paint it out of certain areas, and never permanently damage your original photo.
Ready to take your product shots from blurry to brilliant? ProdShot uses advanced AI to automatically fix and enhance your images, giving you professional, sales-ready results in seconds. Give it a try for free at https://prodshot.net.