
Before we even get into the how of creating high-resolution images, we need to talk about the why. It’s probably the single biggest needle-mover for any e-commerce store.
Put simply, crisp and detailed product photos are your silent salespeople. They stop the scroll, build instant trust, and give customers the confidence to hit that "buy" button. They aren’t just pictures; they're your most valuable asset.
Why High-Resolution Images Are Your Secret Weapon in E-commerce
On the crowded digital shelves of Shopify, Amazon, and Etsy, your product images have a heavy lift. A potential customer can't touch your product, feel its texture, or judge its weight. They rely completely on what they see to gauge quality.
Blurry, pixelated, or badly lit photos don't just look unprofessional—they create doubt. That hesitation is all it takes for a shopper to click away and never come back.

The Numbers Don't Lie
This isn't just a hunch; the connection between image quality and sales is backed by some serious data. When you invest in sharp visuals, you're investing directly in your bottom line.
The table below highlights just how significant the shift from low-quality to high-quality imagery can be for your business.
Impact of Image Quality on E-commerce Success
| Metric | Impact of High-Resolution Images |
|---|---|
| Social Media Shares | 40% higher chance of being shared organically |
| Purchase Decision Factor | A top factor for 90% of online shoppers |
| Conversion Rate Lift | Potential increase of up to 94% |
These figures tell a powerful story. When customers can clearly see what they’re buying, their confidence skyrockets, and your conversion metrics follow suit.
The bottom line is that people buy what they can see. If they can't zoom in to inspect the stitching on a leather bag or the fine details of a piece of jewelry, they won't feel comfortable making the purchase. It's that simple.
Shifting from Pictures to Assets
When you commit to high-quality imagery, the benefits ripple across your entire business. Better visuals lead to fewer questions and less uncertainty, which can directly lower your product return rate.
Suddenly, those product photos become powerful, versatile assets. You can repurpose them for your social media feeds, email marketing campaigns, and paid ads, creating a consistent and professional brand image everywhere you show up.
Thinking about the cost of professional product photography can feel daunting at first. But when you reframe it as a core business investment—not just an expense—the perspective changes. Learning how to get a high-resolution image is the first step in turning your photos from simple placeholders into strategic tools that generate revenue 24/7.
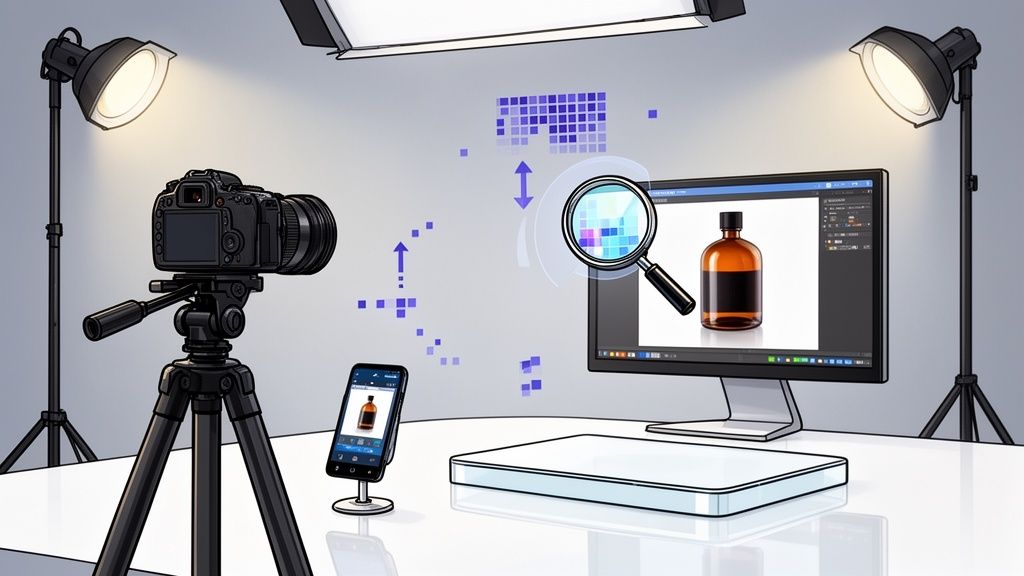
Capturing Sharp Images with the Gear You Already Own

Let's clear up a common myth: you don't need a six-figure studio to get high-resolution product photos. Incredible image quality starts at the source, and the best camera for the job is often the one you already have, whether that's a new smartphone or an old DSLR gathering dust.
The real secret isn't fancy gear. It's about getting a handle on three things: light, stability, and your camera settings. Nail these, and you'll capture images packed with the kind of detail that sells.
Getting Out of "Auto" and Mastering Your Settings
Your camera's manual or "pro" mode is where the magic happens. It’s time to leave "auto" behind and get familiar with the exposure triangle: ISO, aperture, and shutter speed. Balancing these three is the fundamental skill for any sharp, clean shot.
- ISO: Keep your ISO as low as it can go, ideally ISO 100 or 200. Anything higher introduces digital "noise"—that grainy, speckled look that completely ruins fine details.
- Aperture (f-stop): This setting controls how much of your product is in focus. For a single item, an aperture between f/8 and f/11 is the sweet spot. It gives you a deep depth of field, making sure your product is sharp from front to back.
- Shutter Speed: With a low ISO and a narrow aperture, your shutter needs to stay open a bit longer to let in enough light. This is precisely why a tripod is an absolute must-have.
A sturdy tripod is the single most important tool for sharp product photos. It eliminates camera shake, letting you use those slow shutter speeds without a hint of motion blur. It’s the foundation for every crisp detail you want to capture.
Once your camera is on a tripod, you can confidently use a shutter speed of 1/60th of a second or even slower. I also recommend setting your camera’s two-second timer—it’s a simple trick to prevent any wobble from you pressing the shutter button. This setup guarantees a rock-solid, sharp foundation.
The Power of RAW vs. JPEG
Another choice that makes a huge difference is your file format. You should always shoot in RAW (or ProRAW on an iPhone) instead of JPEG.
Think of a RAW file as your digital negative. It contains every bit of uncompressed image data your camera's sensor captured. A JPEG, on the other hand, is a compressed file where the camera has already made permanent decisions about brightness, color, and sharpening, throwing away valuable data to save space.
Why RAW Always Wins for Resolution
| Feature | RAW | JPEG |
|---|---|---|
| Image Data | All original, uncompressed data | Compressed, with permanent data loss |
| Editing Flexibility | Maximum control over adjustments | Limited, edits quickly degrade quality |
| Detail Recovery | Can rescue overexposed highlights | Blown-out details are gone for good |
| White Balance | Fully adjustable in post-production | "Baked in" and very hard to fix |
Shooting in RAW gives you the absolute best raw material to work with. It preserves the maximum amount of detail, which is the very essence of high resolution.
This level of detail has a direct impact on your sales. Poor images are a leading cause of returns, contributing to the 22% return rate from items looking "different" in person. When shoppers can see a product clearly—and 63% of them want 360-degree views to do so—it builds trust and drives conversions. You can find more insights on this in a detailed market research report on shopper behavior.
A Practical Retouching Workflow for Product Photos

Getting that perfect shot in-camera gives you the best possible starting point—a beautiful RAW file. Think of it as your high-quality raw material. Now, it's time to refine it into a polished, professional image that will stop scrollers in their tracks.
This isn't about heavy-handed, drastic changes. The goal is to enhance what you've already captured, making the final image clean, vibrant, and packed with detail that builds trust with your customers.
The smartest way to do this is with a non-destructive workflow. Tools like Adobe Lightroom or Capture One are perfect for this. They apply your edits as a set of instructions, leaving the original RAW file completely untouched. You can always go back, tweak a setting, or start over from scratch without losing a single pixel of data.
Nailing the Fundamental Adjustments
First things first, let's get the basics right. We need to make the product look as true-to-life as possible. This is where you lay the foundation for a high-resolution image that not only looks great but also helps reduce returns by setting accurate expectations.
Your initial edits should focus on these key areas:
- Exposure: Is the photo a little too dark or blown out? Use the exposure slider to find that sweet spot where you have plenty of detail in both the shadows and the highlights.
- Contrast: This is what gives your image that "pop." A small boost can make your product stand out beautifully. Just be careful not to overdo it and crush the subtle details in the dark or light areas.
- White Balance: This is absolutely critical for color accuracy. Use the eyedropper tool in your software and click on a truly neutral part of your image—something that should be pure white or gray. This tells the software how to render colors correctly, ensuring that a white t-shirt doesn't have a weird blue or yellow tint.
Getting the color right is non-negotiable. If a customer buys a red dress that looks bright scarlet online but arrives as a muted crimson, you’re practically asking for a return. For a deeper dive, check out our guide on product photo retouching for more advanced techniques.
Polishing and Sharpening for a Professional Finish
With your core corrections locked in, it's time to add that final layer of professional polish. This means tackling common culprits like digital noise and softness that can make an otherwise great photo feel amateur.
When sharpening, the goal is to enhance edge detail, not to create new detail. A good rule of thumb is to zoom in to 100% and apply sharpening until the edges look crisp but not "crunchy" or surrounded by a bright halo.
Digital noise—that grainy texture you might see in the shadows or in photos shot at a high ISO—can make an image look cheap. Use your software’s noise reduction tool, but use it sparingly. The key is to apply just enough to smooth out the grain without smudging away the fine textures that make your product feel real.
Finally, don't forget output sharpening. This is a subtle, last-minute sharpening pass that makes the details pop on a screen. It cleverly compensates for the slight softness that naturally occurs when an image is resized for the web. It's this final touch that elevates a photo from good to great, delivering that crisp, high-resolution feel every customer expects to see.
Using AI to Intelligently Upscale Your Images
We’ve all been there. You have a great product shot, but it’s just too small. Maybe you need to turn a crisp social media photo into a massive website banner, or you’ve unearthed an older image that just doesn’t cut it for today’s high-resolution standards.
In the past, you’d hit a dead end. Traditional resizing tools would just stretch the pixels, leaving you with a blurry, pixelated mess. It was frustrating and often meant the photo was completely unusable.
This is where modern AI completely changes the game for anyone trying to get a high-resolution image from a smaller file. Instead of just making pixels bigger, AI upscalers analyze your image and intelligently generate new, believable detail. They've been trained on millions of images, so they understand what textures, edges, and patterns are supposed to look like, allowing them to convincingly add data that wasn't there to begin with.
The result? A larger image that stays sharp and clear, completely avoiding that blocky, artifact-filled look from old-school enlargement methods. This technology essentially rescues photos that would otherwise be destined for the trash folder.
When to Upscale and When to Reshoot
AI upscaling is a powerful tool, but it's not a magic wand. Knowing when to use it is the key to getting great results and avoiding hours of frustration.
- Perfect for Upscaling: Repurposing an existing, well-shot photo for a larger format is the ideal use case. Think taking a great Instagram post and turning it into a website hero image. It’s also fantastic for slightly bumping up the size to meet marketplace minimums, like turning an 1800px image into a 2048px one.
- You're Better Off Reshooting: If your original image is fundamentally flawed—blurry, out of focus, or poorly lit—upscaling will only make those problems more obvious. No amount of AI can fix a bad photo at its source.
Upscaling works best on images that are already high-quality, just too small. It enhances existing detail but can’t create it from a blurry, low-information source. The old saying still applies: garbage in, garbage out.
In the fast-paced, visual-first world of e-commerce, which is on track to hit $6.86 trillion by the end of 2025, high-resolution images are non-negotiable. The data is clear: 50% of shoppers choose products based on larger, higher-quality photos.
Understanding True AI Enhancement
It’s really important to know the difference between simple resizing and true AI upscaling. When you enlarge an image in a basic editor, the software uses algorithms like "bicubic interpolation" to essentially guess what the new pixels should be. It’s a mathematical approximation, and it often gets it wrong.
AI, on the other hand, uses a generative process. It actually predicts and creates new pixels that logically fit into the image, preserving textures and keeping lines sharp.
For example, imagine upscaling a photo of a wool sweater. A traditional resizer will blur the knit pattern into a soft, undefined texture. A smart AI upscaler will recognize the pattern and reconstruct the individual stitches at the larger size.
To explore powerful AI solutions built for this kind of image enhancement, you might check out tools like Lunabloom AI. Using these advanced tools gives you the confidence to meet any platform's resolution demands without sacrificing quality.
Exporting Perfect Images for Shopify and Amazon
You’ve done the hard work of shooting and retouching your product photos. Now for the final, critical step: exporting them for the web. Getting your export settings right is what makes your images look fantastic and load quickly on platforms like Shopify, Amazon, and Etsy.
Think of it like this: you've baked a perfect cake (your high-resolution master file), and now you need to slice it perfectly for serving. The wrong settings can make all your effort vanish, leaving you with blurry photos or a sluggish site that sends customers running.
Mastering Pixel Dimensions and File Types
Forget about DPI (Dots Per Inch) for a minute. That's a metric for printing. When it comes to screens, the only thing that matters is pixel dimensions—how many pixels wide and tall your image is. A square format is usually a safe bet across most e-commerce sites.
- Shopify: While they say you can go up to 4472 x 4472 pixels, I’ve found that 2048 x 2048 pixels is the real sweet spot. It gives you incredible detail without slowing down your site.
- Amazon: They require images to be at least 1000 pixels on the longest side to get that all-important zoom feature. For the best look, I always aim for 1600 pixels or more.
For file types, you’ve got a few solid options. JPEGs are the go-to for most product photos because they compress beautifully. If you need a transparent background (like for a logo or a product cutout), PNG is your best friend. And the new kid on the block, WebP, offers amazing quality at an even smaller file size.
Finding the Compression Sweet Spot
This is where the real art of exporting comes into play. Compression is what shrinks your file size, and a smaller file means a faster website—something both customers and search engines love. But if you overdo it, you’ll end up with a pixelated mess.
The magic number for JPEG quality is usually somewhere between 70 and 90. This setting drastically cuts down the file size, but you'll barely notice any difference in visual quality. Always, always preview the export to check for weird artifacts before you hit save.
Once you have your high-resolution images, learning how to optimize images for web to boost SEO is a game-changer. A fast site doesn't just keep customers happy; it can give you a real edge in search rankings.
Here’s a quick reference to keep you on track. Each platform has its own little quirks, so having a cheat sheet handy can save you a lot of headaches.
E-Commerce Image Specification Cheat Sheet
This table breaks down the key specs for the big players, helping you nail the requirements every time.
| Platform | Recommended Dimensions (px) | File Type | Notes |
|---|---|---|---|
| Shopify | 2048 x 2048 (up to 4472 x 4472) | JPEG, PNG, WebP | Square format works best. Keep file size under 20MB. |
| Amazon | 1600+ on the longest side (min. 1000) | JPEG, TIFF, PNG | 1000px minimum is required to enable the zoom feature. |
| Etsy | 2000+ on the shortest side | JPEG, PNG, GIF | Images should be at least 1024px wide. Landscape works best. |
| eBay | 1600+ on the longest side | JPEG, PNG, TIFF | Free hosting for up to 24 photos. 500px minimum. |
Sticking to these guidelines ensures your images will look sharp, load quickly, and meet all the technical requirements without any last-minute surprises.
Sometimes, your source file might be just a little too small to meet these specs. That’s where AI upscaling can be a lifesaver, letting you enlarge an image without it turning into a blurry mess.

This process is perfect for when you're just under the required dimensions and need a little boost to get your image over the line without sacrificing quality.
If you find yourself needing to resize images often, a dedicated tool can make your life a whole lot easier. You can check out this fast and effective image resizer to help streamline things. Getting this last step right ensures all your hard work pays off the moment a customer sees your product.
Your High-Resolution Image Questions, Answered
When you're deep in the weeds of creating product photos, technical terms and conflicting advice can pop up everywhere. It’s easy to get confused.
Let's tackle some of the most common questions and myths that come up when you're trying to get that perfect, crisp high-resolution shot for your online store.
Can You Really Turn a Low-Resolution Image into a High-Resolution One?
This is a classic problem. You've got a small, pixelated image, but you need it to be big and sharp. While you can't magically invent fine details that were never there in the first place, modern tools have changed the game.
Old-school resizing just stretches the existing pixels, which leads to that awful blurry, blocky look. AI upscalers, however, work differently. They analyze the photo and intelligently predict what the missing details should be, generating new pixels to create a much cleaner, sharper result.
Of course, starting with the highest-quality photo you have is always the best plan. But if you’re stuck with a small file, an AI upscaler is your best shot at making it usable for your Shopify or Amazon listings.
What Matters More: Megapixels or Camera Settings?
It's a common debate, but the answer is clear: camera settings and lighting have a far greater impact on the final quality of an image than megapixels alone. A 50-megapixel photo that's out of focus or taken in a dark room will always look worse than a sharp, well-lit 12-megapixel photo.
Megapixels are great for giving you the flexibility to crop in or make massive prints, but they don't automatically create a good picture.
Think of it this way: megapixels determine the size of your canvas, but your camera settings and lighting determine the quality of the painting on it.
Always prioritize getting your settings right. Focus on a low ISO to avoid grain, nail that crisp focus, and make sure your product is beautifully lit. That's the real foundation of a stunning, high-resolution image.
What DPI Do My Product Images Need to Be?
This might be the single biggest point of confusion for e-commerce sellers. Here’s the simple truth: for web images, DPI (Dots Per Inch) is almost completely irrelevant. DPI is a print setting. For screens, the only thing that matters are the pixel dimensions (like 2048 x 2048 pixels).
Your editing software probably defaults to 72 or 96 DPI when you export an image for the web, and that's perfectly fine. Marketplaces like Shopify and Amazon only care about the image's pixel width and height. So, you can officially stop worrying about DPI and just focus on exporting at the right pixel dimensions.
How Can I Make My Image File Size Smaller Without Losing Quality?
Large image files will slow your website down to a crawl, which hurts your customer's experience and can even tank your SEO rankings. The secret isn't just making the image smaller, but using smart compression.
Here are a few ways to shrink your file size while keeping your images sharp:
- JPEG Compression: When you save a JPEG, you can usually set the quality somewhere between 70-90%. This simple adjustment can slash the file size dramatically with no visible loss in quality.
- PNG Optimization: If you need a transparent background, you'll be using the PNG format. After you export it, run the file through a free tool like TinyPNG. It's fantastic for compressing PNGs without touching the transparency.
- Use the WebP Format: This modern format is the best of both worlds. WebP offers amazing compression while maintaining higher quality than JPEG, giving you tiny files that still look incredibly sharp. Most e-commerce platforms now support it.
Stop wrestling with complicated editing software or stressing about expensive photoshoots. With ProdShot, you can turn simple pictures from your phone into stunning, high-resolution product images in just a few seconds. Our AI handles the heavy lifting so you can get back to what matters—selling your products. Transform your product photos today at https://prodshot.net.