
Before you start building anything, let's talk about the most important step: figuring out what you actually need. Learning how to make a photo backdrop is less about following a single blueprint and more about matching the right tool to the right job.
You could piece together a sturdy, pro-level frame from PVC pipe and fabric for less than $50. Or, you could get creative with recycled materials and build a textured, artistic surface for practically nothing. The "best" choice really just depends on what you're shooting.
Matching Your Backdrop to Your Photography Goals
So, before you cut a single pipe or buy a yard of fabric, take a second to think about your end goal. A backdrop isn't just a background; it's a key part of your toolkit that shapes the entire mood, professionalism, and focus of your images. What works perfectly for clean, crisp e-commerce shots is often the exact opposite of what you'd want for a moody, artistic portrait.
This kind of strategic thinking is more critical than ever as visual standards keep climbing. We're seeing this everywhere—the global photo booth market, which really drives backdrop innovation, was valued at a whopping $818.2 million and is only expected to grow. This isn't just about party photos; it points to a huge demand for high-quality, customized visuals in all kinds of photography. You can dig into more of this data over at gminsights.com.
Aligning Material With Subject Matter
The real decision comes down to matching the material’s properties—its texture, sheen, and sturdiness—to whatever is in front of your camera. Get this wrong, and you’ll either create a ton of extra work for yourself in post-production or just miss the mark on the visual impact you were going for.
- Product Photography: If you're selling products online, the name of the game is zero distractions. Smooth, non-reflective surfaces like seamless paper or matte vinyl are the industry go-to for a reason. They give you a clean, consistent canvas that makes your product the undeniable star. For more tips on getting those marketplace-perfect shots, check out our guide on professional Amazon product photography.
- Portraits and Headshots: This is where a little texture can work wonders by adding depth and character. Materials like muslin, canvas, or even velvet absorb light in a really beautiful way, creating a soft, flattering background. That subtle texture adds a layer of sophistication that a perfectly flat surface just can't match.
- Creative and Food Photography: Now here’s where you can really let loose and experiment. Think painted wood, faux brick panels, or even a DIY wall made from old book pages. These kinds of backdrops don't just sit in the background; they become part of the story you're telling.
Your backdrop should always complement your subject, not compete with it. A great backdrop enhances the story, whether that’s the premium quality of a product or the unique personality of a person.
By figuring out your main photography needs first, you can cut through all the noise and focus on building a backdrop that’s not just pretty, but perfectly functional for your work. Trust me, this little bit of planning upfront will save you a ton of time, money, and creative headaches down the road.
Building a Professional DIY Backdrop on a Budget
You don't need to drop a ton of cash on a pre-made kit to get a high-quality photo backdrop. A quick trip to the hardware store and a little bit of DIY spirit are all it takes to build a sturdy, versatile frame that looks just as good as the professional gear—all while saving you a serious amount of money.
This approach is a lifesaver for small business owners and content creators who need polished results without the painful overhead. The secret? A simple frame built from PVC pipe. It's shockingly lightweight, a breeze to put together (and take apart), and surprisingly durable. Don't think of it as a temporary fix; this is a solid foundation you can use with fabric, seamless paper, or even custom-painted canvas for years.
Your PVC Backdrop Shopping List
First things first, let's get your materials sorted. You can grab everything on this list at your local home improvement store for a tiny fraction of what a pro stand costs. This is a huge win, especially when you start adding up the overall cost of professional product photography and looking for smart ways to cut back.
Here’s exactly what you’ll need to build a standard 8-foot by 8-foot frame:
- (4) 10-foot lengths of ¾-inch PVC pipe
- (2) ¾-inch PVC "T" fittings
- (2) ¾-inch 90-degree elbow fittings
- (4) ¾-inch end caps (for the feet)
- A pipe cutter or a hacksaw
- Measuring tape
This setup gives you a frame tall and wide enough for pretty much anything—full-body shots, sprawling product displays, or even interview-style videos.
Assembling Your Frame
Got all your parts? Great. Putting it together is dead simple. The whole idea is to create two "T" shaped feet for stability and a big rectangular frame to hang your backdrop material from.
Cutting Your Pipes to Size
Getting your measurements right is the key to a stable, level frame. A pipe cutter will give you the cleanest, straightest cuts.
- Top & Bottom Bars: Grab two of your 10-foot pipes and cut them down to 8 feet each. These are your main horizontal supports.
- Vertical Sides: Take the other two 10-foot pipes and cut them into two 7-foot sections. This sets the height of your stand.
- Base Supports: From the leftover pieces, cut four 18-inch sections. These will form the feet that keep the whole thing from tipping over.
Pro Tip: After you cut, take a small piece of sandpaper and just smooth out the edges of the PVC. It gets rid of any rough burrs and helps the fittings slide on perfectly for a snug, secure connection.
Once all your pieces are cut, it’s basically like playing with adult-sized building blocks. Connect the 7-foot vertical pipes to the 8-foot horizontal pipes using the 90-degree elbows—those are your top corners. For the base, attach the 18-inch sections to the "T" fittings to create two stable feet, then just slide them onto the bottom of the vertical pipes.
This simple, effective design gives you a pro-level setup on a shoestring budget. And if you're building a backdrop for a specific event, feel free to get creative. There are tons of stunning backdrop ideas for a photo booth, including DIY tips that you can easily adapt to this PVC frame.
Working with Seamless Paper for Clean Results
If you've ever wondered how photographers get that perfectly clean, distraction-free background, the secret is often seamless paper. It's the unsung hero behind countless professional headshots and crisp e-commerce product photos.
The magic of seamless paper is its ability to create an "infinity cove" effect—that smooth, horizon-less look where your subject seems to float. There are no corners, no distracting lines, just a clean slate.
One of the best parts? It’s incredibly practical. The paper comes on a huge roll, so you just pull down a fresh, clean section for your shoot. When it gets scuffed or dirty, you simply tear off the used bit and roll down some more. Easy.
Choosing the Right Paper and Size
Getting started with seamless paper really comes down to two things: size and color. What you pick will shape the entire look and feel of your photos.
- Size: For smaller products, a 53-inch roll is usually all you need. If you're shooting larger items, people, or want to capture full-body shots, the industry-standard 107-inch roll is the way to go.
- Color: While it's fun to play with bold colors, a neutral gray is your most versatile workhorse, especially for e-commerce. You can easily blow it out with light to make it look pure white, or keep light off it to make it a moody dark gray or even black.
Mounting and Creating the Perfect Sweep
The key to that professional infinity look is the "sweep"—that gentle curve where the paper transitions from the wall to the floor. This is what eliminates that hard corner shadow that screams amateur.
To get this effect, you'll need to mount the roll on a backdrop stand or a more permanent wall-mounted system.
Once it's up, carefully unroll the paper so it cascades down to the floor. Don't be shy here; pull out several feet so it extends well in front of where you'll place your subject. Grab some gaffer tape or a few clamps to tack the end of the paper to the floor. This keeps it flat and stops it from annoyingly rolling back on itself.
This simple setup—gathering your gear, putting it together, and securing your backdrop—is the foundation for a professional shot, no matter what kind of frame you use.
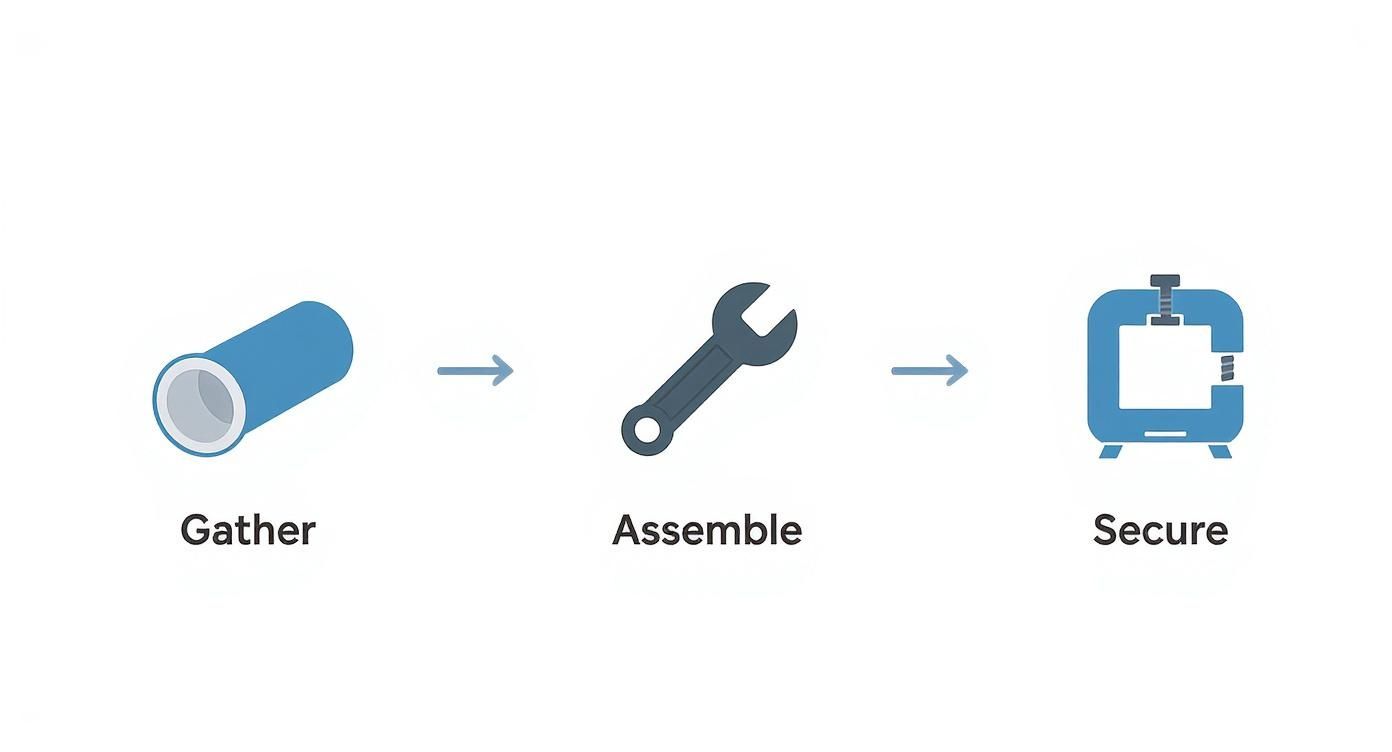
It really is that straightforward: get your materials, build the support, and then stretch your backdrop material for a taut, clean finish.
A common mistake I see is not pulling out enough paper for the floor sweep. Be generous. You need enough room for your subject to stand or sit without being right on top of the curve, which is a surefire way to get unwanted creases.
The push for high-quality images isn't just a feeling; it's a massive market trend. The global photo printing booth market, which relies heavily on great backdrops, is expected to explode from USD 760.4 million to over USD 2 billion by 2034.
This huge growth shows just how much value is being placed on polished photo setups everywhere. You can dive into the numbers and see the full report from Market.us. It really drives home why mastering fundamental skills like working with seamless paper is so important for meeting today's high visual standards.
Getting the Most Out of Fabric and Portable Backdrops
While seamless paper gives you that crisp, modern finish, it's not always the right tool for the job. Sometimes you need something with a little more texture, flexibility, or something you can just throw in the car and go. That's exactly where fabric and portable pop-up backdrops come in.
For anyone who works on location or in a small space that has to serve multiple purposes, these backdrops are a game-changer. They offer a completely different vibe and a level of convenience that a giant roll of paper just can't compete with.
The proof is in the pudding. The demand for dynamic, on-the-go setups is booming, especially in the event world. Search interest for "photo booth backdrop" recently jumped by 29.8%, which tells you that clients are looking for specific, curated aesthetics for their events. A good portable setup is the perfect way to deliver.
If you're after a reusable and endlessly adaptable backdrop, you can find a diverse range of fabric materials that can be draped, stretched, or hung to fit whatever look you're going for.
Choosing the Right Fabric
The fabric you pick will completely define the mood of your photos. Every material plays with light in its own unique way, creating different textures and sheens that you can use to your advantage.
- Muslin: This is the old standby for a reason. It's a lightweight cotton that’s affordable and drapes beautifully, giving you a soft, slightly textured look that’s fantastic for portraits. The only real downside? It wrinkles if you just look at it wrong.
- Velvet: If you're going for a rich, luxurious feel, nothing beats velvet. It drinks up light, which means you get deep, saturated colors with almost no reflection. It’s perfect for creating a dramatic, high-end atmosphere.
- Canvas: For a more rugged, artistic vibe, canvas is a brilliant choice. It’s heavy, durable, and often comes hand-painted, giving it a unique, painterly quality that can add a ton of character to a portrait.
Pop-Up Backdrops: The Ultimate in Convenience
When it comes to pure portability, you can’t beat a collapsible pop-up backdrop. They're built with a flexible metal frame that has fabric stretched over it, allowing them to twist and fold down into a small, easy-to-carry bag. I always keep one in my car for those last-minute headshot gigs—I can be set up and ready to shoot in under a minute.
The real magic of a pop-up backdrop is the speed. When you're on-site shooting corporate headshots, you can walk in, set up, get your shots, and be packed and gone in minutes. It makes you look incredibly efficient and professional.
Just make sure you have enough room to "pop" it open safely—they can spring open with some force. The twisting motion to get it back in the bag takes a little practice, too. My advice? Watch a quick tutorial and try it at home a few times. The last thing you want is to be fumbling with it in front of a client. Their compact size truly makes them the perfect tool for creating a professional studio look, anywhere you need it.
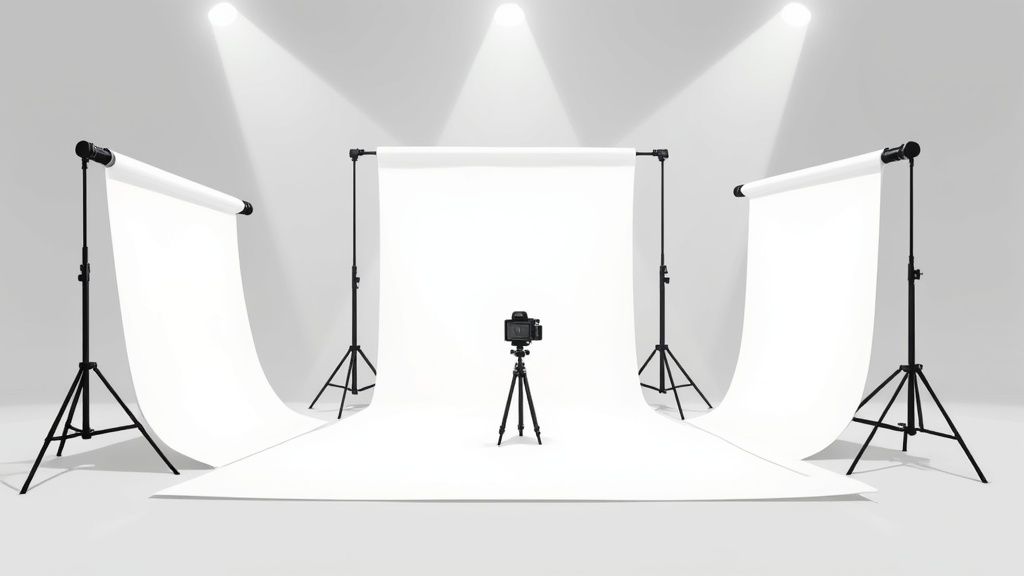
Lighting Your Backdrop for Flawless Photos

So, you’ve built the perfect photo backdrop. That's a huge step, but the work isn't quite done. A fantastic backdrop can fall completely flat without the right lighting.
Honestly, how you light your scene is just as important as the backdrop itself. It’s what controls the mood, gets rid of distracting shadows, and ultimately makes your subject look its best. Think of lighting as the tool you use to sculpt the entire scene. Bad lighting can throw harsh shadows, bring out weird textures on your backdrop, or turn a crisp white background into a dingy gray.
Nailing a few key techniques here will be the difference between an amateur snapshot and a professional-quality photo.
The Foundation: Three-Point Lighting
For portraits, headshots, or most product photography, the classic three-point lighting setup is your best friend. It's a time-tested formula used by photographers and videographers everywhere because it just works. It consistently creates flattering, dimensional light, and it's not nearly as complicated as it sounds.
It all boils down to three key lights:
- Key Light: This is your main event, the brightest light in your setup. You'll want to place it at about a 45-degree angle to your subject to create shape and highlights.
- Fill Light: Positioned on the opposite side, this light is a bit softer than the key. Its only job is to fill in the shadows created by the key light, giving you a more balanced and even look.
- Back Light: Sometimes called a "hair light" or "rim light," this one goes behind your subject. It creates a subtle glowing outline that separates them from the background, preventing that flat, "pasted on" look.
Lighting the Backdrop and Subject Separately
Here’s a trick that really separates the pros from the beginners: light your subject and your backdrop as two different things. When you use dedicated lights for each, you get total creative control over the final shot. This is exactly how photographers get that perfectly pure white background or a dramatic, moody dark one.
For example, you can use your three-point setup on your subject, and then point one or two other lights directly at your backdrop. This completely erases any shadows your subject might be casting, giving you a flawlessly lit background.
My rule of thumb is to place the subject at least 4-6 feet away from the backdrop. This distance is crucial—it gives you enough room to light the backdrop without that light spilling onto your subject, and vice versa.
Dialing In Your Camera Settings
Your camera settings are the final piece of the puzzle, working hand-in-hand with your lighting. Getting them right ensures your subject is perfectly sharp against a beautifully exposed background.
| Camera Setting | What It Does | Pro Tip for Backdrops |
|---|---|---|
| Aperture (f-stop) | Controls the depth of field—how much of your shot is in focus. | Use a wide aperture (like f/2.8 or f/4) to get a soft, blurry background. This makes your subject pop and hides any minor imperfections in your backdrop. |
| ISO | Determines how sensitive your camera's sensor is to light. | Keep your ISO as low as possible (100 or 200) to avoid grainy, noisy images. Since you're controlling the light, you shouldn't need to crank it up. |
| Shutter Speed | Controls how long the camera's sensor sees the light. | Set it fast enough to prevent motion blur (at least 1/125s), especially if you're shooting handheld or your subject is moving. |
When you combine a well-made backdrop with thoughtful lighting and the right camera settings, you’ve created a powerful trio. This level of control is the secret to producing consistently professional, eye-catching images every single time.
Common Questions About Making Photo Backdrops
Once you start building your own backdrops, you’ll quickly run into a few classic challenges. It’s just part of the process. Getting these figured out early will save you a ton of headaches and reshoots down the line.
Think of this as your cheat sheet for the most common hurdles. From picking the right color to battling those stubborn wrinkles, these are the practical, real-world tips that make all the difference when you're on set.
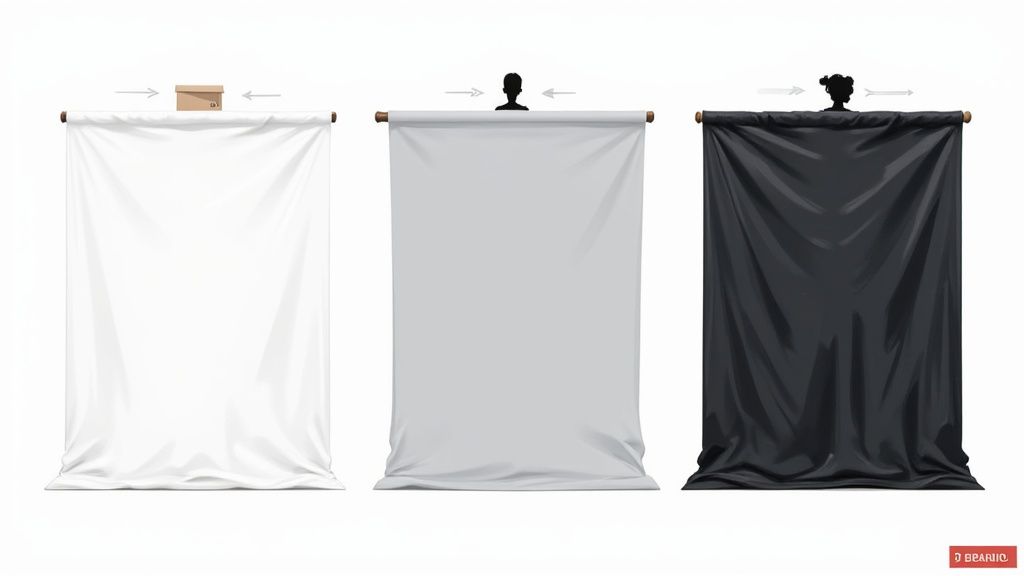
What Is the Best Color for a Versatile Photo Backdrop
If you can only buy one, make it a medium gray, often sold as ‘storm gray.’ It’s the undisputed champion of versatility. Why? Because it’s a true neutral—it won’t throw any weird color casts onto your product or subject, giving you a perfectly clean canvas.
But the real magic of gray is how you can manipulate it with light. Blast it with a bright light, and it turns nearly pure white. Keep light off of it (a technique called 'flagging'), and that same backdrop becomes a deep, moody, almost-black. That means you get multiple distinct looks from a single roll, which is a huge win for both portraits and product photography.
White is another go-to, especially for those crisp e-commerce shots, but it's much harder to light well. It loves to create reflective ‘hot spots’ and can easily wash out the fine details on your subject.
How Can I Get Rid of Wrinkles in My Fabric Backdrop
Ah, wrinkles. They are the arch-nemesis of anyone working with fabric backdrops like muslin or cotton. Your best friend here is a simple handheld steamer. A quick pass right before you shoot will relax the fibers and make most creases vanish.
If you have a bit more time, let gravity do the work. Just hang the backdrop a day or two before your shoot, and you'll be surprised how many wrinkles fall out on their own.
For the really persistent creases, you have a few options:
- Give it a light spritz with a water bottle and then gently pull the fabric taut.
- Use heavy-duty clamps on all sides of your stand to stretch the fabric as tight as you can.
- Fake it in post-production. Shoot with a shallow depth of field (a low f-stop like f/2.8) to blur the background. Minor wrinkles will completely melt away.
A shallow depth of field is a photographer’s secret weapon for imperfect backdrops. It not only hides wrinkles but also adds a professional, cinematic quality by drawing all the focus to your subject.
How Far Should My Subject Be from the Backdrop
This one is crucial. As a rule of thumb, place your subject at least 3 to 6 feet (about 1 to 2 meters) away from the backdrop. This isn't an arbitrary number; that distance solves two big problems.
First, it stops your main lights from casting ugly, distracting shadows on the backdrop right behind your subject. Second, it creates a sense of depth and separation, which is one of the hallmarks of a professional image. That space gives you room to light your subject and your background independently, which is where the real creative control comes from.
This separation is also a lifesaver if you plan to remove the background later. For example, our guide on how to remove a background for Shopify product images explains how that clean space makes the editing process infinitely smoother, whether you’re doing it by hand or using an AI tool.
Ready to skip the setup and get straight to stunning images? ProdShot uses AI to instantly transform your simple product photos into professional, marketplace-ready visuals. No lights, no backdrop, just perfect shots in seconds. See how it works at https://prodshot.net.