
To make your product pictures look truly professional, you need a mix of smart preparation and even smarter editing. It all starts with the basics: clean backgrounds and good lighting. From there, you apply a few simple composition rules when you shoot, and you wrap it all up with some quick edits—often with a little help from AI—to make colors pop, get rid of distractions, and keep everything looking consistent.
Why Pro-Level Photos Are a Non-Negotiable Asset
Before we dive into the nitty-gritty of camera settings and editing tricks, let's get one thing straight: this stuff really matters. In the world of e-commerce, your product photos are doing a ton of heavy lifting. They're your digital storefront, your best salesperson, and your brand ambassador, all rolled into one.
They’re the single most powerful tool you have to stop a potential customer from scrolling right past your product.
The Psychology of Visual Commerce
Think about it. When a customer can't physically pick up your product, they're relying completely on what they see to make a decision. Your photos have to bridge that gap by communicating quality, detail, and—most importantly—trustworthiness.
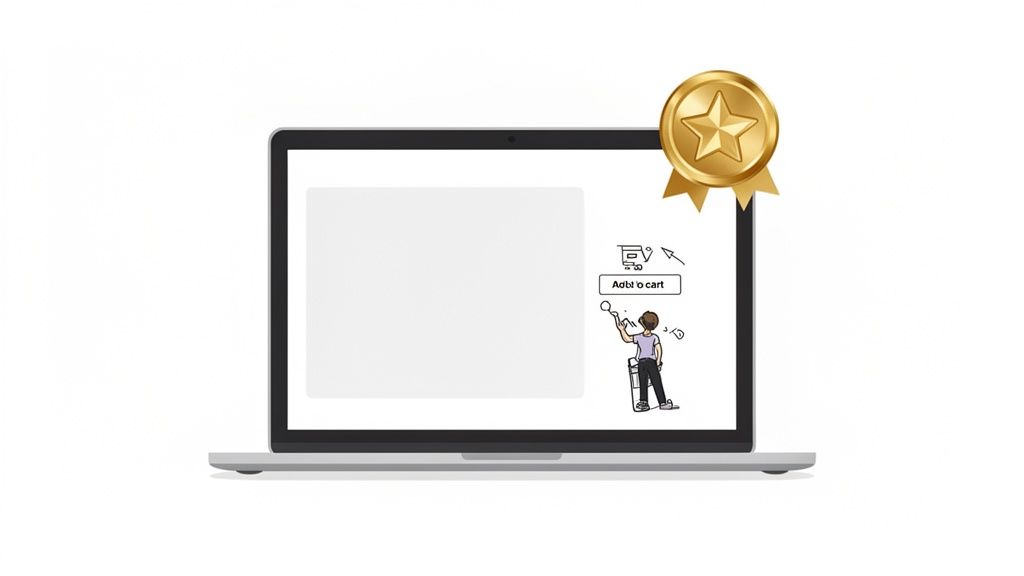
A blurry, poorly lit photo doesn't just look bad; it sends a subtle message that your product, and maybe your whole business, is unprofessional. On the other hand, a crisp, well-composed image builds instant credibility. It helps customers imagine the item in their hands, answering all those silent questions about its size, texture, and finish. That visual confidence is often the final nudge they need to click "add to cart."
The Hard Data Behind Great Images
This isn't just a hunch; the numbers back it up. A staggering 9 out of 10 online shoppers say high-quality product photos are one of the most critical factors in their buying decisions.
The data gets even more compelling. High-resolution images can drive a 94% higher conversion rate compared to their low-res counterparts. It's not uncommon for businesses that upgrade their photography to see a sales jump of up to 30%. It's a clear return on the investment.
Your images aren't just decorations; they're critical business assets. Every single photo is a new chance to build trust, show value, and drive a sale.
Ultimately, learning how to make your pictures look professional is a direct investment in your brand's future. It cuts down on customer hesitation, reduces returns (by setting clear expectations), and elevates how people see your brand. While the cost of professional product photography or the time spent doing it yourself might seem like a lot, it's nothing compared to the revenue and loyalty it generates.
The best part? With the tools available today, getting that polished look is more achievable than ever.
Here is the rewritten section, crafted to sound completely human-written and natural, following the provided style guide and examples.
Get Your Product (and Your Space) Ready for Its Close-Up
A killer photo doesn't just happen when you press the shutter. Honestly, most of the magic happens before the camera even comes out. The biggest mistake I see sellers make is jumping right into shooting without any prep work. That groundwork is what separates a quick, amateur snapshot from a professional photo that actually sells.
Think of your product like a model getting prepped for a magazine cover.
Even if it’s fresh out of the box, your camera's lens is designed to pick up every tiny flaw. Start by giving your product a thorough, meticulous cleaning. Grab a microfiber cloth to get rid of dust, smudges, and fingerprints—it won't leave any annoying lint behind. For anything stubborn, a dab of isopropyl alcohol usually does the trick. And a pro tip: if you’re shooting jewelry or anything reflective, pop on some cotton gloves. It’ll save you the headache of seeing your own fingerprints in the final shot.
I can't stress this enough: every minute you spend on prep will save you ten minutes of frustrating editing later. It's so much easier to wipe off a speck of dust now than to try and clone it out of 50 different images.
Your Simple, No-Fuss DIY Studio
You absolutely do not need to rent a fancy studio to get professional-looking photos. The real goal is just to create a clean, simple space where your product is the undisputed star of the show. Getting this setup right—and keeping it consistent—is the secret to a cohesive and trustworthy brand aesthetic.
The fastest and most effective way to do this is with a seamless white background. It’s the classic e-commerce look for a reason: it puts 100% of the focus on your item. You can pull this off with stuff you can find almost anywhere.
- White Poster Board: Just a big sheet from a craft or office supply store is perfect.
- Create a "Sweep": Lay the board on a table and let it curve up gently against a wall, using a bit of tape to hold it in place. This curve creates a smooth, infinite background with no distracting corners or lines.
This simple trick ensures every single photo has that same bright, clean, and professional feel. That consistency is what builds brand recognition.
Let There Be (Natural) Light
Lighting is everything. I mean everything. The first thing you should do is forget that your camera even has a built-in flash—it’s the fastest way to get harsh, ugly shadows and make your product look cheap.
Instead, let’s find the best natural light you’ve got.
Set up your little poster board studio right next to the biggest window in your home or office. What you're looking for is soft, indirect light. Think of the light on a slightly overcast day—it's perfect. Direct, blazing sunlight is your enemy; it creates deep, dark shadows and blows out all the detail in the highlights.
If the sun is just too bright, no problem. You can easily diffuse the light by hanging a plain white bedsheet over the window. This acts like a giant softbox, softening the light and wrapping it beautifully around your product for a much more flattering, high-end look. Once you nail down this lighting and background setup, you've created a repeatable process you can use for every single photoshoot.
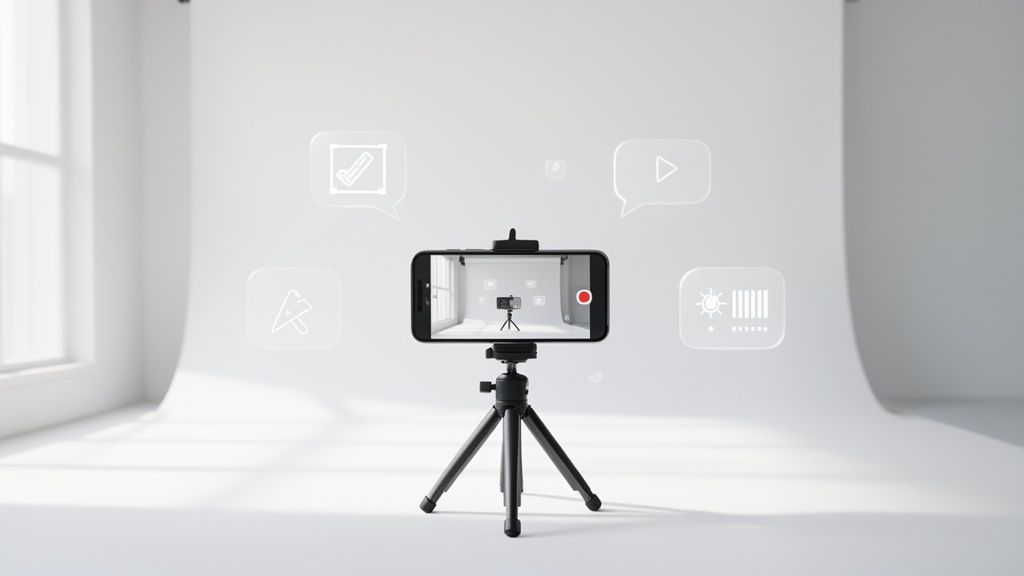
Capturing Stunning Shots with Your Smartphone
You really don't need a fancy DSLR to get professional-looking product shots. That powerful little camera in your pocket is more than up to the task, as long as you know how to play to its strengths. It all boils down to getting the fundamentals of light and composition right.
The first—and most important—rule of smartphone photography? Never, ever use the built-in flash. It’s the fastest way to make your products look cheap, creating harsh, flat light and ugly shadows.
Instead, find a large window and set up nearby. Soft, diffused natural light is the secret sauce for that high-end, premium feel.
This simple workflow is the foundation of every great shot.
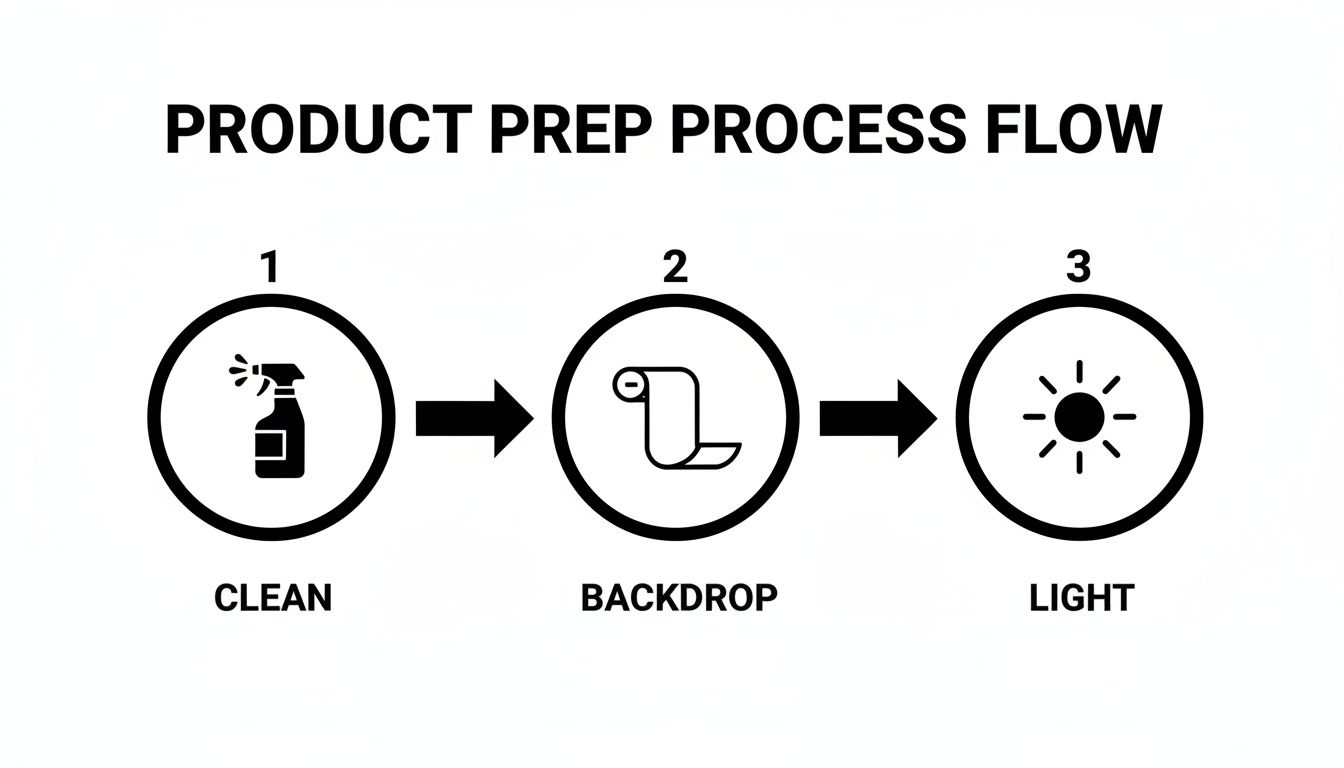
As you can see, a great picture starts long before you press the shutter button. It’s all built on a foundation of a clean product, a simple backdrop, and fantastic lighting.
Mastering Composition for Impact
With your lighting sorted, your next focus is composition. This is simply how you arrange your product in the frame to catch the viewer's eye and make the image interesting. It’s what separates a basic snapshot from a photo that truly sells.
A great place to start is the rule of thirds. Just imagine your phone screen is split into a 3×3 grid. Instead of sticking your product right in the dead center, try placing it along one of the lines or where two lines cross. This tiny shift instantly makes the image feel more dynamic and balanced.
Another trick the pros use is negative space—that’s just the empty area around your product. Don't be afraid to leave plenty of clean, uncluttered space. It makes your product the undeniable hero of the shot and gives the whole image a more luxurious, high-end vibe.
Don’t just take one photo and call it a day. Your goal is to tell a complete visual story. By capturing your product from multiple angles, you build buyer confidence and answer questions before they’re even asked.
Telling a Complete Story with Multiple Angles
Did you know successful e-commerce brands use an average of 8 images per product? They do it to give customers a 360-degree view, just like they’d get in a real store. For instance, 95.6% of fashion brands use models to show how an item fits, while 57.2% also use flat-lays to show off the little details. When you show your product from every important perspective, you help customers feel like they've already held it in their hands, which makes them much more likely to click "buy."
To stay consistent, it helps to create a quick shot list for every product.
- The Hero Shot: A crystal-clear, straight-on view of your product against a clean background. This is your main image.
- The Detail Shot: A close-up that highlights texture, materials, stitching, or any unique features.
- The In-Context Shot: An image showing your product being used. This helps customers imagine it in their own lives.
- The Scale Shot: A photo that includes a common object (like a coin or a hand) to give a clear sense of the product’s true size.
Nailing these angles is key to creating a complete gallery that answers customer questions and builds trust.
Here's a quick reference table of essential angles every e-commerce seller should capture:
Essential Smartphone Photography Angles for E-commerce
| Angle Type | Description | Best For |
|---|---|---|
| Front Angle (Hero) | A direct, head-on shot. | The main product image, showing the full item clearly. |
| 45-Degree Angle | Shot from the side and front, showing depth. | Displaying dimension and shape for items like shoes, bags, or electronics. |
| Top-Down (Flat Lay) | Shot from directly above. | Clothing, accessories, food items, or creating artistic arrangements. |
| Close-Up (Macro) | A tightly cropped shot of a specific feature. | Highlighting texture, branding, unique materials, or craftsmanship. |
| In-Context | The product shown in its intended environment. | Lifestyle brands, home decor, and helping customers visualize use. |
| Back Angle | A direct shot of the back of the product. | Showing details like clasps on jewelry, ports on electronics, or back designs on apparel. |
Covering these key angles for each product will give your listings a polished, professional feel and provide shoppers with all the visual information they need to make a confident purchase.
Of course, to get the absolute best results, it helps to know your phone's camera inside and out. If you're an Apple user, you might find a detailed comparison to help you choose which iPhone has the best camera useful. And for more marketplace-specific advice, our guide for eBay sellers on perfecting product photos is packed with tips that can make a real difference to your sales.
Turning Raw Photos Into Polished Assets
The real magic often starts long after you’ve put the camera down. Post-production is where a decent snapshot becomes a conversion-driving machine. It's the final polish that turns a raw photo into an image that looks trustworthy and professional.
And no, you don't need to become a Photoshop wizard overnight.
These days, a few strategic tweaks can make a massive difference. The idea isn't to trick your customers, but to present an accurate, idealized version of your product—what it looks like in its best light.
The Foundational Edits Every Photo Needs
Before you get fancy, every single photo you take can benefit from a few basic adjustments. Think of these as the non-negotiables that clean up your image and create a solid foundation for everything else.
First up, crop and straighten. Is the horizon line perfectly level? Are there any distracting bits of your background peeking in from the edges? A quick crop forces the viewer's eye right where you want it: on your product.
Next, you’ll want to dial in the brightness and contrast. Photos taken on a smartphone can often look a little dull or flat right out of the gate. A small bump in brightness can give the image a clean, airy feel, while a touch more contrast will add depth and make your product literally "pop" off the screen.
The New Age of AI-Assisted Editing
This is where things get really interesting and, frankly, much easier. While wrestling with complex editing software has a notoriously steep learning curve, modern AI-powered tools have flipped the script entirely. They handle the time-sucking, tedious tasks that used to take hours and deliver studio-quality results with just a few clicks.
These tools are built from the ground up for e-commerce, tackling the exact problems sellers like you face every day.
- Flawless Background Removal: Instantly zap your messy background and replace it with the pure white canvas required by major marketplaces like Amazon.
- Smart Color Correction: The AI analyzes your product and automatically punches up the colors to be vibrant and true-to-life. Your customers will see exactly what they're getting.
- Realistic Shadow Generation: Nothing screams "amateur" like a product floating in a white void. A subtle, natural shadow grounds your product, giving it weight and a realistic, three-dimensional look.
AI editing isn’t here to replace your creative instincts; it’s here to supercharge them. It takes care of the technical grunt work, freeing you up to focus on the bigger picture—like curating a beautiful and consistent brand aesthetic.
This tech means any seller can achieve a polished, cohesive look without needing to hire a pro or spend a decade learning design. If you need to scale this process, exploring dedicated photo editing services for ecommerce can be a great move to guarantee every single image is perfect.
The biggest win here is consistency. When you apply the same AI-driven edits to all your photos, you create a seamless, professional, and trustworthy shopping experience. Your entire catalog will look like it was shot in the same high-end studio, building brand credibility and making your products look that much more appealing.
You've done the hard work. You prepped, shot, and edited your product photos, and they look fantastic. But don't pop the champagne just yet—there's one final, absolutely critical step before you can call it a day.
You have to make sure your images are perfectly formatted for the specific places you sell.
Skipping this part is like running a marathon and stopping a foot from the finish line. Every single marketplace, whether it's Shopify, Amazon, or Etsy, has its own rulebook for images. Blowing off these guidelines can lead to a world of frustration—think annoying upload errors, slow-loading pages that make customers click away, or photos that look stretched and weird on mobile.
This final check is all about making sure your hard work pays off with a sharp, fast-loading gallery that looks incredible everywhere.
JPEG vs. PNG: Picking the Right Tool for the Job
When you hit "save," you'll usually face a choice between two main file types: JPEG and PNG. They might look the same at a glance, but they're built for different things. Choosing the right one is a small detail that makes a big professional difference.
-
JPEG (or JPG): This should be your default for pretty much every product photo. JPEGs are absolute champs at compression. They can shrink a file down to a fraction of its original size with almost no visible loss in quality. This is a huge deal for page speed, which impacts everything from customer experience to your SEO rankings.
-
PNG: Pull this one out of your toolbox only when you need a transparent background. Say you’re layering a logo over an image or you need a shot of just your product floating in space—PNG is perfect for that. The catch? The file sizes are way, way bigger.
For your primary hero shots on a solid background, always choose JPEG. The smaller file size will help your pages load in a snap, keeping impatient shoppers from bouncing.
Nailing the Technical Specs
File type is just the start. Every platform has its own sweet spot for image dimensions and file sizes. It's tempting to upload a massive, high-resolution photo thinking "bigger is better," but that will absolutely kill your site's loading speed.
The goal is to find that perfect balance: the best possible quality at the smallest possible file size. This whole process is called image compression.
Think of image compression like packing a suitcase. You want to fit everything you need (image quality) into the smallest possible bag (file size) without crushing anything important.
Most editing software and online tools have a "Save for Web" or "Export As" option that does this balancing act for you. If you're looking to get your products seen on major retail platforms, a huge piece of the puzzle is correctly setting up your Google Shopping Feed, where your image quality is make-or-break for getting clicks. Following each platform's rules isn't just a suggestion; it's essential for success.
Marketplace Image Specification Cheat Sheet
Every platform has slightly different rules, and keeping them straight can be a pain. I put together this quick-reference table to help you get it right every time.
| Marketplace | Recommended Dimensions (Pixels) | Maximum File Size |
|---|---|---|
| Shopify | 2048 x 2048 (for square images) | Under 20 MB (but aim for <500 KB) |
| Amazon | At least 1000 on the longest side | Under 10 MB |
| Etsy | 2000 on the shortest side | Under 1 MB (for best performance) |
| eBay | At least 1600 on the longest side | 12 MB |
| Google Shopping | 250 x 250 (min), 1024 x 1024 (recommended) | 16 MB |
Bookmark this page or save this chart! It'll save you a ton of headaches down the road by ensuring your images are optimized and ready to convert, no matter where you sell.
Got Questions? Let's Talk Product Photos
Even after you've got the basics down, a few questions always pop up. That’s completely normal. Nailing your product photography is a process, and a bit of trial and error is part of the game. Let's tackle some of the most common hurdles I see sellers run into when they're trying to get that professional look.
Think of this as your go-to guide for those "what if" moments. The answers here are straight to the point—practical advice you can put to work right away.
Do I Really Need a White Background for My Product Photos?
While it’s not some unbreakable rule, the clean white background is the e-commerce gold standard for a reason. It puts 100% of the focus on your product, plain and simple. No distractions. This creates a clean, consistent, and professional vibe across your entire shop, which is a massive trust signal for shoppers.
Big marketplaces like Amazon actually require a pure white background for the main product image. For your secondary or lifestyle shots, go wild and get creative! But for that all-important first impression, white is almost always the right move. And with today's AI editing tools, getting that perfect white background is easier than it's ever been, making it a no-brainer.
A white background isn't just a style choice; it's a strategic decision that removes friction from the buying process. It tells the customer, "This is exactly what you're getting," with no visual noise to get in the way.
How Much Editing is Too Much?
Here's the golden rule: enhance, don't alter. Your mission is to make the product look its absolute best while staying 100% true to what it looks like in real life. Stick to the fundamentals. Tweak the brightness so it's clear, give the contrast a little boost to make details pop, and make sure the colors are spot-on to what the customer will pull out of the box.
Oh, and you can definitely over-edit. Slapping on heavy filters, cranking up the saturation until it looks unnatural, or smoothing out important textures can seriously mislead your customers. Not only does it feel a bit dishonest, but it's also one of the top reasons for product returns. The best editing is the kind you barely notice—it just makes reality look a little better.
Can I Mix Smartphone Photos with Professional Ones?
Consistency is everything for a professional-looking shop. You can absolutely mix photos from different cameras, but they have to feel like they belong together. If a customer is scrolling through your gallery and sees a jarring jump in lighting, background color, or editing style, it can make your brand look amateur and pieced together.
This is another spot where AI editing can be your secret weapon. You can take a shot from your smartphone and another from a DSLR, run them through the same editing workflow to get a consistent background, balance the lighting, and match the colors. This trick ensures your whole gallery looks cohesive and high-end, no matter what you shot it with.
What’s the Single Biggest Mistake Beginners Make?
Hands down, it's bad lighting. I see it all the time. Beginners either rely on their camera's harsh built-in flash or they shoot in direct, blazing sunlight. Both create nasty, hard-edged shadows and glaring hotspots that can make even a premium product look cheap.
The secret to photos that look professional is soft, diffused light. You don't need a bunch of expensive gear to get it, either. Just set up your product near a large window on a day that's a little overcast. This one change—switching from harsh light to soft light—will improve your photos more than anything else you can do.
Ready to stop wrestling with complicated editing and start creating stunning, conversion-ready images in seconds? ProdShot uses powerful AI to automatically remove backgrounds, perfect lighting, and generate studio-quality photos from simple smartphone snapshots. Try it for free and see the magic for yourself.