
You can't just point and shoot when it comes to jewellery. The secret to those crisp, professional-looking photos that make customers click "add to cart" all comes down to what you do before you ever touch that shutter button. Getting the foundation right—your camera, lens, and prep work—is what separates a pro shot from an amateur snap.
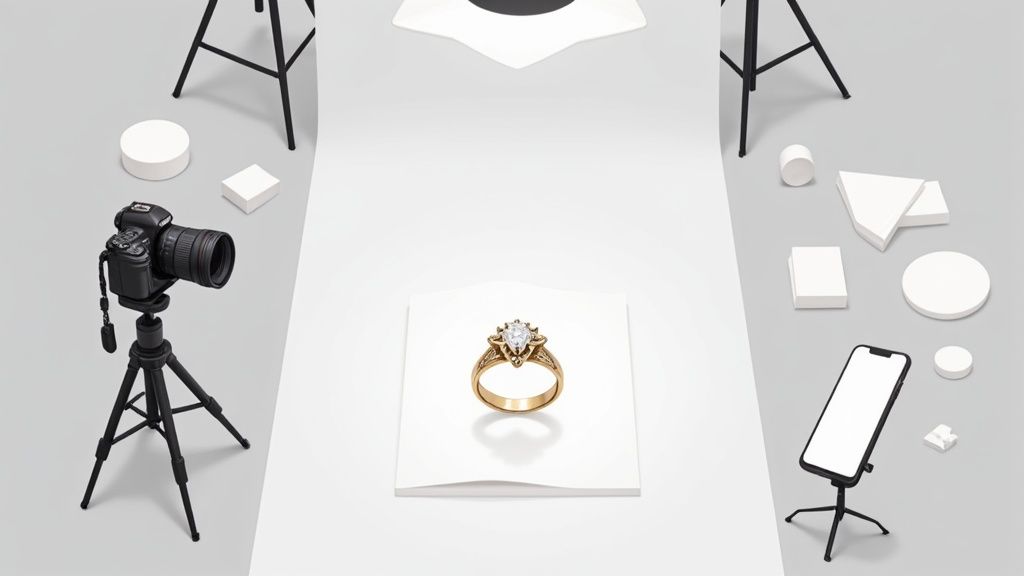
Building Your At-Home Photography Studio
You don’t need a massive, expensive studio to get jaw-dropping jewellery photos. Honestly, a dedicated corner in a room is all it takes, as long as you have the right gear. The whole point is to create a controlled environment where you dictate everything, from the stability of the camera to how light kisses every facet of a gemstone.
Think of this as the most critical part of the entire process. Why? Because a slightly shaky photo or a smudged stone is a nightmare to fix in post-production. It never looks quite right. A small investment in the right tools now will save you hours of pulling your hair out later.
Choosing Your Camera and Lens
While almost any modern DSLR or mirrorless camera can get the job done, the real star of the show is the macro lens. This is what lets you get up close and personal, capturing those tiny, intricate details that customers want to see—the delicate metalwork, the precise cut of a gem, the unique texture of a setting. A lens with a focal length somewhere between 60mm and 105mm is the sweet spot for most cameras.
Using a smartphone? No problem. You can get fantastic results, but you'll need a little help. There are tons of affordable clip-on macro lenses that will give your phone's camera the superpower it needs to focus at extremely close distances. Without one, you’ll just get a blurry mess.
Key Takeaway: A macro lens isn't just a "nice-to-have"—it's a non-negotiable for jewellery photography. It's the single piece of gear that has the biggest impact on capturing the fine craftsmanship that sells.
Before we go further, let's break down the essential gear you'll need, whether you're team DSLR or team smartphone.
Essential Gear for Jewellery Photography Smartphone vs Camera
Here’s a quick rundown of the gear you'll want to have on hand. Notice that a lot of the core principles—like stability and clean pieces—apply no matter what you're shooting with.
| Equipment | Dedicated Camera (DSLR/Mirrorless) | Smartphone |
|---|---|---|
| Camera/Lens | DSLR or mirrorless camera with a 1:1 macro lens (60-105mm is ideal). | A modern smartphone with a high-quality camera and a clip-on macro lens. |
| Stability | A sturdy, reliable tripod is a must. | A small tripod with a phone mount. Don't skip this! |
| Shutter | Remote shutter release or camera's self-timer to avoid any shake. | Use the phone's self-timer or a Bluetooth remote shutter. |
| Lighting | 2-3 continuous LED lights or strobes with diffusers/softboxes. | At least one good quality ring light or a couple of small LED panel lights. |
| Background | White or neutral-coloured seamless paper, acrylic sheet, or a lightbox. | A simple piece of white poster board or a small pop-up lightbox. |
| Jewellery Prep | Cotton gloves, microfibre cloths, small air blower. | Same as for a dedicated camera—cleanliness is key! |
This table should give you a clear shopping list. The goal isn't to buy the most expensive stuff, but the right stuff to control your shot.
Essential Gear for Stability and Control
Even if you think you have the steadiest hands in the world, you can't beat a tripod. The slightest movement—even your own breathing—can introduce a tiny bit of blur that kills the sharpness of an image. A solid tripod guarantees that every single shot is perfectly crisp.
To take it a step further, you need to avoid touching the camera when you take the picture. That’s where a remote shutter release or your camera’s built-in timer comes in. The simple act of pressing the shutter button can cause a micro-vibration that a macro lens will amplify into a blurry detail.
And of course, you'll need light. We'll dive much deeper into lighting techniques in the next section, but having your essential photography lights set up and ready to go is part of this core prep stage.
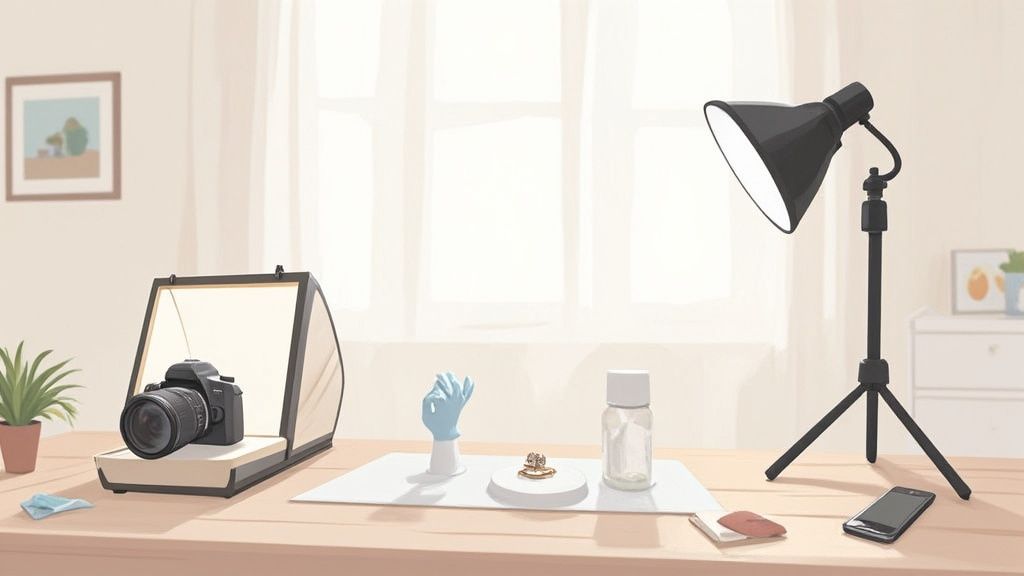
Preparing Your Jewellery for Its Close-Up
Your camera sees everything. Every fingerprint, every speck of dust, every tiny fibre you didn't know was there. Before a piece ever sees the lens, it needs a spa day.
- Polish Everything: Grab a soft, lint-free microfibre cloth and give the entire piece a thorough polish. This gets rid of oils and smudges that make metal and gems look dull and flat.
- Handle with Care: Once it's clean, put on a pair of cotton or latex gloves. This stops you from immediately putting your fingerprints all over your hard work.
- Final Inspection: Use a magnifying glass or just zoom in with your camera to hunt down any last bits of dust. A little air blower (like the ones for cleaning camera sensors) is perfect for puffing away tiny particles without having to touch the surface.
This might feel a bit tedious, but trust me, it’s the secret sauce. Taking five extra minutes here is the difference between a photo that looks like a quick snapshot and a professional product shot that actually drives sales.
Mastering Light to Make Your Jewellery Shine
When it comes to jewellery photography, light is everything. It's the magic ingredient that turns a simple piece of metal and stone into something truly captivating. Get the lighting right, and a silver band gets a soft, luxurious gleam; a diamond explodes with fire. Get it wrong, and even the most exquisite piece can look flat and cheap.
The goal isn't just to make things bright—it's about control. Harsh, direct light is your enemy. It creates nasty glare, unflattering reflections, and deep, distracting shadows. To get that professional look, you need to master soft, diffused light. This is the kind of light that wraps gently around your jewellery, showing off its true color and texture without all the visual noise.
Natural Light vs. Artificial Light Setups
You've really got two choices for your light source: the sun or a lamp. Both can give you incredible results, but you have to know how to work with them.
Natural Window Light: The Budget-Friendly Option
This is the most accessible way to get started, and frankly, it can produce some of the most beautiful, high-end looking shots. It’s completely free, and the light from a window is often naturally soft and directional. For the best results, try to shoot on a slightly overcast day, or find a window that isn't getting blasted with direct sun.
Here’s how to make it work:
- Get close to a big window. The larger the window, the softer and more flattering your light will be. Set your table right up next to it.
- Give it some space. Don't place your jewellery right against the glass. Position it a few feet back to let the light spread out and soften up.
- Bounce that light. Grab a simple white foam board or a reflector and place it on the opposite side of your jewellery, just out of the frame. This kicks light back into the shadows, brightening the dark side of your piece and evening everything out.
A common mistake is just using any old window. North-facing windows are the secret weapon here because they provide consistent, indirect light all day long. You won't have to deal with the light changing every five minutes like you would with an east or west-facing window.
A Lightbox: The Controlled Environment
If you need dead-on consistency, a lightbox (or light tent) is your best friend. It’s essentially a cube made of white translucent fabric with lights positioned around the outside. It’s designed to create a perfectly diffused, nearly shadow-free environment—the gold standard for those clean, product-on-white shots you see on e-commerce sites.
You can buy a ready-made lightbox, but it's also surprisingly easy to DIY one with a cardboard box, some white tissue paper, and a couple of desk lamps. The principle is exactly the same: create your own little world of soft, even light.
Taming Reflections and Using Shadows
Reflections are the number one headache in jewellery photography. Polished metals and faceted gems are basically tiny, complicated mirrors, and they will reflect everything—you, your camera, the mess in the corner of your room.
This is where diffusers and reflectors become non-negotiable. A diffuser, which can be anything from a professional softbox to a thin white sheet held between the light and your product, scatters the light. This simple act softens its quality and dramatically cuts down on those sharp, ugly reflections.
Next, you need to think about shadows. While a lightbox is designed to kill them off, sometimes a subtle shadow is exactly what you need to give a piece a sense of depth and make it feel more real. You control this with your reflectors. Place a white foam board right up close to your jewellery to fill in all the shadows for a bright, clean look. Move it further away, and you'll get softer, more defined shadows that can add a touch of drama.
Choosing the Perfect Background
Your background sets the stage. Its only job is to be a supporting actor that makes your jewellery the star of the show.
For E-commerce: Clean and Simple Wins
On marketplaces like Amazon, Shopify, or Etsy, a pure white or light grey background is the undisputed king. It’s clean, professional, and keeps the customer’s focus exactly where it should be: on your product. This also gives your entire shop a consistent, polished look. A sheet of white acrylic can add a subtle, elegant reflection, while seamless paper gives you a totally flat, non-reflective surface.
For Lifestyle and Social Media: Tell a Story
That clean white background is perfect for product listings, but it can feel a little sterile for Instagram or your website's homepage. This is your chance to get creative and inject some brand personality into your shots.
Think about using backgrounds that add a bit of context and texture:
- Marble or Slate: Gives off a vibe of luxury, elegance, and cool sophistication.
- Linen or Silk Fabric: Can add softness, a bit of texture, and a romantic feel.
- Polished Wood or Concrete: Perfect for creating an earthy, modern, or rustic mood.
The trick is to find a background that complements the jewellery without competing with it. If you’re shooting a really intricate, detailed piece, keep the background simple. If the jewellery itself is more minimalist, a background with some texture can add just the right amount of visual interest. Just make sure the colors of your background work in harmony with the metals and gemstones you're trying to sell.
Nailing Your Camera Settings for Sharp Details
With your lighting and setup handled, it’s time to tell your camera exactly what you want it to see. Forget the intimidating dials and menus for a second. Mastering just a few key settings is what separates a soft, amateurish photo from a crisp, professional image that actually sells. This is where you take back control from the camera.
"Auto" mode might seem like the easy button, but it will almost never get jewellery photography right. It's built for everyday snapshots, not for capturing the tiny, reflective, intricate details of a piece of jewellery. To get the results you need, you have to jump into Manual Mode (M). This gives you direct control over the big three: aperture, ISO, and shutter speed.
Aperture: The Key to All-Over Sharpness
When you photograph jewellery, the goal is to get the entire piece in focus—from the front facet of a diamond to the clasp at the back of the chain. The setting that controls this is the aperture, measured in f-stops (like f/2.8, f/8, or f/16).
Think of aperture like the pupil of your eye. A low f-stop number (f/2.8, for example) means the opening is wide open. It lets in a ton of light but creates a very shallow "depth of field." This is fantastic for portraits when you want a beautifully blurred background, but it's a total disaster for product photos. Parts of your ring or necklace will inevitably be out of focus.
For jewellery, you need the exact opposite. A high f-stop number creates a narrow aperture opening, which keeps more of the image sharp.
- Start with an aperture of f/8. This is a solid, all-around setting that will get most of a single item in focus.
- Push it to f/11 or even f/16 for larger pieces. If you're shooting a chunky necklace or a detailed bracelet, a higher f-stop is crucial to keep everything sharp from front to back.
Using a high f-stop means less light hits the sensor, so you'll have to compensate with your other settings. This is precisely why a tripod is non-negotiable.
ISO: For Clean and Grain-Free Images
Next up is ISO, which is basically your camera's sensitivity to light. A high ISO makes the sensor more sensitive, which sounds good for shooting in darker conditions. But it comes at a steep price: digital noise. You'll see it as an ugly, distracting grain all over your photos.
For jewellery photography, your goal is the cleanest, smoothest image possible.
Pro Tip: Always, always keep your ISO set to its lowest native setting. This is usually ISO 100 or ISO 200. Since you’re on a tripod and have complete control over your lighting, there's simply no reason to ever increase it. A low ISO gives you the highest quality file with the most detail and the least noise.
Sticking to this one rule guarantees your final images are smooth and professional, letting the fine details of the jewellery shine through without getting muddled by grain.
The infographic below shows how all these different elements—from your light source to how you shape it—come together in a real jewellery shoot.
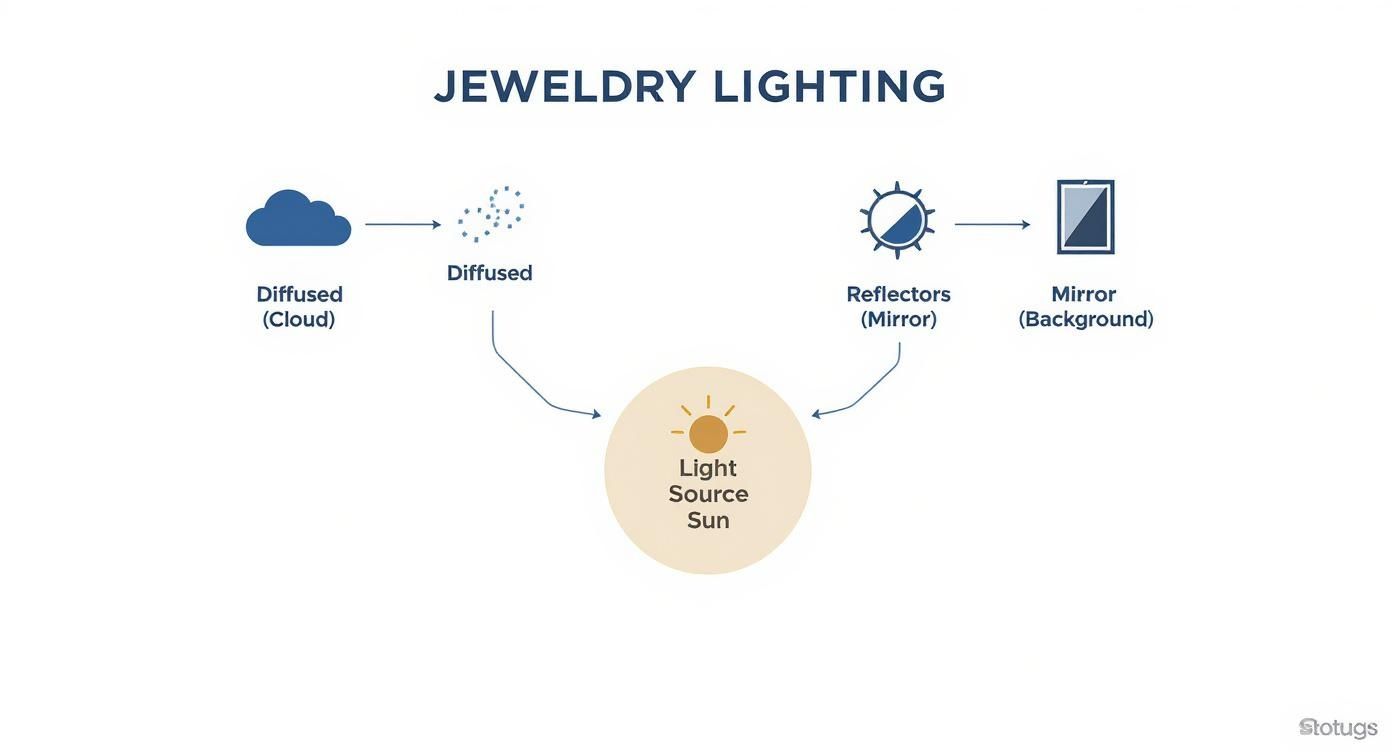
As you can see, your main light is just the starting point. It's the diffusers, reflectors, and the right background that truly shape that light for a perfect shot.
Shutter Speed and Eliminating Camera Shake
Okay, so your aperture is set high and your ISO is set low. To get a bright enough photo, your camera now needs to keep its shutter open for a longer period. This is perfectly fine—your camera is on a tripod, remember? Shutter speed is the final piece of the puzzle you'll adjust to dial in the perfect brightness.
There's one catch. The simple act of pressing the shutter button can cause a tiny vibration that will blur your image, especially when using a macro lens. It’s infuriating. Luckily, there are two easy ways to avoid this:
- Use a remote shutter release. This is a small remote that lets you fire the shutter without ever touching the camera. It completely eliminates any chance of shake.
- Use the camera's built-in self-timer. Just set it to a two or ten-second delay. This gives the camera plenty of time to stabilize after you press the button and before it takes the picture.
Setting Your White Balance for True Colors
Finally, let's talk about color. Ever taken a photo where a beautiful silver ring looks weirdly blue, or a gold necklace has a sickly yellow cast? That’s a white balance problem. "Auto White Balance" gets easily confused by studio lights and shiny surfaces.
To get your colors spot-on, you need to set a custom white balance. The easiest way to do this is with a simple grey card—an inexpensive piece of card that is a perfectly neutral shade of grey.
Just place the grey card in your scene under your lighting, take a picture of it, and then go into your camera's menu to tell it, "This is what neutral grey should look like." The camera will instantly adjust all its colors based on that reference point. Your gold will look golden, your silver will look silver, and your gemstones will be true to life. This single step can save you hours of frustrating color correction in post-production.
Styling and Composition That Sells Your Pieces
A technically perfect photo with flawless lighting and sharp focus is a great start. But let's be honest, it’s the styling and composition that truly make a customer fall in love with a piece.
This is where you shift from just being a photographer to being a storyteller. You’re creating images that feel aspirational, irresistible. It’s about arranging your jewellery in a way that’s not just seen, but felt.
This creative step is more important than ever. The demand for high-quality visuals is surging—the professional photography industry was valued at a whopping $55.6 billion in 2023 and is only expected to grow. For jewellery sellers, this means strong photography isn't just a nice-to-have; it's a core requirement for standing out.
Finding the Best Angles for Your Jewellery
The angle you choose can completely change how a piece of jewellery is perceived. A single, straight-on shot is rarely enough to do it justice. If you want to build a compelling product gallery, you need to show the item from multiple viewpoints, highlighting every little detail that makes it special.
Here are the key angles I always make sure to get for my shot list:
- The Straight-On Shot: This is your classic, essential product view. It's perfect for showing the full design clearly and is a must-have for any marketplace listing on Amazon or Etsy.
- The 45-Degree Angle: Shooting slightly from the side and above adds a sense of depth and dimension. This angle is fantastic for rings, as it helps to show off both the setting and the band in one go.
- The Flat Lay (Overhead): A shot from directly above is perfect for creating an elegant, organized look. It works beautifully for necklaces, bracelets, and earring sets arranged artfully on a surface.
- The Detail Shot (Macro): Time to get up close and personal. Use your macro lens to capture the intricate engravings, the unique texture of the metal, or the precise facets of a gemstone. These are the shots that scream quality.
A common mistake I see is people only shooting the "hero" part of the jewellery, like the main stone on a ring. But customers also want to see the thickness of the band, the style of the clasp on a necklace, and the backs of earrings. Showing these practical details builds trust and helps manage expectations before they click "buy."
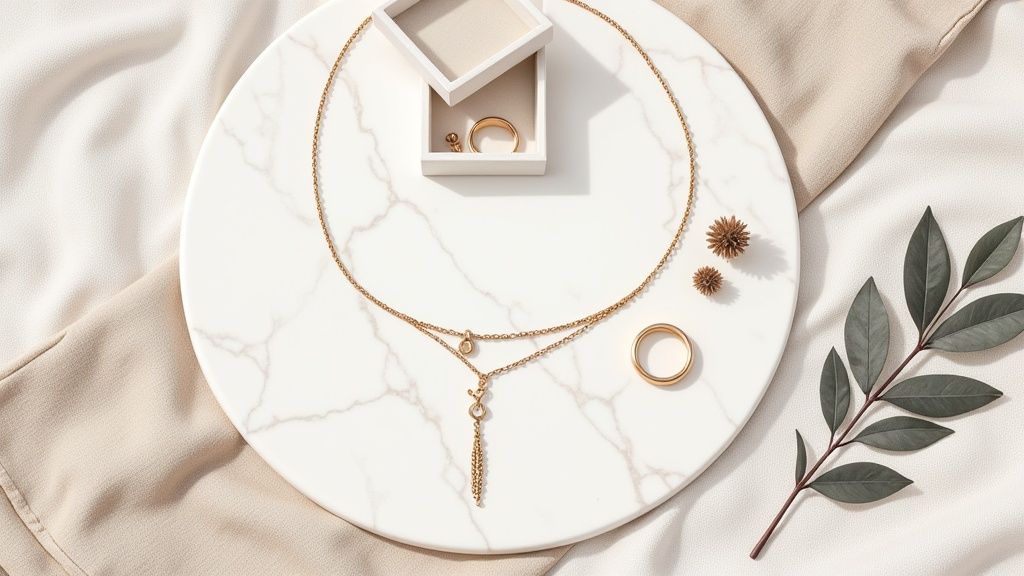
Using Props to Add Context and Style
Props can elevate your photos from simple product shots to compelling lifestyle images, but they have to be chosen with care. The golden rule is that a prop should complement the jewellery, not compete with it. Seriously, less is almost always more.
When styling your scene, start with one or two simple props and build from there. The goal is to create a mood or tell a story that feels true to your brand.
- For an elegant vibe: Think a silk ribbon, a delicate ceramic dish, or a single flower petal.
- For a modern feel: Use geometric shapes, a piece of slate, or clean-lined trinket trays.
- For a natural or rustic look: Try dried flowers, a piece of wood, or textured linen fabric.
Avoid anything overly bright, busy, or large that pulls the viewer's eye away from what you're selling. Your jewellery must always be the hero of the shot. If you're feeling stuck, our guide on the best jewellery product photos has some excellent visual inspiration to get your creative juices flowing.
The Power of Compositional Rules
You don't need to be a fine artist to compose a beautiful photo. Following a few simple principles can make a massive difference in how balanced and professional your images look.
The Rule of Thirds is the most famous for a reason—it works. Imagine your frame is divided by two horizontal and two vertical lines, creating a 3×3 grid. Instead of placing your jewellery dead center, position it along one of the lines or at an intersection point. This simple technique creates a more dynamic and visually interesting image that naturally guides the viewer's eye.
A Smart Editing Workflow for E-Commerce Success
The magic of a stunning jewellery photo doesn't stop when the shutter clicks. In fact, that's just the beginning. The real transformation happens in post-processing, where a good shot becomes a great one—the kind that stops scrollers in their tracks on Shopify, Amazon, and Etsy.
Think of your original photo as a perfectly cut but unpolished gemstone. Editing is that final buff and polish that brings out its true fire and brilliance. The goal isn’t to fake it, but to enhance what’s already there, ensuring your colours are true-to-life and every intricate detail is razor-sharp.
This is where modern tools can completely change the game, letting you generate countless professional-looking scenes from a single, simple photo.
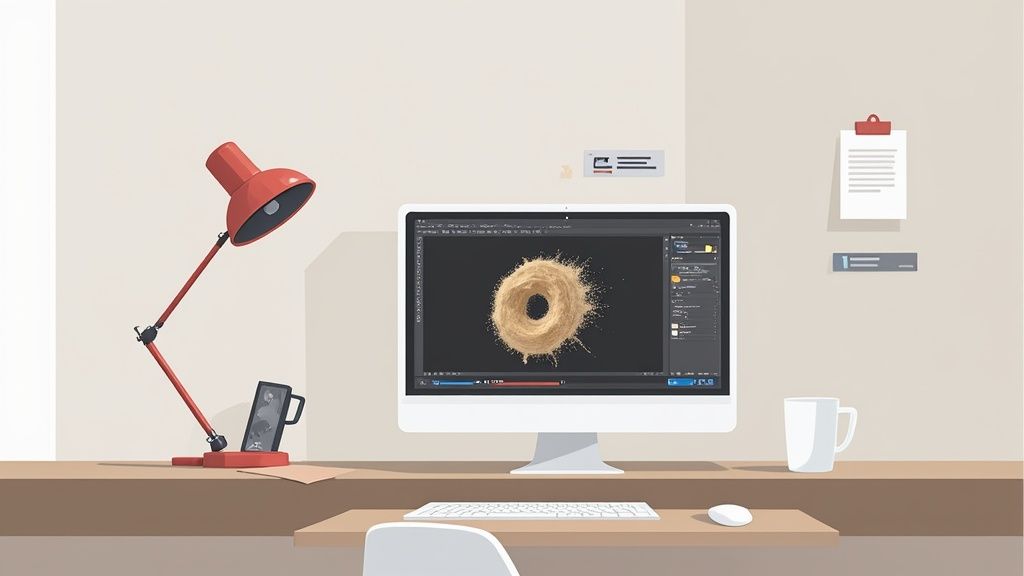
It’s an incredible time-saver and allows for a level of creativity that used to require a full-blown studio setup.
Essential First-Pass Adjustments
Before diving into the nitty-gritty, every single photo needs a round of basic adjustments. This is your foundation. Whether you’re using Adobe Lightroom or Photoshop, these initial tweaks create a clean, balanced canvas to work from.
First up, nail the white balance. Even if you set it in your camera, a tiny adjustment can make the difference between a gold ring looking rich and warm versus having a weird, greenish tint. The goal is to get your metals looking right—warm golds, neutral silvers.
Next, play with exposure and contrast. You're aiming for a bright, vibrant image where the jewellery pops without blowing out the highlights on a gem or losing detail in the shadows. Finally, a touch of sharpening is non-negotiable. It’s what makes the fine metalwork and gemstone facets look crisp and professional. Just don't go overboard; too much sharpening looks harsh and unnatural.
The Critical Task of Background Removal
For most e-commerce platforms, a clean, pure white background isn't just a nice-to-have; it's a hard requirement. It creates a consistent, high-end shopping experience and eliminates distractions. This is often the most time-consuming part of the editing process, but you have options.
- Manual Removal in Photoshop: The Pen Tool is your best friend for precision. It gives you total control but requires a steady hand and a lot of patience, especially with something like a delicate chain.
- Automated Tools: Quick "select subject" features in most software can give you a head start, but they often stumble on the complex outlines and tiny gaps in jewellery.
- AI-Powered Solutions: This is where things get exciting. Tools built for product photography use AI to nail background removal in seconds, handling even the most intricate pieces without breaking a sweat.
Key Insight: A consistent, clean background across your entire product catalog is a huge trust signal. It tells customers you're a professional brand and makes your storefront look cohesive and polished, which can absolutely boost your conversion rates.
AI in Jewellery Photo Editing
Artificial intelligence is no longer some far-off concept—it’s a practical tool that’s making high-end photo editing accessible to everyone. AI can instantly balance lighting, remove those pesky reflections from shiny surfaces, and even enhance the sparkle in a diamond. These were all tasks that once required hours of painstaking work by a Photoshop pro.
Once your photos are perfectly edited, you can begin to think about marketing. Once your jewellery photos are impeccably edited for e-commerce, explore effective strategies to monetize Instagram to showcase your beautiful new visuals.
Final Touches and Exporting for the Web
Almost done. The last step is to zoom in and hunt for any tiny imperfections. Use a spot healing tool to click away any specks of dust or minuscule scratches you might have missed during prep. This final cleanup ensures your product looks absolutely flawless.
When you're ready to export, save your images as a web-friendly JPEG or PNG. Keep a close eye on the file size. Huge images will slow your website to a crawl, which is bad for both user experience and SEO. A good rule of thumb is to compress the image to around 70-80% quality to find that sweet spot between visual fidelity and a fast-loading page.
If this all sounds like a lot, don't worry. There are fantastic specialized product photo editing services out there that can take this entire workflow off your plate, delivering perfectly optimized images ready for your store.
Common Jewellery Photography Questions Answered
Even with the best plan, you’re bound to run into a few hurdles when learning how to photograph jewellery. Let's tackle some of the most common issues I see pop up time and time again, with some straightforward fixes to get you back on track.
How Do I Prevent Glare and Reflections?
Glare is the absolute nemesis of a good jewellery photo. Because jewellery is designed to be shiny, it acts like a little mirror, reflecting everything in the room—including you, your phone, and your camera.
The secret to taming these reflections is diffusion. You want to soften your light source so it gently wraps around the piece instead of hitting it with a harsh, direct beam.
- Use a Light Tent: This is the easiest all-in-one solution. A lightbox, or light tent, surrounds your jewellery with white fabric walls that diffuse light from every direction, killing most of those pesky reflections.
- DIY Diffusers: No lightbox? No problem. If you're using lamps, just place a thin white sheet, a piece of parchment paper, or some translucent acrylic between the light and your jewellery.
- Strategic Blocking: Sometimes, the most obvious reflection is your camera lens staring right back at you. An old pro trick is to take a piece of white or black card, cut a small hole for your lens, and shoot through it. This simple trick blocks the reflection of the camera itself.
The goal isn't to kill every single reflection—that would make the metal look dull. It's about controlling them to create soft, appealing highlights that show off the piece, not distracting glare.
Why Does My Entire Piece of Jewellery Not Look Sharp?
This is a classic depth of field problem. It's incredibly frustrating when the front of a ring is perfectly sharp, but the back half is a disappointing blur. The culprit here is almost always an aperture setting that’s too wide (a low f-stop number like f/2.8 or f/4). While that’s great for creating blurry backgrounds in portraits, it's a disaster for product photos where every detail matters.
To fix this, you need to take control. Switch your camera to Manual or Aperture Priority mode and set a high f-stop number, like f/11 or even f/16. This creates a much deeper depth of field, ensuring more of your jewellery—from the front to the back—stays in crisp focus.
Just remember, a higher f-stop lets in less light. You'll have to compensate with a slower shutter speed, which is exactly why a sturdy tripod is non-negotiable.
A hard lesson for many photographers is that you can’t truly fix bad focus in post-production. Sharpness has to be captured in the camera, so dialing in that aperture before you click the shutter is a critical step for professional-looking results.
Should I Use a Model or Props for My Photos?
My answer? Both, but for very different jobs.
For your main product listings on sites like Amazon, Shopify, or Etsy, you absolutely need clean, distraction-free shots on a white or neutral background. These are your workhorse images. They show the product clearly and are often required by the platform.
But for social media, your website's homepage, or email campaigns, photos with a model or tasteful props are where you can really shine.
- Models Provide Scale and Context: Seeing a necklace on a person immediately tells a customer how big it is and how it drapes. It helps them imagine wearing it themselves.
- Props Create a Mood: A few well-chosen props—a velvet ring box, a delicate flower, a silk scarf—can help tell your brand’s story and create an aspirational vibe around your products.
A good workflow is to nail your clean product shots first. Once those are done, you can get creative with more styled, lifestyle images.
Can I Afford Professional Quality Photos?
This is a question every growing business owner asks. Should you keep doing it yourself or hire a pro? DIY photography is a fantastic, budget-friendly way to get started. But as your business grows, you'll find that the hours you spend shooting and editing photos are hours you aren't spending on marketing, customer service, or designing new pieces.
Hiring a professional photographer can be a smart investment that frees up your time and elevates your brand. Of course, costs can vary widely. If you're weighing the options, getting a better understanding of the cost of professional product photography can give you a clearer picture of the investment and help you decide when it’s the right time to hand off the camera.
Don't let complicated editing workflows slow you down. ProdShot uses AI to turn your simple photos into high-quality, e-commerce-ready images in seconds. Remove backgrounds, perfect your lighting, and create stunning visuals that sell. Try it for free at https://prodshot.net.