

If you want to take truly great photos of your jewelry, it all comes down to a few key things: getting your pieces sparkling clean, using a simple background, controlling your light, and dialing in the right camera settings. The whole process starts with preparing your pieces, creating a seamless backdrop, and then diffusing your light source to kill any nasty glare. From there, you'll use a macro lens or mode to capture all those gorgeous little details. The final polish happens in post-production, where you can make the colors pop and the gems shine.
Quick Guide To Photographing Jewelry
Learning how to photograph jewelry can feel like a huge hurdle, especially for online sellers. You're dealing with tiny, intricate details and super reflective surfaces—challenges you just don't run into with most other products. But nailing your photos is everything. High-quality images are often the single biggest reason a customer decides to click "buy."
Think of this quick guide as your high-level roadmap. Before we get into the nitty-gritty of camera settings and lighting, let's walk through the essential pillars of a successful jewelry shoot. It’s like a pre-flight checklist to make sure you’ve got all your bases covered.
Core Elements of a Professional Jewelry Shoot
The whole process really boils down to five key stages, with each one building on the last. If you get these fundamentals right from the beginning, you'll save yourself a massive amount of time in editing and end up with a much more professional-looking image.
- Product Preparation: First things first, always start with an immaculately clean piece of jewelry. Grab a microfiber cloth and the right cleaning solution. A tiny fingerprint or speck of dust might be invisible to your eye, but a macro lens will make it look like a huge flaw.
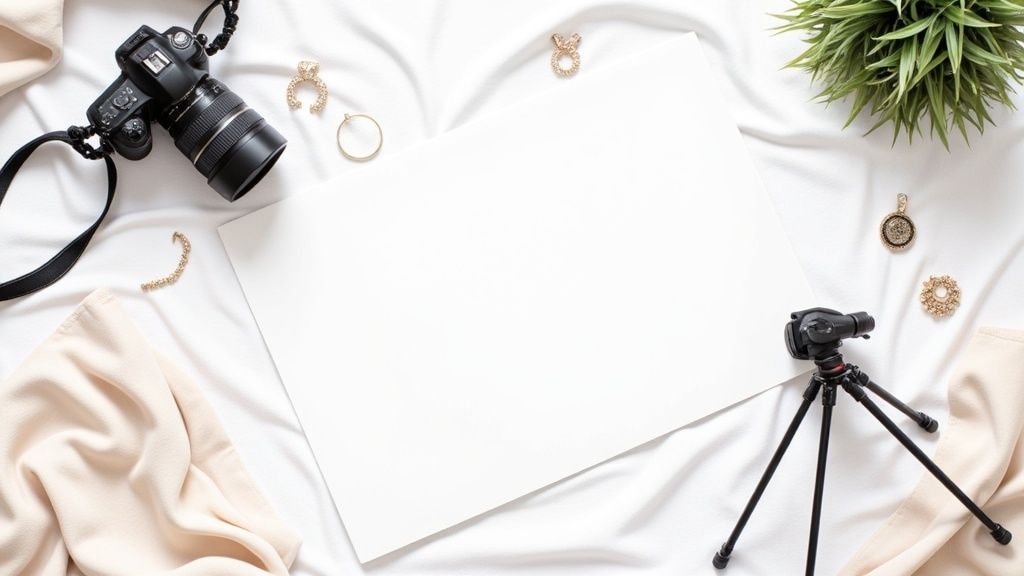
- Background and Staging: A clean, seamless white background is the gold standard for e-commerce. It kills distractions and makes sure the jewelry is the absolute star of the show. A simple white paper sweep or a light tent is perfect for creating that professional, uncluttered look.
- Controlled Lighting: This is probably the most critical part of the whole setup. Harsh, direct light creates ugly reflections and deep, distracting shadows. What you're aiming for is soft, diffused light that just seems to wrap around the piece. Natural light from a window (but not direct sun) can work, but for real consistency, a controlled setup with softboxes or a light tent is the way to go.
- Camera and Settings: You don't need a top-of-the-line DSLR, but you do need to be able to control your settings. A macro lens (or the macro mode on your camera or smartphone) is a must-have for capturing fine detail. The key settings to focus on are a small aperture (think f/11 or f/16) for a deep depth of field and a low ISO (around 100) to keep the image from looking grainy.
- Post-Production Editing: Let's be real—no jewelry photo is truly finished without a little retouching. This is where you'll do color correction, remove any lingering dust spots, sharpen the details, and really make those gemstones sparkle. Tools like ProdShot can automate a lot of this heavy lifting, turning good photos into incredible ones. You can see how to generate polished jewelry product photos using AI to speed up your workflow.
Key Takeaway: Consistency is your best friend. Document your entire setup—from camera settings and light placement to the background you use. This will help you create a cohesive, professional look across your entire product catalog.
The photography industry, which is expected to hit a value of around $105.2 billion by 2025, has seen a huge shift. While smartphones now take over 92.5% of all photos worldwide, professional techniques are still essential for capturing the kind of intricate jewelry details that most phones just can't handle. This has led pros to rely on specialized gear like macro lenses and light tents to master reflections and bring out the brilliance.
If you're ready for a deeper dive, these Top Jewelry Photography Tips offer some fantastic techniques to help boost your sales.
Jewelry Photography At A Glance
To help you keep these essentials in mind, I've put together a quick-reference table. Think of this as your cheat sheet for setting up a professional jewelry shoot.
| Element | Best Practice | Benefit |
|---|---|---|
| Preparation | Clean and polish every piece thoroughly before shooting. | Prevents distracting smudges and dust in close-ups. |
| Background | Use a seamless white sweep or a light tent. | Creates a professional, distraction-free product focus. |
| Lighting | Employ soft, diffused light from a large source. | Minimizes harsh reflections and deep shadows. |
| Camera Settings | Use a macro lens, small aperture (f/11+), and low ISO (100). | Ensures sharp focus on all details without digital noise. |
| Editing | Perform color correction, sharpening, and dust removal. | Enhances visual appeal and ensures product accuracy. |
Getting these five elements right will put you on the fast track to creating stunning images that not only look professional but also help you sell more.
Master Your Camera Settings For Jewelry Photography
Ditching Auto and switching your camera to Manual Mode can feel a little intimidating at first. All those dials and numbers… where do you even begin? But if you're serious about capturing the true brilliance of your jewelry, getting comfortable with your camera's settings is a non-negotiable step.
Think of it this way: your camera's three core settings—aperture, ISO, and shutter speed—are like the legs of a tripod. If one is off, the whole setup gets wobbly. The goal is to find that perfect balance between them to nail a razor-sharp, perfectly lit shot, every single time.
Why A Small Aperture Is Your Best Friend
With jewelry, the name of the game is getting the entire piece in focus. This is where your aperture setting comes into play.
Aperture, measured in f-stops (like f/2.8 or f/16), controls the depth of field—basically, how much of your photo is sharp from front to back. A wide aperture (a low f-stop number like f/1.8) gives you that blurry background effect you see in portraits. That’s great for people, but a total disaster for product shots. You need every single gem, clasp, and tiny detail to be crystal clear.
This is why you'll want to use a small aperture, which means a high f-stop number.
- Your sweet spot is f/11 to f/16. This range gives you a deep depth of field, making sure a ring is sharp from the front stone all the way to the back of the band.
- Don't push it too far. Going beyond f/16 can actually make your image a tiny bit softer due to an optical effect called diffraction. Stick to that f/11-f/16 range for the best results.
Setting a small aperture ensures your customers see every beautiful detail you worked so hard to create.
Keep Your ISO Low To Eliminate Noise
Next up is ISO. This setting controls how sensitive your camera's sensor is to light. For clean, professional-looking images, you want to keep this number as low as possible.
A low ISO, like 100 or 200, means the sensor is less sensitive, which produces the highest quality image with the most detail. As you crank up the ISO, you introduce digital "noise"—that ugly, grainy texture that can make fine metals look gritty and gemstones appear dull.
In a controlled studio environment with good lighting, there's absolutely no reason to raise your ISO. Always start with your camera's lowest native setting (usually ISO 100) for the cleanest, crispest results.
Balancing Shutter Speed With A Tripod
Okay, so we've set a small aperture (like f/11), which doesn't let in much light. We've also set a low ISO (like 100), which makes the sensor less sensitive. To get a bright enough photo, we need to compensate.
That's the job of the shutter speed. It determines how long the camera's shutter stays open. To let in enough light with our other settings, we'll need a slower shutter speed—maybe 1/15th of a second, or even a full second.
But here’s the catch: at these slow speeds, even the slightest movement will create a blurry photo. This is why a sturdy tripod is an absolute must-have. It keeps your camera perfectly still. To be extra safe, I recommend using a remote shutter release or your camera's built-in self-timer. This avoids the tiny jiggle caused by just pressing the button.
Here's a quick cheat sheet to pull it all together.
Recommended Camera Settings For Jewelry Photography
This table is your go-to reference for dialing in the perfect settings to get sharp, professional-quality jewelry photos.
| Setting | Recommended Value | Reason |
|---|---|---|
| Shooting Mode | Manual (M) | Gives you full control over aperture, ISO, and shutter speed for consistent results. |
| Aperture (f-stop) | f/11 – f/16 | Creates a deep depth of field, ensuring the entire piece of jewelry is in sharp focus. |
| ISO | 100 (or lowest native) | Minimizes digital noise, producing the cleanest and most detailed image possible. |
| Shutter Speed | Varies (e.g., 1/15s – 1s+) | Adjust as needed to achieve the correct exposure after setting aperture and ISO. |
| White Balance | Custom or Preset (e.g., Flash) | Ensures your colors are accurate and that whites look white, not yellow or blue. |
| Focus Mode | Manual Focus (MF) | Allows you to precisely select the most important part of the jewelry to be in focus. |
Once you get the hang of these settings, they become second nature. You'll be able to walk up to any piece and know exactly what to do.
This visual guide shows how your lighting setup works hand-in-hand with your camera settings.
When you have stable, diffused lighting, you can lock in your camera settings and focus on composition, knowing your technical foundation is solid. By combining a small aperture for sharpness, a low ISO for clarity, and a tripod to handle a slow shutter speed, you've built the perfect recipe for stunning jewelry photos.
Set Up Perfect Lighting For Jewelry Photography
If your camera settings are the technical foundation of your shot, then lighting is its artistic soul. It’s the one thing that can take a flat, boring photo and turn it into something dynamic and captivating, full of sparkle and depth.
Let's be real: bad lighting will ruin even the most beautiful piece of jewelry. It creates ugly glares, harsh shadows, and makes gemstones look dull. But get the lighting right? That’s when metals start to gleam and facets begin to dance.
The biggest challenge with jewelry is that every surface is a tiny, complex mirror. Unlike a t-shirt, it reflects everything. Your goal is to get control over those reflections by creating a soft, even light that just wraps around the piece.
Natural Light The Right Way
Natural light can give you gorgeous, soft results, but you have to know how to use it. Just plopping your jewelry in direct sunlight is a one-way ticket to disaster—you’ll get blown-out highlights and shadows so sharp they could cut glass. What you're really after is indirect daylight.
Try setting up your shooting table next to a large window, ideally on a slightly overcast day or at a time when the sun isn't shining directly through it. The closer you get to that window, the softer and bigger your light source becomes.
- Positioning is key. Don't face the window directly. Instead, set up at a 90-degree angle to it. This lets the light skim across the jewelry's surface, which does a fantastic job of defining its shape and texture.
- Use a reflector. The side of the jewelry opposite the window will naturally be darker. To fix this, grab a simple white reflector—a piece of foam core or even just a folded sheet of paper works great—and place it on the shadow side. This will gently bounce light back into the dark areas, filling them in nicely.
Of course, the major downside to natural light is that you can't control it. The weather changes, the sun moves across the sky, and your morning shots will look completely different from your afternoon ones. If you need consistency for a product catalog, you’ll want a more controlled setup.
Pro Tip: If the light from your window is still a bit too harsh, you can diffuse it even more by taping a sheet of parchment paper or a thin white bedsheet over the glass. This simple hack turns your window into a giant, professional-quality softbox.
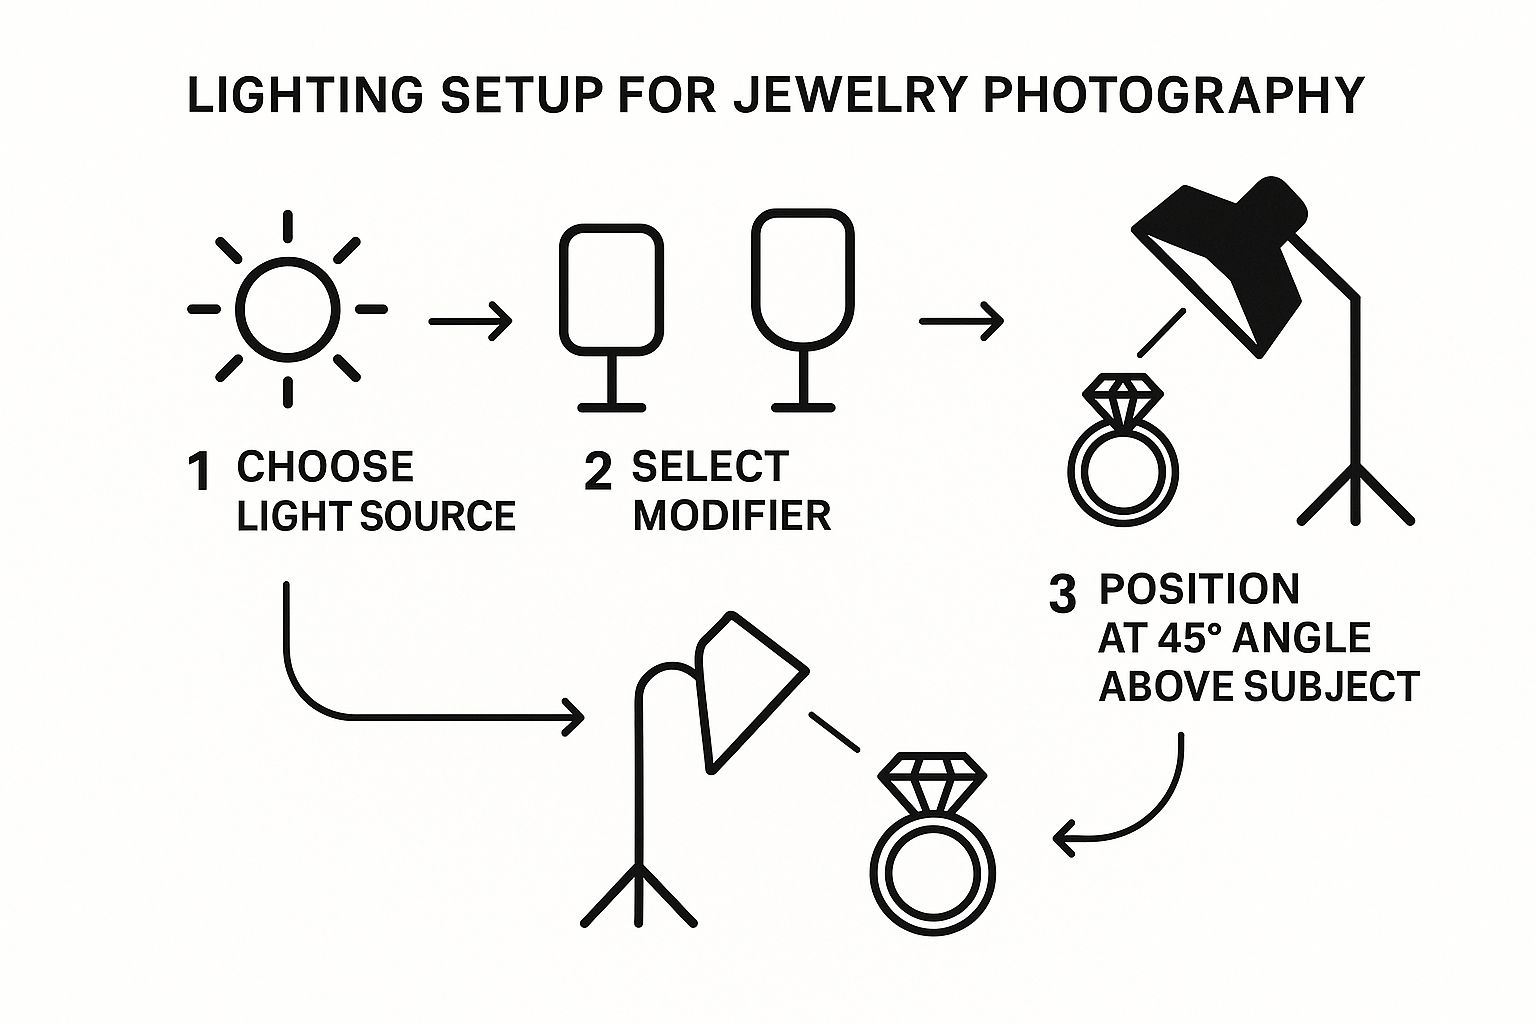
Building A Controlled Lighting Setup
For consistent, professional results any time of day, an artificial lighting setup is the way to go. You don't need to break the bank on fancy studio strobes; you can build an effective and affordable setup yourself. The goal is exactly the same: create large, soft, diffused light.
The simplest path to success here is using a light tent. It's basically a cube made of translucent white fabric that you place your product inside. You shine your lights through the fabric walls, which diffuses the light from every angle and kills those distracting reflections.
Another great option is a softbox, which is a light with a diffusion panel on the front. For most jewelry pieces, a two-light setup works like a charm.
- Key Light: This is your main light. Position it at a 45-degree angle to your jewelry, slightly above it. This will create the main highlights and define the item's shape.
- Fill Light: This is your secondary light. It’s less powerful and goes on the opposite side. Its only job is to "fill in" the shadows created by the key light, which reduces the overall contrast for that clean, commercial look. A white reflector can also work here instead of a second light.
Taming Reflections and Shaping Highlights
Even when you’re using a softbox or light tent, you’ll still have to manage some reflections. Highly polished metals will show everything in the room, including you and your camera. This is where you can get a little creative with small black and white cards.
- To block reflections: See an unwanted reflection of your camera? Place a small black card strategically to block that reflection from hitting the jewelry.
- To add highlights: A perfectly placed highlight can define the curve of a ring band or the edge of a setting. You can create one by positioning a small white card to bounce a tiny sliver of light exactly where you want that bright line to appear. It's a more advanced technique, but it adds an incredibly polished touch.
Ultimately, getting great at jewelry photography lighting comes down to playing around. Move your lights, angle your reflectors, and pay attention to how every tiny adjustment changes the way light interacts with the piece. With a bit of practice, you’ll be shaping light like a pro to reveal the true beauty of your work.
Composition And Styling Techniques For Jewelry Photography
Alright, you've got your lighting and camera settings dialed in. Now comes the fun part—the artistry. This is where you shift from simply documenting a piece of jewelry to actually telling its story.
Great technique gets you a sharp, clear photo. But thoughtful composition? That creates a compelling image. It's all about how you intentionally arrange every element in the frame to guide the viewer’s eye and create a little bit of magic. Even the smallest shift in placement can transform a basic shot into something truly memorable.
Frame Your Jewelry For Maximum Impact
Before you even reach for a single prop, think about where the jewelry sits inside your frame. A few classic principles can make a massive difference right away.
- The Rule of Thirds: This is a classic for a reason. Imagine your screen is cut into a 3×3 grid. Instead of plunking your piece right in the dead center, try placing it along one of the lines or at an intersection. It's a simple trick that instantly makes your photo feel more dynamic and professional.
- Leading Lines: Use other elements in your shot to draw the eye right where you want it to go. The delicate curve of a necklace chain can lead directly to the pendant. The edge of a prop can create a diagonal line that injects energy into the shot.
- Negative Space: Don't be afraid of empty space! Leaving some uncluttered room around your jewelry gives it space to breathe and makes it feel more luxurious and important. It keeps the shot from feeling crowded and ensures your product is the hero.
Think of these less as rigid rules and more as powerful guidelines. Once you get a feel for them, you'll know exactly when to break them to create something unique.
Choose Props That Enhance, Not Distract
Let's be clear: props are there to add context, texture, and mood. They should never steal the show. The goal is to find items that complement the jewelry's aesthetic without fighting for attention.
Think about the story you're trying to tell. A delicate, nature-inspired ring might look incredible next to a smooth river stone or a sprig of dried lavender. A bold, modern bracelet? Maybe style it on a piece of slate or a textured concrete block.
Key Takeaway: Your prop is the supporting actor, never the star. Its texture, color, and shape should harmonize with the jewelry and reinforce your brand's style, whether that's minimalist, bohemian, or classic luxury.
Explore Different Angles And Shot Types
Mixing up your shots is absolutely crucial for giving your customer the full picture. In a global jewelry market valued at roughly $348 billion, visuals are everything. You have to remember, your customer can't pick up the piece and feel it.
It's no surprise that 82% of jewelry brands use multiple photo styles to showcase their products, combining those crisp detail shots with more evocative lifestyle images. This approach highlights both craftsmanship and emotional appeal. If you want to dive deeper, you can learn more about how visual trends shape the jewelry market.
Here are the three essential shots you need for every product listing:
- The Studio Shot: This is your hero image. It’s a clean, straightforward, perfectly lit photo that shows the entire piece, usually on a white or neutral background. It's the e-commerce standard because it's professional and all about the product.
- The Macro Shot: Get in close. Really close. Use your macro lens or mode to capture those tiny, intricate details—the facets of a gemstone, the texture of the metal, a small maker's mark. These are the shots that build trust and show the quality that justifies the price.
- The Lifestyle Shot: Now, show the jewelry in its natural habitat. This could be on a model or styled in a flat lay. A lifestyle shot helps customers visualize the scale and imagine themselves wearing it, whether it's a necklace layered over a cozy sweater or earrings paired with an elegant evening look.
When you bring all of these elements together—strong composition, smart styling, and a variety of shots—you create a rich visual narrative. You’re no longer just selling a piece of jewelry; you're selling a feeling, a style, and a story that your customers want to be a part of.
Use AI Tools To Edit Jewelry Photos
Getting the shot is only half the battle. Post-production is where your good photos transform into images that truly sell. While mastering manual editing skills like color correction, sharpening, and painstakingly removing tiny dust specks is valuable, it's also incredibly time-consuming. This is where modern tools can completely change your workflow, handing you back hours of your day.
Let's be real—even with a flawless setup, your camera will pick up tiny imperfections. For jewelry, polishing metals until they gleam, balancing the true color of a gemstone, and ensuring a pristine background aren't just nice-to-haves. They're non-negotiable for building customer trust and getting that "add to cart" click.
A New Era of AI-Powered Editing
Not too long ago, professional retouching felt out of reach for many small business owners. It often meant expensive software and a steep, frustrating learning curve. Today, artificial intelligence has leveled the playing field, making pro-level editing accessible to everyone by automating the most repetitive and challenging tasks.
These smart tools can analyze your photo and apply complex, nuanced adjustments in a matter of seconds. And this isn't just about moving faster. It's about achieving a level of precision and consistency that’s tough to replicate by hand, especially when you're working through a large catalog of products.
By 2025, AI will be a core part of jewelry photography, automating and enhancing huge chunks of the workflow. Around 85% of jewelry brands have already started using AI, and small businesses have seen their photo editing costs plummet by up to 93%. These tools are handling everything from background removal to lighting adjustments and gemstone clarity, helping brands nail popular visual trends.
AI Shortcuts to Streamline Your Workflow
So, how can you actually use AI to make your jewelry photos better and reclaim your time? These features are designed to do the heavy lifting, freeing you up to focus on the more creative side of your business.
- One-Click Background Removal: A pure white background is the e-commerce gold standard, but manually cutting out a delicate necklace or an intricate ring is a recipe for a headache. AI tools can instantly identify your product and clip out the background with stunning accuracy, leaving you with a clean PNG file ready for any marketplace.
- Intelligent Sparkle and Shine: Making gemstones pop and metals gleam without looking fake is a true art. AI algorithms, trained on thousands of jewelry images, know exactly where to add a touch of light. They selectively boost highlights on facets and metallic surfaces to create that perfect sparkle, all without over-processing the rest of the image.
- Automatic Dust and Blemish Removal: Hunting for microscopic dust particles pixel by pixel is one of the most soul-crushing editing jobs. AI-powered "healing" tools scan your photo and zap these tiny imperfections automatically, saving you an enormous amount of time and ensuring a flawless result.
The Big Picture: The point of using AI isn't to replace your creative eye—it's to amplify it. When you automate the tedious, technical parts of editing, you free up your mental energy to focus on what really matters: styling, composition, and telling your brand's story.
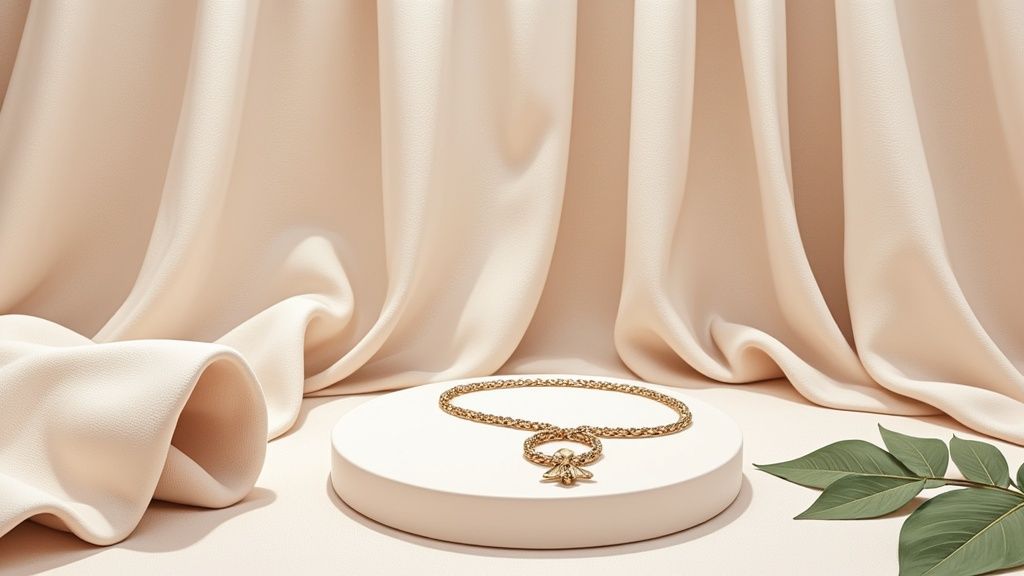
Generate Endless Backgrounds Instantly
One of the most powerful things you can do with AI is create entirely new scenes from a single photograph. Once you have a clean image with the background removed, you can use an AI product photo generator to place your jewelry into countless different settings.
This screenshot shows just how easy it is. A single product shot can be dropped into a variety of AI-generated backgrounds with just a few clicks.
The interface lets you instantly see how your piece looks on a marble surface, against rich wood, or in a full lifestyle context. You can create a whole suite of marketing assets from just one original photo.
Forget about spending hours or days setting up complicated lifestyle shoots. Now you can generate dozens of options in minutes. This is a game-changer for creating unique content for social media, email campaigns, and website banners. Imagine being able to test whether your audience responds better to a marble slab, a silk cloth, or a minimalist concrete block—all from the same initial photograph.
Frequently Asked Questions About Jewelry Photography
Even when you feel like you've got the basics of jewelry photography down, a few tricky questions always seem to come up. This section is your go-to troubleshooting guide for the common hurdles that can trip up even seasoned photographers. Let's get straight to the point with some practical answers to help you solve problems on the fly.
What Is The Best Lens For Jewelry Photography
A true macro lens is, without a doubt, the single most important piece of gear you can invest in for high-quality jewelry photography. Don't get this confused with the "macro mode" on a kit lens; a dedicated macro is engineered to capture tiny subjects at a 1:1 life-sized magnification. This is how you fill the entire frame with a small earring and show off every single tiny detail.
For the best mix of sharpness and working room, I always recommend a macro lens with a focal length somewhere between 90mm and 105mm. This range gives you a comfortable working distance from the piece, so you're not hovering so close that your camera starts casting shadows or creating weird reflections. It’s the sweet spot for capturing those intricate gemstone facets and delicate metal textures that standard lenses just can’t see.
A macro lens isn't just a "nice-to-have"—it's the tool that separates amateur snapshots from professional product images. It reveals the craftsmanship that justifies your pricing and builds customer confidence.
How Do I Stop Reflections In My Photos
Ah, reflections—the eternal battle of jewelry photography. Every polished surface acts like a tiny, curved mirror, so your main job is to control what it's reflecting. The most effective way to do this is to surround your jewelry with soft, diffused light.
- Use a Light Tent or Softbox: These are non-negotiable. They create a large, even light source that wraps gently around the piece, which immediately cuts down on the harsh, distracting glare you’d get from a bare bulb or direct sun.
- Employ Reflector Cards: Even with diffused light, you'll still see reflections of the room. This is where small white and black foam core cards become your best friends. Place them strategically around your piece to block reflections of your camera or to bounce clean, neutral light back onto the metal.
- Adjust Your Angles: Sometimes the simplest fix is the most effective. Just slightly changing the angle of your camera or your lights can shift a distracting reflection right off the piece, replacing it with a clean highlight from your light source instead.
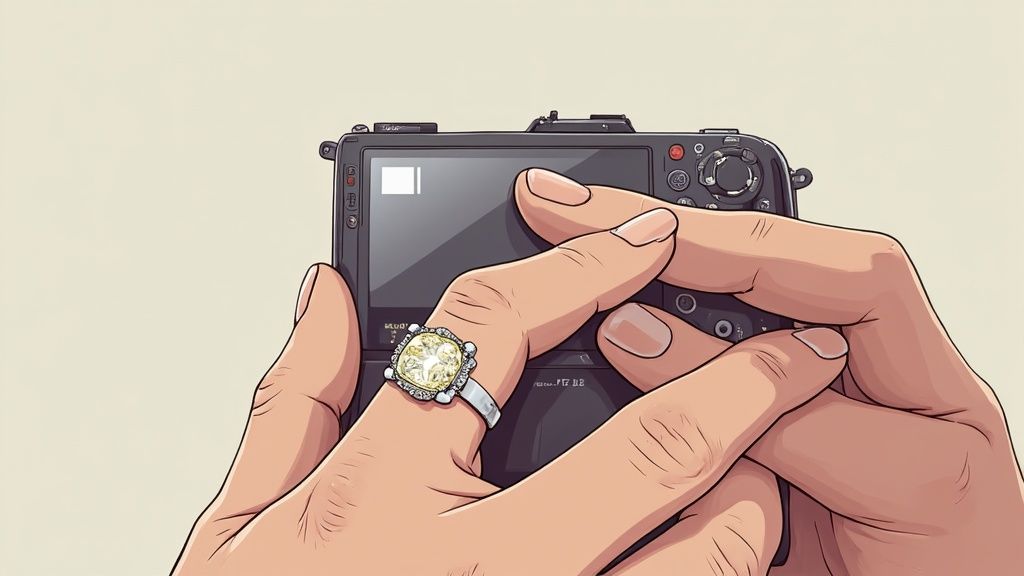
Can I Get Good Results With A Smartphone
Absolutely. While a DSLR gives you more precise control, modern smartphones are incredibly capable tools for capturing beautiful jewelry photos, especially for social media and basic e-commerce sites. The trick is to give your phone the right support to make up for its built-in limitations.
You can’t just handhold your phone and expect professional results. A stable setup is everything.
- Use a Tripod: A small, sturdy tripod for smartphones is essential. It eliminates camera shake and ensures your images are perfectly sharp every time.
- Add a Macro Lens Attachment: To capture the fine details, you'll need a quality clip-on macro lens. This lets you get much closer to your jewelry than the phone's native lens can manage on its own.
- Control Your Settings: Don't just point and shoot. Use your phone's "Pro" or "Manual" camera mode. This lets you lock in the focus, set a low ISO to avoid that grainy look, and adjust the white balance for true-to-life colors—giving you much more consistency than the default auto mode ever will.
With these additions, your smartphone becomes a surprisingly powerful tool for creating high-quality images. It's a fantastic and budget-friendly way to start. When you're ready to take those shots to the next level, exploring professional product photo retouching services can elevate even smartphone images to a commercial standard.
Ready to transform your jewelry photos in seconds? With ProdShot, you can turn simple product snapshots into stunning, e-commerce-ready images without any editing skills. Remove backgrounds, add realistic lighting, and generate endless professional scenes with the power of AI. Try it free and see the difference at https://prodshot.net.