
You can almost always rescue a blurry image with today's photo enhancers or good old-fashioned manual editing. The real trick isn't just picking a tool; it's knowing why your photo is blurry in the first place. Whether it's motion blur from a shaky hand or soft focus from a missed shot, the cause determines the cure.
Understanding Why Your Photos Are Blurry
Before you can even think about how to remove blur from a picture, you have to put on your detective hat. Not all blur is created equal, and figuring out the root cause is the first and most critical step toward getting that sharp, crystal-clear image you were hoping for.
Think of it like a doctor diagnosing an illness. You wouldn't want a prescription without a proper diagnosis, right? The same logic applies here.
More often than not, you're dealing with one of two culprits: motion blur or focus blur. Motion blur is what you get from camera shake or a subject that just won't stay still. It leaves behind tell-tale directional streaks or a ghostly after-image. Focus blur, on the other hand, is much softer. It happens when the lens just doesn't quite lock onto your subject, leaving the whole picture—or parts of it—looking uniformly soft and out of focus.
Identifying the Root Cause
Take a hard look at your photo. Do you see those distinct lines or trails I mentioned? That's a dead giveaway for motion blur. Or is the whole thing just a bit hazy, with no single sharp point anywhere? That's almost certainly focus blur.
This initial diagnosis is everything. Why? Because different tools are built to tackle different problems. A specialized AI tool designed to reverse camera shake will do a much better job on motion blur than a generic "sharpen" filter ever could.
The deblurring process is actually pretty complex under the hood. It's essentially a mathematical operation trying to reverse how a sharp image got scrambled in the first place. For those who love the nitty-gritty, you can read the full research about this convolution process. It explains how algorithms work backward to guess what the original, sharp photo looked like. This is where AI really shines—it's been trained on millions of images to intelligently reconstruct those missing details.
This decision tree gives you a great visual for that diagnostic process, guiding you from spotting the type of blur to picking the best fix.

Before you jump into a tool, take a moment to diagnose your photo's specific blur issue. Use this quick guide to pinpoint the problem and find the right solution.
Quick Guide to Identifying and Fixing Image Blur
| Type of Blur | What It Looks Like | Primary Cause | Best Way to Fix It |
|---|---|---|---|
| Motion Blur | Directional streaks, ghosting, or light trails. | Camera shake or a fast-moving subject. | AI-powered deblurring tools that specialize in motion correction. |
| Focus Blur (Soft Focus) | Uniformly soft and hazy across the image, no sharp points. | The camera lens failed to focus correctly. | General AI photo enhancers or manual sharpening filters (like Unsharp Mask). |
| Gaussian Blur | An even, consistent blur, often added intentionally in post-production. | A filter applied in editing software. | Often difficult to reverse completely, but AI sharpeners can help. |
| Lens Blur (Bokeh) | A pleasing, soft background with a sharp subject. | A shallow depth of field from the camera's lens/aperture settings. | This is usually intentional! No fix is needed unless the subject is also blurry. |
By knowing the why behind the blur, you're set up for success. You can choose a tool that will actually deliver crisp, professional results instead of just making a soft image look like a crunchy, over-sharpened mess.
Instantly Fix Blur with AI Photo Enhancers
When you need a sharp image but don't want to spend hours fiddling with complex software, AI photo enhancers are your best friend. These tools are built for speed and simplicity, making them perfect for anyone who just wants to fix a blurry picture fast. They work by analyzing your image and intelligently rebuilding the details that were lost—all in just a few clicks.

We've all been there. You capture a perfect moment at a family gathering, but your hand wasn't quite steady, leaving the shot just a little soft. Instead of tossing it in the digital trash bin, an AI tool can often rescue it. The process is almost always dead simple.
Getting Started with AI Unblurring
Most AI enhancers share a similar, easy-to-follow workflow. You kick things off by uploading your blurry photo right to the platform. From there, you just need to find a button labeled "Enhance," "Sharpen," or "Unblur."
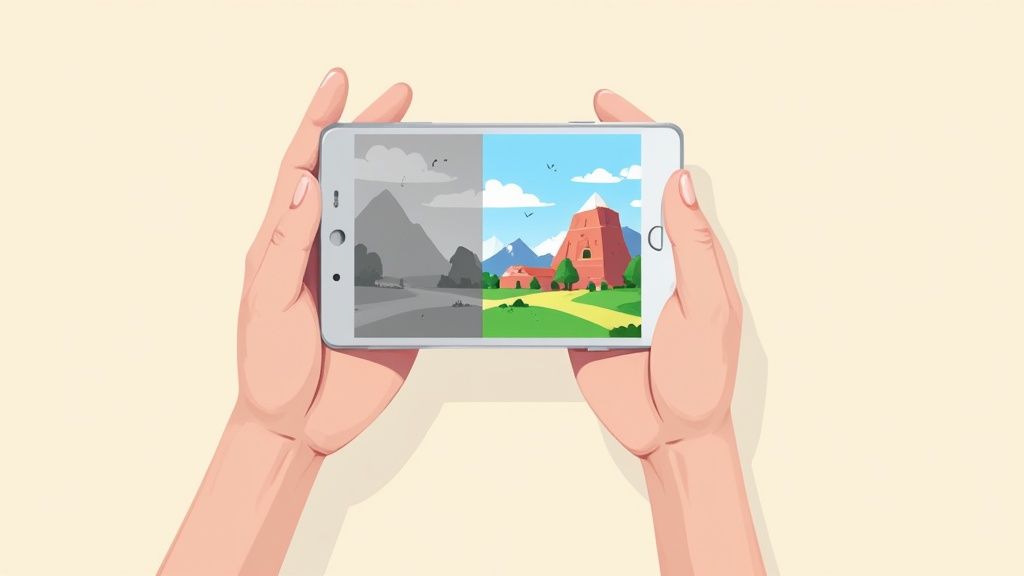
Once you click it, the AI takes over. It scans the pixels to figure out the type and direction of the blur and then applies a correction. In just a few seconds, you'll usually see a handy side-by-side comparison showing the before and after.
This tech has come a seriously long way. Image deblurring has been a tough nut for computer scientists to crack for decades, but modern neural networks have made it incredibly effective for everyday use.
Evaluating Your AI-Enhanced Photo
After the AI has worked its magic, take a close look at the result. A good tool will sharpen the important stuff—like eyes in a portrait or text on a sign—without making the image look unnatural or "crunchy."
The goal of an AI enhancer is to restore clarity, not just paste on artificial sharpness. A great result looks clean and natural, as if the photo was perfectly focused from the start.
Sometimes, you might need to tweak things a bit. Many tools give you a slider to control how intense the sharpening effect is, so you have the final say on the look.
For anyone running a product-based business, this kind of technology is a game-changer. An AI product photo generator like ours can not only fix a slightly blurry shot but also help create clean, professional images from a simple smartphone picture. And AI isn't just for blur; you can also learn about fixing overexposed pictures with AI to save even more shots. By using these smart tools, you can rescue photos you once thought were a total loss.
Gain Control with Manual Sharpening Techniques
AI photo enhancers are fantastic for a quick fix, but sometimes you need the kind of granular control that only comes from rolling up your sleeves and doing it yourself. When you need to fine-tune every last detail, diving into powerful photo editing software like Adobe Photoshop or GIMP is the way to go. These programs put you in the driver's seat, letting you decide exactly how and where to apply sharpening.
This hands-on approach is perfect for making a specific part of your image really pop—think the intricate facets of a diamond ring or the crisp text on a product label. It's the kind of detailed work that separates a good photo from a truly great one.
Professional software like Photoshop gives you a full suite of these robust manual controls.
The interface might look a bit intimidating at first, but once you master a couple of key tools, you unlock a whole new world of precision for fixing blurry photos.
Decoding the Unsharp Mask and Smart Sharpen Tools
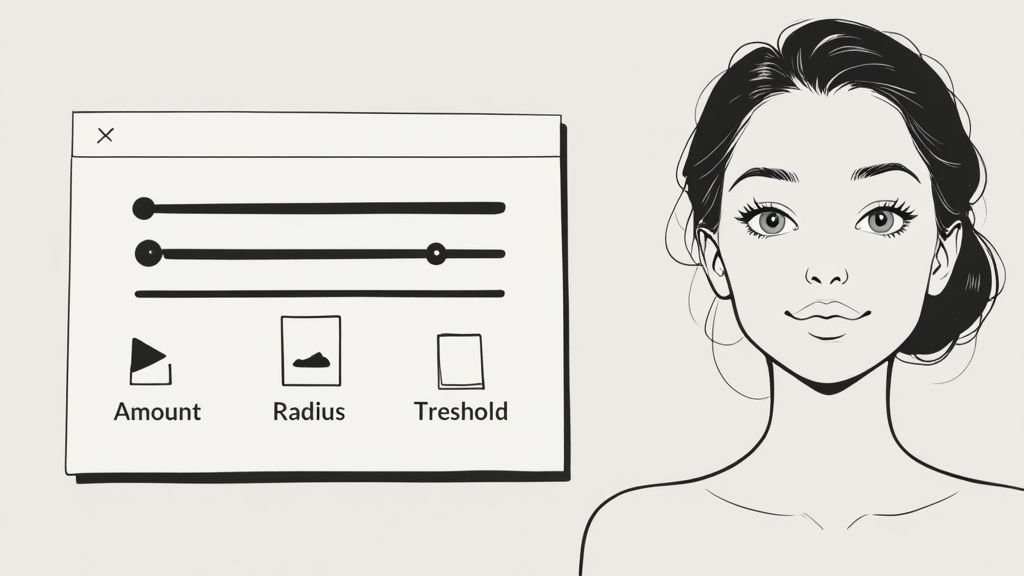
Two of the most battle-tested tools in any editor's toolkit are the Unsharp Mask and Smart Sharpen filters. Their names sound a bit technical, but their settings are actually pretty straightforward once you get the hang of them.
-
Amount: This slider is all about the intensity of the sharpening. Think of it as a volume knob for clarity. A higher value (I usually start somewhere around 100-150%) creates a stronger effect, but be careful. Pushing it too far can introduce some nasty-looking grain.
-
Radius: This setting tells the software how wide of an area around an edge to sharpen. For images with delicate, fine details, a small radius of 0.5 to 2 pixels is your best bet. Go too large here, and the image will start to look harsh and over-processed.
-
Threshold: This is your secret weapon for avoiding that over-sharpened, crunchy look. It tells the software to ignore areas with low contrast—like a person's smooth skin or a clear blue sky—preventing them from getting grainy while the important details get crisp.
Applying Sharpening with Precision
The real magic of manual editing is being selective. Instead of just slapping a sharpening filter over the entire image, pros use layers and masks. This technique allows you to essentially "paint" the sharpening effect only onto the parts of the photo that need it, like the eyes in a portrait or the product in a lifestyle shot.
By sharpening your main subject while leaving the background just a little softer, you create a beautiful sense of depth. It's a classic technique that guides the viewer's eye exactly where you want it to go.
This level of detail is absolutely critical in e-commerce, where clarity and focus directly impact sales. For businesses that want this polished, professional look without the steep learning curve, a dedicated product photo retouching service can deliver incredible results.
Ultimately, mastering these manual techniques gives you complete artistic freedom over your final image.
Sometimes, a photo is more than just a little soft. We’ve all been there—you’ve got unmistakable streaks from a shaky hand or those ghostly trails from something moving just a bit too fast. When your standard sharpening filter throws its hands up in defeat, you need to call in the specialists.
These advanced tools aren't just cranking up the edge contrast. They’re much smarter. Think of them as digital detectives, performing a deep analysis on the image to figure out exactly what went wrong and how to reverse it.
Take Photoshop's Shake Reduction filter, for instance. It doesn't just make a wild guess. It actually analyzes a piece of the image to map out the precise path and length of the camera shake. Once it understands that motion, it works backward to realign the pixels, basically reconstructing the parts of the photo that the blur wiped out.
When to Pull Out the Big Guns
This kind of heavy-duty deblurring is your last line of defense for photos that would otherwise be destined for the trash bin. You'll want to reach for these tools in a few key situations:
- Action Shots Gone Wrong: That perfect shot of a bird taking flight or your kid scoring a goal, but it’s just a blur of motion.
- Low-Light Nightmares: Photos you took in dim lighting where a slow shutter speed caused some serious camera shake.
- The Irreplaceable Moments: That one-in-a-million photo from a wedding or vacation that you simply can't recreate.
It's crucial to keep your expectations in check, though. While these techniques can work wonders on moderately to severely blurred photos, they can't create detail that was never captured in the first place. If the image is a complete, indecipherable mess, it’s probably beyond saving.
This isn't just for hobbyist photographers, either. The same principles are used in security and forensic analysis to clarify crucial footage. It's how investigators can sometimes pull a readable license plate number from a grainy security camera still. You can see more real-world examples of these deblurring applications and how powerful the technology has become.
While you can't salvage every single photo, these powerful techniques give you the best possible shot at recovering a treasured memory. Knowing how to fix a picture with severe motion blur can be the difference between a lost moment and a cherished image you can actually use.
While fixing a blurry photo is a great skill to have in your back pocket, an ounce of prevention is worth a pound of cure. Seriously. Nailing a crisp, clear shot right from the start saves you a ton of headaches and editing time later. It really just boils down to a few solid photography habits that make all the difference.
The public enemy number one for sharpness? Camera shake. Even a tiny, almost imperceptible hand movement while the shutter is open can introduce motion blur, especially when the light is low.
The fastest way to fight this is to bump up your shutter speed. A faster shutter effectively freezes motion. As a rule of thumb, try to stay at 1/125th of a second or faster when you're shooting handheld.
Another dead-simple trick is to just plant yourself. Tuck your elbows into your body and hold the camera with both hands. This creates a surprisingly stable base—way better than holding your phone or camera out at arm's length.
Master Your Camera Settings and Stability
Beyond just holding steady, a few other fundamentals will ensure your photos come out tack-sharp every single time. If you're shooting products for e-commerce, getting this stuff right isn't just a suggestion; it's essential.
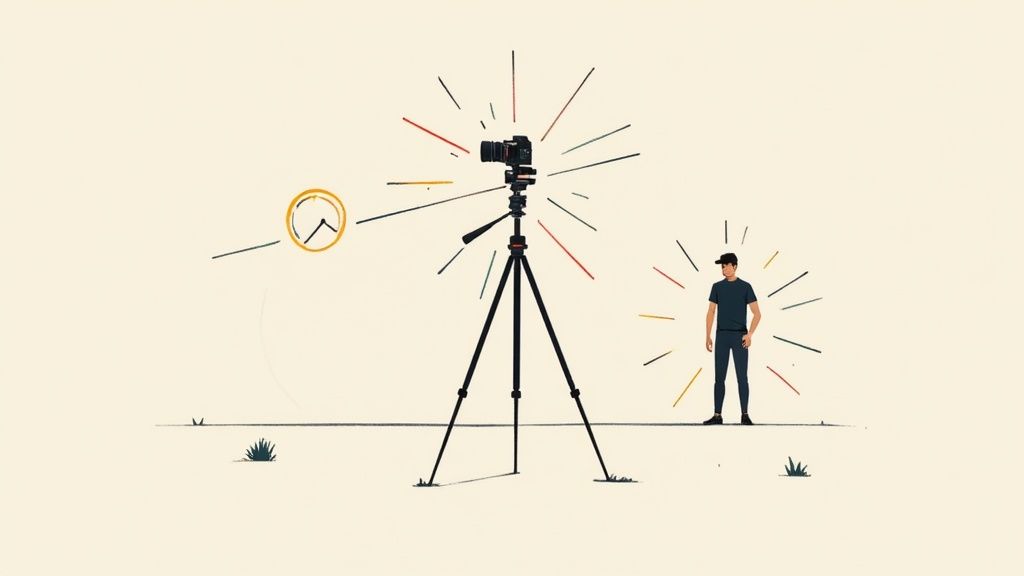
- Use a Tripod: This is the ultimate weapon against camera shake. For anything that isn't moving, a tripod is your best friend. It guarantees a perfectly stable shot, making it non-negotiable for product photography and low-light scenes.
- Clean Your Lens: I know, it sounds ridiculously obvious. But you'd be surprised how often a stray fingerprint or a bit of dust is the real culprit behind a soft, hazy photo. A quick wipe with a microfiber cloth can be a game-changer.
- Set Your Focus Manually: Don't let your camera's autofocus have all the fun—or make all the decisions. Tap the screen on your smartphone or use your camera's focus points to tell it exactly what part of the image needs to be the sharpest.
A sharp, well-lit photo does more than just look good. It builds immediate trust with your customers and shows you're a professional who cares about quality.
For anyone selling online, these preventative measures are vital. It's the kind of fundamental skill that separates amateur shots from what you'd get with professional Amazon product photography. By focusing on getting it right in the camera, you spend less time trying to fix mistakes and more time actually selling your products.
Common Questions About Fixing Blurry Pictures
Even with the best AI tools in your corner, you'll probably still run into some tricky situations and questions when trying to unblur a photo. Let's tackle a few of the most common ones I hear all the time.
Can I Actually Fix a Super Out-of-Focus Picture?
I wish I could say yes, but honestly, the answer is almost always no. If a photo is severely out of focus, it's because the camera lens never captured that detail in the first place. There’s literally no information there for the software to work with.
While some advanced AI tools can make a heroic attempt at guessing what the details should have looked like, the result usually looks a bit strange or artificial. Deblurring software really shines when it’s dealing with mild to moderate motion blur or photos that are just slightly soft. In those cases, there's enough original data for the tool to grab onto and reconstruct.
Sharpening vs. Deblurring—What's the Difference?
It’s super easy to mix these two up, but they do completely different things. Here’s a simple way to think about it:
- Sharpening is all about creating an illusion. It works by cranking up the contrast right along the edges of objects and pixels, which makes an already-clear image feel just a bit crisper. It’s an enhancement, not a repair.
- Deblurring is a restoration process. The software actually analyzes the way the image is blurred and tries to reverse-engineer it, rebuilding the details that were lost to motion or a missed focus. Think of it as a rescue mission for your photo.
Will Trying to Fix the Blur Just Make My Photo Look Worse?
It definitely can if you get a little too enthusiastic with the sliders. Over-sharpening is one of the most common mistakes, and it’s a fast track to creating ugly, glowing halos around your subject. It also amplifies digital noise, making the whole picture look grainy and unnatural.
The secret to a great result is to be subtle. I always, always work on a duplicate layer so I can dial back the effect if I go too far. Make sure you zoom in to 100% to check for weird artifacts before you save your final image.
Ready to take your product shots from blurry to brilliant? With ProdShot, you can turn simple phone pictures into professional, high-converting images in seconds. Try it for free and see what a difference AI can make.